
Earl
-
Posts
6996 -
Joined
-
Last visited
-
Days Won
118
Reputation Activity
-

-
 Earl got a reaction from KaiserRolls in ClassE 1989 325IS Build Thread
Remove the wear sensors and pop the bulb out of the dash=) Save big money!
-
 Earl got a reaction from jc43089 in ClassE 1989 325IS Build Thread
Remove the wear sensors and pop the bulb out of the dash=) Save big money!
-
 Earl got a reaction from Rowleym in New Daily: 1992 E34 525i 5spd
My old one looks like it is made out of sheeps intestine...
-
 Earl got a reaction from YoungCR in Opinions of best midsized sedan
This is literally personal preference. Right now I would say the best sedan I have been in is an e34 but I am biased by how happy I am with my new car.
-
-
 Earl got a reaction from DrLeadFoot in New Daily: 1992 E34 525i 5spd
I didn't make it out to the shop this weekend like I wanted to, but I did pick up my new daily....
It's not quite a Honda Insight
Bens (GunMetalGrey) 1992 525i, 5 speed, tan interior with black heated seats and black door cards swapped in, ellipsoids, and all rear (poly) and front suspension refreshed (minus strut assemblies).
Thank you again Ben for selling me this thing=)
It is such a comfortable highway cruiser and is actually sipping less fuel than I thought it would, which is a plus=D
I will be out at the shop this weekend at the latest, but might stop in a few times during the week to look at a few things.
-
Earl got a reaction from jc43089 in New Daily: 1992 E34 525i 5spd
I didn't make it out to the shop this weekend like I wanted to, but I did pick up my new daily....
It's not quite a Honda Insight
Bens (GunMetalGrey) 1992 525i, 5 speed, tan interior with black heated seats and black door cards swapped in, ellipsoids, and all rear (poly) and front suspension refreshed (minus strut assemblies).
Thank you again Ben for selling me this thing=)
It is such a comfortable highway cruiser and is actually sipping less fuel than I thought it would, which is a plus=D
I will be out at the shop this weekend at the latest, but might stop in a few times during the week to look at a few things.
-
 Earl got a reaction from REKIII in New Daily: 1992 E34 525i 5spd
I didn't make it out to the shop this weekend like I wanted to, but I did pick up my new daily....
It's not quite a Honda Insight
Bens (GunMetalGrey) 1992 525i, 5 speed, tan interior with black heated seats and black door cards swapped in, ellipsoids, and all rear (poly) and front suspension refreshed (minus strut assemblies).
Thank you again Ben for selling me this thing=)
It is such a comfortable highway cruiser and is actually sipping less fuel than I thought it would, which is a plus=D
I will be out at the shop this weekend at the latest, but might stop in a few times during the week to look at a few things.
-
-
-
Earl got a reaction from DrLeadFoot in UUC DSSR?
Now you guys are making me want one.....someone here with a lathe should start making these=)
-
-
Earl got a reaction from DrLeadFoot in My name is Earl, and I have a Stainless Steel bolt fetish =)
I started off yesterday by installing my new tensioner with the new plug and washer.
Old vs New
Tensioner
Installed and torqued
When I put it in it was short. The manual said to press the chain guide into it and release it. It only listed that for the m42 tensioner and not the m44 tensioner. I think I managed to get the m42 tensioner since I can see the snap ring when the tensioner is realeased. It isn't a big deal, but I swear I ordered the m44 tensioner.
After I released the tensioner, I torqued the cam sprockets down and also torqued the upper chain guide.
After that I cleaned the gasket surfaces and installed the lower timing cover hand tight.
Bolts out and surface cleaned
Gasket on
Cover on hand tight
At this point I was going to torque it all down hardware but thought I should check the timing first. The cam and cam sprocket marks line up perfect but I was still unsure of if I had the engine at TDC when I put the chain on.
I put the cam bolt in and turned it with a ratchet and it seemed to stop after a quarter turn. I couldn't tell if the bolt was just tightening, the springs got super stiff at that point, or if the piston was hitting a valve. Instead of cranking on it I just backed off and am having a buddy come check it out next weekend just to check it over for me=)
I figured while I was working on that, I could get the crank pulley flange all cleaned up and ready to go on.
When the crank bolt initially came out I had my friend get it out with an impact, but he KO'd the dowel pin for the crank pulley. I ordered a new one for a few cents and pounded it in yesterday.
Old vs New
Installed
At that point I went to attach the crank pulley but bent the mounting surface by trying to draw it on using the 6 bolts. It didn't want to go on nice since the fresh paint didn't allow much clearance. I am going to be sanding that ID out at work and getting it painted back up and installed before the week is over. I am glad I noticed when I did that it wasn't drawing on straight.
At this point I was as far as I could get with the engine so I started on the template for the false floor.
Initial shape from tracing the carpet and side cubbies and oversizing it a bit
After a bit of trimming I got close to what I need. There are some spots where I cut it too small and I need to tape on pieces to make the template correct. Otherwise it should be pretty good. I did figure out that I will need to make the false floor in two halves because it does not want to fit through the hatch as one piece. I will still wrap it in carpet as one piece though.
My buddy Kyle woke up a little late, but made up for it by getting a lot of the seams left on the strut towers welded up. Next time he comes out he will be smoothing them all out. He did start welding on the firewall but it was short lived.
He was welding it and I turned and said we should peel the carpet back to keep it from burning. I opened the passenger side door and the car was filled with smoke. I looked under the glovebox and didn't see anything initially. After a few more seconds I could see some embers coming through the carpet and at that exact moment, my buddy Jory threw my water bottle to me and said "Douse it!". I squirted the bottle and out it went. I got the glovebox out with the quickness to make sure nothing was by the wiring. It ended up stopping right under the carpet. The foam carpet insulation helped slow the fire down which is great. I am happy I said something when I did and I have to get a new carpet anyways=)
Next weekend the engine timing should be all sorted out so that I can get the engine together further. I might even start making the false floor with MDF.
Pat also swung by to pick up a set of foglights I had for him. I also gave him a spare motorsport strut mount cover that I had laying around.
I also found a new daily that I will hopefully be rolling in soon=)
-
Earl got a reaction from Rowleym in My name is Earl, and I have a Stainless Steel bolt fetish =)
I started off yesterday by installing my new tensioner with the new plug and washer.
Old vs New
Tensioner
Installed and torqued
When I put it in it was short. The manual said to press the chain guide into it and release it. It only listed that for the m42 tensioner and not the m44 tensioner. I think I managed to get the m42 tensioner since I can see the snap ring when the tensioner is realeased. It isn't a big deal, but I swear I ordered the m44 tensioner.
After I released the tensioner, I torqued the cam sprockets down and also torqued the upper chain guide.
After that I cleaned the gasket surfaces and installed the lower timing cover hand tight.
Bolts out and surface cleaned
Gasket on
Cover on hand tight
At this point I was going to torque it all down hardware but thought I should check the timing first. The cam and cam sprocket marks line up perfect but I was still unsure of if I had the engine at TDC when I put the chain on.
I put the cam bolt in and turned it with a ratchet and it seemed to stop after a quarter turn. I couldn't tell if the bolt was just tightening, the springs got super stiff at that point, or if the piston was hitting a valve. Instead of cranking on it I just backed off and am having a buddy come check it out next weekend just to check it over for me=)
I figured while I was working on that, I could get the crank pulley flange all cleaned up and ready to go on.
When the crank bolt initially came out I had my friend get it out with an impact, but he KO'd the dowel pin for the crank pulley. I ordered a new one for a few cents and pounded it in yesterday.
Old vs New
Installed
At that point I went to attach the crank pulley but bent the mounting surface by trying to draw it on using the 6 bolts. It didn't want to go on nice since the fresh paint didn't allow much clearance. I am going to be sanding that ID out at work and getting it painted back up and installed before the week is over. I am glad I noticed when I did that it wasn't drawing on straight.
At this point I was as far as I could get with the engine so I started on the template for the false floor.
Initial shape from tracing the carpet and side cubbies and oversizing it a bit
After a bit of trimming I got close to what I need. There are some spots where I cut it too small and I need to tape on pieces to make the template correct. Otherwise it should be pretty good. I did figure out that I will need to make the false floor in two halves because it does not want to fit through the hatch as one piece. I will still wrap it in carpet as one piece though.
My buddy Kyle woke up a little late, but made up for it by getting a lot of the seams left on the strut towers welded up. Next time he comes out he will be smoothing them all out. He did start welding on the firewall but it was short lived.
He was welding it and I turned and said we should peel the carpet back to keep it from burning. I opened the passenger side door and the car was filled with smoke. I looked under the glovebox and didn't see anything initially. After a few more seconds I could see some embers coming through the carpet and at that exact moment, my buddy Jory threw my water bottle to me and said "Douse it!". I squirted the bottle and out it went. I got the glovebox out with the quickness to make sure nothing was by the wiring. It ended up stopping right under the carpet. The foam carpet insulation helped slow the fire down which is great. I am happy I said something when I did and I have to get a new carpet anyways=)
Next weekend the engine timing should be all sorted out so that I can get the engine together further. I might even start making the false floor with MDF.
Pat also swung by to pick up a set of foglights I had for him. I also gave him a spare motorsport strut mount cover that I had laying around.
I also found a new daily that I will hopefully be rolling in soon=)
-
 Earl got a reaction from mkoepp in My name is Earl, and I have a Stainless Steel bolt fetish =)
I started off yesterday by installing my new tensioner with the new plug and washer.
Old vs New
Tensioner
Installed and torqued
When I put it in it was short. The manual said to press the chain guide into it and release it. It only listed that for the m42 tensioner and not the m44 tensioner. I think I managed to get the m42 tensioner since I can see the snap ring when the tensioner is realeased. It isn't a big deal, but I swear I ordered the m44 tensioner.
After I released the tensioner, I torqued the cam sprockets down and also torqued the upper chain guide.
After that I cleaned the gasket surfaces and installed the lower timing cover hand tight.
Bolts out and surface cleaned
Gasket on
Cover on hand tight
At this point I was going to torque it all down hardware but thought I should check the timing first. The cam and cam sprocket marks line up perfect but I was still unsure of if I had the engine at TDC when I put the chain on.
I put the cam bolt in and turned it with a ratchet and it seemed to stop after a quarter turn. I couldn't tell if the bolt was just tightening, the springs got super stiff at that point, or if the piston was hitting a valve. Instead of cranking on it I just backed off and am having a buddy come check it out next weekend just to check it over for me=)
I figured while I was working on that, I could get the crank pulley flange all cleaned up and ready to go on.
When the crank bolt initially came out I had my friend get it out with an impact, but he KO'd the dowel pin for the crank pulley. I ordered a new one for a few cents and pounded it in yesterday.
Old vs New
Installed
At that point I went to attach the crank pulley but bent the mounting surface by trying to draw it on using the 6 bolts. It didn't want to go on nice since the fresh paint didn't allow much clearance. I am going to be sanding that ID out at work and getting it painted back up and installed before the week is over. I am glad I noticed when I did that it wasn't drawing on straight.
At this point I was as far as I could get with the engine so I started on the template for the false floor.
Initial shape from tracing the carpet and side cubbies and oversizing it a bit
After a bit of trimming I got close to what I need. There are some spots where I cut it too small and I need to tape on pieces to make the template correct. Otherwise it should be pretty good. I did figure out that I will need to make the false floor in two halves because it does not want to fit through the hatch as one piece. I will still wrap it in carpet as one piece though.
My buddy Kyle woke up a little late, but made up for it by getting a lot of the seams left on the strut towers welded up. Next time he comes out he will be smoothing them all out. He did start welding on the firewall but it was short lived.
He was welding it and I turned and said we should peel the carpet back to keep it from burning. I opened the passenger side door and the car was filled with smoke. I looked under the glovebox and didn't see anything initially. After a few more seconds I could see some embers coming through the carpet and at that exact moment, my buddy Jory threw my water bottle to me and said "Douse it!". I squirted the bottle and out it went. I got the glovebox out with the quickness to make sure nothing was by the wiring. It ended up stopping right under the carpet. The foam carpet insulation helped slow the fire down which is great. I am happy I said something when I did and I have to get a new carpet anyways=)
Next weekend the engine timing should be all sorted out so that I can get the engine together further. I might even start making the false floor with MDF.
Pat also swung by to pick up a set of foglights I had for him. I also gave him a spare motorsport strut mount cover that I had laying around.
I also found a new daily that I will hopefully be rolling in soon=)
-
-
-
Earl got a reaction from mkoepp in Painter Wanted
Paint will always follow the "You get what you pay for" motto.
If you want a cheap paint job that looks good, stop being lazy and do a $50 rustoleum paint job. It takes a while and sounds ghetto, but if you take your time and out effort into it, you end up with an amazing result for costing less than $100-$200 total.
-
Earl got a reaction from DrLeadFoot in My name is Earl, and I have a Stainless Steel bolt fetish =)
My ECS order arrived yesterday. I started right away on assembling my hubs and installing my speed bleeders.
(the lighting was terrible for all of these phone pictures so I apologize in advance)
Here is where I started, bare freshly powdercoated knuckles.
I then took these rear dust covers
and fitted them to the knuckles.
After that I opened up these guys
and tapped them on with a mallet
Well, I only got one fully down. Reason is that I am an idiot and was tapping on the outer races/hubs instead of waiting to grab my socket and tapping them on from the inner race. From the multiple people I have asked, there shouldn't be any damage to the bearings since I wasn't bashing on them like Bam Bam with a wooden club. The use of a rubber mallet also saved me. I am waiting to do the other one until tonight when I will have my socket=)
After all of that I installed my speed bleeders.
I don't have any installed pictures because the sun went down and the lights in my living room are terrible.
I did however only install 3 successfully. The fourth one I threaded in by hand like the previous 3. However, after slowly threading it in with a wrench, it felt like it wasn't going any further or tightening. I backed it out to see this:
I am not quite sure how the threads stripped without applying any more torque than a simple turn of the wrench. I sent ECS an email about it, but I will probably just need to order a new one. I also made sure to take a cotton swab and get the stripped threads out of the bleeder hole so that they don't go into the bore=)
Never a dull moment I guess. More updates tomorrow I am hoping.
-
Earl got a reaction from KaiserRolls in My name is Earl, and I have a Stainless Steel bolt fetish =)
It is hashtag satin black to have a smooth mounting surface for the engine mounts=)
-
Earl got a reaction from DrLeadFoot in My name is Earl, and I have a Stainless Steel bolt fetish =)
Not a ton done this weekend.
Saturday I went out to the shop and threw my front subframe and sway bar in the trunk to clean up at work this week. I think I will have my front subframe reinforcements TIG'd in at work as well.
My proper Adams Rotors came and I also picked up my powdercoated calipers, carriers, and knuckles.
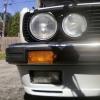
I also ended up talking to a guy who does vector images and asked how he does them. I realized I didn't have the tool to do it, but he offered to do one of my car. He did an awesome job. He even modeled my AC Schnitzer Mirrors.
His name is Artur Borovik. Here is his portfolio: http://arturborovik.com/
-
 Earl reacted to TehRaydarlover in The price of older BMW's: The state of things.
I don't know much about the prices of non ix e30s, but it seems like you can't find an ix for under $1k, even for the shitbox non running rust buckets. When you make someone an offer on their pos ix they say, "Na, can't do that its worth more in parts" People seem to think that its worth more parted out b/c of the AWD system and can therefore charge more. My experience is that ix parts are indeed becoming harder to find but they also have an increasingly small demand. Your not going to get what you think you should get out of ix parts without sitting on them for a year waiting for someone to have an emergency. Then even when someone does have an emergency you have 5 other people with the same parts for sale. This summer I bought essentially 1.5 ix drivetrains (engine, t-case, tranny, axles, diffs etc) for a total of $300. This was from people who bought an ix for something like the 855 head and wanted to part it out quick, they need it gone and end up selling everything for cheap. Long story short people need to stop parting ix's. Not worth it if your looking for quick cash and its a shame to see them die. (dabs tear)
-
-
Earl got a reaction from DrLeadFoot in My name is Earl, and I have a Stainless Steel bolt fetish =)
Found this: http://grippysgarage.com/2011/09/03/camaro-shock/
They look either the same or maybe a hair longer than the Mustang shocks, but they do have cheap adjustable dampening shocks available.