Tkuhn
-
Posts
302 -
Joined
-
Last visited
-
Days Won
13
Reputation Activity
-

 Tkuhn got a reaction from Partiallypurple in A purists nightmare - E46 drift build
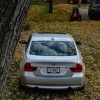
Photos of the new to me trunk installed.
-

 Tkuhn reacted to KaiserRolls in A purists nightmare - E46 drift build
Just remembering all the issues that came with putting 20lbs of poo in a 10lb bag
-
 Tkuhn got a reaction from patsbimmer1 in A purists nightmare - E46 drift build
Been a minute! Have had quite the off season just getting to this point. I'm going to try and keep the story as short winded as possible.
First thing was first it was that time of year to get the car on the stands and drained the engine fluids.
Big news first, I was able to purchase a VF engineering supercharger kit from a friend!
He sent me everything to use the kit with the m54b30 manifold and the parts that he made up to have the kit work with a M50 manifold.
For starters you may notice that there is no mounting bracket for the charger to the engine. Well thats because the box broke in shipping and the bracket slipped out, never to be seen again. This is where the story could get long winded, BUT the short of it is UPS is absolutely useless with help or even through the claim process and I was forced to find another option.
Lucky I found a guy in Latavia that makes a bracket for Votech V1,2 and 3 blowers to M5x engines. It's no billet piece like the VF one but VF Engineering is also as useless as UPS. They told me they won't support old kits because it's a liability, so they won't sell a bracket separately. COOL RIGHT.
Anyways here's the steel bracket I sourced.
Now in typical fashion of course the bracket didn't fit right lol. It was hitting on the alternator housing, after talking to the seller it appears it was designed around a smaller 90 amp alternator, and mine is a 120 amp. Soooooo I took the alternator apart and massaged off some material.
And here is the alternator reassembled.
And here's the bracket mounted with the blower on as well.
The next hurdle I knew about, which was seeing how much clearance there was on the expansion tank being that this kit was designed with the factory radiator. I have the thicker CSF aluminum one, and the friend I bought the kit from tried to swap to a CSF like mine and said it didn't fit.
Somehow it fits on my car though, so I'm not mad about that hahahah.
Here is a photo of the fitment of the tank/radiator along with the start of fitting the new silicone upper hose, which I started by chopping off the clamps of an original one to get the ends off.
Then I trimmed the upper hose and installed the clamps.
Here is the blower mounted with the intake on it along with the M50 charge pipe. (This is the b30 manifold though)
I decided that I wanted to ditch the old leaky oil return hose that came with the kit. So I ordered up some Vibrant parts 🤗
The cool thing is the drain which just connects to the CCV drain on the dipstick, so I used a tube to AN adapter.
I then ran into another road block. The drain fitting on the bottom of the blower hit the housing because it was too big (-8 AN).
I couldn't seem to find an extension that I was happy with, plus the extension would make the line sit lower than I would like. Sooooo I decided to "clearance" the housing to allow for the larger fitting.
Before.
After.
Worked out great 👍
Now that I solved that headache I finished making and installing the drain line.
And finally to finish catching up to where I'm at currently I pulled the intake manifold in preparation for the M50 manifold I will be picking up in a week or two.
Thats it for now!
-
Tkuhn reacted to YoungCR in A purists nightmare - E46 drift build
Didn't know M54 guys swap on M50 manifolds too. Great work as always! Excited to see this shred tires faster.
-
 Tkuhn got a reaction from m42b32 in A purists nightmare - E46 drift build
Been a minute! Have had quite the off season just getting to this point. I'm going to try and keep the story as short winded as possible.
First thing was first it was that time of year to get the car on the stands and drained the engine fluids.
Big news first, I was able to purchase a VF engineering supercharger kit from a friend!
He sent me everything to use the kit with the m54b30 manifold and the parts that he made up to have the kit work with a M50 manifold.
For starters you may notice that there is no mounting bracket for the charger to the engine. Well thats because the box broke in shipping and the bracket slipped out, never to be seen again. This is where the story could get long winded, BUT the short of it is UPS is absolutely useless with help or even through the claim process and I was forced to find another option.
Lucky I found a guy in Latavia that makes a bracket for Votech V1,2 and 3 blowers to M5x engines. It's no billet piece like the VF one but VF Engineering is also as useless as UPS. They told me they won't support old kits because it's a liability, so they won't sell a bracket separately. COOL RIGHT.
Anyways here's the steel bracket I sourced.
Now in typical fashion of course the bracket didn't fit right lol. It was hitting on the alternator housing, after talking to the seller it appears it was designed around a smaller 90 amp alternator, and mine is a 120 amp. Soooooo I took the alternator apart and massaged off some material.
And here is the alternator reassembled.
And here's the bracket mounted with the blower on as well.
The next hurdle I knew about, which was seeing how much clearance there was on the expansion tank being that this kit was designed with the factory radiator. I have the thicker CSF aluminum one, and the friend I bought the kit from tried to swap to a CSF like mine and said it didn't fit.
Somehow it fits on my car though, so I'm not mad about that hahahah.
Here is a photo of the fitment of the tank/radiator along with the start of fitting the new silicone upper hose, which I started by chopping off the clamps of an original one to get the ends off.
Then I trimmed the upper hose and installed the clamps.
Here is the blower mounted with the intake on it along with the M50 charge pipe. (This is the b30 manifold though)
I decided that I wanted to ditch the old leaky oil return hose that came with the kit. So I ordered up some Vibrant parts 🤗
The cool thing is the drain which just connects to the CCV drain on the dipstick, so I used a tube to AN adapter.
I then ran into another road block. The drain fitting on the bottom of the blower hit the housing because it was too big (-8 AN).
I couldn't seem to find an extension that I was happy with, plus the extension would make the line sit lower than I would like. Sooooo I decided to "clearance" the housing to allow for the larger fitting.
Before.
After.
Worked out great 👍
Now that I solved that headache I finished making and installing the drain line.
And finally to finish catching up to where I'm at currently I pulled the intake manifold in preparation for the M50 manifold I will be picking up in a week or two.
Thats it for now!
-
 Tkuhn got a reaction from P_Roloff in A purists nightmare - E46 drift build
Been a minute! Have had quite the off season just getting to this point. I'm going to try and keep the story as short winded as possible.
First thing was first it was that time of year to get the car on the stands and drained the engine fluids.
Big news first, I was able to purchase a VF engineering supercharger kit from a friend!
He sent me everything to use the kit with the m54b30 manifold and the parts that he made up to have the kit work with a M50 manifold.
For starters you may notice that there is no mounting bracket for the charger to the engine. Well thats because the box broke in shipping and the bracket slipped out, never to be seen again. This is where the story could get long winded, BUT the short of it is UPS is absolutely useless with help or even through the claim process and I was forced to find another option.
Lucky I found a guy in Latavia that makes a bracket for Votech V1,2 and 3 blowers to M5x engines. It's no billet piece like the VF one but VF Engineering is also as useless as UPS. They told me they won't support old kits because it's a liability, so they won't sell a bracket separately. COOL RIGHT.
Anyways here's the steel bracket I sourced.
Now in typical fashion of course the bracket didn't fit right lol. It was hitting on the alternator housing, after talking to the seller it appears it was designed around a smaller 90 amp alternator, and mine is a 120 amp. Soooooo I took the alternator apart and massaged off some material.
And here is the alternator reassembled.
And here's the bracket mounted with the blower on as well.
The next hurdle I knew about, which was seeing how much clearance there was on the expansion tank being that this kit was designed with the factory radiator. I have the thicker CSF aluminum one, and the friend I bought the kit from tried to swap to a CSF like mine and said it didn't fit.
Somehow it fits on my car though, so I'm not mad about that hahahah.
Here is a photo of the fitment of the tank/radiator along with the start of fitting the new silicone upper hose, which I started by chopping off the clamps of an original one to get the ends off.
Then I trimmed the upper hose and installed the clamps.
Here is the blower mounted with the intake on it along with the M50 charge pipe. (This is the b30 manifold though)
I decided that I wanted to ditch the old leaky oil return hose that came with the kit. So I ordered up some Vibrant parts 🤗
The cool thing is the drain which just connects to the CCV drain on the dipstick, so I used a tube to AN adapter.
I then ran into another road block. The drain fitting on the bottom of the blower hit the housing because it was too big (-8 AN).
I couldn't seem to find an extension that I was happy with, plus the extension would make the line sit lower than I would like. Sooooo I decided to "clearance" the housing to allow for the larger fitting.
Before.
After.
Worked out great 👍
Now that I solved that headache I finished making and installing the drain line.
And finally to finish catching up to where I'm at currently I pulled the intake manifold in preparation for the M50 manifold I will be picking up in a week or two.
Thats it for now!
-
 Tkuhn got a reaction from jc43089 in A purists nightmare - E46 drift build
Photos of the new to me trunk installed.
-

 Tkuhn got a reaction from B C in A purists nightmare - E46 drift build
Hahaha so SLR offers this set up which is more geared toward drift but it has 4 Ackerman adjustment settings to go from full drift to full race. Id recommended checking out what they offer for a road race application on their website! Also Sean the owner is extremely knowledgeable.
-
 Tkuhn got a reaction from Jdesign in A purists nightmare - E46 drift build
Small update!
Ordered some drifttec toe brackets in hopes of really being able to dial in my rear alignment.
Last time i lowered the car it really messed up the rear alignment, the car had a 1/2" toe out which is obviously not great lol
These braclets are really well made as i was kind of skeptical originally.
Here is a side by side with the original one I had in the car, sketchy slotting and all lol.
Got these installed and the car aligned in just over an hour which was great.
Now the rear is sitting at 3/16" toed in. Which for now will be worth trying and aging with some settings to see how it will affect grip.
-
Tkuhn got a reaction from Jdesign in A purists nightmare - E46 drift build
Update!
Received the new SLR kit and got it installed the same day!
The quality and build of this kit is out of this world.
And fhe fit is right in par with everything else about it. I cannot believe I waited this long to purchase one.
Here is a photo of one installed.
And a photo of the wheels on at full lock, mind you this is without the lock stops that keep the barrel from making contact with the lower arm. Its just insane what this kit is capable of.
Once I had the lock stops dialed it was time for a good ole driveway alignment.
Went to a shop get together/party with the Pnuespeed guys (who we get our tires from) and they announced the big news of a rebranding! They are adding wheels, clutches, suspension and lots of other automotive parts to their arsenal and it will all be available through Track Day Direct.
Here's a photo from the get together
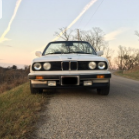
And after the shop party we went for a cruise to get ice cream in Milwaukee and I snagged a few pics!
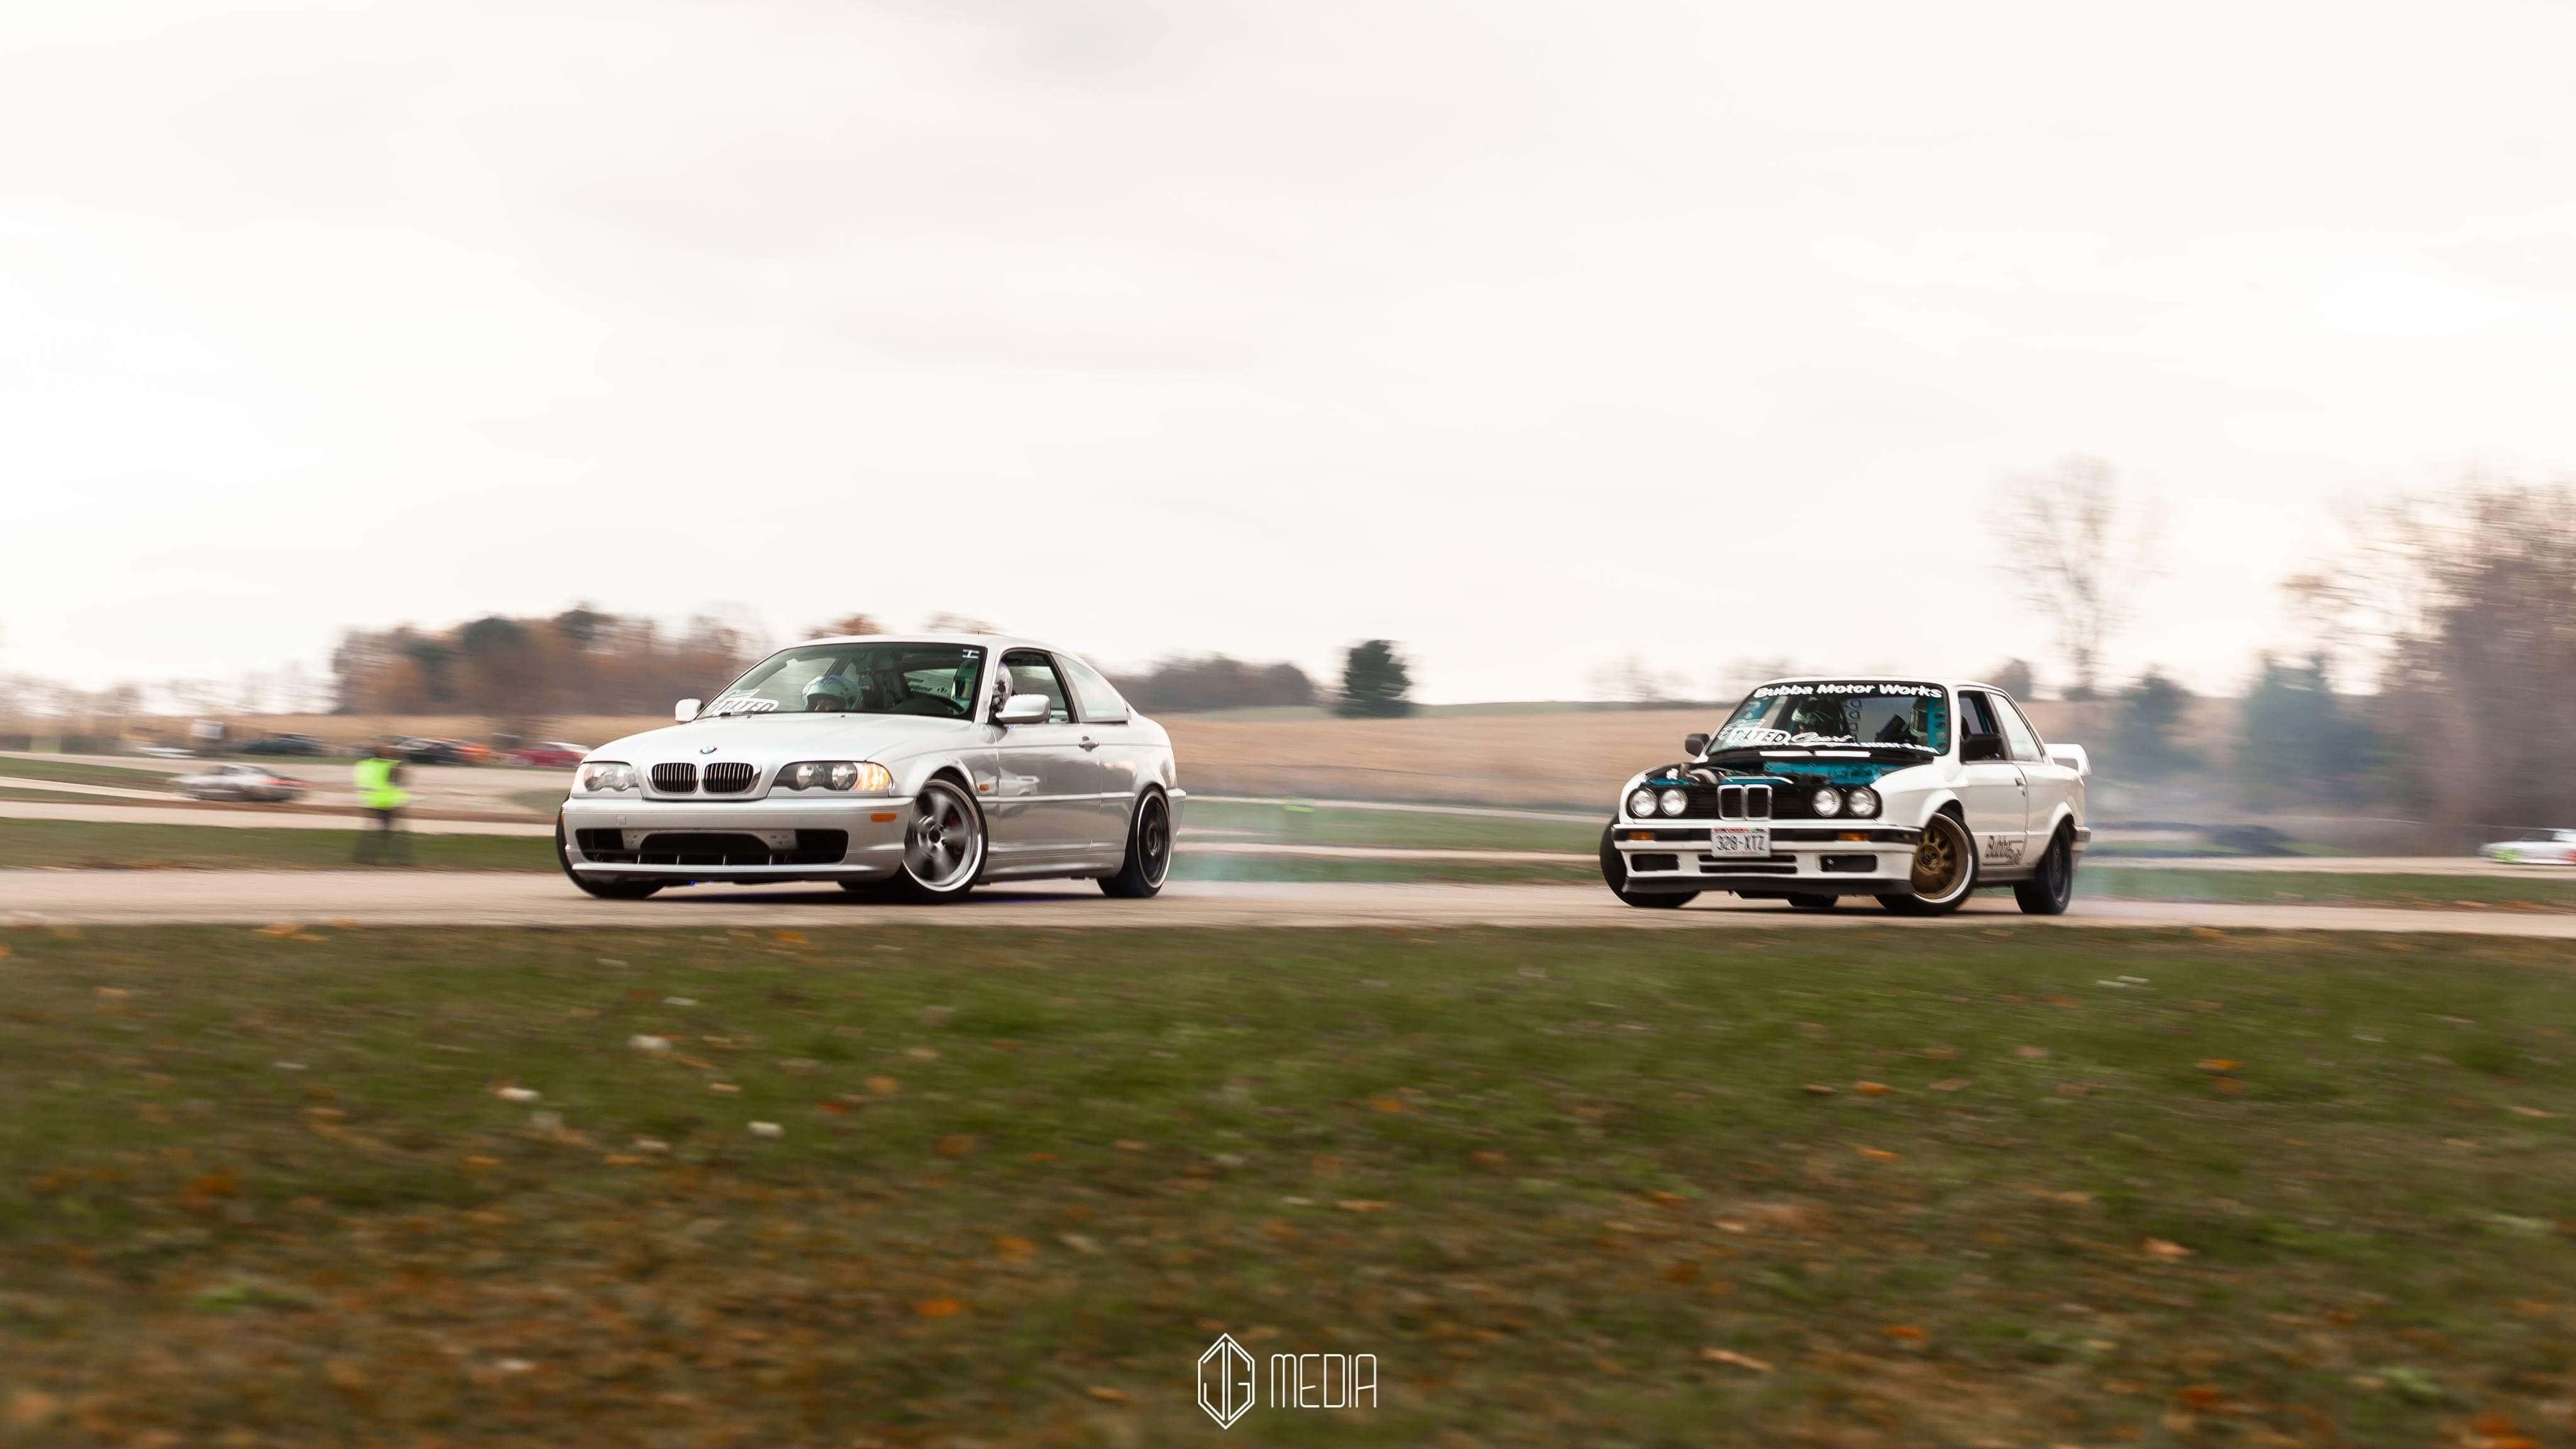
It was really nice getting to go for more than a 10 minute cruise! Hopefully after getting the sway bar set up sorted out/parts ordered ill be able to make it to an event this year lol.
-
Tkuhn got a reaction from Jdesign in A purists nightmare - E46 drift build
Small update:
Got the parts in to replace my tensioner. I went with the updated hydraulic one, which is nice because the pulley is replaceable rather than the whole unit unlike the mechanical style.
I also replaced the belt while I was in there and it's cheap.
I also adjusted the preload on my coils (because I realized I never did it) and then went ahead and lowered the rear now that I have the room to.
-
Tkuhn got a reaction from P_Roloff in A purists nightmare - E46 drift build
Been a minute since I updated.
Got some photos from a shoot with a friend. Unfortunately this was before I lowered the rear haha.
New SLR ultra angle kit should be here tomorrow! So I pulled the MG kit off the car along with swapped in a factory subframe.
Installed new inner tie rods while everything was apart.
Picked up a used UUC dssr as well and got that installed while the car is down for a few days, excited to hopefully feel the difference
More updates soon hopefully!
-
 Tkuhn got a reaction from Rekpoint in A purists nightmare - E46 drift build
Been a minute since I updated.
Got some photos from a shoot with a friend. Unfortunately this was before I lowered the rear haha.
New SLR ultra angle kit should be here tomorrow! So I pulled the MG kit off the car along with swapped in a factory subframe.
Installed new inner tie rods while everything was apart.
Picked up a used UUC dssr as well and got that installed while the car is down for a few days, excited to hopefully feel the difference
More updates soon hopefully!
-
Tkuhn got a reaction from patsbimmer1 in A purists nightmare - E46 drift build
Id love to see it if you made it come to life! Haha but I cant wait to get it in all white.
-
Tkuhn got a reaction from P_Roloff in A purists nightmare - E46 drift build
UPDATE
Totally have been slacking on the updates again now that there's no major things going on.
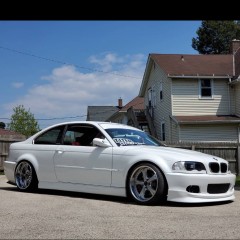
Finished shaving the driver side fender and got it primed and put on the car.
I tried putting in the passenger seat with the home made seat bases and brackets that I had from before and it just was not going to work. So I finally splurged on some real swat brackets and bases.
Planted steel bases with planted aluminum side mounts.
Here is the seat mounted. I really liked that they give you so much room to play with and drill your own holes in the seat mount baseplate.
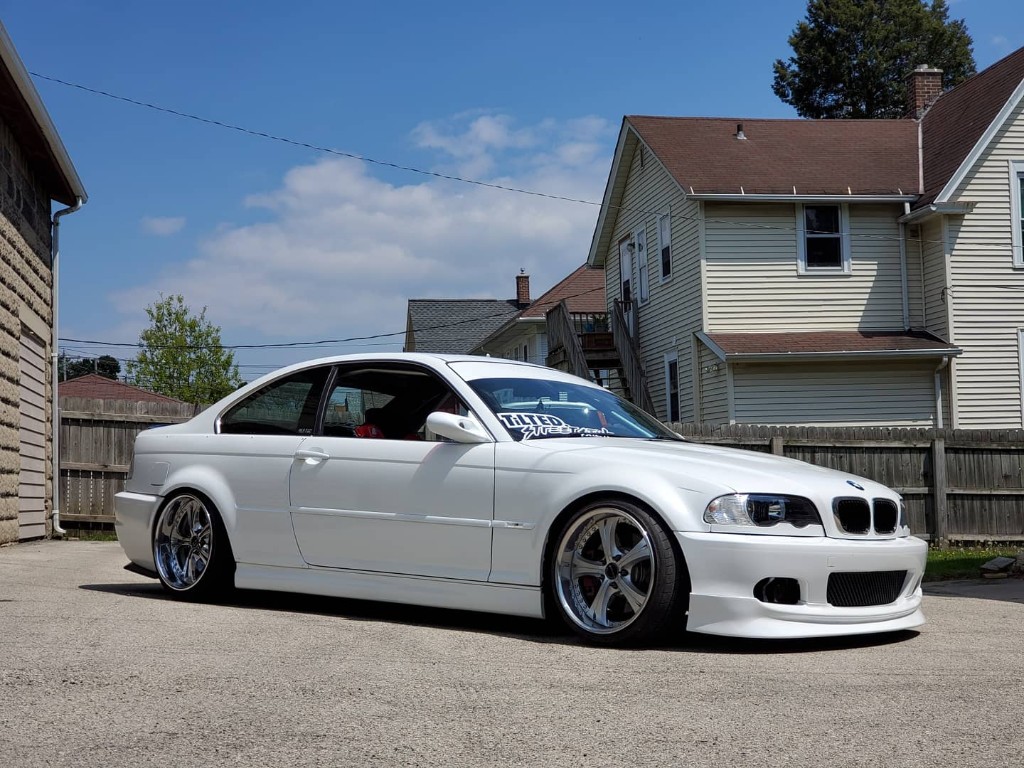
And here is both seats finally mounted in the car, with much better seating positions compared to before as well.
On to something smaller, I finally upgraded to the brass bleeder screw rather than the plastic one.
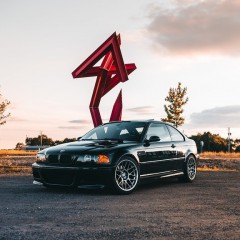
Was able to get out to a "meet" last weekend at the old forest mall in fond du lac so that was cool to get the car out for a bit.
I also ordered some new DEPO clear front marker lights since I broke the tab on my left side one (thus the painters tape lmao).
I also decided to take care of the worn out idler and tensioner pulleys. But soon found out that the tensioner pulley I ordered was for the hydraulic tensioner, and i have the mechanical one. After doing some reading it appears the hydraulic one is the upgrade that BMW put in place so I got one on order.
And while I was discouraged about not getting that simple job done I decided to completely clean out the catch can and all the lines for it.
Thats it for now! I am waiting on a few new parts to show up that I am excited to share once they come in!
-
Tkuhn got a reaction from Rekpoint in A purists nightmare - E46 drift build
UPDATE
Totally have been slacking on the updates again now that there's no major things going on.
Finished shaving the driver side fender and got it primed and put on the car.
I tried putting in the passenger seat with the home made seat bases and brackets that I had from before and it just was not going to work. So I finally splurged on some real swat brackets and bases.
Planted steel bases with planted aluminum side mounts.
Here is the seat mounted. I really liked that they give you so much room to play with and drill your own holes in the seat mount baseplate.
And here is both seats finally mounted in the car, with much better seating positions compared to before as well.
On to something smaller, I finally upgraded to the brass bleeder screw rather than the plastic one.
Was able to get out to a "meet" last weekend at the old forest mall in fond du lac so that was cool to get the car out for a bit.
I also ordered some new DEPO clear front marker lights since I broke the tab on my left side one (thus the painters tape lmao).
I also decided to take care of the worn out idler and tensioner pulleys. But soon found out that the tensioner pulley I ordered was for the hydraulic tensioner, and i have the mechanical one. After doing some reading it appears the hydraulic one is the upgrade that BMW put in place so I got one on order.
And while I was discouraged about not getting that simple job done I decided to completely clean out the catch can and all the lines for it.
Thats it for now! I am waiting on a few new parts to show up that I am excited to share once they come in!
-
Tkuhn got a reaction from jc43089 in A purists nightmare - E46 drift build
UPDATE
Totally have been slacking on the updates again now that there's no major things going on.
Finished shaving the driver side fender and got it primed and put on the car.
I tried putting in the passenger seat with the home made seat bases and brackets that I had from before and it just was not going to work. So I finally splurged on some real swat brackets and bases.
Planted steel bases with planted aluminum side mounts.
Here is the seat mounted. I really liked that they give you so much room to play with and drill your own holes in the seat mount baseplate.
And here is both seats finally mounted in the car, with much better seating positions compared to before as well.
On to something smaller, I finally upgraded to the brass bleeder screw rather than the plastic one.
Was able to get out to a "meet" last weekend at the old forest mall in fond du lac so that was cool to get the car out for a bit.
I also ordered some new DEPO clear front marker lights since I broke the tab on my left side one (thus the painters tape lmao).
I also decided to take care of the worn out idler and tensioner pulleys. But soon found out that the tensioner pulley I ordered was for the hydraulic tensioner, and i have the mechanical one. After doing some reading it appears the hydraulic one is the upgrade that BMW put in place so I got one on order.
And while I was discouraged about not getting that simple job done I decided to completely clean out the catch can and all the lines for it.
Thats it for now! I am waiting on a few new parts to show up that I am excited to share once they come in!
-
Tkuhn got a reaction from Jdesign in A purists nightmare - E46 drift build
Finally got around to putting the clear vinyl on the cage to protect it. Obviously can't see much in the photo but its nice to have the cage fully exposed and not covered.
Also ordered these rear bumper extensions off of ebay, and I am pleasantly surprised with how they look!
Hard to get a decent photo with my phone of them but it was a decent $25 gamble lmao.
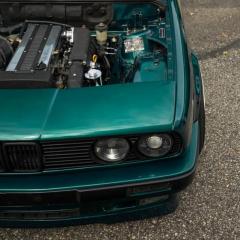
And also finally got the car and engine bay washed.
Just a few things left to tidy up before its ready to drive, even though it will be 5 different colors lol.
-
 Tkuhn got a reaction from KaiserRolls in A purists nightmare - E46 drift build
Finally got around to putting the clear vinyl on the cage to protect it. Obviously can't see much in the photo but its nice to have the cage fully exposed and not covered.
Also ordered these rear bumper extensions off of ebay, and I am pleasantly surprised with how they look!
Hard to get a decent photo with my phone of them but it was a decent $25 gamble lmao.
And also finally got the car and engine bay washed.
Just a few things left to tidy up before its ready to drive, even though it will be 5 different colors lol.
-
 Tkuhn got a reaction from Boris3 in A purists nightmare - E46 drift build
Finally got around to putting the clear vinyl on the cage to protect it. Obviously can't see much in the photo but its nice to have the cage fully exposed and not covered.
Also ordered these rear bumper extensions off of ebay, and I am pleasantly surprised with how they look!
Hard to get a decent photo with my phone of them but it was a decent $25 gamble lmao.
And also finally got the car and engine bay washed.
Just a few things left to tidy up before its ready to drive, even though it will be 5 different colors lol.
-
 Tkuhn got a reaction from SteelBlue in A purists nightmare - E46 drift build
Finally got around to putting the clear vinyl on the cage to protect it. Obviously can't see much in the photo but its nice to have the cage fully exposed and not covered.
Also ordered these rear bumper extensions off of ebay, and I am pleasantly surprised with how they look!
Hard to get a decent photo with my phone of them but it was a decent $25 gamble lmao.
And also finally got the car and engine bay washed.
Just a few things left to tidy up before its ready to drive, even though it will be 5 different colors lol.
-
Tkuhn got a reaction from Jdesign in A purists nightmare - E46 drift build
I wouldnt say the same, it has metallic pieces in it and im not sure if panel bond does. It does come up down the list when you search panel bond, but panel bond and scotch weld are both 3M products. I believe panel bond is more for gluing 2 surfaces together like a quarter panel. Or if you were trying to mold a over to a car? I'm no body guy lmao
Definitely do NOT have the patience for that stuff thats for sure.
-
Tkuhn reacted to SteelBlue in A purists nightmare - E46 drift build
I don’t know why, but I kind of like how it looks as is.
-
Tkuhn got a reaction from Jdesign in A purists nightmare - E46 drift build
Update.
So here is my solution to there not being an exhaust exit on the M bumper (that I currently can make work and that I like).
Not super proud of it but it will work for now.
You can't see it from looking at the car at all so thats cool with me, and it will do until its time to make a real exhaust.
Next i tackled fitting the gas door.
I drilled some new holes that would work with the M door layout. And trimmed up the standoffs I bought to make the door fit the overs correctly.
I also found a spacer that I had laying around that I trimmed down until it was the right size to sit against the original non-M push button thing. I need to decide how I want to attach it yet. Most likely some sort of epoxy.
And here is the fit when closed!
My girlfriend deep cleaned the dash and interior which was VERY NEEDED! I'm so glad she has the patience for that because I dont.
I also started on shaving the driver side fender. I chose to use 3M scotch-weld to "weld" in the piece of metal to shave the vent.
Here is the patch panel held in on the outside with hot glue. I then put painters tape over it to keep it in place for sure. I used the hot glue because its easily removeable.
And here is from the inside.
And here it is with the scotch-weld mixed up and applied.
Honestly I think this is going to work out really well. After 12 hours we will see!
Finally got the windows cleaned on the inside as well then installed the rear quarter glass.
Still alot more little stuff to do so hoping to keep picking away at it.
-
Tkuhn got a reaction from B C in A purists nightmare - E46 drift build
Update.
So here is my solution to there not being an exhaust exit on the M bumper (that I currently can make work and that I like).
Not super proud of it but it will work for now.
You can't see it from looking at the car at all so thats cool with me, and it will do until its time to make a real exhaust.
Next i tackled fitting the gas door.
I drilled some new holes that would work with the M door layout. And trimmed up the standoffs I bought to make the door fit the overs correctly.
I also found a spacer that I had laying around that I trimmed down until it was the right size to sit against the original non-M push button thing. I need to decide how I want to attach it yet. Most likely some sort of epoxy.
And here is the fit when closed!
My girlfriend deep cleaned the dash and interior which was VERY NEEDED! I'm so glad she has the patience for that because I dont.
I also started on shaving the driver side fender. I chose to use 3M scotch-weld to "weld" in the piece of metal to shave the vent.
Here is the patch panel held in on the outside with hot glue. I then put painters tape over it to keep it in place for sure. I used the hot glue because its easily removeable.
And here is from the inside.
And here it is with the scotch-weld mixed up and applied.
Honestly I think this is going to work out really well. After 12 hours we will see!
Finally got the windows cleaned on the inside as well then installed the rear quarter glass.
Still alot more little stuff to do so hoping to keep picking away at it.