

YoungCR
-
Posts
5295 -
Joined
-
Last visited
-
Days Won
154
Content Type
Profiles
Forums
Events
Gallery
Store
Posts posted by YoungCR
-
-
Sweet! Always great when that long term play pays off. Any good options the other X5 doesn’t have?
-
Hey everyone,
P_Roloff is wondering if his gift has been sent out yet. Not everyone replied in the forum thread either that they received their gifts. I don’t know what the matches are so sending out a message is the best I can do.
If you have P_Roloff as your drawn name you can send him a message directly by going to My Drawn Name and scrolling down to the text box “Ask a question anonymously” to say the gift was sent out or not at this point or contact him directly on the forum or if you have his info and don’t mind giving up anonymity.
If anyone else is waiting on a gift still please reply as well to help track that down.
-
-
Welcome! Glad to see another E28 on here. I don’t remember all the details but I can point you towards things to research. Also there is a good swap guide somewhere on MyE28.com, might be in the Rod’s E28 website archive as well.
Theres 3 important things you’ll need to match up: the transmission, the output flange and the driveshaft length. As @P_Roloff stated it’s ideal to get the complete swap from the same car. I think there were 3 or 4 Getrag manuals hence the changes.
There’s 2 shift selector styles as well. I upgraded from the old plate style when I converted my 528e. I don’t know the details on what’s cross compatible with the M30 transmissions though. Remember M20 and M30 have different bell housings so you have to source from a 533i or 535i. Not sure if still available but I did buy a shifter mount from the dealer years back. It’s the only welding required as for whatever reason auto E28’s didn’t get them from the factory like E30’s did regardless of transmission.
Pedals are easy, you can just buy the clutch portion and add it on to your pedal box but might be easier to just buy the whole replacement. Although I haven’t done it welding in reinforcement plates is suggested as it’s common to find cracked pedal boxes. For the clutch line I just had a braided stainless line with a 90 degree fitting at the clutch master made at Pegasus racing vs the stock 3 piece line set.
Feel free to start a build thread! Images can be hosted on site here and would love to follow along on your progress.
-
-
-
Didn’t realize there was a setting in the group for sharing addresses. You can go to the group page and click on your username to input your address For your Santa to see.
-
On 11/22/2023 at 10:43 PM, rampelsauce said:
Sorry guys I dropped my balls on this one. If I can jump in this I'd love to be involved.
Sorry I missed this, if we can wrangle together at least one more person along with you, we could make things work.
-
-
Would everyone be ok with using DrawNames.com for secret Santa? It will make the picks for us and that way I get to have an anonymous grifter as well. We use this for our family and it works well. I can set up restrictions on not getting the same recipient as last year.
I could make a group and then when you draw a name you can send an anonymous message to your recipient via draw names to get their address.
-
Secret Santa Time !!! Assignments will be done on Tues 11/21/2022
PM/text me your address if you are interested in participating and you will be added to the list.
General guideline for gifts is ~$20 or more if you choose. Gifts can be sent or opened at any time but it's more magical when the presents are opened or revealed on Christmas Eve/Christmas Day. Please reply in this thread with what you received! It's all part of the fun to see what others got and to verify gifts made it to their destination.
PARTICIPANTATIONS:
------------------------------------------ YoungCR
- JDesign
- WasntM3
- m42b32
- P_Roloff
- Patsbimmer1
- Rampelsauce
- Rekpoint
-
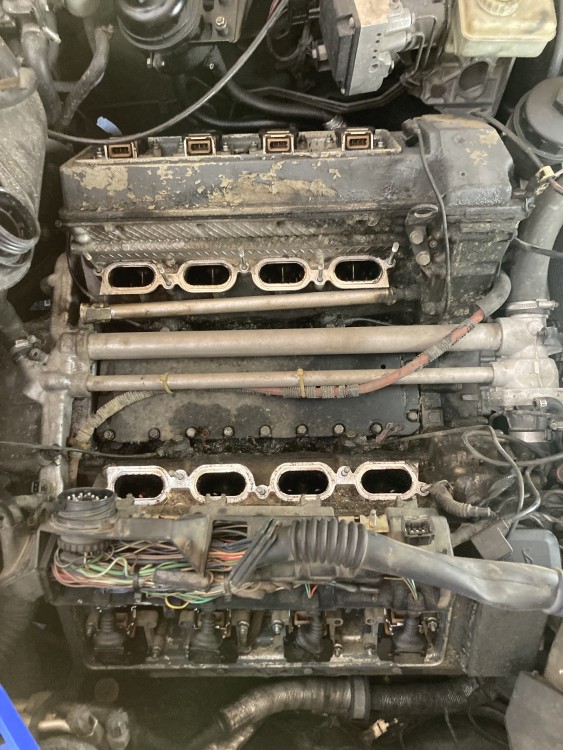
Behind on updates but October's project was the 100k service punch list. I won't be doing a project this big again without a garage, setup/organization and mainly weather dragged this out over 3.5 weekends for me but I'd say its a solid 3-4 day amount of wrenching for all of this. Overall the work itself wasn't as daunting as I anticipated.
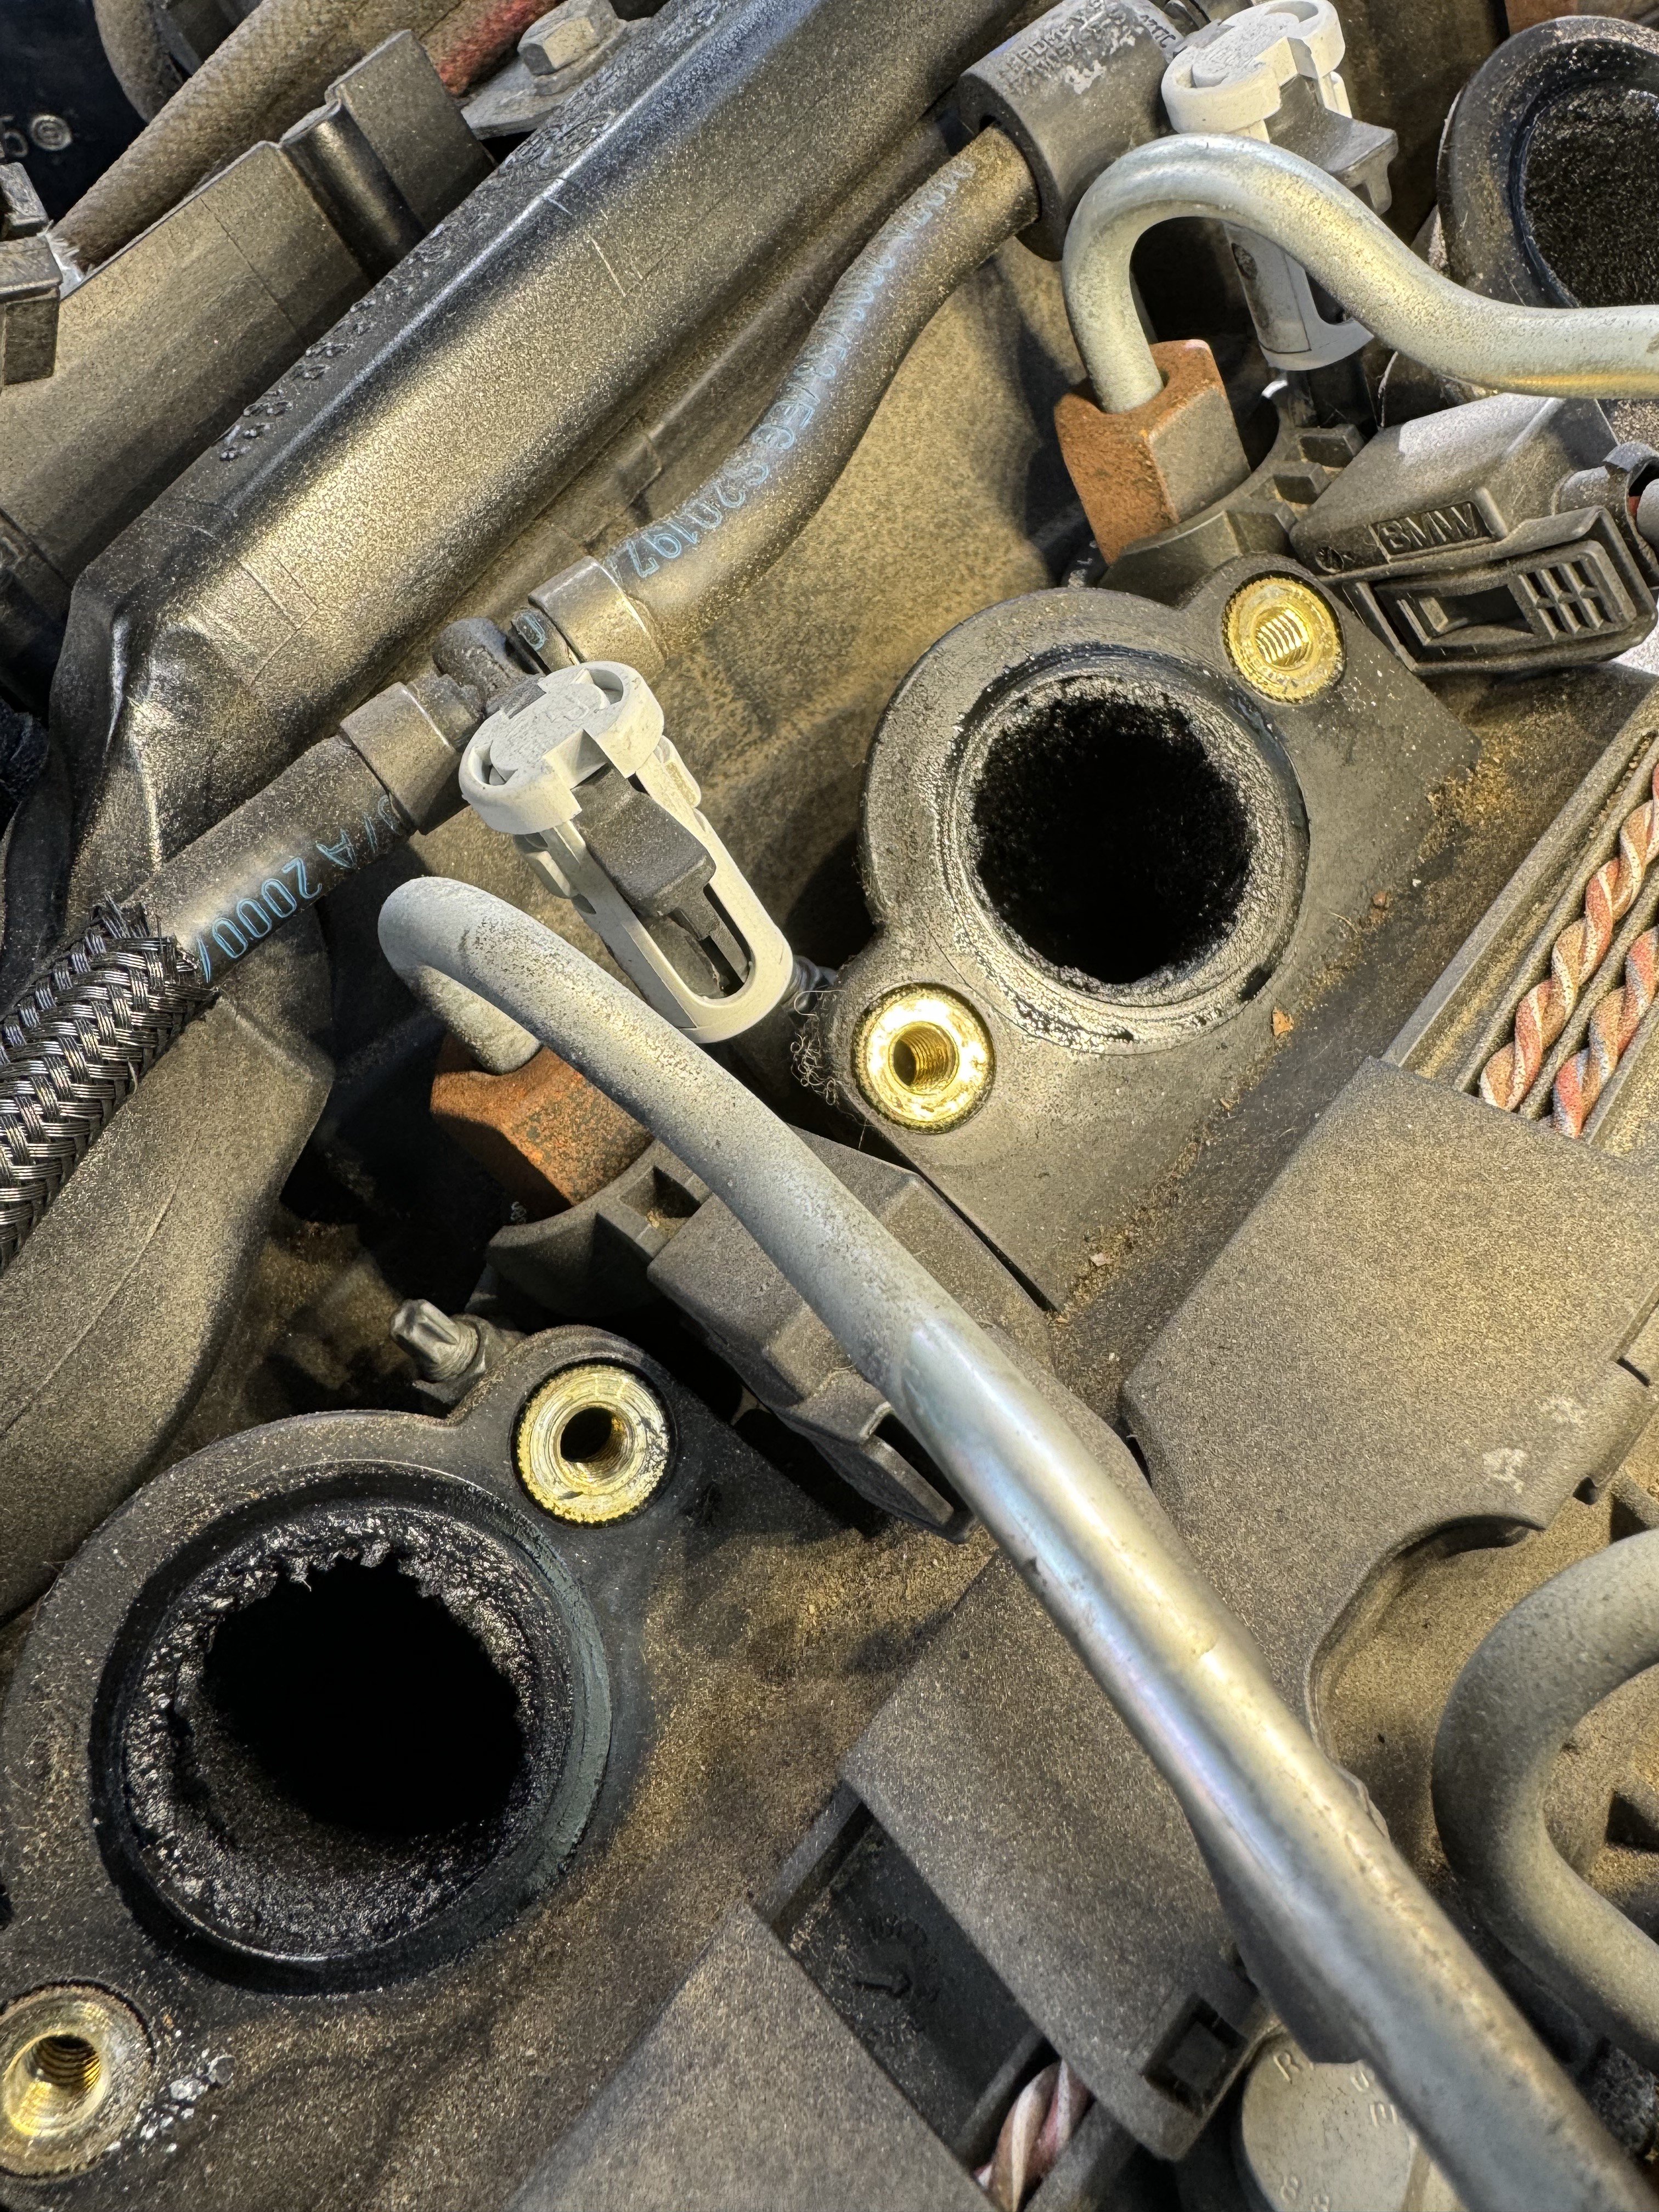
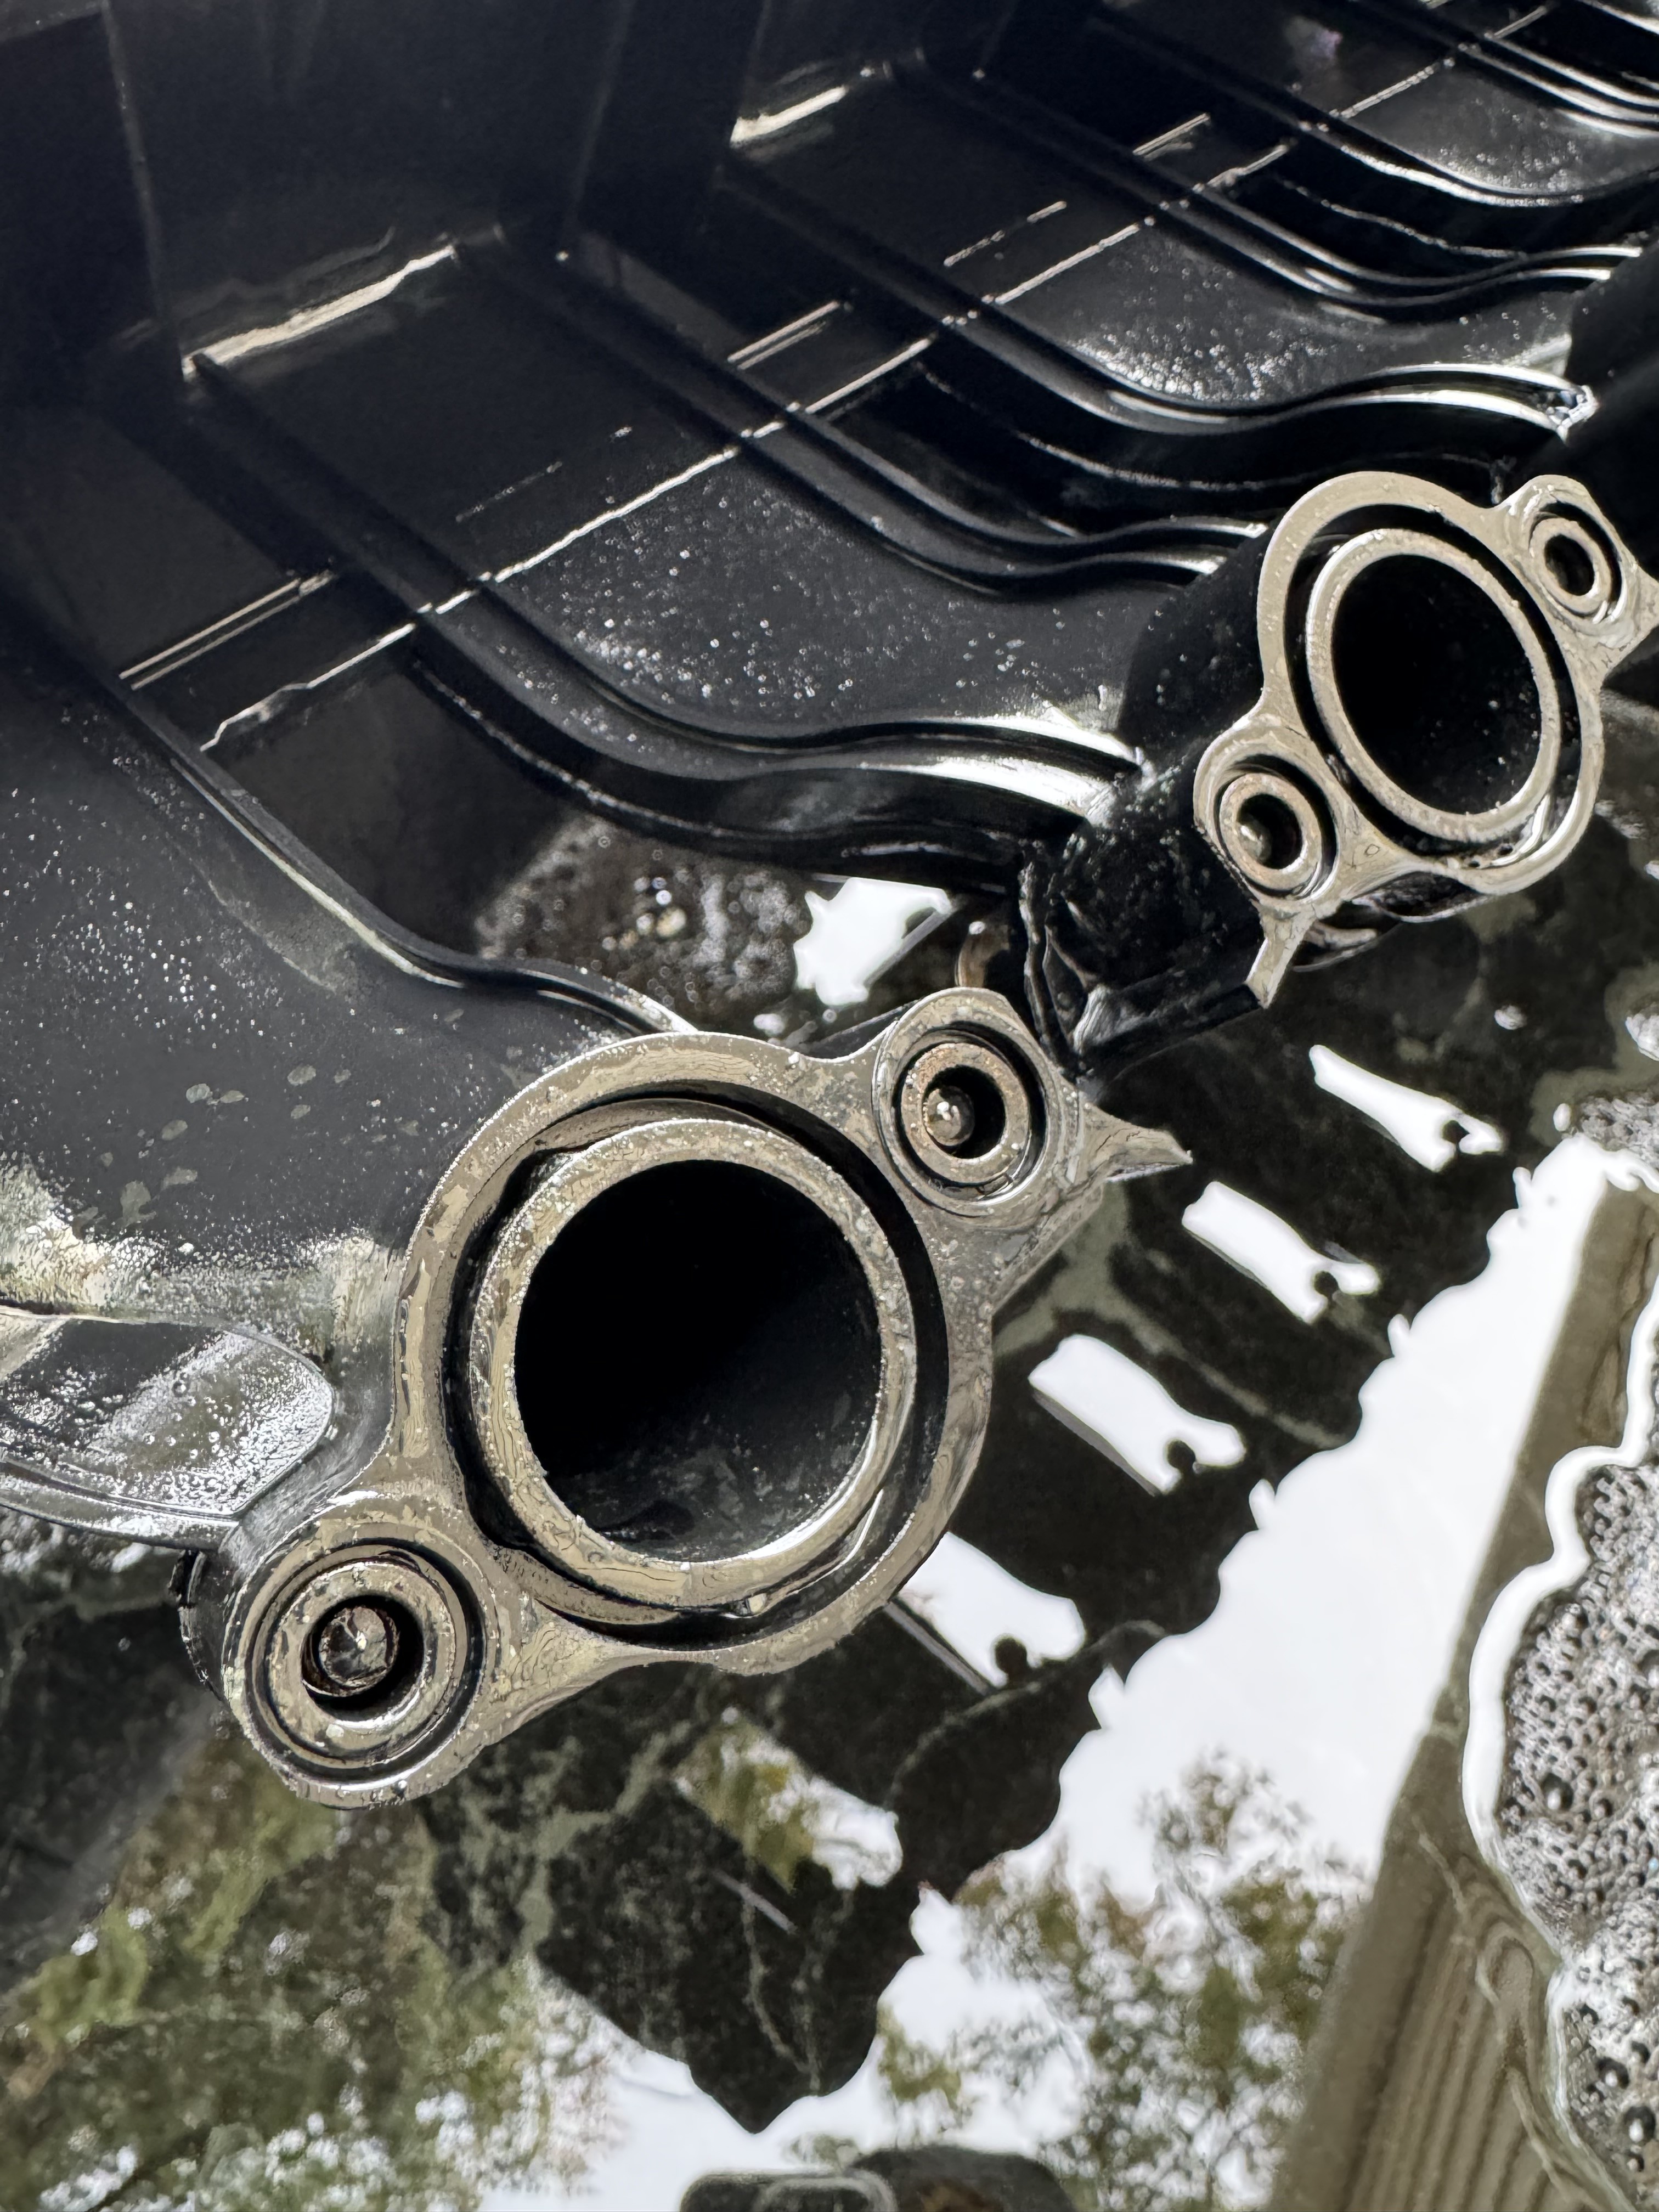
Im guessing this engine had a walnut blast at some point, the worst build up was in the intake runners themselves but the valves had minimal carbon buildup so I ended up not performing a walnut blast.
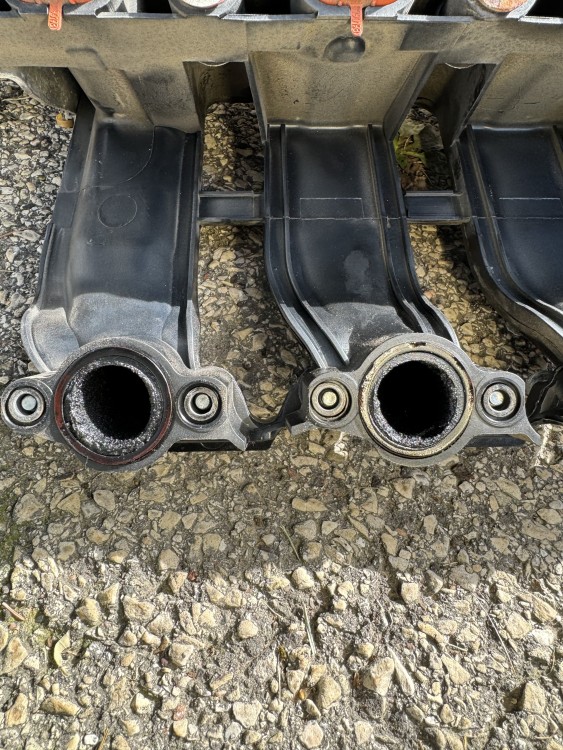

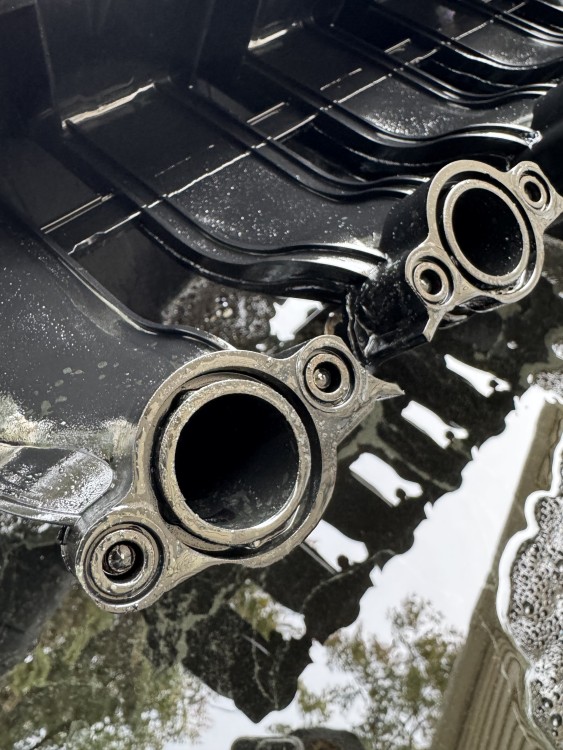
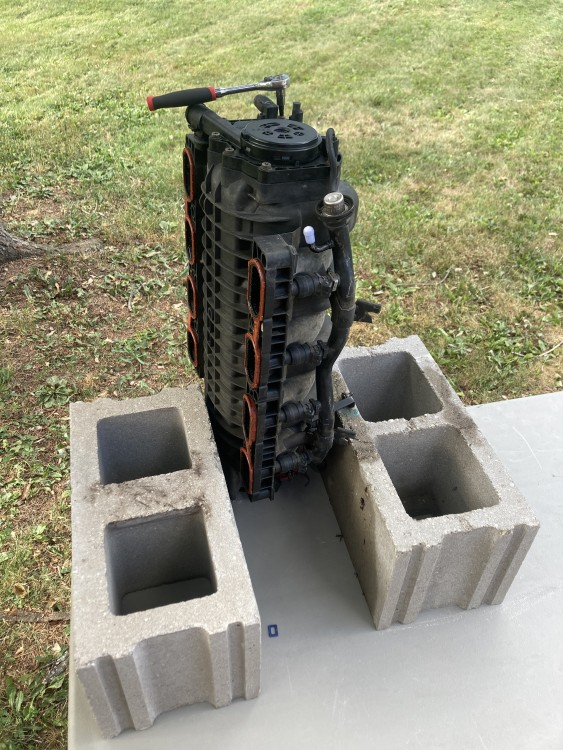
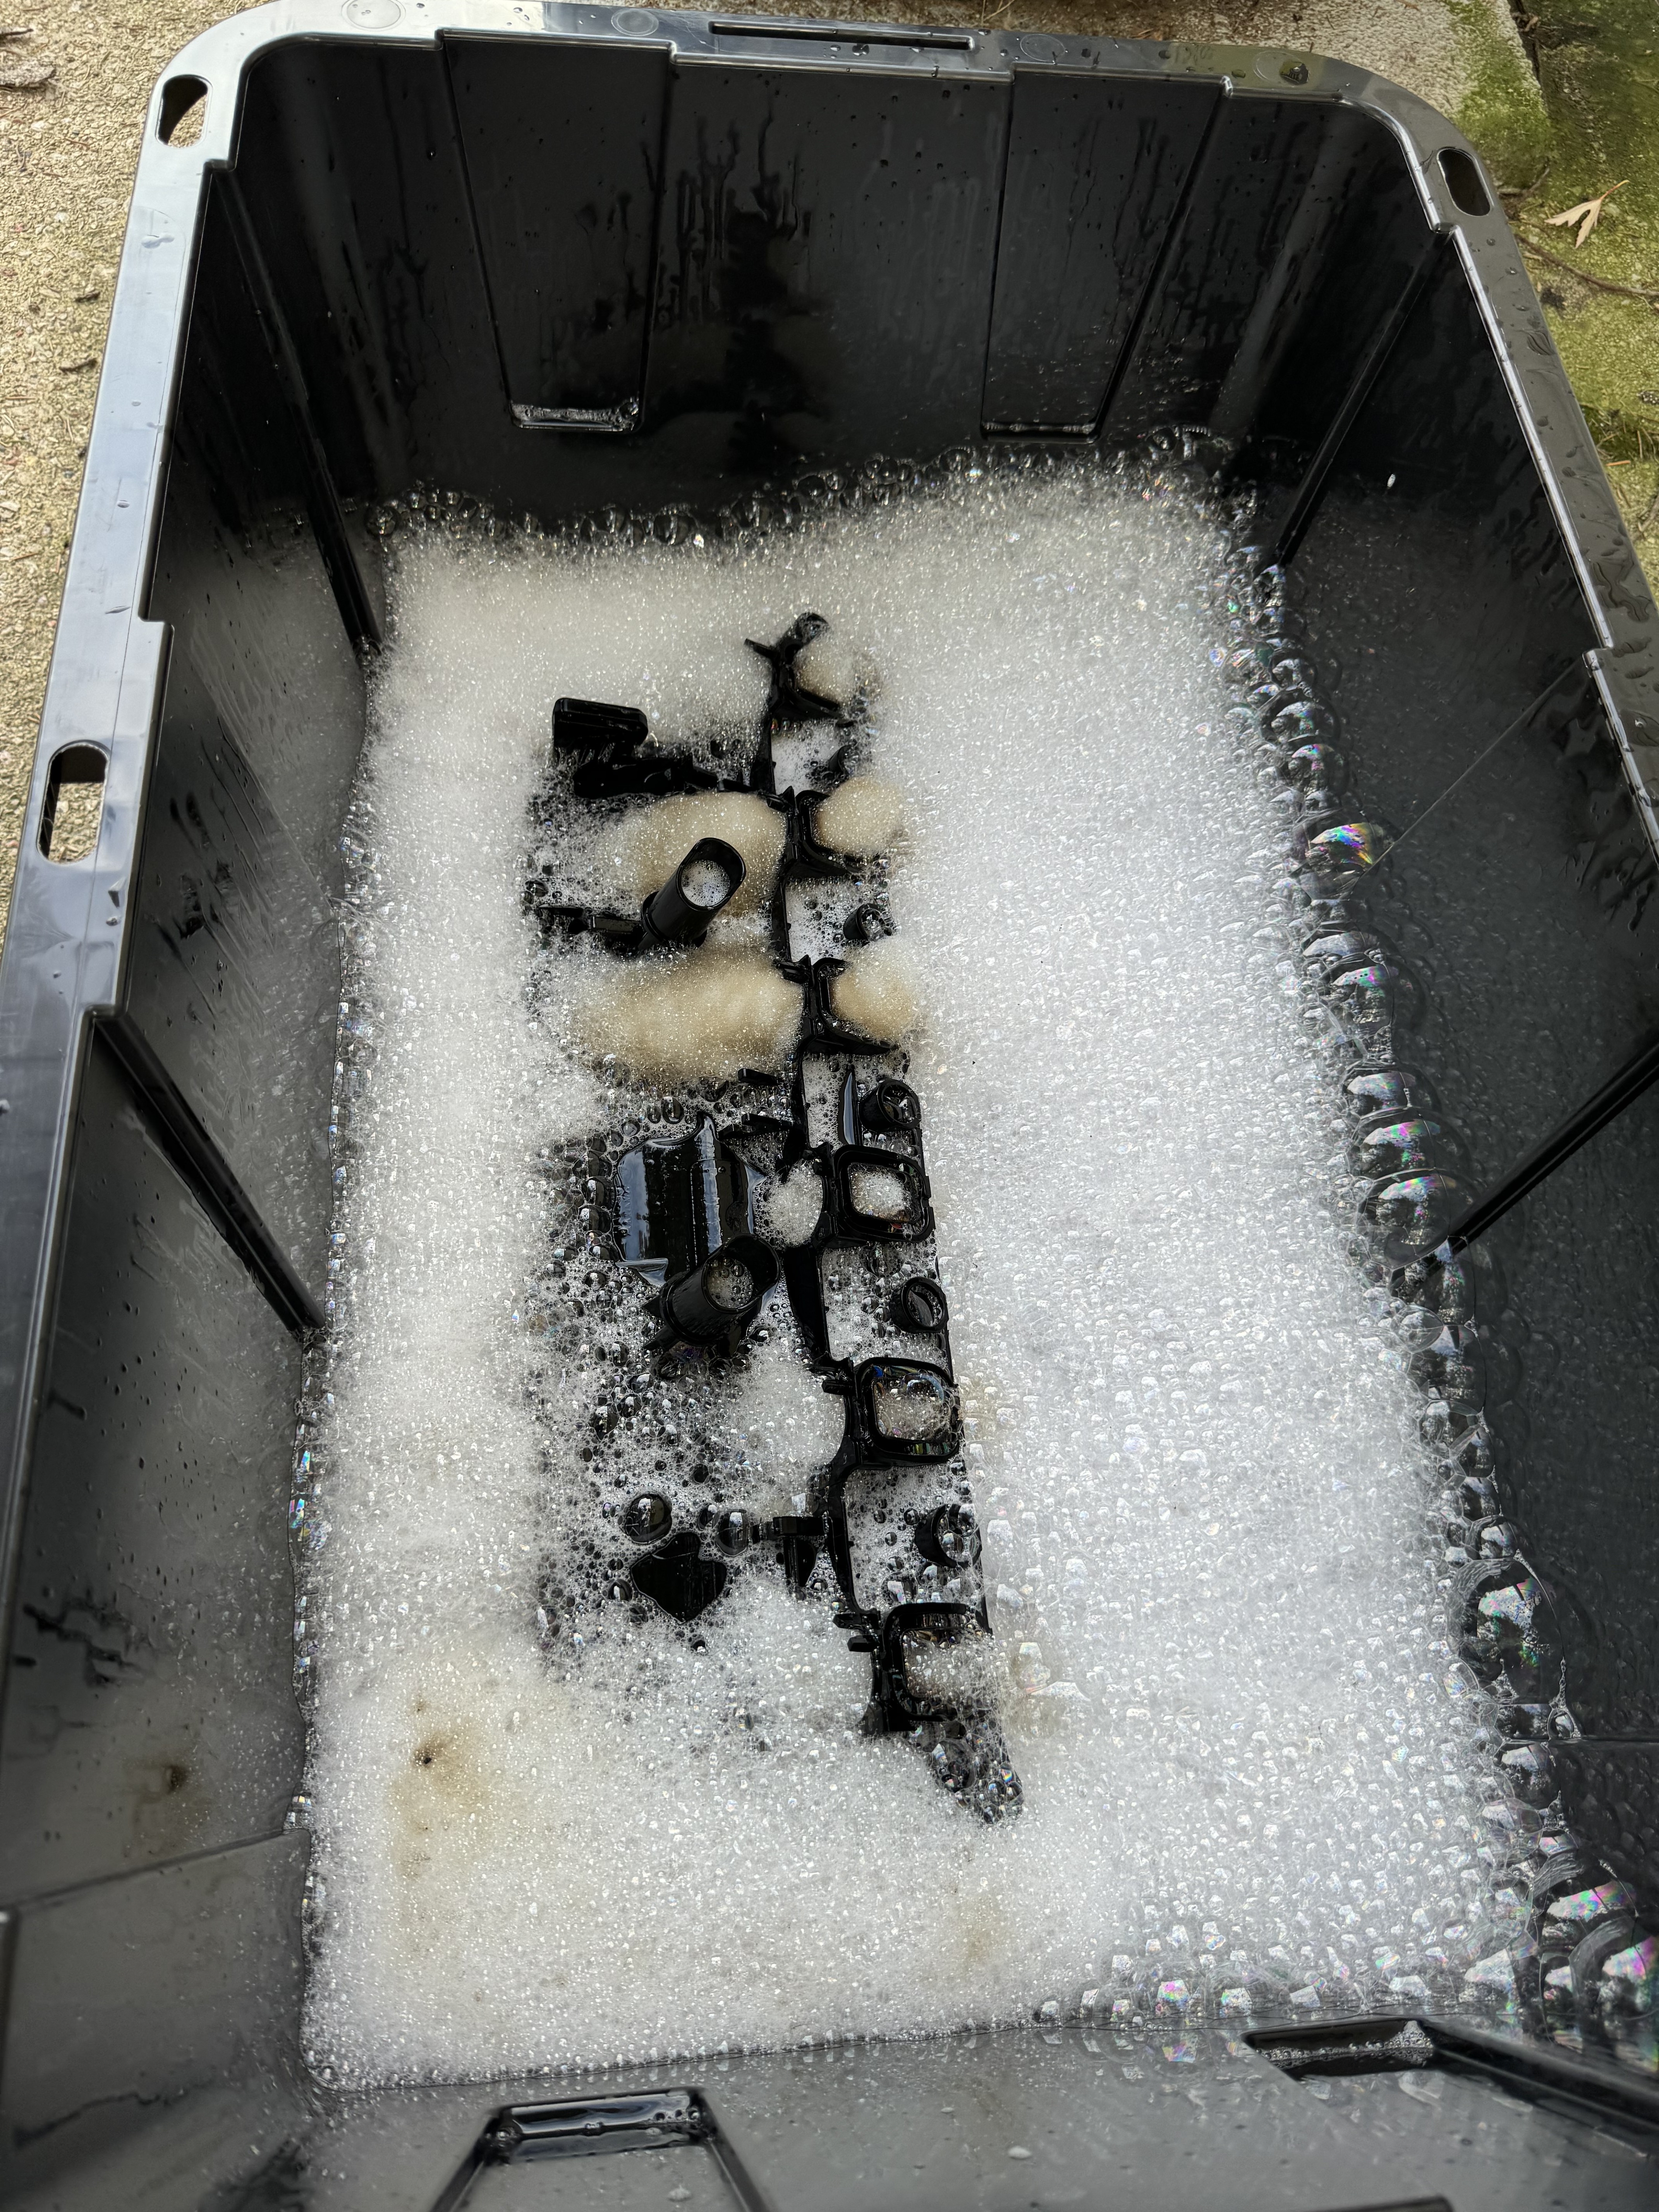
I had read online somewhere that somebody just soaked their intake manifold in ZEP Industrial Purple Degreaser so I gave it a shot and was pleased with the results. Menards has 5 gal jugs so I dumped all of that in and then added another 3ish gallons of water to get the intake completely submerged but wanted to keep the concentrate as strong as possible.

I ended up soaking it for a week, the runners came out almost perfect. All the heavy build up was taken care of but there were still sections of minimal surface buildup that was really baked on. I did pressure wash as well to clean out debris and I was able to get a little bit more of the surface buildup off but not too much.
I think with another treatment of Liquid Moly Diesel Purge the valves will be in great shape as well. One thing that wasn't one the recommended parts list was 11612246949, the mating gaskets for the intake bolts. The metal washer was either rusted or separating from the gasket on about half of mine. I wanna say it was a 16mm I used to seat them.
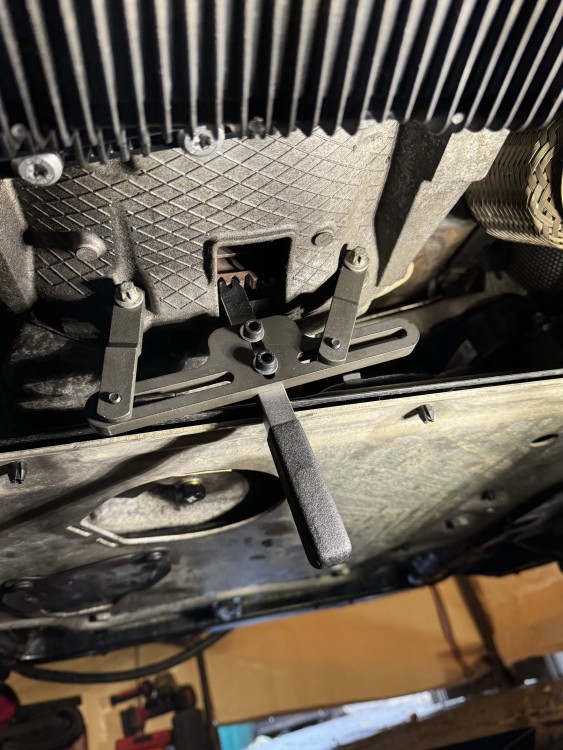
I did a majority of the jobs in 3 groups: top, front and exhaust side of the motor. I mainly referred to the TIS on instructions and torque values but the TME YouTube videos were a great help too for some tips/shortcuts. For doing the flywheel I did buy CTA Tools 2890 BMW T.D.C. Pin for locking the crank but that particular tool was just too long to fit into the access hole. I had bought a generic version of special tool 118180 per the TIS for walnut blasting so I ended up locking the crank that way. More expensive tool but easier to work with and I can use it on my other cars as well.
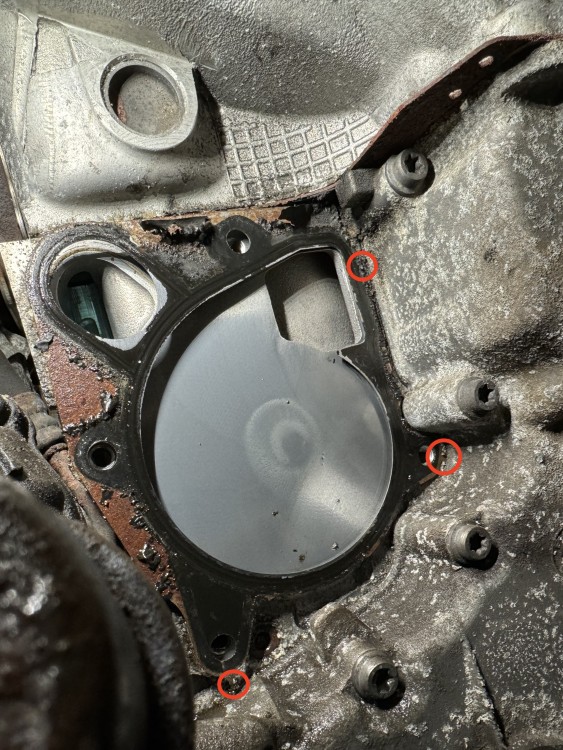
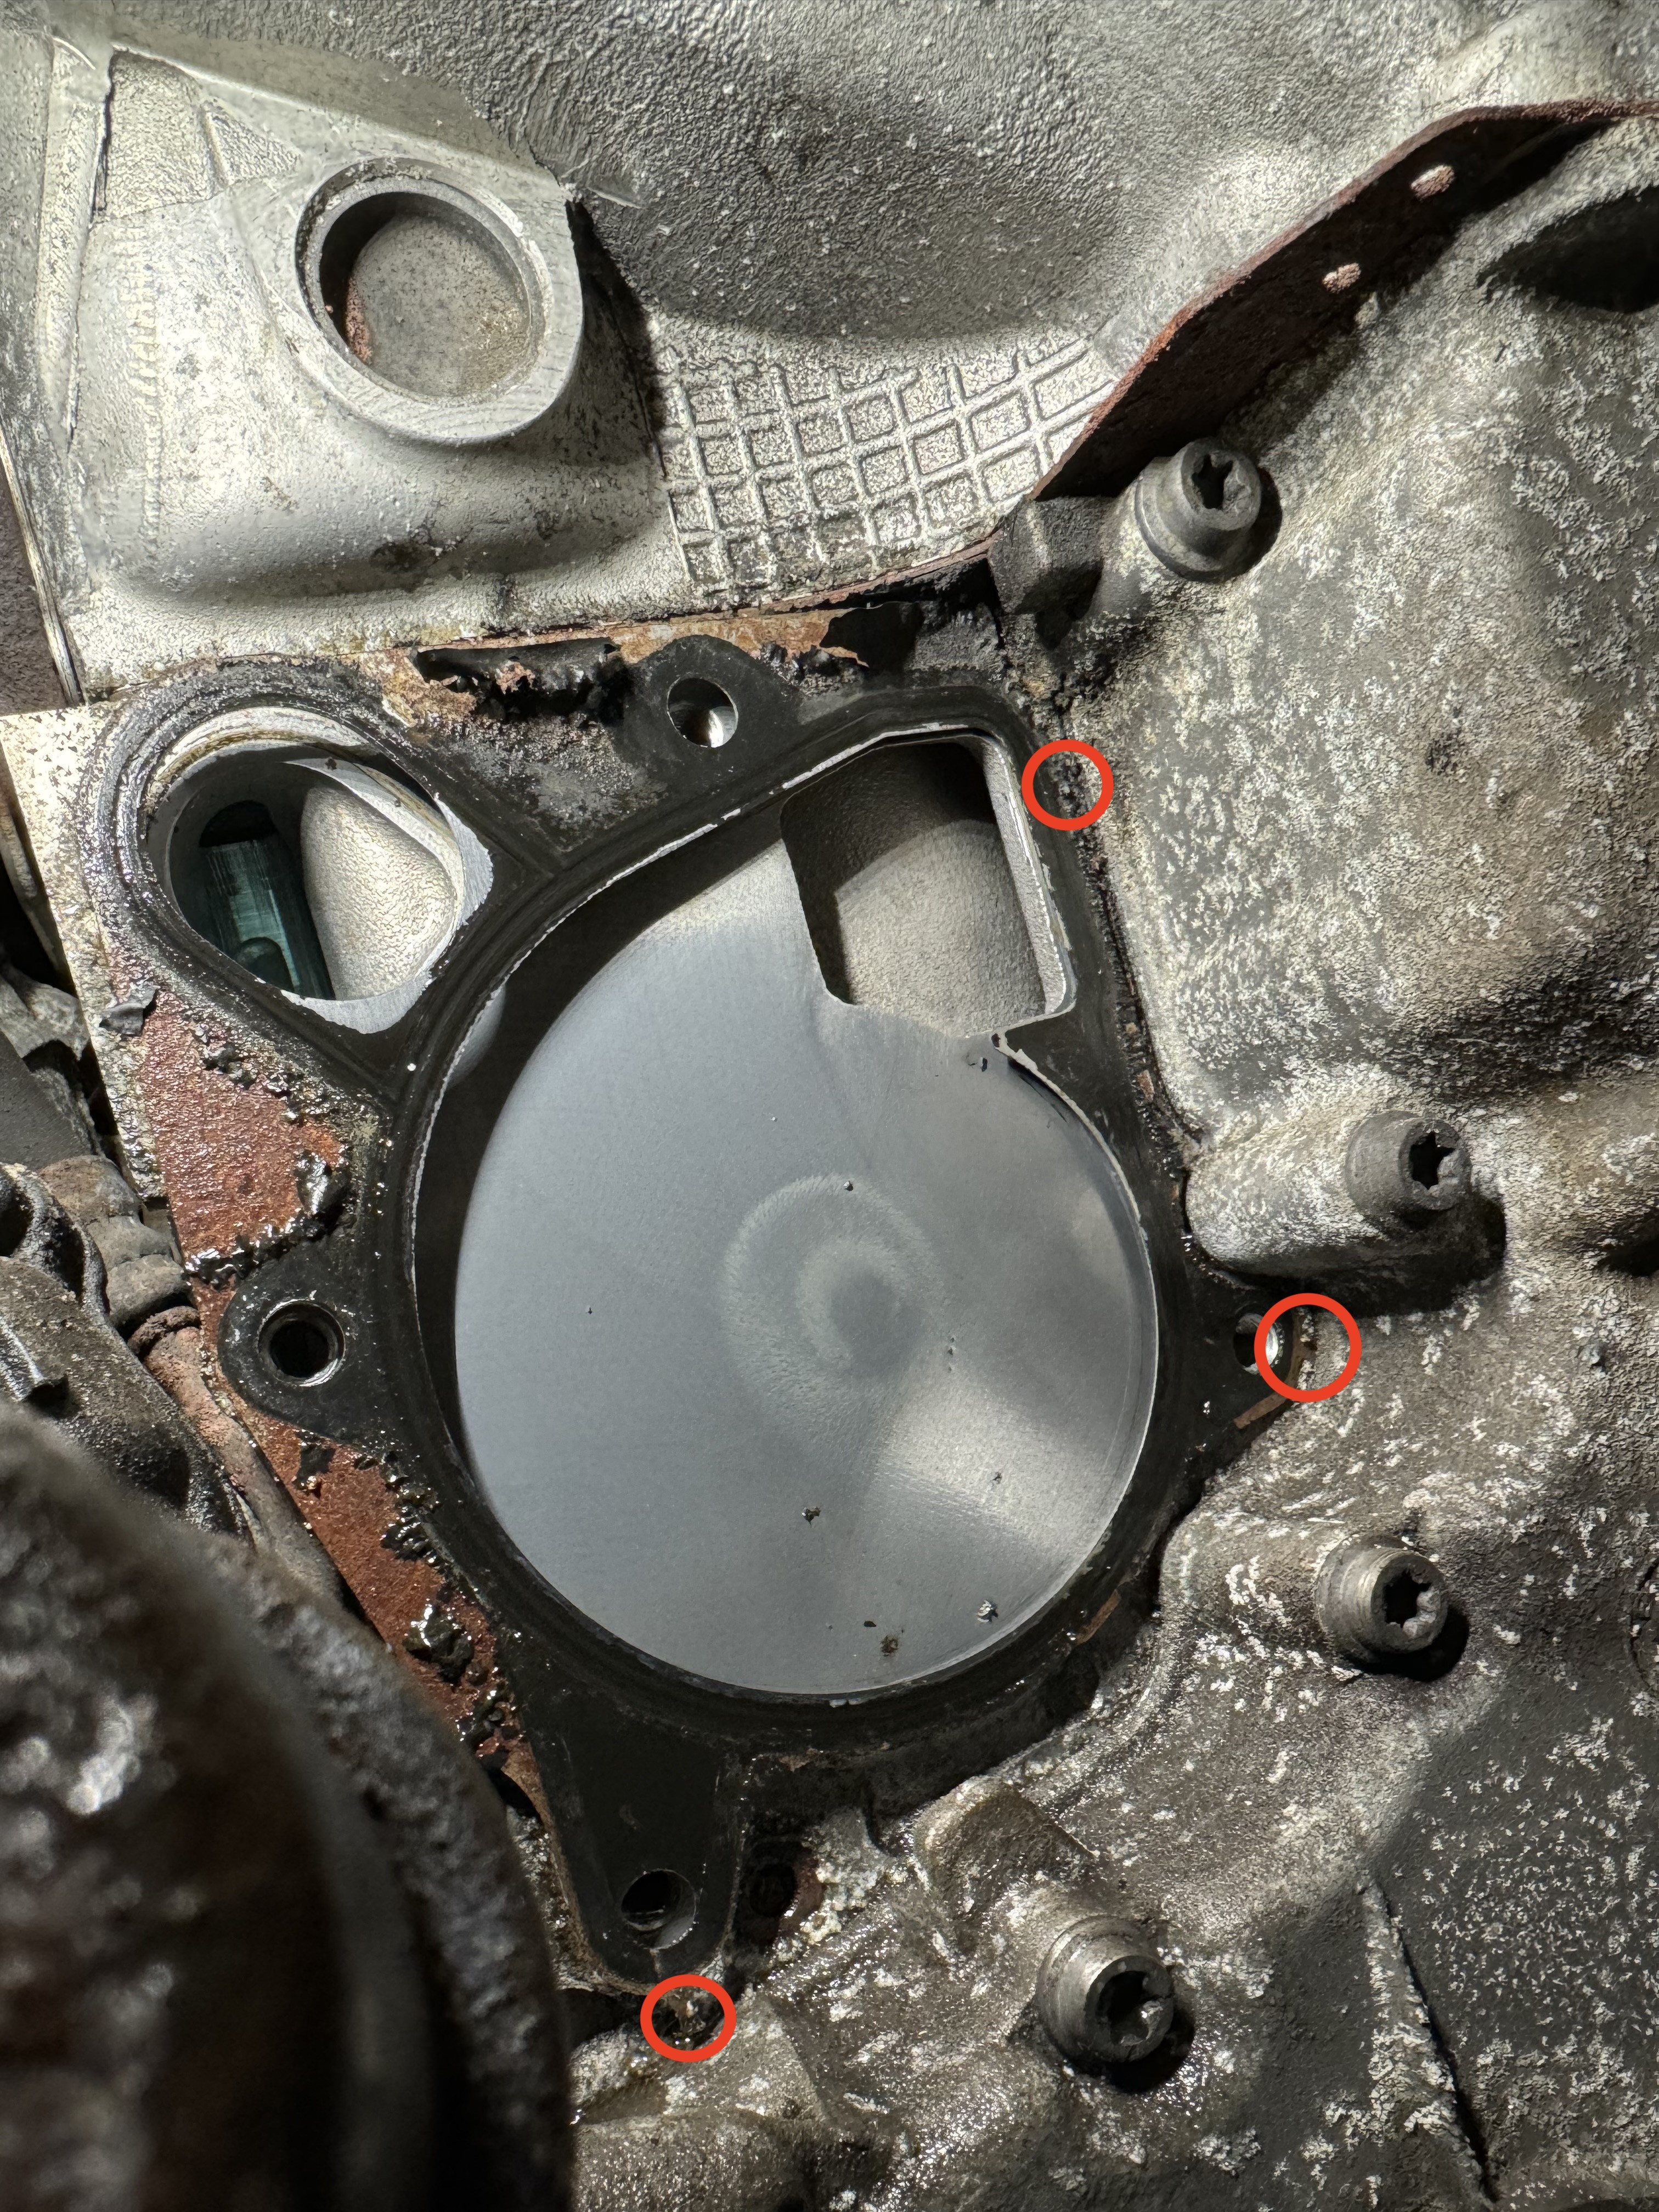
Per the TIS the factory M57 water pump gasket is integrated with another cover gasket and needs to be chiseled off at the 3 tabs. These are the 3 locations to take some of the guess work out as there wasn't a diagram.
The clutched alternator pulley also wasn't on my list and luckily TME had just a couple left in stock at the time. I did not end up doing the belt tensioner as the tube is seized into the motor. The idler pulley was already updated so I'm saving that battle for another day. Apparently removing the alternator and mounts below will gain more access into pulling that out. Took me quite a few tries to get the A/C belt back on as well as it kept being off by 1 rib.
Didn't get pics but now that I have an air compressor I bought a UView 550000 as someone else on here had recommended a while back and holy shit was it worth every penny. It took me more time to mix the coolant concentrate then to fill the system itself to capacity and having the peace of mind knowing there weren't any leaks beforehand was great too. The UView 550500 is the all plastic economy version and cheaper yet HF has a Maddox clone now too but I preferred the metal body/fittings for just a bit more.
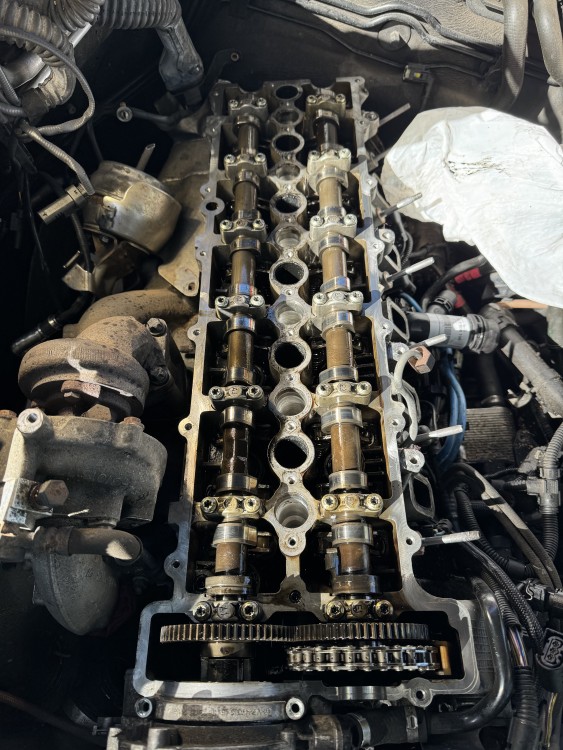
Valve cover gasket was easy and I was happy with how things looked under there.
Besides the removal/install of the charge pipes, my other least favorite part of this project was the vacuum block. It's just a rats nest of plugs in a tight space to get it off but install is easier than removal.
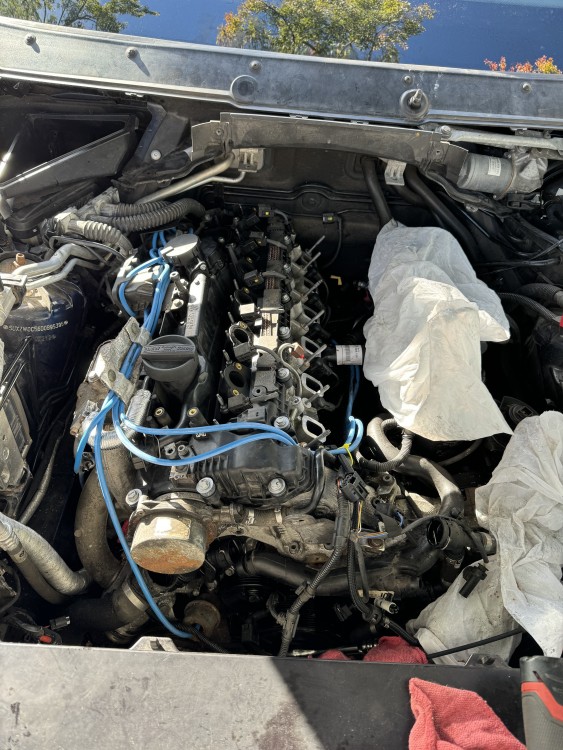
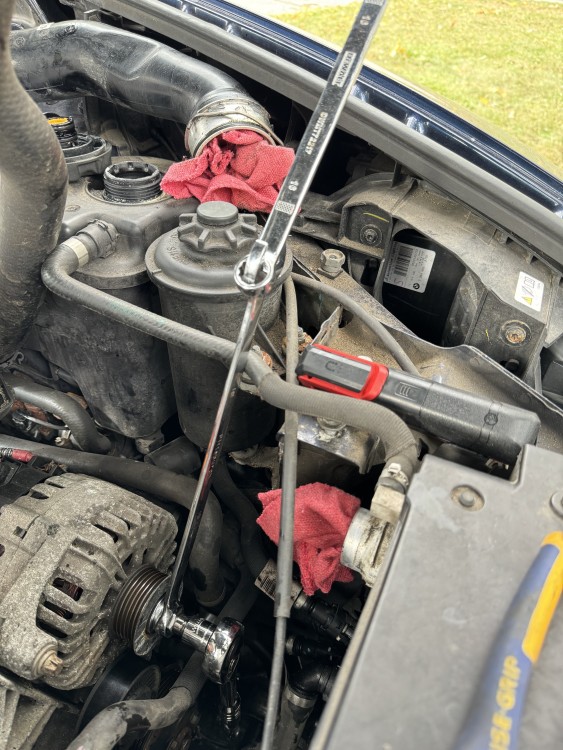
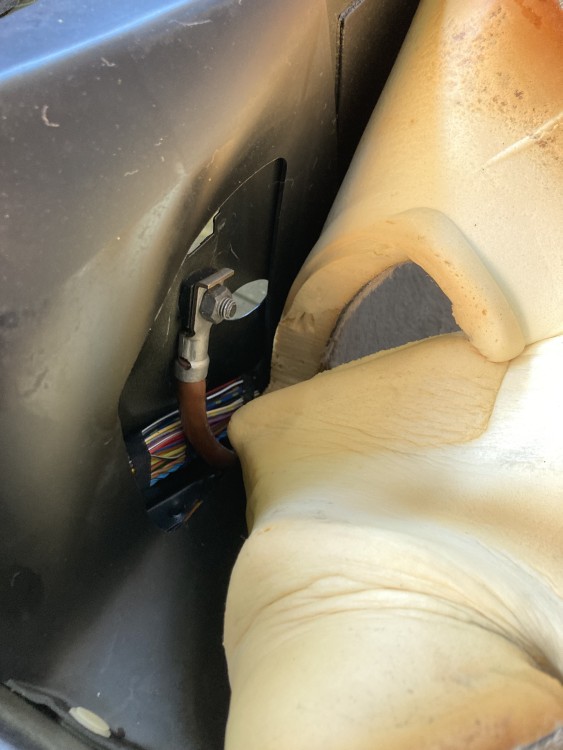
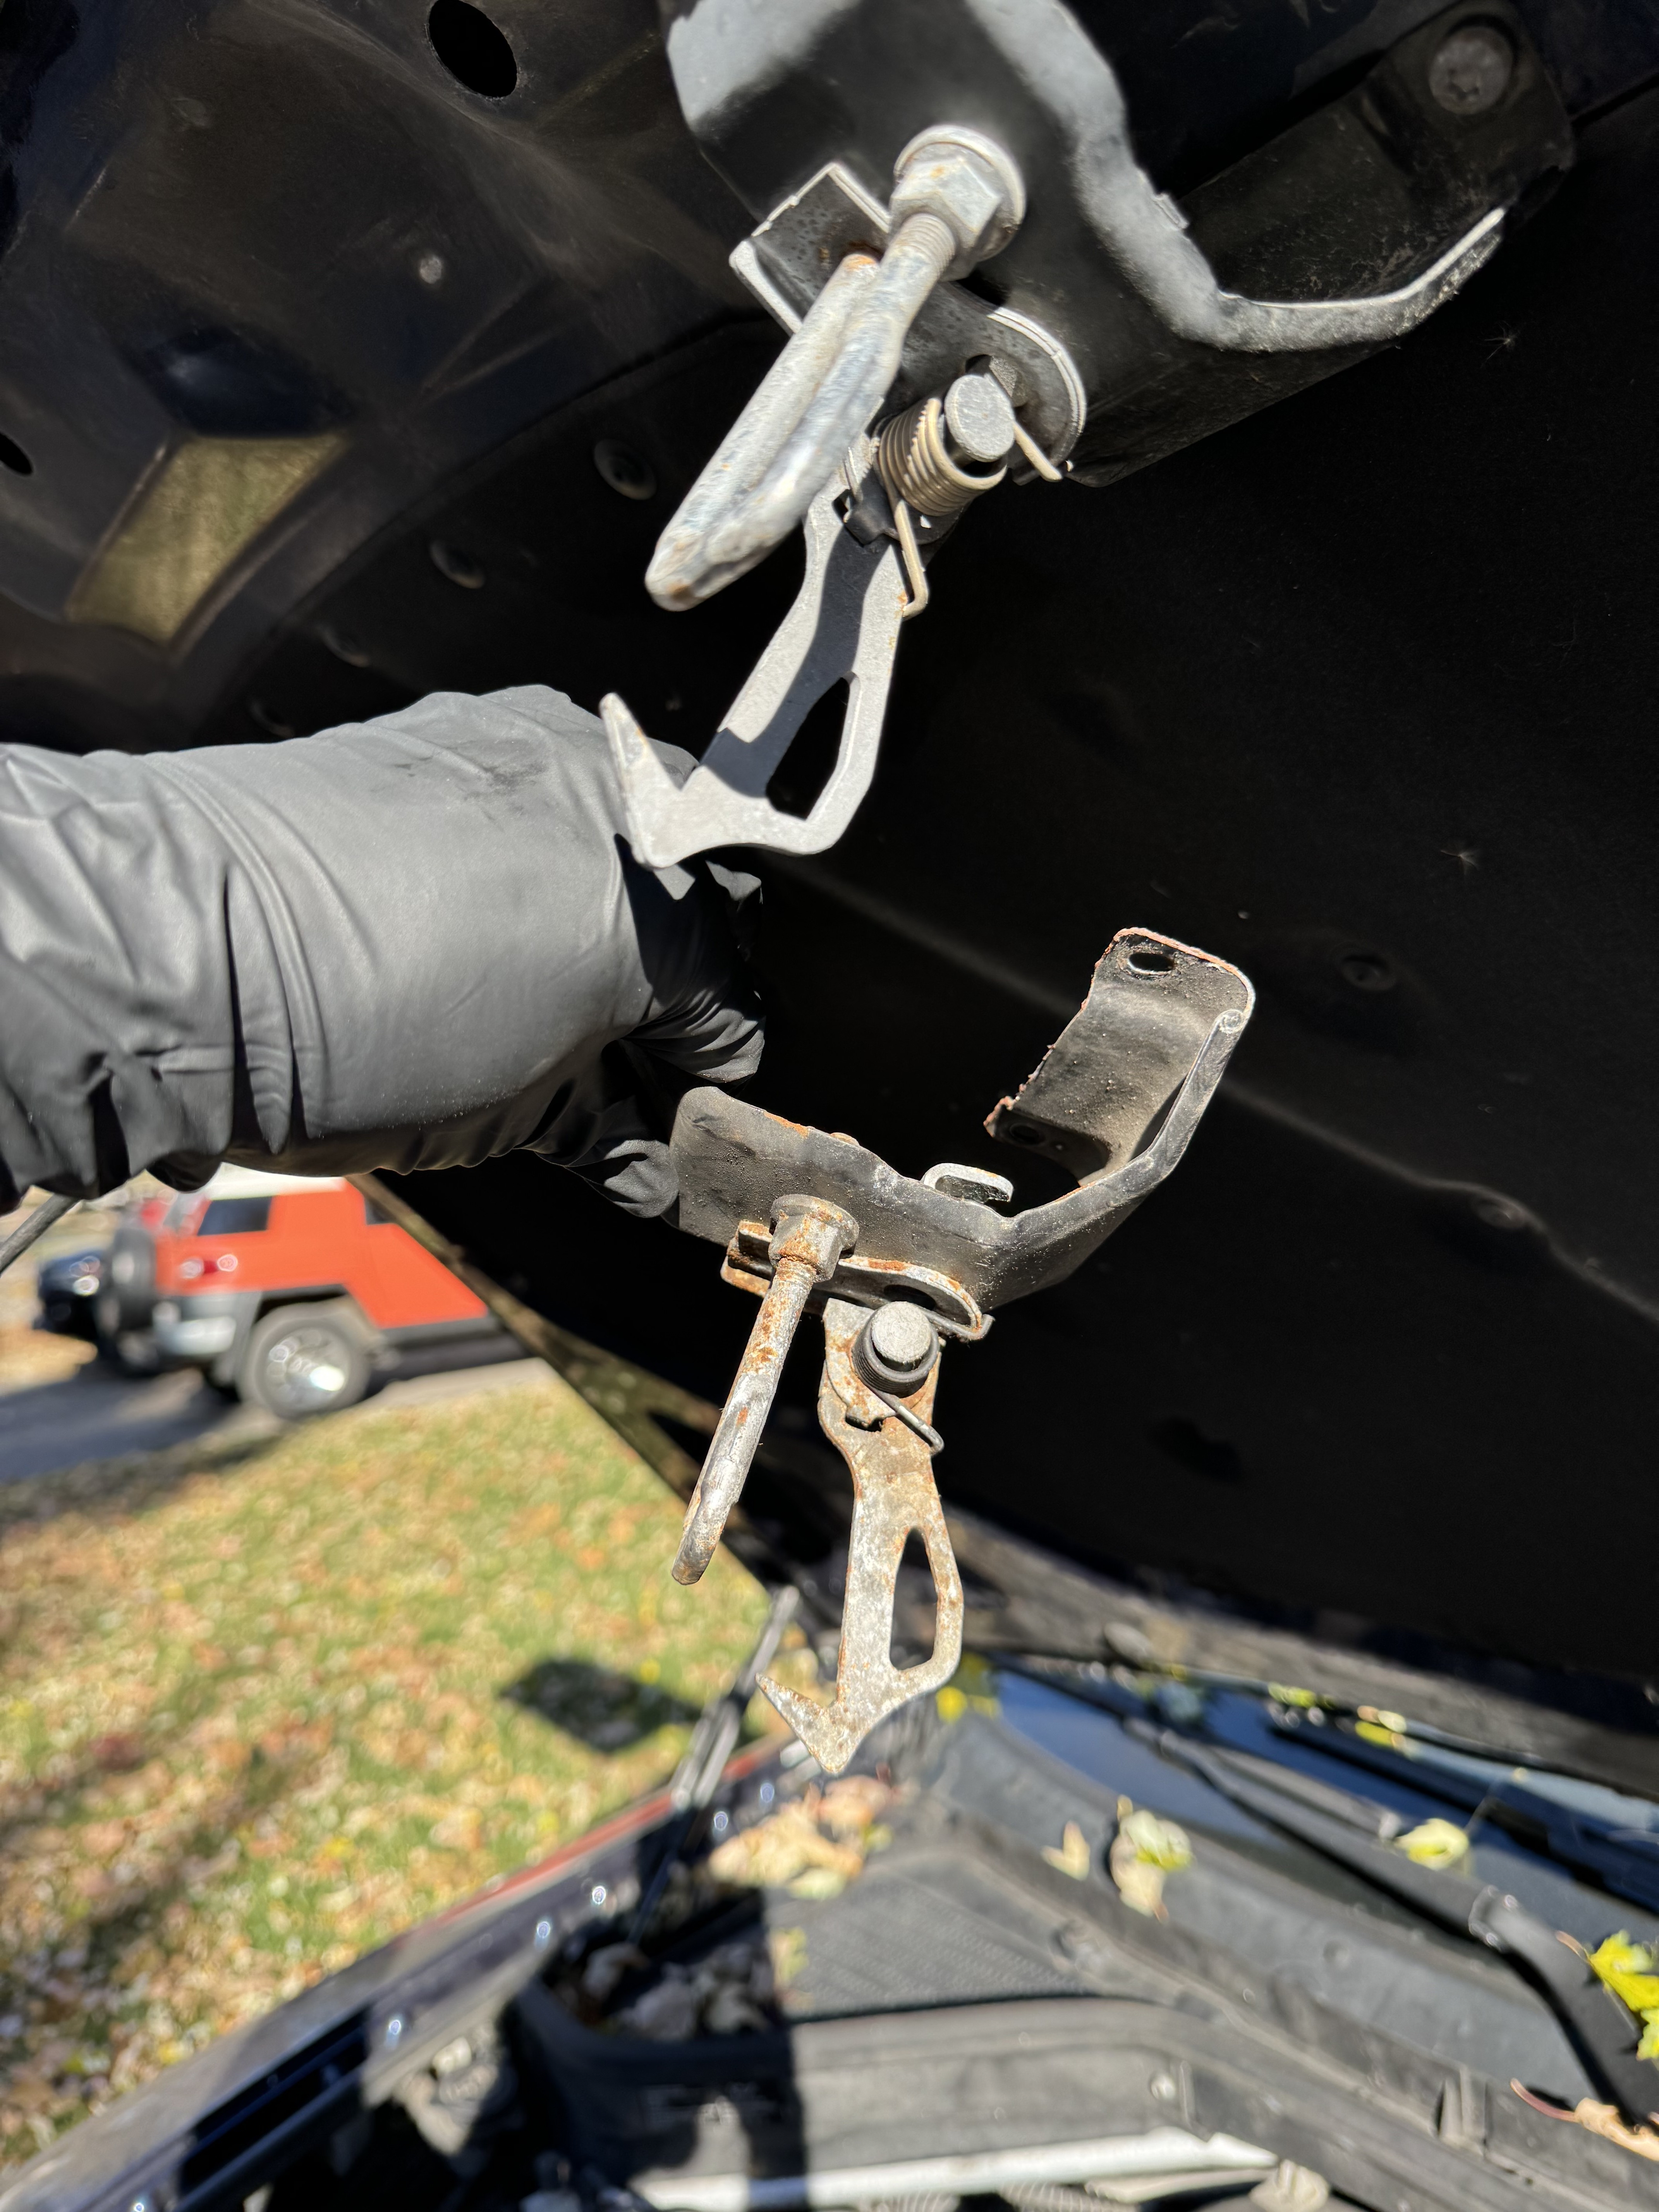
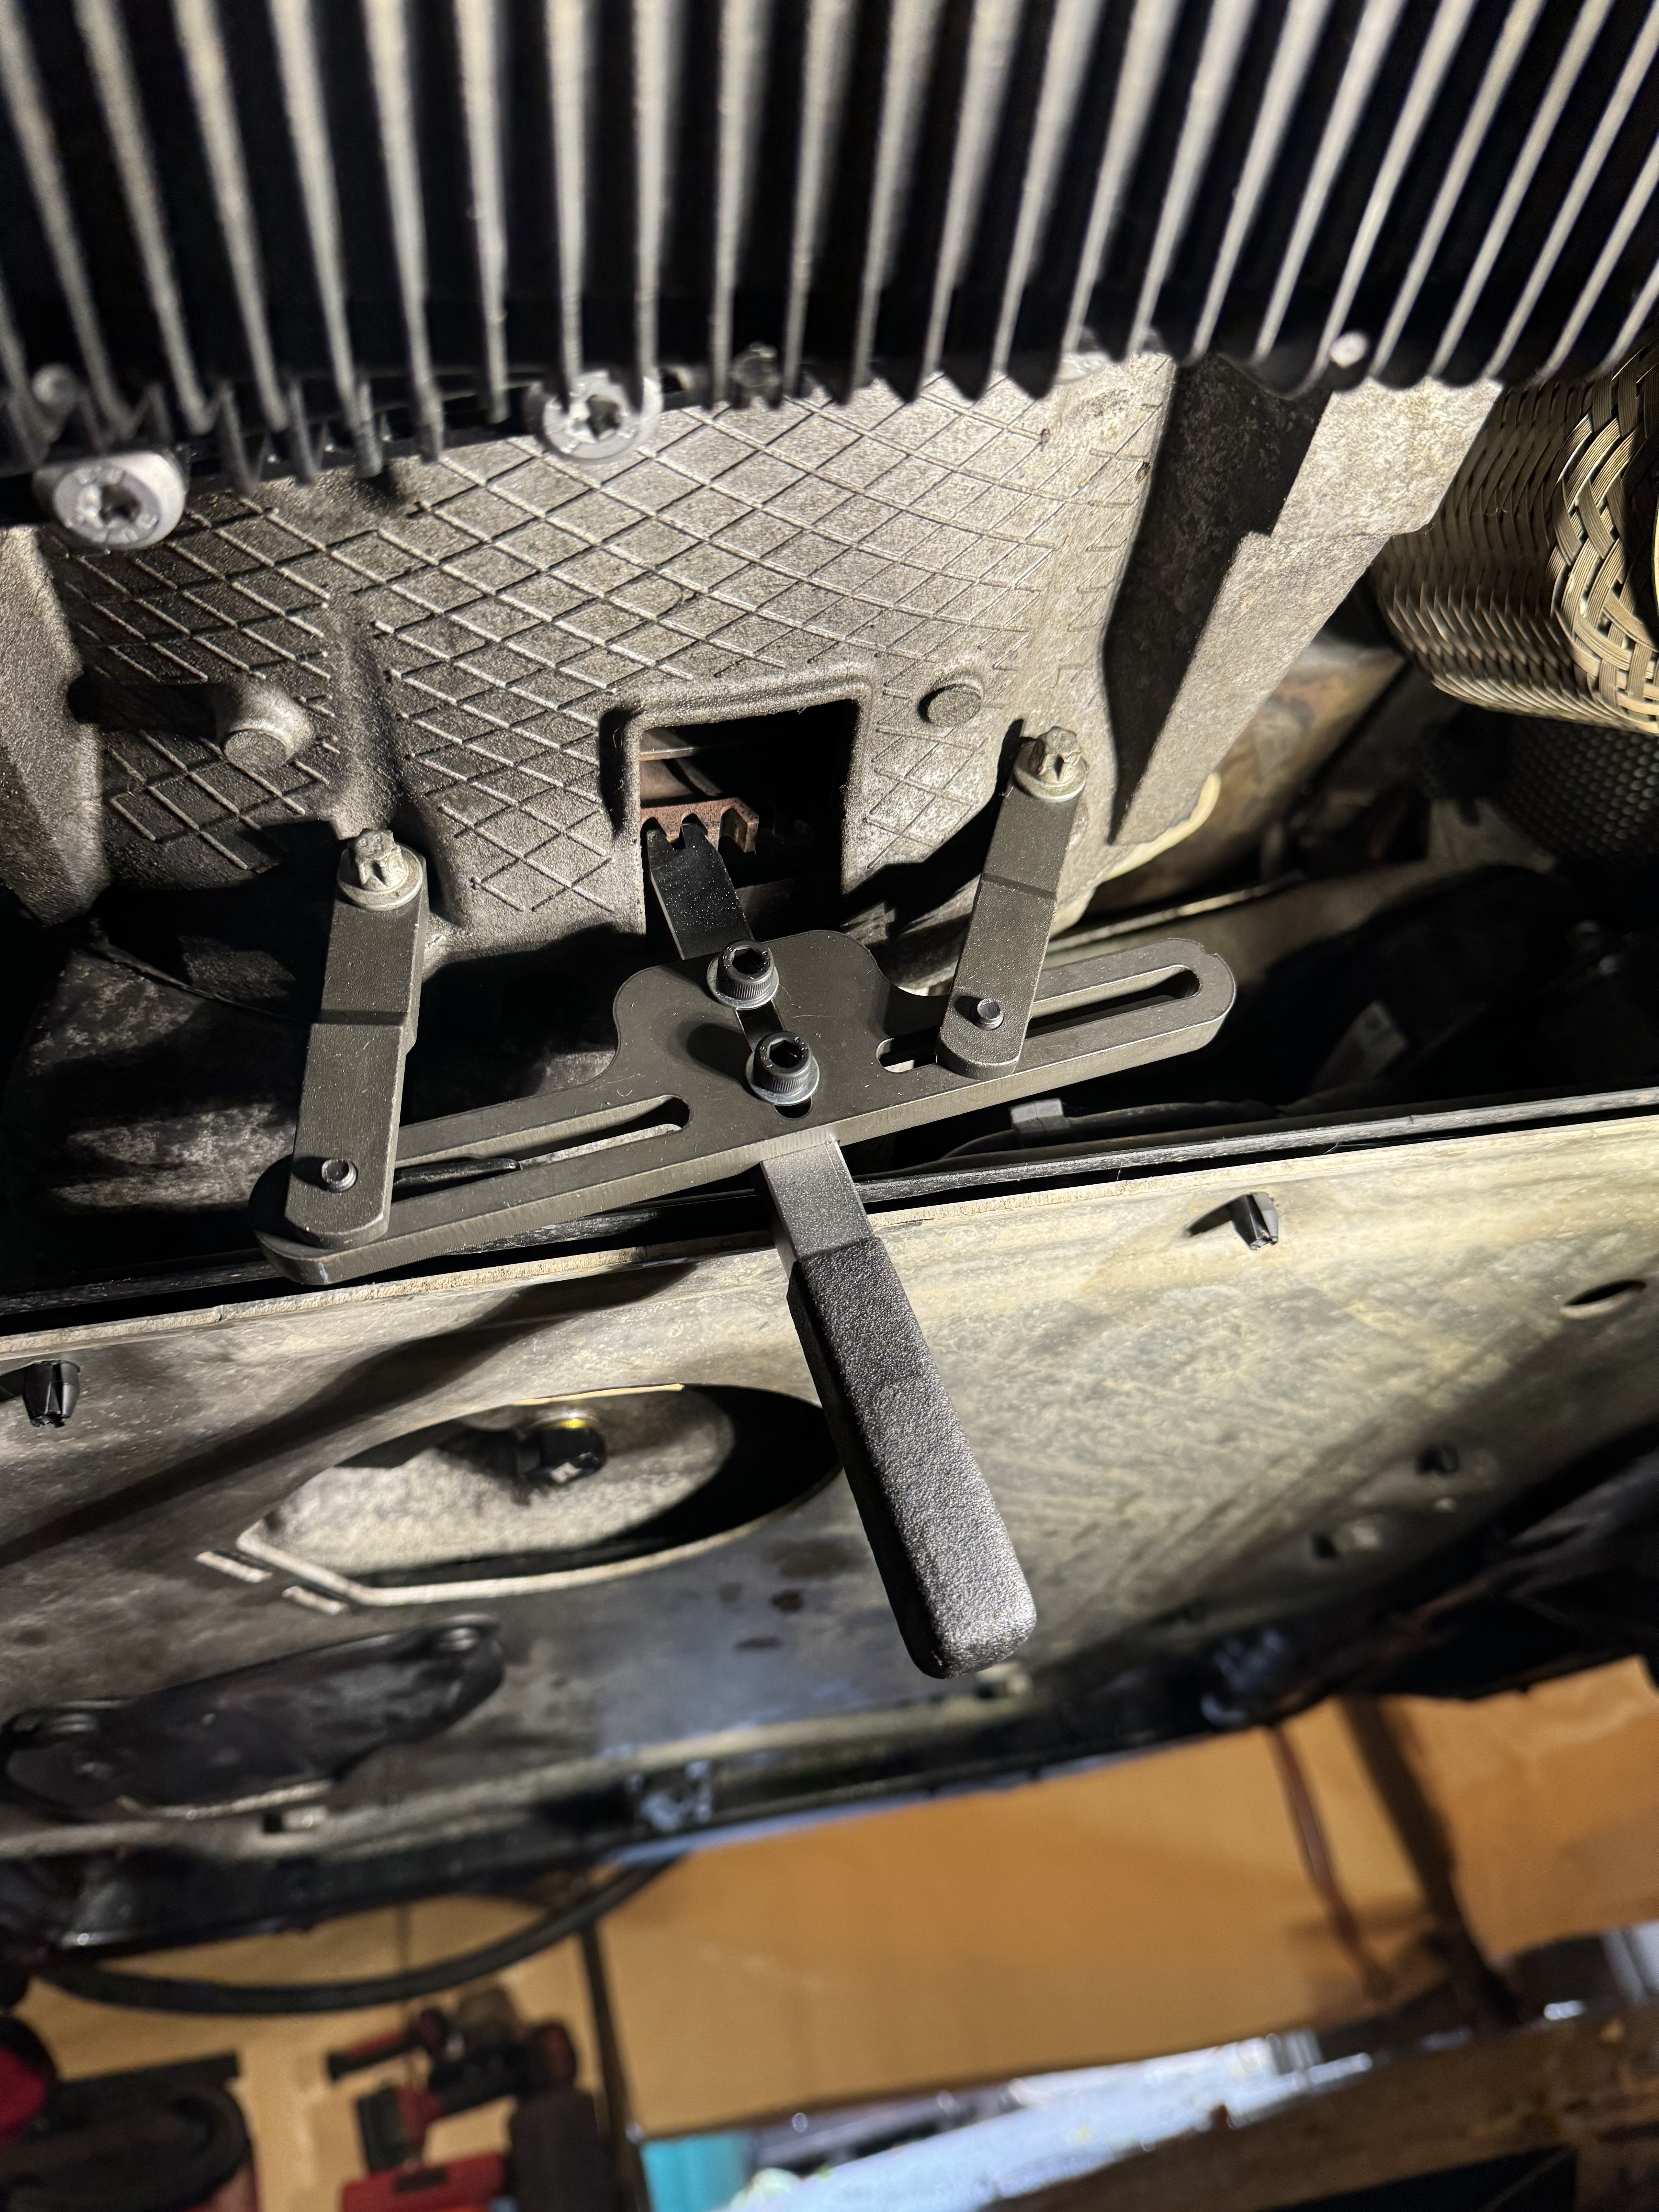
Still have a few things to button up but for the most part the motor is back in shape and we've continued to rack up the miles on this. Of course shutting the hood after finishing everything, the latch sounded different. Few days later when I went to add washer fluid I found out the passenger side latch is jammed or broke. Cables are all pretty stretched at this point but I tried the 3/16 rod trick to push on the latch through the gap between on the side of the radiator but it still won't release. So I get to perform another surgery this weekend 🙄
-
Golf Yellow E9 😍 I doubt the claim on the largest collection of E9’s though haha
-
-
Pulled an all nighter last weekend but I got the car back on the road for the trip to Milwaukee. It was very nice to surprise Ben as he hadn't seen his car in 6 years. Deja vu for me driving a BMW to the Saint Kate hotel too to pick him up as I used to get customers there frequently working at the dealership.
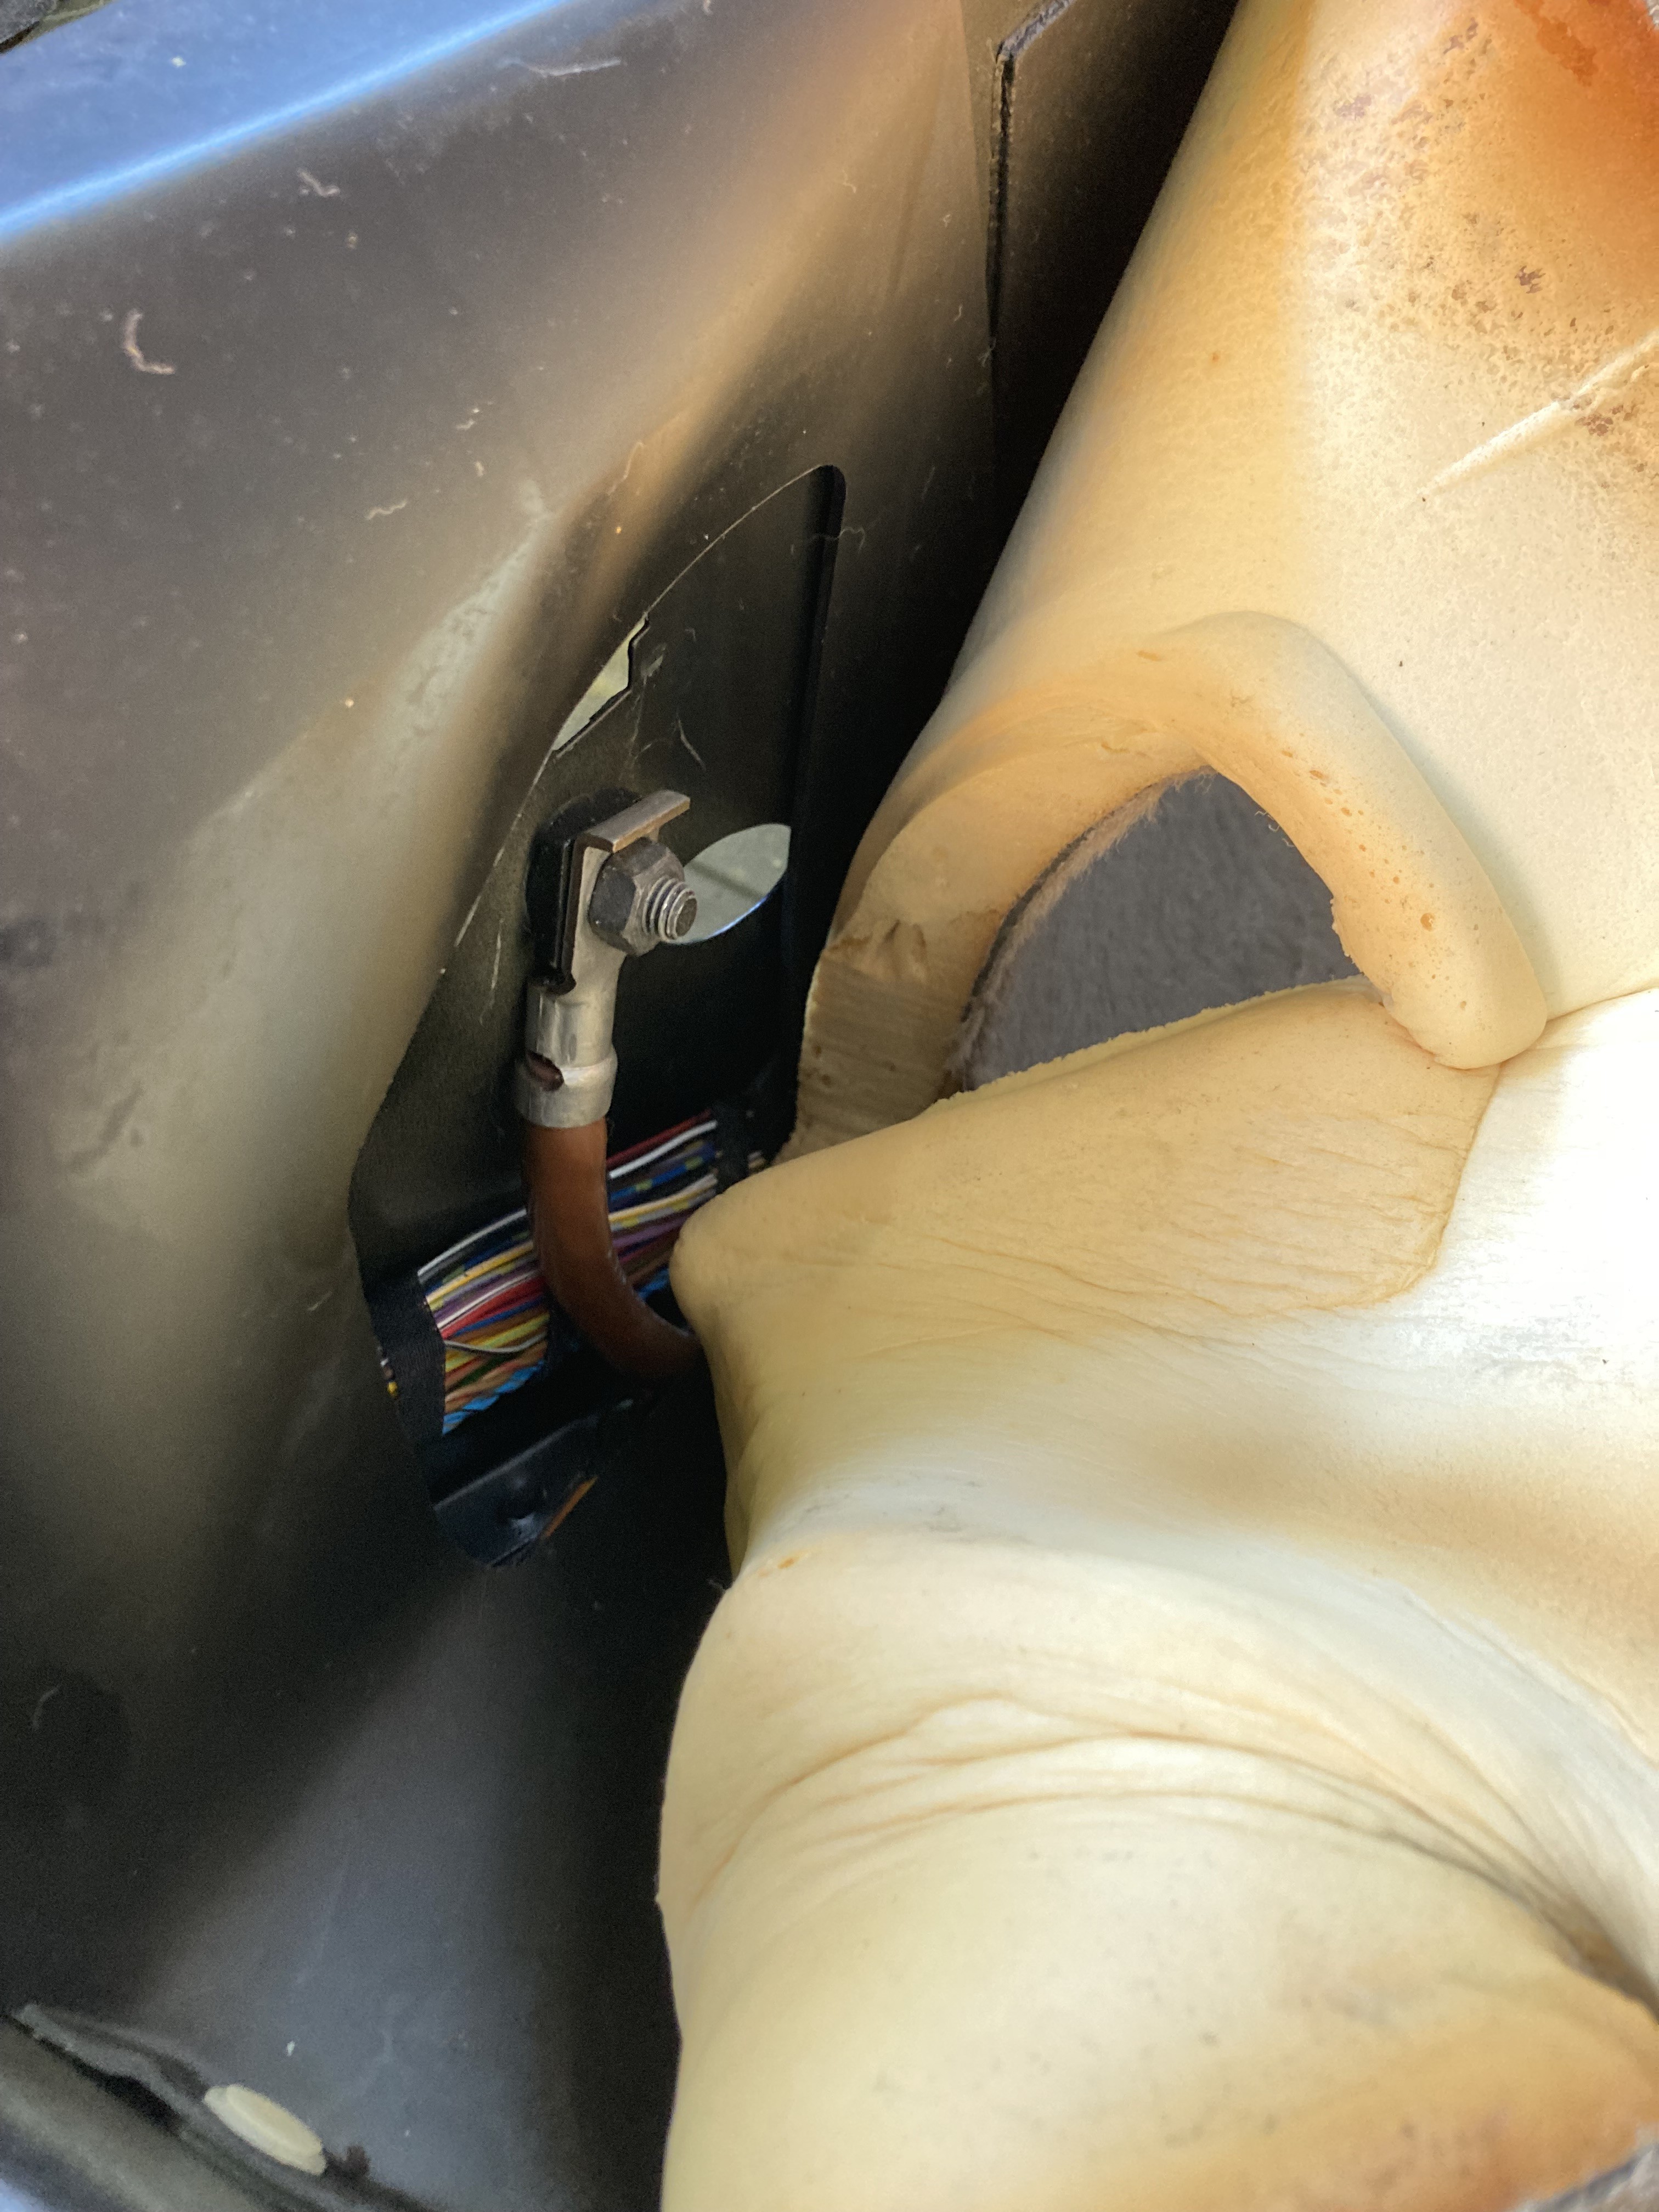
The battery negative clamp had been cracked on this car for a while and I finally broke it taking the old dead battery out. Replaced with just a standard slightly longer cable as I never liked how tight the stock ones are. The chassis ground is the footwell side of the back seat. Also tired of traditional batteries failing even with trickle charging so I upgraded to Costco Item Number 1355853 Group Size H8 (49) Interstate AGM Battery. It won't show up in their system as a match though.
I set myself back a little bit trying to start the car as I flooded the engine, which is super easy to do on M60's. There's a few posts on other forums form the same guy stating that he can get one started by just pulling the plugs on one bank and adding a little oil to seal the rings. I gave that a shot as it had been 7ish years probably since the last time I had done it. After not having success with that though I ended up pulling the plugs on both sides and airing it out for a couple hours while I recharged the battery and worked on the passenger door and fender.
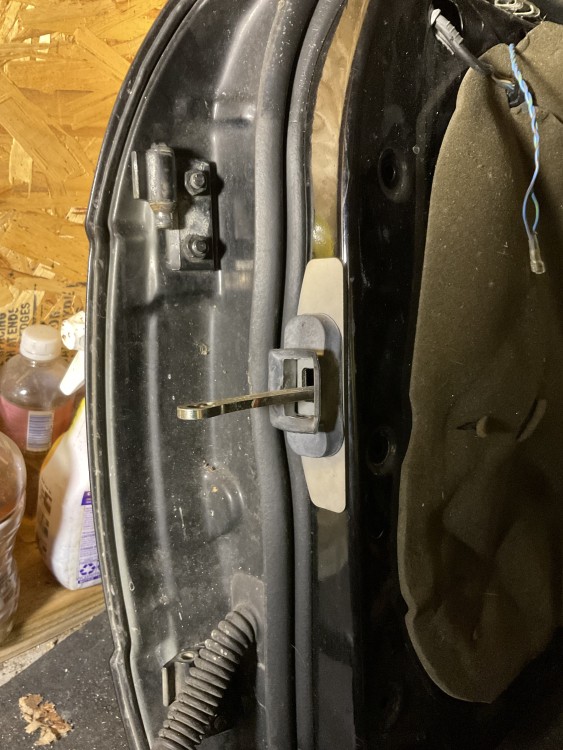
Door and fender swap was pretty straight forward but I did it in a hurry just to get it done. The side skirt doesn't fit right as the pinch rail must've been pulled out a little bit at the fender mounts when it was hit. I forgot to replace the door hinge sleeves too so both will come back off but I'm super happy with how these used parts matched up. Door stay reinforcement plates are a must, super simple install. I still have to replaced the drivers door as well as that one is actually ripped out.

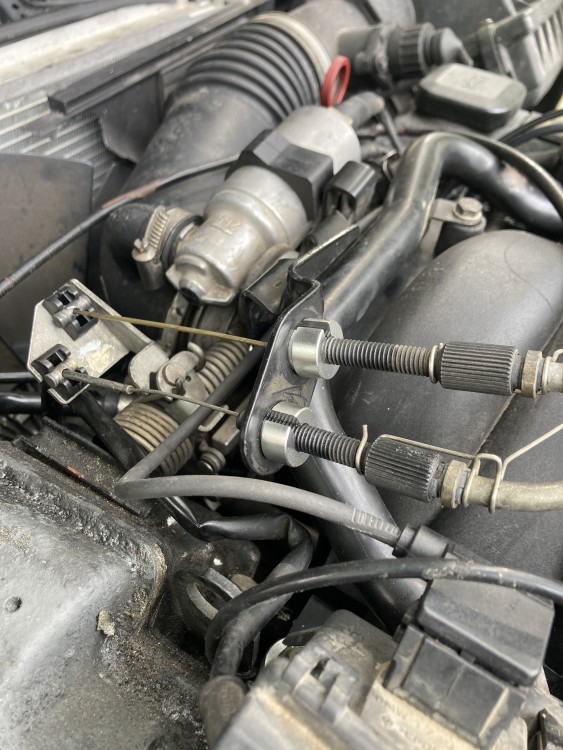
Very happy with how the car ran and drove though. Pulling the intake I destroyed the throttle cable bushings but glad I finally bought a pair of Billet Throttle Cable Bushings as it improved the drivability a lot getting rid of the throttle delay from the slack.
Getting some big things off the checklist felt great and glad to be driving on of the cars again. Got a few items left on the punch list but this car will be pretty well sorted before winter storage and ready to rock next spring.
-
-
Didn’t know there were off road parks around here, looks fun! Any big adventures planned yet? Michigan sand dunes would be a fun weekend trip.
-
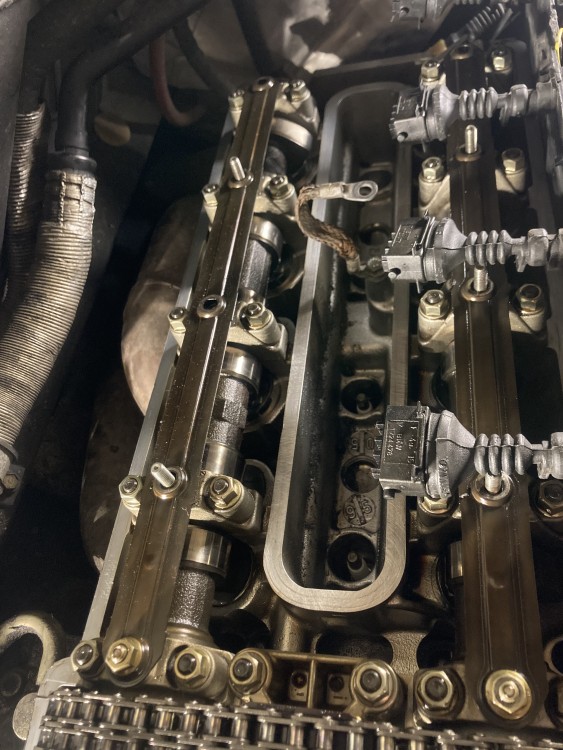
Had a productive weekend despite the heat. Water Pump and Valley Pan done, new knock, crank and cam position sensors, billet throttle cable bushings, Intake w/ new PCV installed. I was going to do both the valve cover gaskets even though they didn't really need to be done but doing the right side turned out to be a bit of a nightmare. I think 4 of the studs backed out and 2 of them stripped going back in. The fun part is the studs are threaded into the CAM BEARING CAPS 🤔🙄 Not happy about that and haven't had this issue before on other M60's. I cleaned up the threads with a tap & die and hand tightened things as tight as I felt comfortable, the spec is only 10Nm and thankfully the lower back corner held tight. The center stud is barely hanging on though, Hopefully no leaks otherwise it'll be quite the job to properly fix that. Gonna leave the other side until it absolutely needs it.
Engine bay is all back together besides the fan and intake. Just need to replace the battery and battery negative cable before startup. If all goes well and running issues solved it'll be onto swapping out the front doors and fender.
- Jdesign, KaiserRolls, jc43089 and 4 others
-
 7
7
-
Started working on things a month ago and have slowly been plugging away. Working on chasing the not revving past 3k issue along with coolant and oil leaks. Digging into the motor has shown its Texas roots though as I'm finding lots of dry rotted stuff. Water pump had a small leak at the bottom so that lasted 30-40k. Valley pan has never been done though so going through that whole ordeal. Also found the water pump pulley was missing a chunk
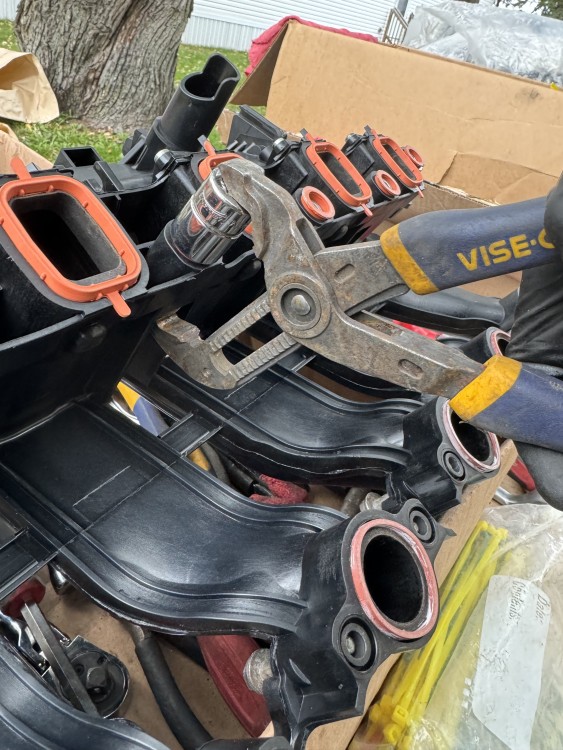
Just like every other M60 intake though I've managed to strip 2 of those shallow T30's, even on my "bench vise". There is enough clearance around the throttle body to get an angle grinder in there to square off the head just a little bit to give the vise grips a place to hold onto. All will be replaced with standard hex heads like I've done in past. Got the intake completely disassembled and power washed and I've been working on the fuel rail today. Replaced the FPR and found all the injector O-Rings are dry rotted so pulling those and working on a jerry-rigged injector cleaner/tester as I saw at least a couple nozzles looked clogged.

-
17 hours ago, HipMF said:
Speaking of Nirvana-related things, the former Smart Studios building (where "Nevermind" was recorded) on east wash here in Madison has recently been bought and turned into an air-bnb.
https://spectrumnews1.com/wi/milwaukee/news/2022/03/11/smart-studios-rehab
Learned something new today, very cool.
-
On 7/25/2023 at 9:06 AM, SteelBlue said:
M539 Restorations also did this on his E70 and it made a big difference.
Haven’t come across this channel, looks like great content!
3 hours ago, GunMetalGrey said:I greatly appreciate your posts in here so I can follow your advice later!
My 2-3 shifts are quite hard especially cold, and know the trans is in need of some love.
Keep crushing it!Thanks! Eager to get all the boxes of parts out of my living room but it’s too damn hot to wrench for 2-3 days straight. Hopefully end of next month I can tackle the rest of the jobs.
-
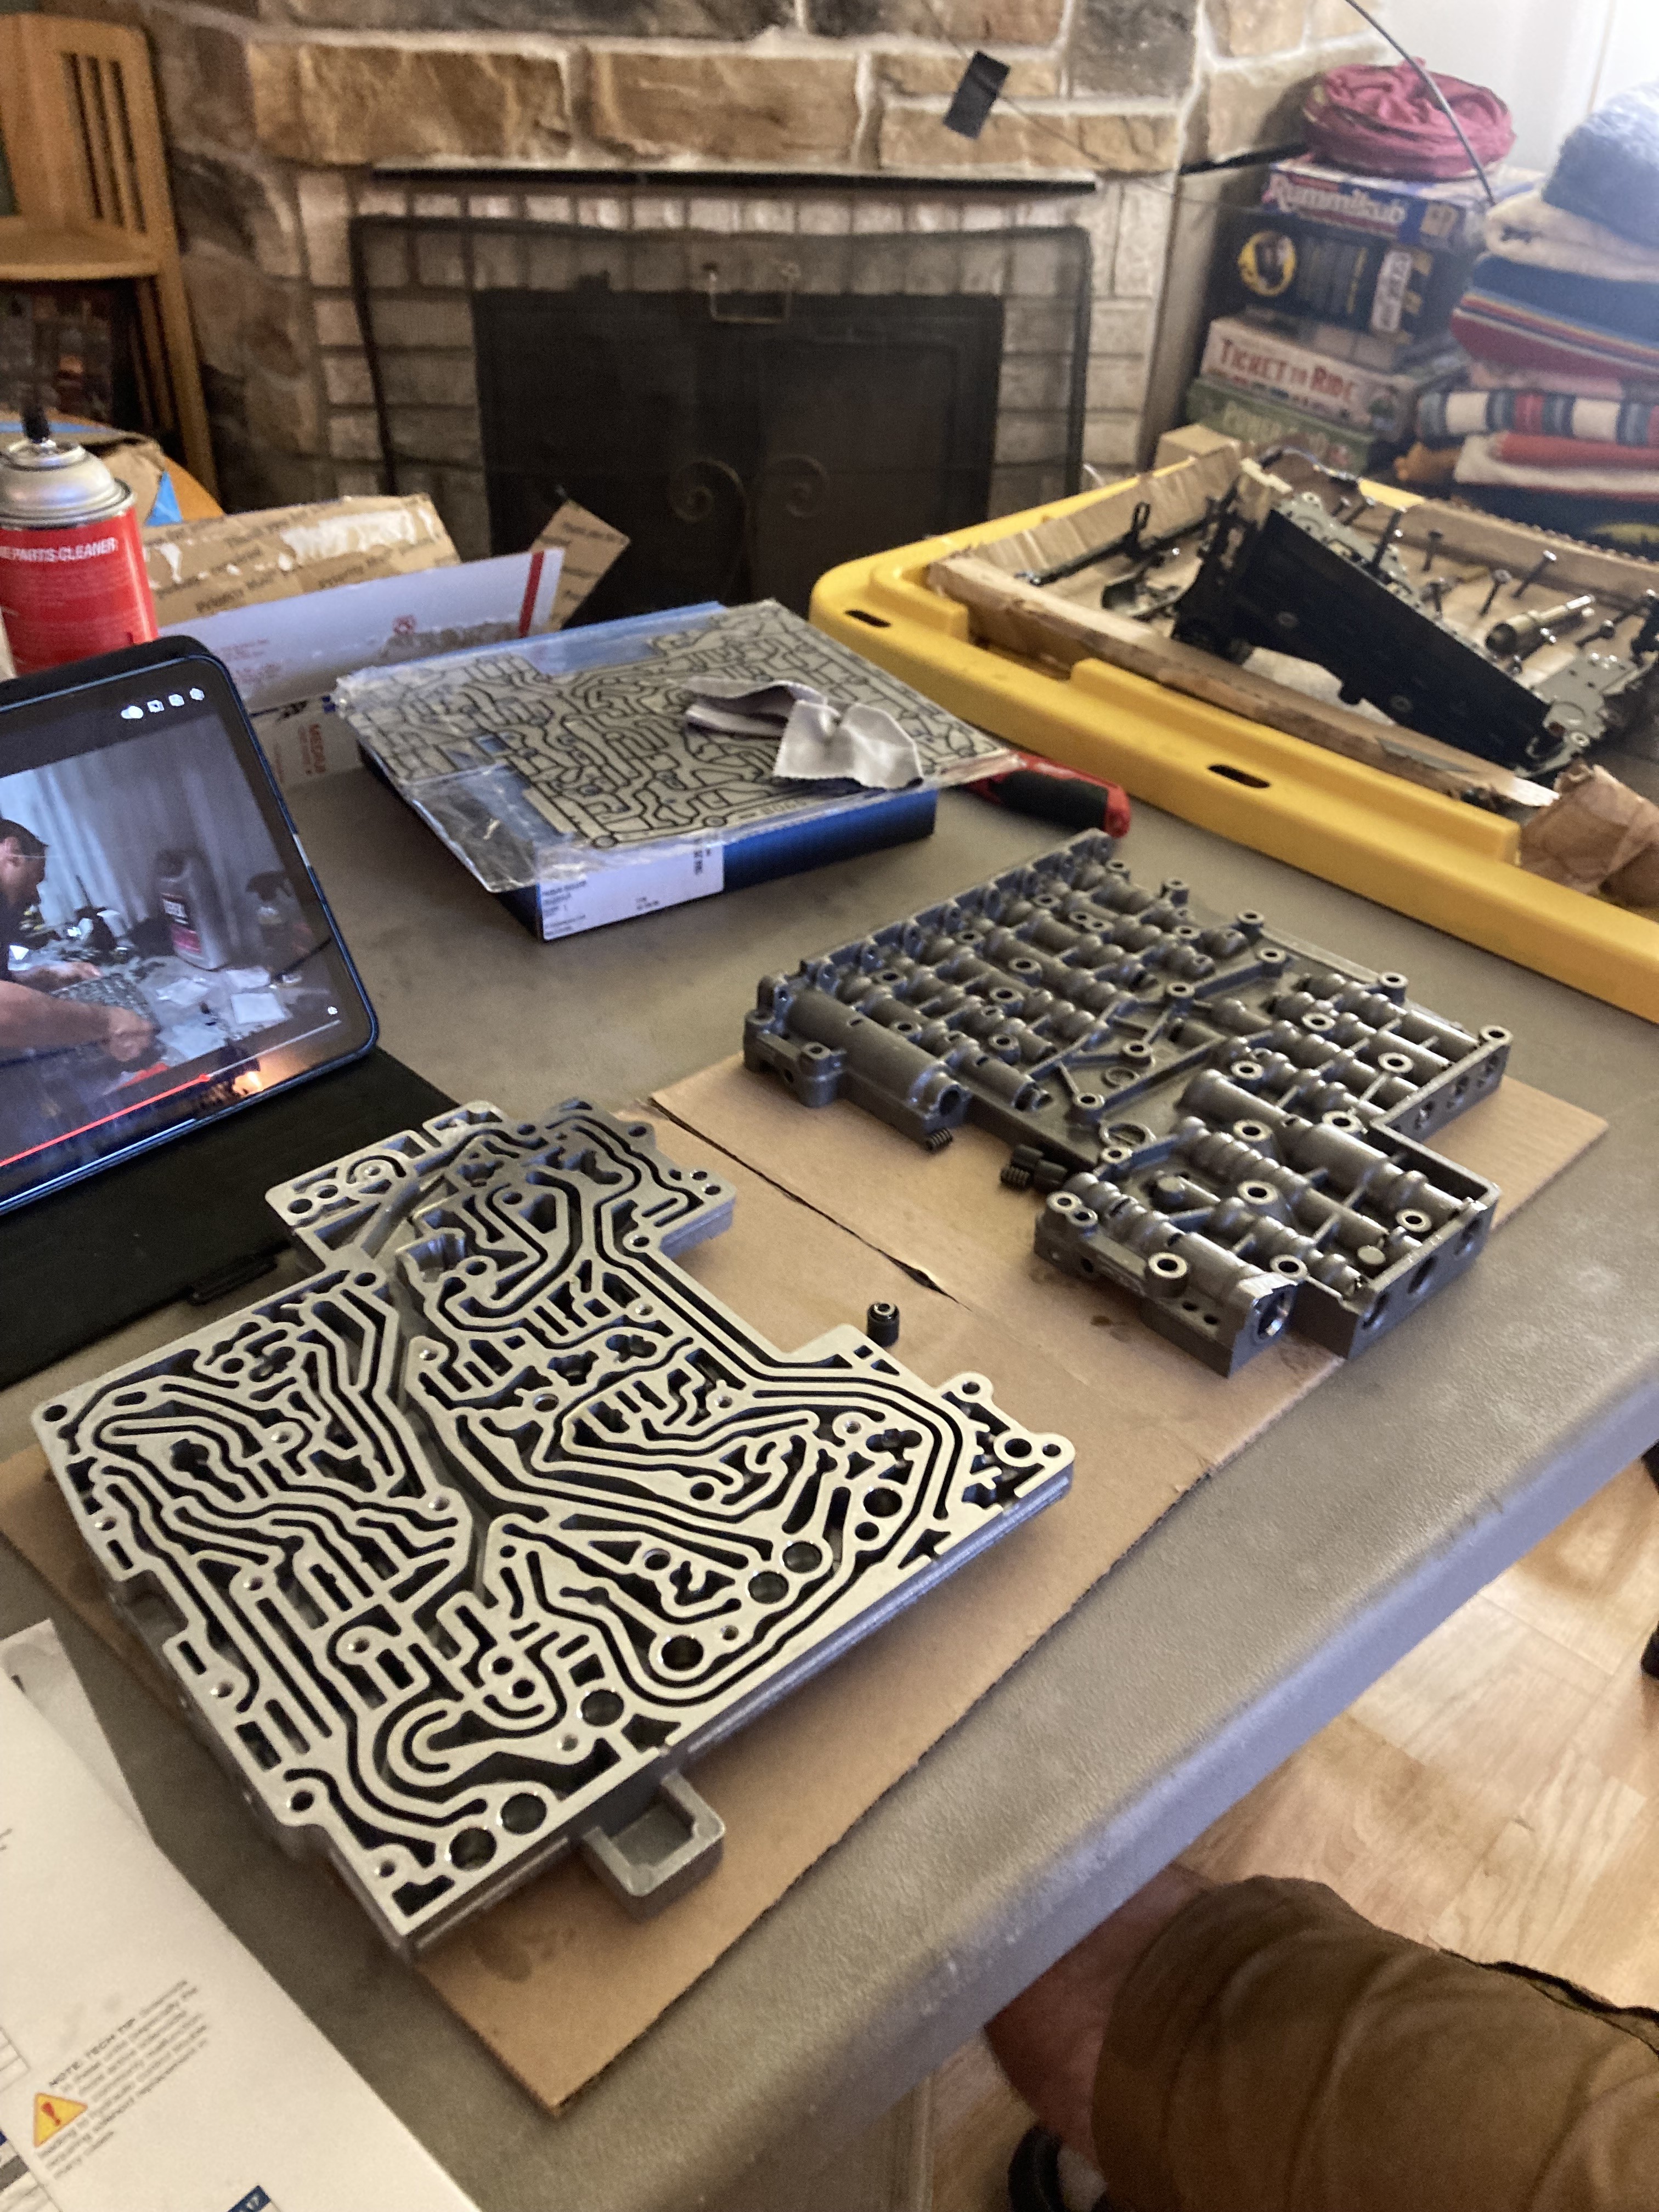
Did the full transmission service a few weekends ago now and got about 2500 trouble free miles on it since. I haven't floored it yet but very happy with the improvement on the 2-3 shift. Overall the job looks more intimidating than it was but it certainly was a full weekend project. This is pretty well covered in these videos but I'll share my tips.
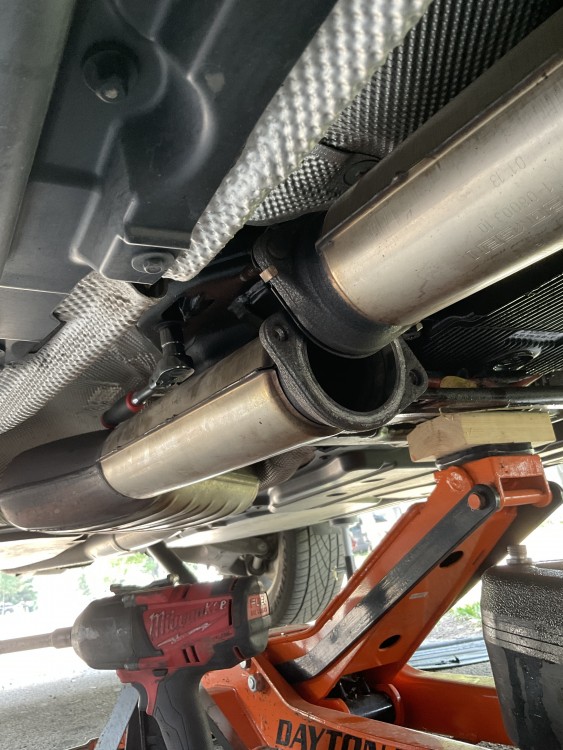
I did end up pulling the transfer case cross member. People buy or fabricate a shallow Torx wrench to get at the rear pan bolts blocked by the cross member that takes 10min to remove. I unbolted the exhaust as well to get additional clearance for the passenger side center bolt, no issues with that leaking afterwards and my flange nuts were in good shape.
6HP26/28 how to video. I followed this along with the TIS instructions. I would highly recommend marking the mechatronic sealing sleeve with a paint pen as I had a hell of a time getting that lined back up properly and that would've saved me the headache like the TIS suggests.
This is a E53 mechatronic rebuild but similar enough procedure with good assembly tips.
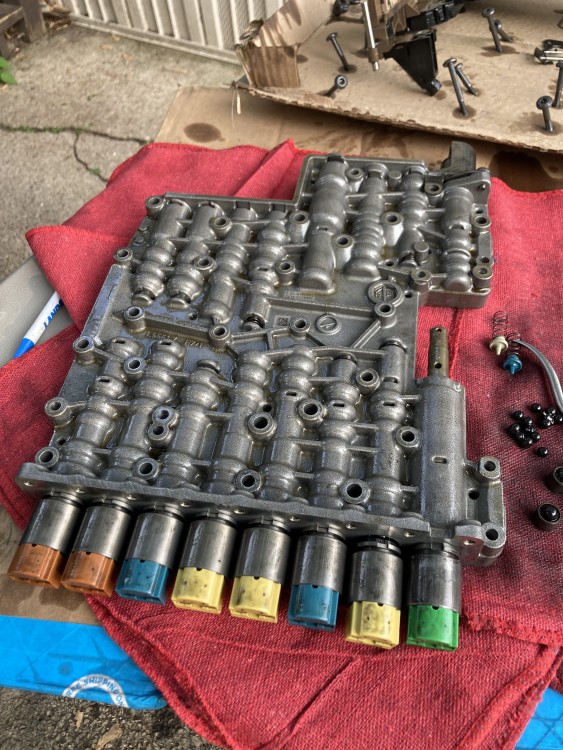
Mechatronic unit after removal and splitting. Split the plate this side up so the accumulator pistons and check valves don't fall out, those are reused along with the filter.
I let the transmission drain overnight too with the mechatronic unit out and I ended up needing the full 9.5l capacity, luckily NAPA does stock the Liquid Moly Top Tec 1800 so I was able to get what I needed to finish the job.

Just to reiterate, my E-Shift 6HP28X with with main parts list 1068-050-045 did indeed use the ZF 1068298047 mechatronic service kit as confirmed by California Transmission Supply and Automatic Choice. I even wrote to FCP Euro Support asking them about their product listing comparing to these sources and wrote back to me after a month stating that their BMW Catalog team confirmed this was not for my vehicle and to check with my local BMW Service Center. The dealers only sell the complete mechatronic unit so guessing thats why this "doesn't match my vin". Again not sure why FCP and ECS don't have as complete main parts list compatibility as those transmission sites do but I would reference those. I didn't have any luck getting into ZF's official catalog.
Also if you are going to do the Sonnax Zip-Kit, remember that the valve body separator plate needs to be replaced as well which in my case was the A065 plate also available through Sonnax. I just ended up doing all the end plugs, pressure regulator sleeves and Clutch A & E control boost valves since I had this out and given the mileage instead of diagnosing what it might just need. Only issue I did have was having to redo 1 or 2 o-rings during assembly as they got cut on the valve bores that were still tight tolerances. Just takes time and make sure everything is well lubricated. Again it's just a tedious job but glad I did it and saved a bunch of $$$.
-
Looks great from here!
-


Ci Intervention
in Members BMWs
Posted
Welcome ! Bummer on the water but looking forward to following along on the build. Are those yellow E38 16” style 5’s?