Jdesign Posted April 26, 2016 Author Report Share Posted April 26, 2016 Im hoping its done in the next few weeks... Quote Link to comment Share on other sites More sharing options...
Jdesign Posted April 26, 2016 Author Report Share Posted April 26, 2016 I wanted to use this manifold because it looks awesome but its too big and functionally a pile of shit on the inside. As you can see, theres no way I could run this without alot of messing around. Quote Link to comment Share on other sites More sharing options...
Jdesign Posted April 26, 2016 Author Report Share Posted April 26, 2016 So I ended up buying a stock manifold because the motor didn't have one. It's an ugly SOB so I shaved all the tabs, vacuum lines and other garbage off of it and Chris welded it all shut. you can see even with the stock manifold the heater core lines are extremely tight. i was also able to mount the stock oil cooler above the fmic using the stock mounts! Quote Link to comment Share on other sites More sharing options...
Jdesign Posted April 26, 2016 Author Report Share Posted April 26, 2016 I started painting all the new parts with VHT wrinkle paint for that OEM look and baked them in my oven for a few minutes. I was really happy with the results. Once mounts were all made, we focused on the driveshaft. Since I had the yoke for the R154 it was super easy to just chop the stock e30 shaft and weld the new steel tube between the two. exhaust is basically full 3" stainless from the turbo back. Chris went to town on this and did a beautiful job. I'm more than happy. Quote Link to comment Share on other sites More sharing options...
Jdesign Posted April 26, 2016 Author Report Share Posted April 26, 2016 Quote Link to comment Share on other sites More sharing options...
Jdesign Posted April 26, 2016 Author Report Share Posted April 26, 2016 Here's some nice pics of the manifold after paint. Quote Link to comment Share on other sites More sharing options...
Jdesign Posted April 26, 2016 Author Report Share Posted April 26, 2016 I was able to catch up with Craig again and he sold me the spare aluminum radiator he had. It wasn't quite what I wanted, but with time and money I just went for it. Obviously some modification was needed, and Chris went to town welding. I can tell you he wasn't the happiest man welding shitty aluminum but the result again was flawless Quote Link to comment Share on other sites More sharing options...
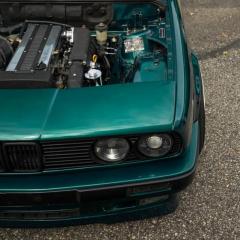
Jdesign Posted April 26, 2016 Author Report Share Posted April 26, 2016 Everything slowly fitting into place. Took me awhile, but I finally pulled up my britches and prepared to cut the front valance. Chris started preparing the exhaust manifold for the weird German turbo I acquired. It's a K27 from a Mercedes diesel. I guess it's similar to the turbo upgrades people use on Porsche 930's. He also had to change the mounting location and flange for the old deltagate wastegate I'm going to use. While he he was doing this, I was grinding and painting to try and make everything look and fit nice. Quote Link to comment Share on other sites More sharing options...
Jdesign Posted April 26, 2016 Author Report Share Posted April 26, 2016 Here you can see the result of my front mount set up. I cut out the valance but I didn't want to cut my bumper. So what I did was remove the lower section of the bumper so air still gets into the FMIC but it's not a huge eye sore in the front of the car. Quote Link to comment Share on other sites More sharing options...
Jdesign Posted April 26, 2016 Author Report Share Posted April 26, 2016 Chose a bov location and welded everything together. I wanted to make the couplers near the lower part of the engine bay because I think they are hideous. The turbo also had a bun welded to it and the charge piping was also welded too. I fixed the heater core lines which were a massive pain in my ass. Since they are hard lines, I was hoping bending them out of the way and using molded silicone hose would be enough to get me by. I was wrong. I had to climb into my favorite place, under the dash, and cut the hardlines back enough so that I could run the molded hose through the grommet in the firewall and make the harsh 90 turn under the manifold. Im not entirely happy with the way it looks, but my options are pretty slim next to running no heat, or making some extensive modification to the heatercore so this will have to do for now. Quote Link to comment Share on other sites More sharing options...
Jdesign Posted April 26, 2016 Author Report Share Posted April 26, 2016 I slowly have been cleaning and painting all the components when I get a chance. Overall everything is coming together well and I'm getting pretty excited. the coolant lines are still not complete but Ive been tackling other things because I know it's gonna suck. I mounted and painted all the charge piping now which I'm pleased with. This wrinkle paint is awesome. no more brake ducts. Oh well. Quote Link to comment Share on other sites More sharing options...
Jdesign Posted April 26, 2016 Author Report Share Posted April 26, 2016 Chubs, the man behind the mask, has been cranking away helping me get this car going, and up to this point, I can't thank him enough. I have a massive list of things to buy and complete yet, but I'm certainly 3/4's of the way there I finally started messing with the brakes. I have a massive delete I bought from Collin and I was going to use a Porsche 944 master. I have since change my mind because of the fitment and overall style of the master. I also have a tilton that I was going to use until I realized it's not the right bolt pattern as the booster delete. :/ so I took the booster delete with me and headed to the salvage yard where I found a 13/16 master from a early 80's Honda Civic. fits like a glove. Quote Link to comment Share on other sites More sharing options...
Jdesign Posted April 26, 2016 Author Report Share Posted April 26, 2016 I also painted the cover over the blower motor. Huge pain. I used a torch to burn the old material off, then a wire wheel, then cleaned and painted it. Quote Link to comment Share on other sites More sharing options...
B C Posted April 26, 2016 Report Share Posted April 26, 2016 Awesome work Jason! Jdesign 1 Quote Link to comment Share on other sites More sharing options...
YoungCR Posted April 27, 2016 Report Share Posted April 27, 2016 Those parts all cleaned up well! Great work man. B C and Jdesign 2 Quote Link to comment Share on other sites More sharing options...
Jdesign Posted April 27, 2016 Author Report Share Posted April 27, 2016 4 hours ago, Snap said: Awesome work Jason! Thanks Snap but Chubs has been working on this equally, if not harder than me!! 15 minutes ago, YoungCR said: Those parts all cleaned up well! Great work man. Thanks man, you should stop out again soon!! Quote Link to comment Share on other sites More sharing options...
ClassE Posted April 27, 2016 Report Share Posted April 27, 2016 Needs more zinc. Nice series of updates - I can't wait to see this in person. Awesome work so far! 👍 Jdesign 1 Quote Link to comment Share on other sites More sharing options...
Jdesign Posted April 27, 2016 Author Report Share Posted April 27, 2016 1 minute ago, ClassE said: Needs more zinc. Nice series of updates - I can't wait to see this in person. Awesome work so far! 👍 Thanks man, and I agree. I wanted to get all new hardware but getting laid off and still performing the swap has made my life, well, creative. I intend on just getting it driving and then going back and slowing making everything MUCH much better. Quote Link to comment Share on other sites More sharing options...
B C Posted April 27, 2016 Report Share Posted April 27, 2016 This is the only Chubbs I know (RIP) ClassE, KaiserRolls and Jdesign 3 Quote Link to comment Share on other sites More sharing options...
patsbimmer1 Posted April 27, 2016 Report Share Posted April 27, 2016 Is that the engine from his e46? Jdesign 1 Quote Link to comment Share on other sites More sharing options...
Jdesign Posted May 3, 2016 Author Report Share Posted May 3, 2016 90% of the brakes are complete. I ran all the hard lines minus the Bias valve that I am picking up tomorrow. I also managed to run the reservoir for the clutch slave cylinder. See my sneakiness? I plan on doing the same with the brake reservoir later too. Funds and time are playing a big part here for me now. Its crunch time. Quote Link to comment Share on other sites More sharing options...
Jdesign Posted May 3, 2016 Author Report Share Posted May 3, 2016 On 4/27/2016 at 7:43 AM, patsbimmer1 said: Is that the engine from his e46? No. He sold the car to Jake. I managed to find a motor and trans for the mega cheap. Quote Link to comment Share on other sites More sharing options...
Jdesign Posted May 3, 2016 Author Report Share Posted May 3, 2016 I knew working at Allis Bike part time would come in handy besides my biking addiction. I picked up a bike brake cable, housing, and misc knarps, ferrels, and barrel ends for making the throttle cable linkage. I used a dirty finger (hehe) and a nice piece of bond paper and created an outline of the mounting holes on the intake manifold for the cable bracket. I then created a quick sketch of what I will probably weld together tomorrow to make it all work together. Quote Link to comment Share on other sites More sharing options...
Jdesign Posted May 3, 2016 Author Report Share Posted May 3, 2016 Idk why there are two of the same pics there but every time I delete them they reappear.... Quote Link to comment Share on other sites More sharing options...
wasnt m3 Posted May 3, 2016 Report Share Posted May 3, 2016 22 minutes ago, Jdesign said: Idk why there are two of the same pics there but every time I delete them they reappear.... Fixed. Quote Link to comment Share on other sites More sharing options...
Recommended Posts
Join the conversation
You can post now and register later. If you have an account, sign in now to post with your account.