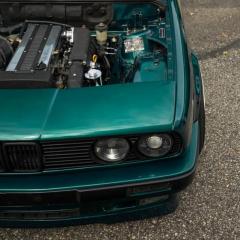
Jdesign Posted March 18, 2015 Author Report Share Posted March 18, 2015 So I have been trying to find a complete set of boots for these axles and I can only find the inners. This is what I was looking at: http://www.ebay.com/itm/231058828736?_trksid=p2060353.m1438.l2649&ssPageName=STRK%3AMEBIDX%3AIT I know the Meyle ones are nice, but I cant find the other ends. Anyone have any pointers? On a side note, I took my buddies drift car to work the other day and it developed a slight vibration. upon return to my shop, I found the culprit....... Also, 18's on an E30? :PUKE: Quote Link to comment Share on other sites More sharing options...
ClassE Posted March 18, 2015 Report Share Posted March 18, 2015 Depending on offsets and tire size, 18's in back almost look "presentable"... Everytime someone posts pics of 18's on E30's tho, it's always the rear..... Because 18's in front looks like utter and complete rubbish. Quote Link to comment Share on other sites More sharing options...
Jdesign Posted March 18, 2015 Author Report Share Posted March 18, 2015 Depending on offsets and tire size, 18's in back almost look "presentable"... Everytime someone posts pics of 18's on E30's tho, it's always the rear..... Because 18's in front looks like utter and complete rubbish. Double stagger might be possible, but why. Quote Link to comment Share on other sites More sharing options...
jc43089 Posted March 18, 2015 Report Share Posted March 18, 2015 http://www.realoem.com/bmw/showparts.do?model=BB13&mospid=47326&btnr=33_0470&hg=33&fg=25 Item 5 is the inner, 6 is the outer. Pelican has a full kit with all 4 boots, the bolts, grease etc for $115.50 Jdesign 1 Quote Link to comment Share on other sites More sharing options...
Jdesign Posted March 19, 2015 Author Report Share Posted March 19, 2015 http://www.realoem.com/bmw/showparts.do?model=BB13&mospid=47326&btnr=33_0470&hg=33&fg=25 Item 5 is the inner, 6 is the outer. Pelican has a full kit with all 4 boots, the bolts, grease etc for $115.50 Awesome!!! thank you so much. Placing my order today! Quote Link to comment Share on other sites More sharing options...
Jdesign Posted April 14, 2015 Author Report Share Posted April 14, 2015 So it been awhile since I updated, So here are some pics of my latest struggles and successes with my E30 . It seemed like the more I started to take things apart, the more I found things that needed to be fixed. Typical money pit as expected. So I can start here, I removed the old subframe bushings with a two jaw press. It was a little annoying but it worked pretty good. Once that was done, I got out the wire wheel and sandpaper, and took the pleasure of grinding and sanding all that nasty ruberized coating off of the subframe to prep it for paint. I had a good friend of mine machine some camber plates(which look amazing) and I planned on welding those on. But due to the deadline of Sowo closing in, I decided that they will have to wait until I get back to be installed. This is what the kit basically looks like. So skipping that, which im not to thrilled about, I Painted my Subframe. Needless to say I am stoked how it turned out. Its a shame I will need to grind it down again to weld on the camber plates. Here's a close up. I used this metallic spray after a nice coat of black, and it really gave it some POP! Also prior to tackling my rear subframe, I installed new wheel bearings up front, only to realize that my balljoints were starting to get really weak. So I took everything apart, cleaned and painted everything. I ordered new control arms, sway bar endlinks, and sway bar bushings for the front end. DrLeadFoot 1 Quote Link to comment Share on other sites More sharing options...
Earl Posted April 14, 2015 Report Share Posted April 14, 2015 Coming together awesome=) Quote Link to comment Share on other sites More sharing options...
Jdesign Posted April 14, 2015 Author Report Share Posted April 14, 2015 After sorting out what needed to be ordered for the front end, I crawled under the car to take a closer look at my drive shaft. I had a slight vibration at higher speeds and I think I found the culprit. Transmission mounts were garbage. I jacked the motor up and the mounts were completely in half. It made me think back to the year prior, when I replaced my motor mounts that were the exact same way, yet I never checked the trans mounts. Meaning for who knows how long, I was just driving around with my motor resting on top of the mount locations. Pretty neat. LOL (P.S. Dont mind the nastiness. The leak has since been fixed and I haven't take the time to rack the car and Pressure wash the underside) Needless to say I think I found everything that I needed to replace suspension wise. So I got out my check book and ordered the following: X_Axle boot kitX_Rear trailing/control arm bushingsX_drive shaft flex discX_drive shaft mount bearingX_rear axlenut locking plates x2X_Sway bar endlinks front and rearX_Lemforder Control arms and ball jointsX_Front control arm bushings X_Stainless braided brake linesX_rear Wheel bearingsX_countless misc hardwareX_and the Obvious Trans mounts But then I didnt stop there. I also had a lead on the first step to the new motor swap I am going to pursue next winter... Quote Link to comment Share on other sites More sharing options...
Jdesign Posted April 14, 2015 Author Report Share Posted April 14, 2015 The majority of the new parts came. I clear coated all the metal pieces to prevent rust and oxidation and painted the control arms to match the subframe. I also made a stop out to a friends shop to lend him a hand on an E92 he was welding a cage in.Needless to say he was making great progress before I even go there and it fit in the car flawlessly. There was also another BMW nearby... I will be pressing the rear hubs out tonight and painting the swing arms as well. I will take more pics as I move along. I want to drive this thing again!!! Urggghh Quote Link to comment Share on other sites More sharing options...
YoungCR Posted April 14, 2015 Report Share Posted April 14, 2015 Pretty sure that's the ESS supercharged M3 I got to drive at Concours. Can't be too many around right?Paint looks great! Quote Link to comment Share on other sites More sharing options...
DrLeadFoot Posted April 15, 2015 Report Share Posted April 15, 2015 Great work! More pics of the tools and how you pull the bearings please! Quote Link to comment Share on other sites More sharing options...
Rowleym Posted April 15, 2015 Report Share Posted April 15, 2015 You missed the engine bay pic of that second bmw!!! But hey this is excitingAlso. Is that an r154? DId you give up on the adapter? I'm very much so thinking my next swap will be 4g63 into an e30 for a daily. Quote Link to comment Share on other sites More sharing options...
Jdesign Posted April 15, 2015 Author Report Share Posted April 15, 2015 Great work! More pics of the tools and how you pull the bearings please!I will for sure. I was unable to find time last night, so I will be doing it today. Pretty sure that's the ESS supercharged M3 I got to drive at Concours. Can't be too many around right?Paint looks great!I assume so. It hardly has over 10k on the clock. Coming together awesome=) Thanks Earl! Quote Link to comment Share on other sites More sharing options...
Jdesign Posted April 15, 2015 Author Report Share Posted April 15, 2015 You missed the engine bay pic of that second bmw!!! But hey this is excitingAlso. Is that an r154? DId you give up on the adapter? I'm very much so thinking my next swap will be 4g63 into an e30 for a daily. Ahhhh, I was waiting for someone to ask what trans that was.. and no, I did not give up on the adapter, but the price was right so I had to! BTW you didn't miss much, that E30 was just a stock M20. Quote Link to comment Share on other sites More sharing options...
Rowleym Posted April 15, 2015 Report Share Posted April 15, 2015 Are you going to at least tell me what trans? Ha. Sent from my iPhone using Tapatalk Quote Link to comment Share on other sites More sharing options...
Jdesign Posted April 16, 2015 Author Report Share Posted April 16, 2015 Are you going to at least tell me what trans? Ha. Sent from my iPhone using Tapatalk Only if you can guess what it is. You were close though lol. Quote Link to comment Share on other sites More sharing options...
cpandrewschmidt Posted April 16, 2015 Report Share Posted April 16, 2015 What sideskirts are you rockin'? Quote Link to comment Share on other sites More sharing options...
Jdesign Posted April 17, 2015 Author Report Share Posted April 17, 2015 What sideskirts are you rockin'? Genuine Rieger side skirts sir. I plan on getting the Reiger Infinity front lip to match soon too, but I just want to get the moving bits all squared away first. Quote Link to comment Share on other sites More sharing options...
Jdesign Posted April 21, 2015 Author Report Share Posted April 21, 2015 More updates. Since I had the back seat out to remove the subframe, I took my seat to a local friend of a friend that does interior upholstery to have the top of the seat restitched. The plastic rear window amplifies the sun and bakes the top of almost all the vert rear seats. My seat was extremely dry and fragile when I got the car, and after the first year of owning it and packing people into the back, the stitching gave away. I have since added lots and lots of leather replenishing chemicals and the leather has bounced back quite well, so I finally got it fixed. I unfortunately did not take any before pictures of the seat, but here is what it looks like now that I got it back(I have since cleaned and replenished the leather). Focusing back on the suspension, I go the new control arms installed, along with the new sway bar links and brackets, the calipers I rebuilt, and I installed the new lines. it all came together very nice and I am getting excited to drive this thing more and more each day. New sway bar links Old brake line New VS. Old brake lines side by side Everything installed and back together minus the wheels I also rebuilt the calipers, but due to having brake fluid all over, I didn't take any pictures. DrLeadFoot 1 Quote Link to comment Share on other sites More sharing options...
Jdesign Posted April 21, 2015 Author Report Share Posted April 21, 2015 Heres one more for good measure Quote Link to comment Share on other sites More sharing options...
YoungCR Posted April 21, 2015 Report Share Posted April 21, 2015 Looks great! Gonna drive like a new car Quote Link to comment Share on other sites More sharing options...
Jdesign Posted April 22, 2015 Author Report Share Posted April 22, 2015 Looks great! Gonna drive like a new car Thanks! I am super excited! Quote Link to comment Share on other sites More sharing options...
Doorman Posted April 22, 2015 Report Share Posted April 22, 2015 Lookin perrrrtrty!!! Quote Link to comment Share on other sites More sharing options...
Jdesign Posted April 23, 2015 Author Report Share Posted April 23, 2015 Lookin perrrrtrty!!!Thanks!!! Quote Link to comment Share on other sites More sharing options...
Jdesign Posted April 23, 2015 Author Report Share Posted April 23, 2015 Well I got more accomplished last night before I fell asleep under the car somewhere around 3am. I managed to get the diff cover off, blast it, clean it, paint it, put a gasket in there (there wasnt one at all :/), and bolt it to the subframe. I installed new axles because I messed up the boot on one of them and it was cheaper to order a set then use the rebuild kit anyways. So I returned the rebuild kit and ended up with these bad boys Installing them was a bit of a challenge since I wanted to put them on outside of the car. I used two Allen keys with the new hardware I bought and held the axle in place with one while I use the other key to torque the other axle into place. The result was very satisfying though I then managed to BY MYSELF raise the sub frame into the car with two dolly's, a floor jack, two jack-stands, and some misc wood. I only have a few pictures here as this was extremely hard by myself. I could have waited for help, but I was anxious to get it together. In the end, I managed to get it installed and the drive shaft bolted up. I had to wedge the sub frame studs back through the holes behind the interior panels, slight pounding and yelling ensued. I also installed the new sway bar links(while I laughed and made jokes about the cute sway bar that most likely does nothing anyways) and also ran all the new stainless brake lines, and bolted the ABS sensors and Ebrake cables back into place. Somewhere along this process is where I fell asleep on the comfy Creeper and woke up confused around 4am. I will take pictures when I finally install the brakes and power bleed the system very soon!!! DrLeadFoot, nick.e46.330i., KaiserRolls and 1 other 4 Quote Link to comment Share on other sites More sharing options...
Recommended Posts
Join the conversation
You can post now and register later. If you have an account, sign in now to post with your account.