
ThatRatRodProject
-
Posts
149 -
Joined
-
Last visited
-
Days Won
9
Content Type
Profiles
Forums
Events
Gallery
Store
Posts posted by ThatRatRodProject
-
-
1 hour ago, straight6pwr said:
very cool!
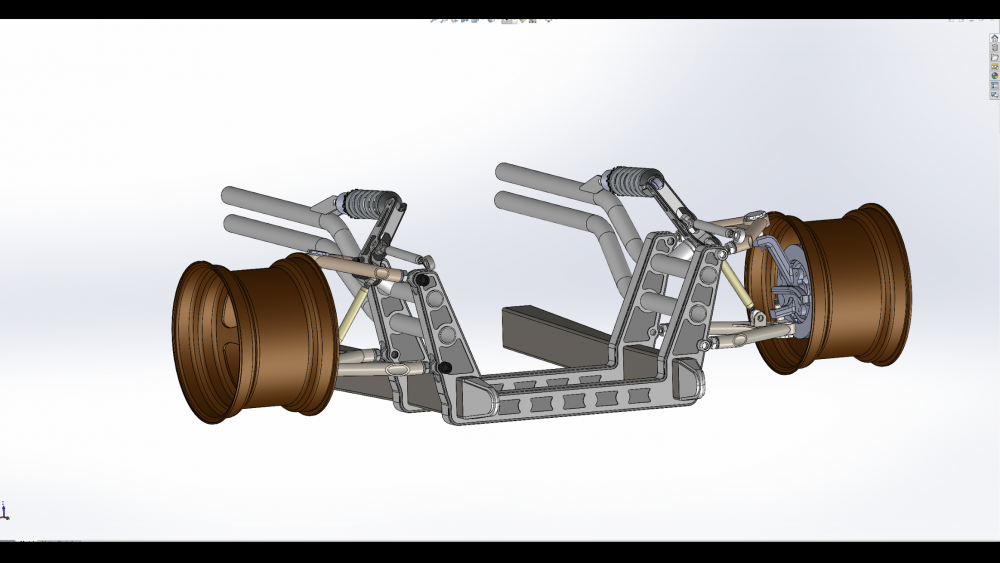
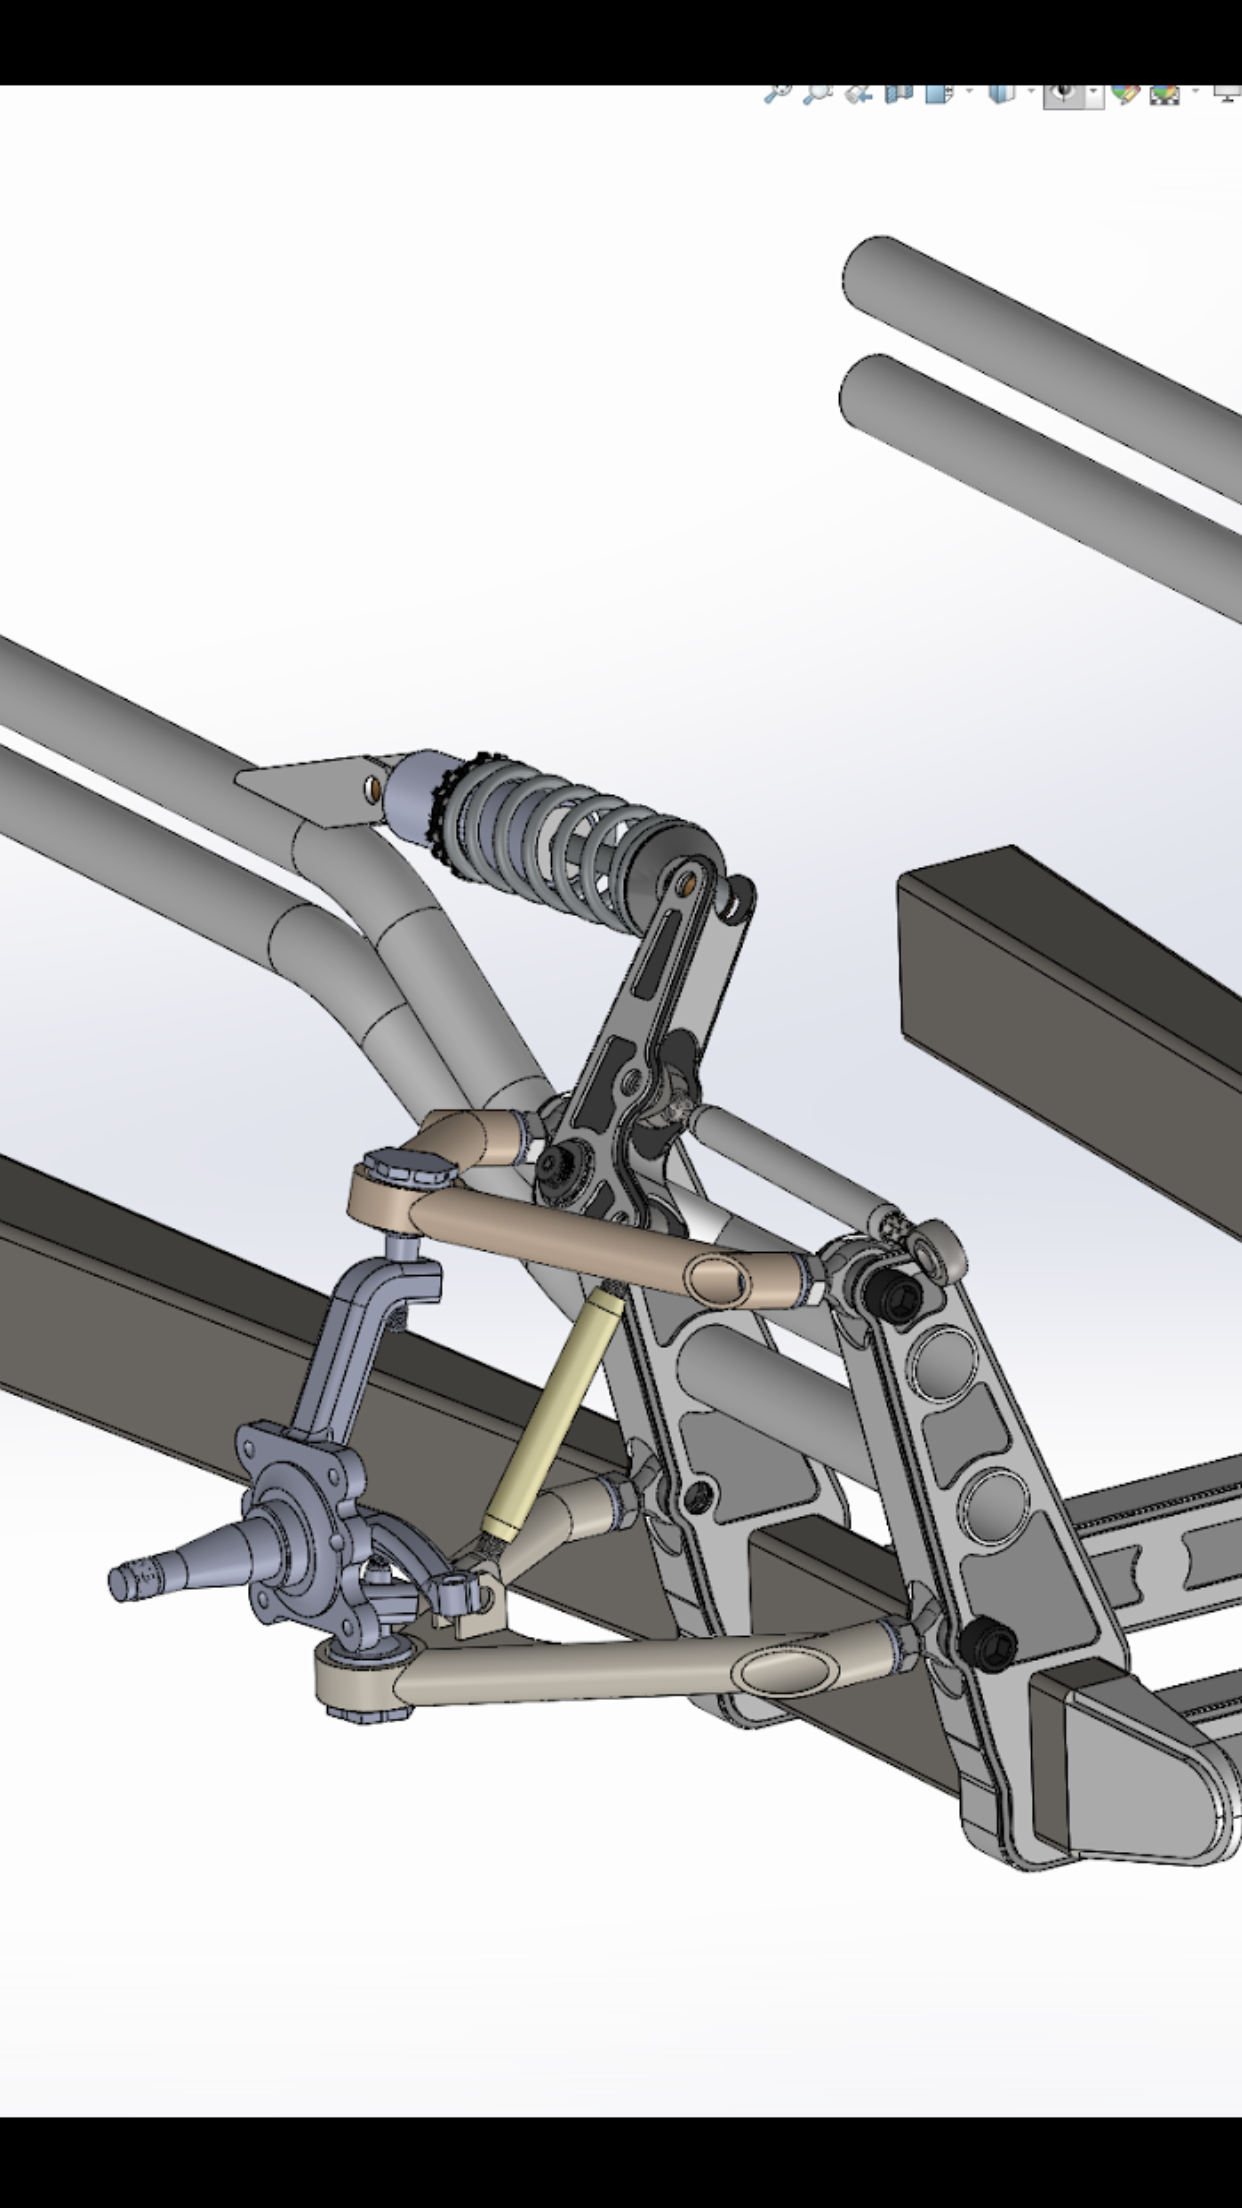
seconded. it appears there is room for the coilover where you've placed that yellow connecting rod. are you using an undersized spring/shock and but increasing its effectiveness with the pivot arm?
what is the connecting rod coming forward from the pivot arm?
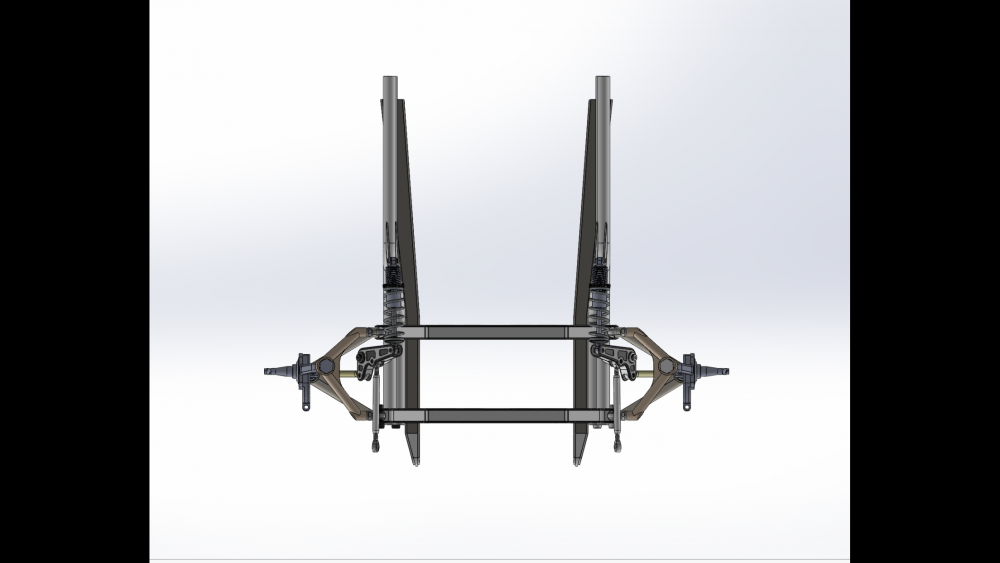
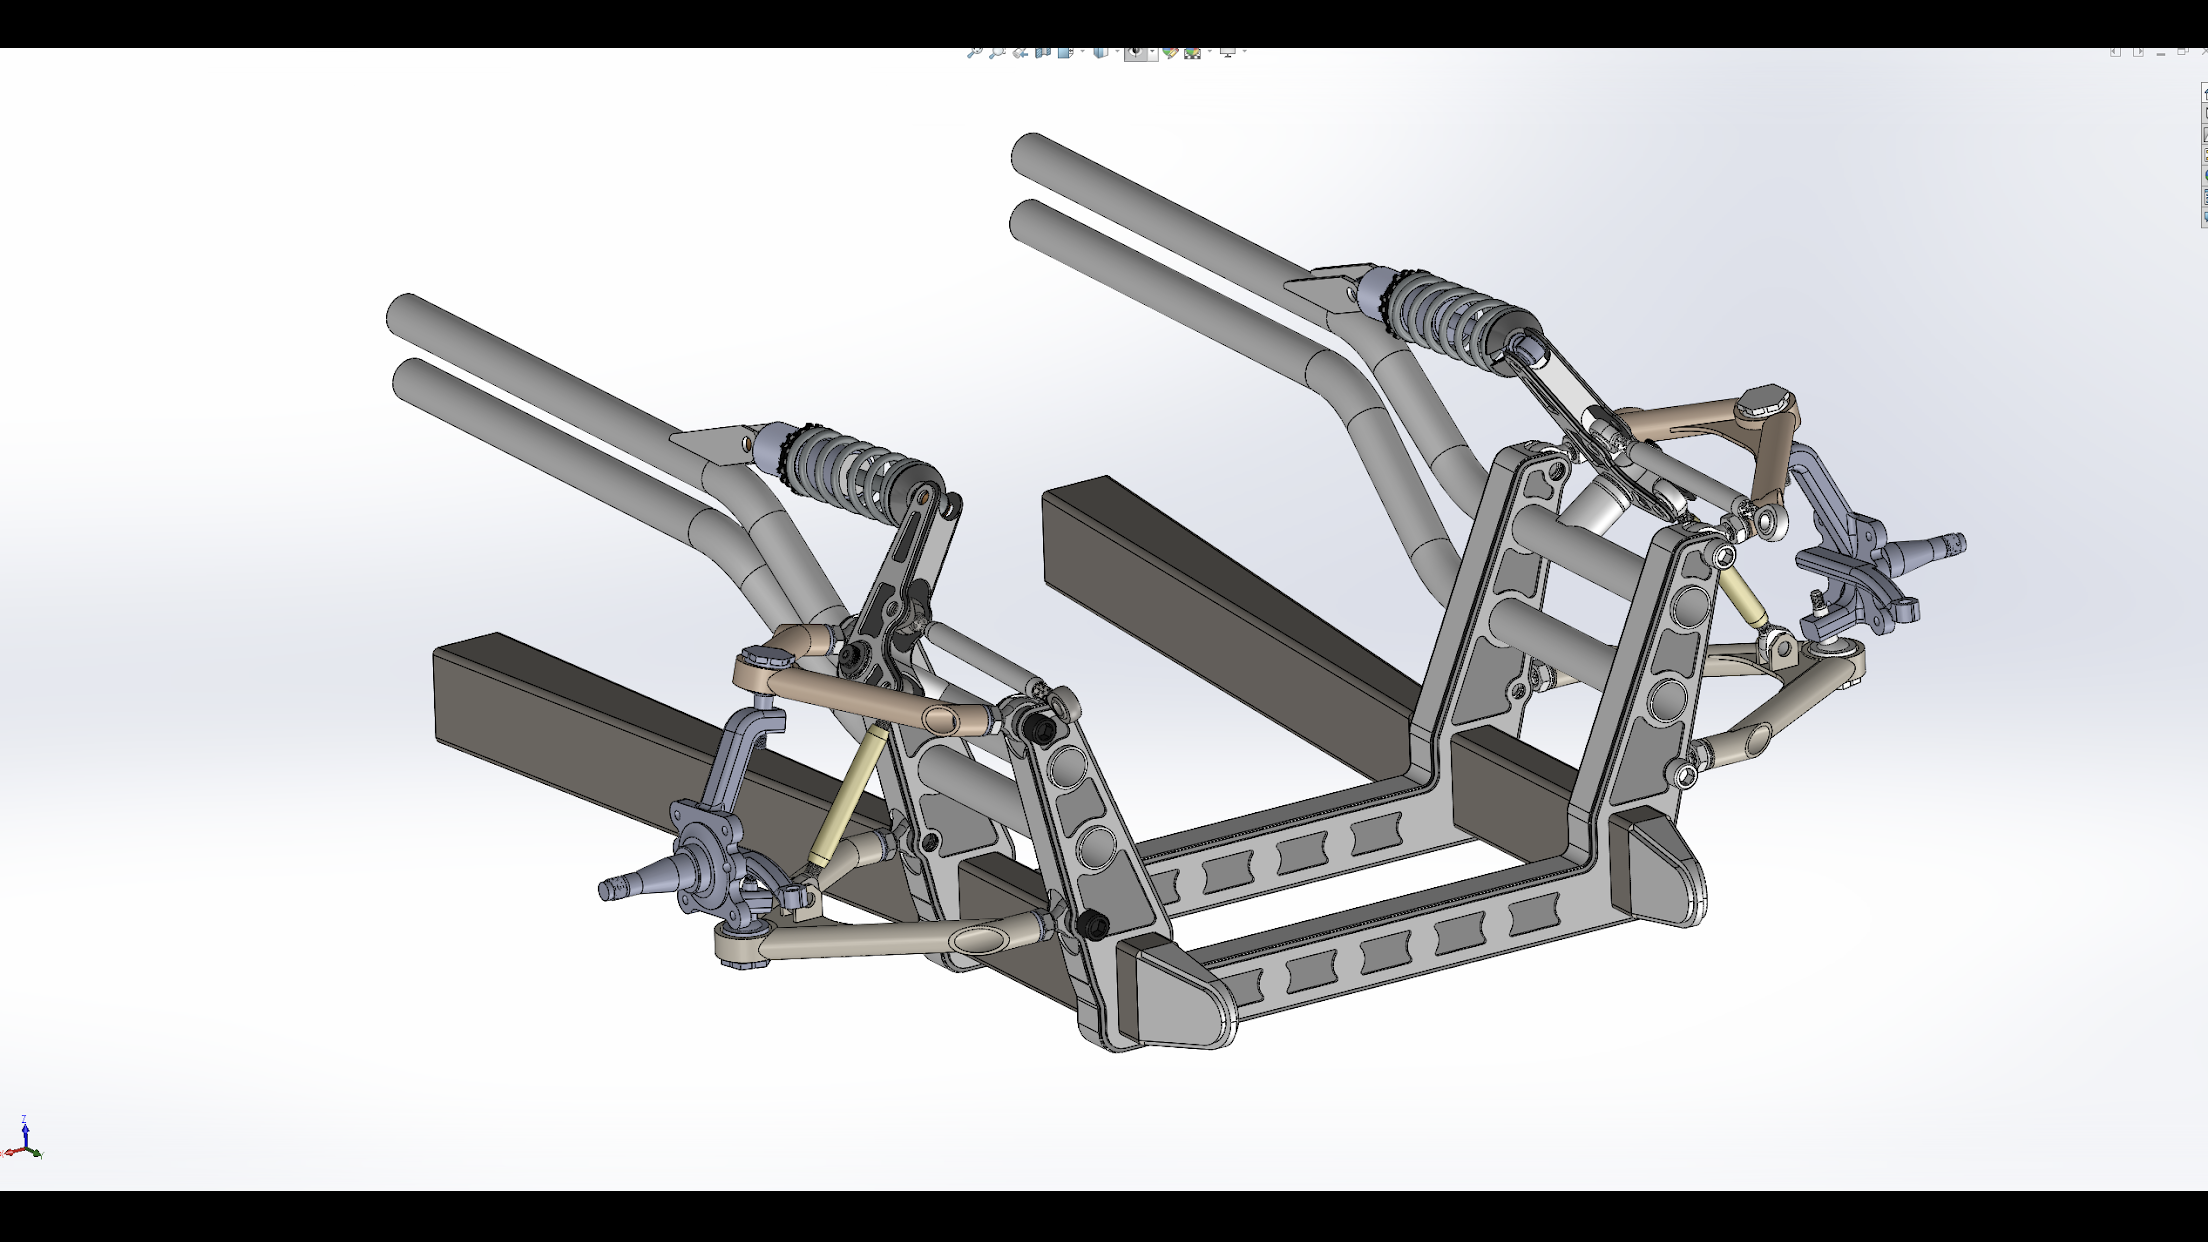
There is a couple reasons why i have the coil-over mounted horizontally .
1. Keep it Clear of road Hazards like Dirt, rocks, Ect.
2. I am using a under rated spring. So with the Cantilever allows me to achieve my desired spring rate with some sacrifice of overall suspension Travel. Because i honestly don't know what the project will weigh in at. I may have to re-fabricate the Cantilever Section. But This may be to stiff.
-
30 minutes ago, m42b32 said:
Sway bar link maybe?
Looks great! I'm glad this project is still happening
Yes Sway Bar Link Set up will be coming off the cantilever toward the front of the frame.
Linked Will Be the Sway Bar I'm Using. Haven't Modeled It in yet.
-
So it’s been some time but this project is not dead. Updates will be coming. Re-designed front frame section sneak peak.

- P_Roloff, Bassboy3313, HipMF and 2 others
-
 5
5
-
Another update. I recently order a lot of supplies to get my project. This is going to be a picture update. And I designed up some clutch and brake pedals.


Not ordered yet but soon will be the tires
I am looking for a 3.73 or 4.11 medium case diff.
Sent from my iPhone using Tapatalk- jc43089 and Bassboy3313
-
2
-
Great progress and success today with my custom wiring box. I have an official standalone engine management system for my M60b40.
After reading a lot of wire diagrams and taking a step out of my comfort zone. it all worked out in the end. This is the first time I've done any really serious wiring on a car.
--Ill let the pictures do the talking
Before


After


Sent from my iPhone using Tapatalk
-
-
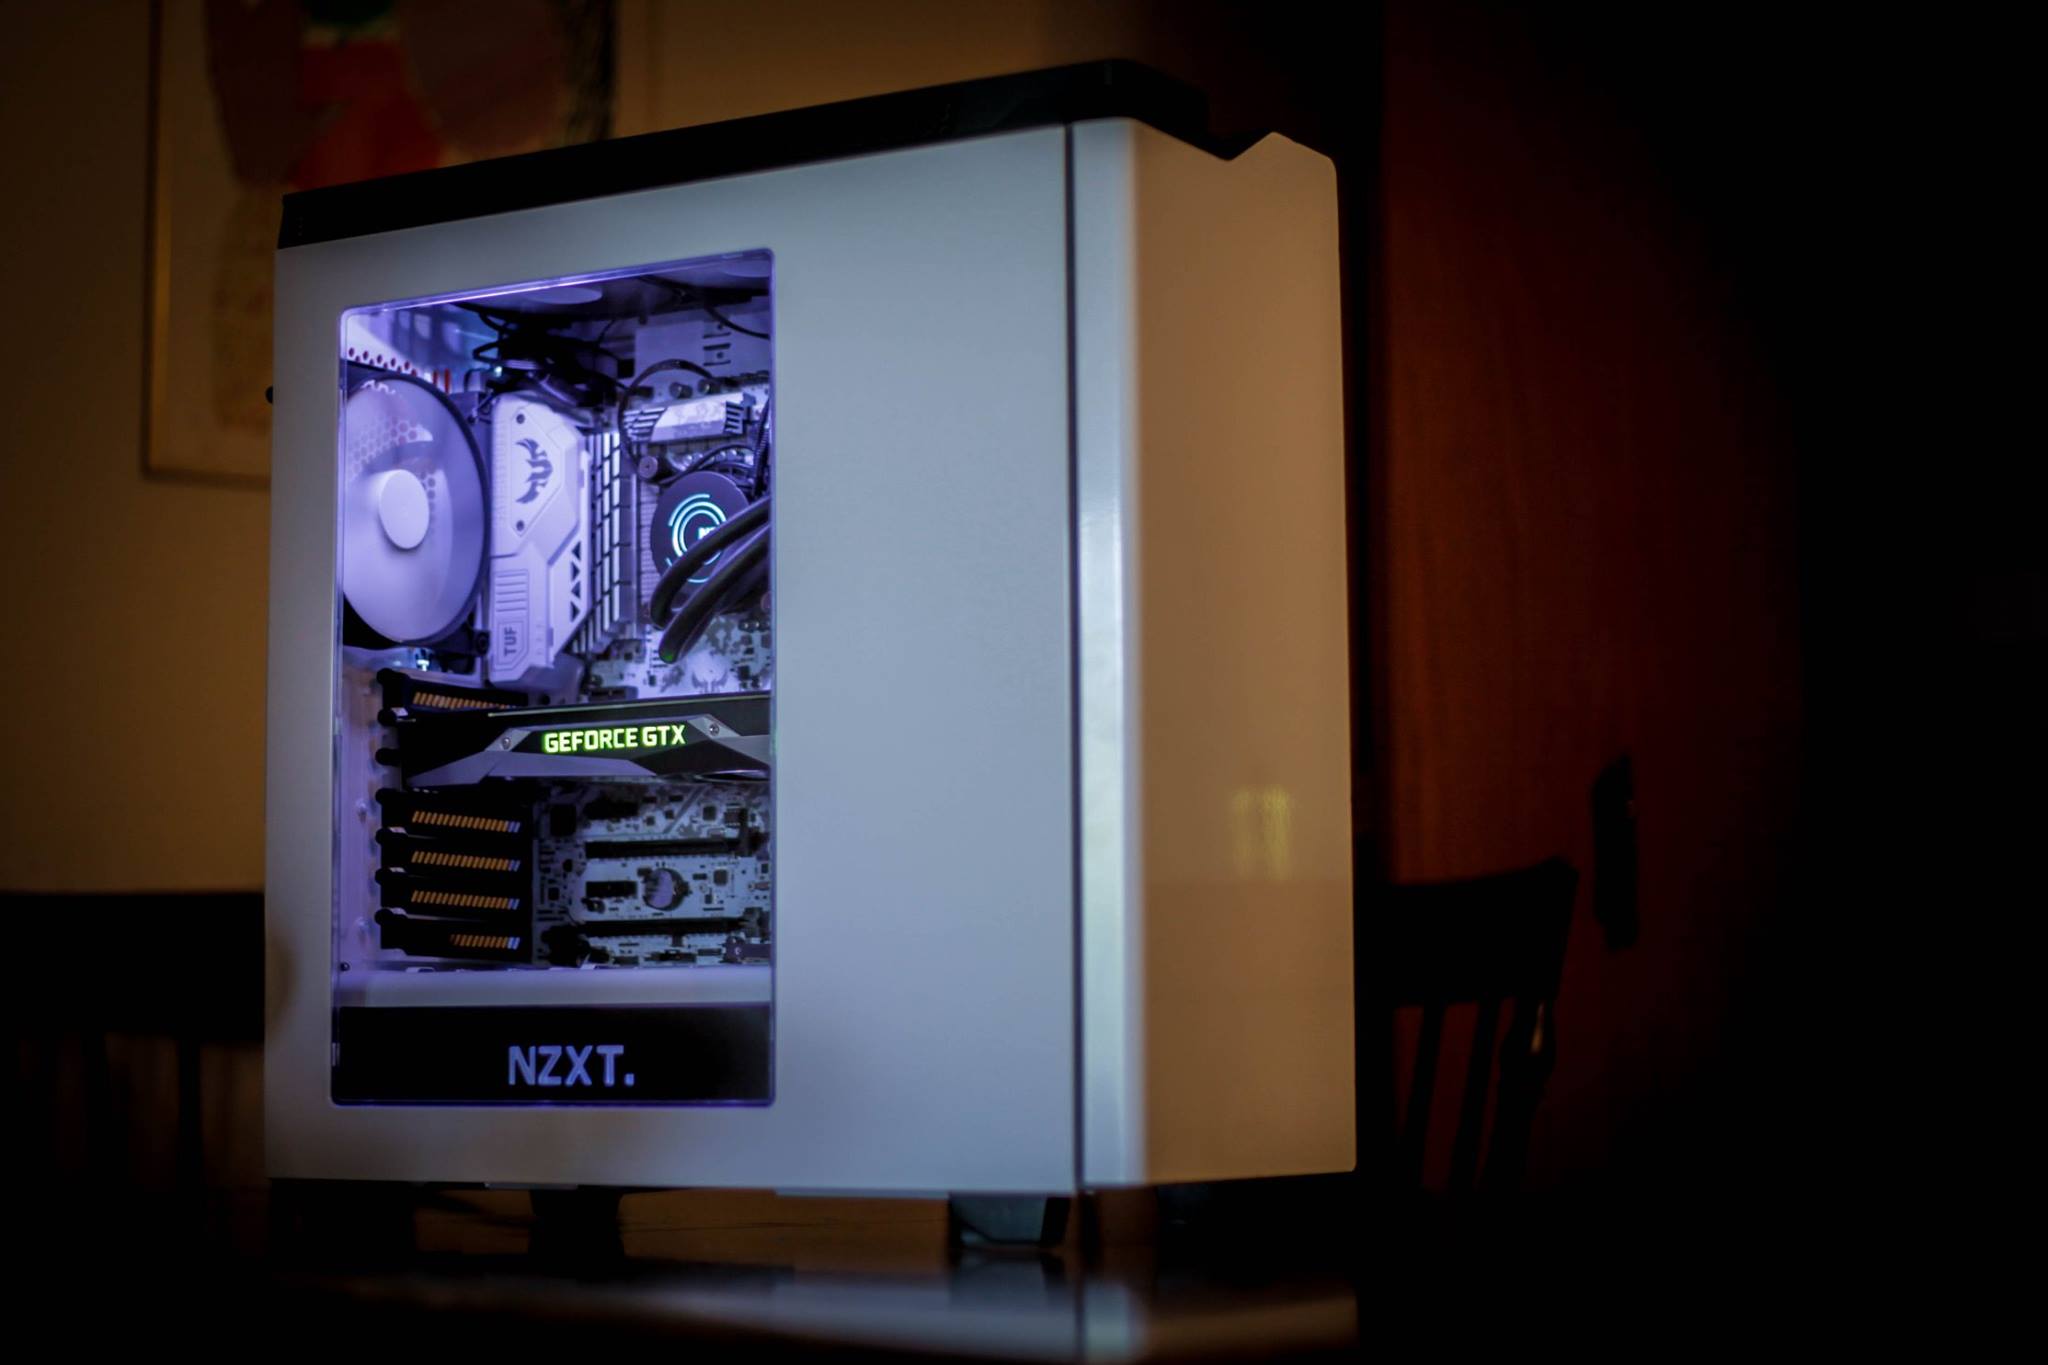
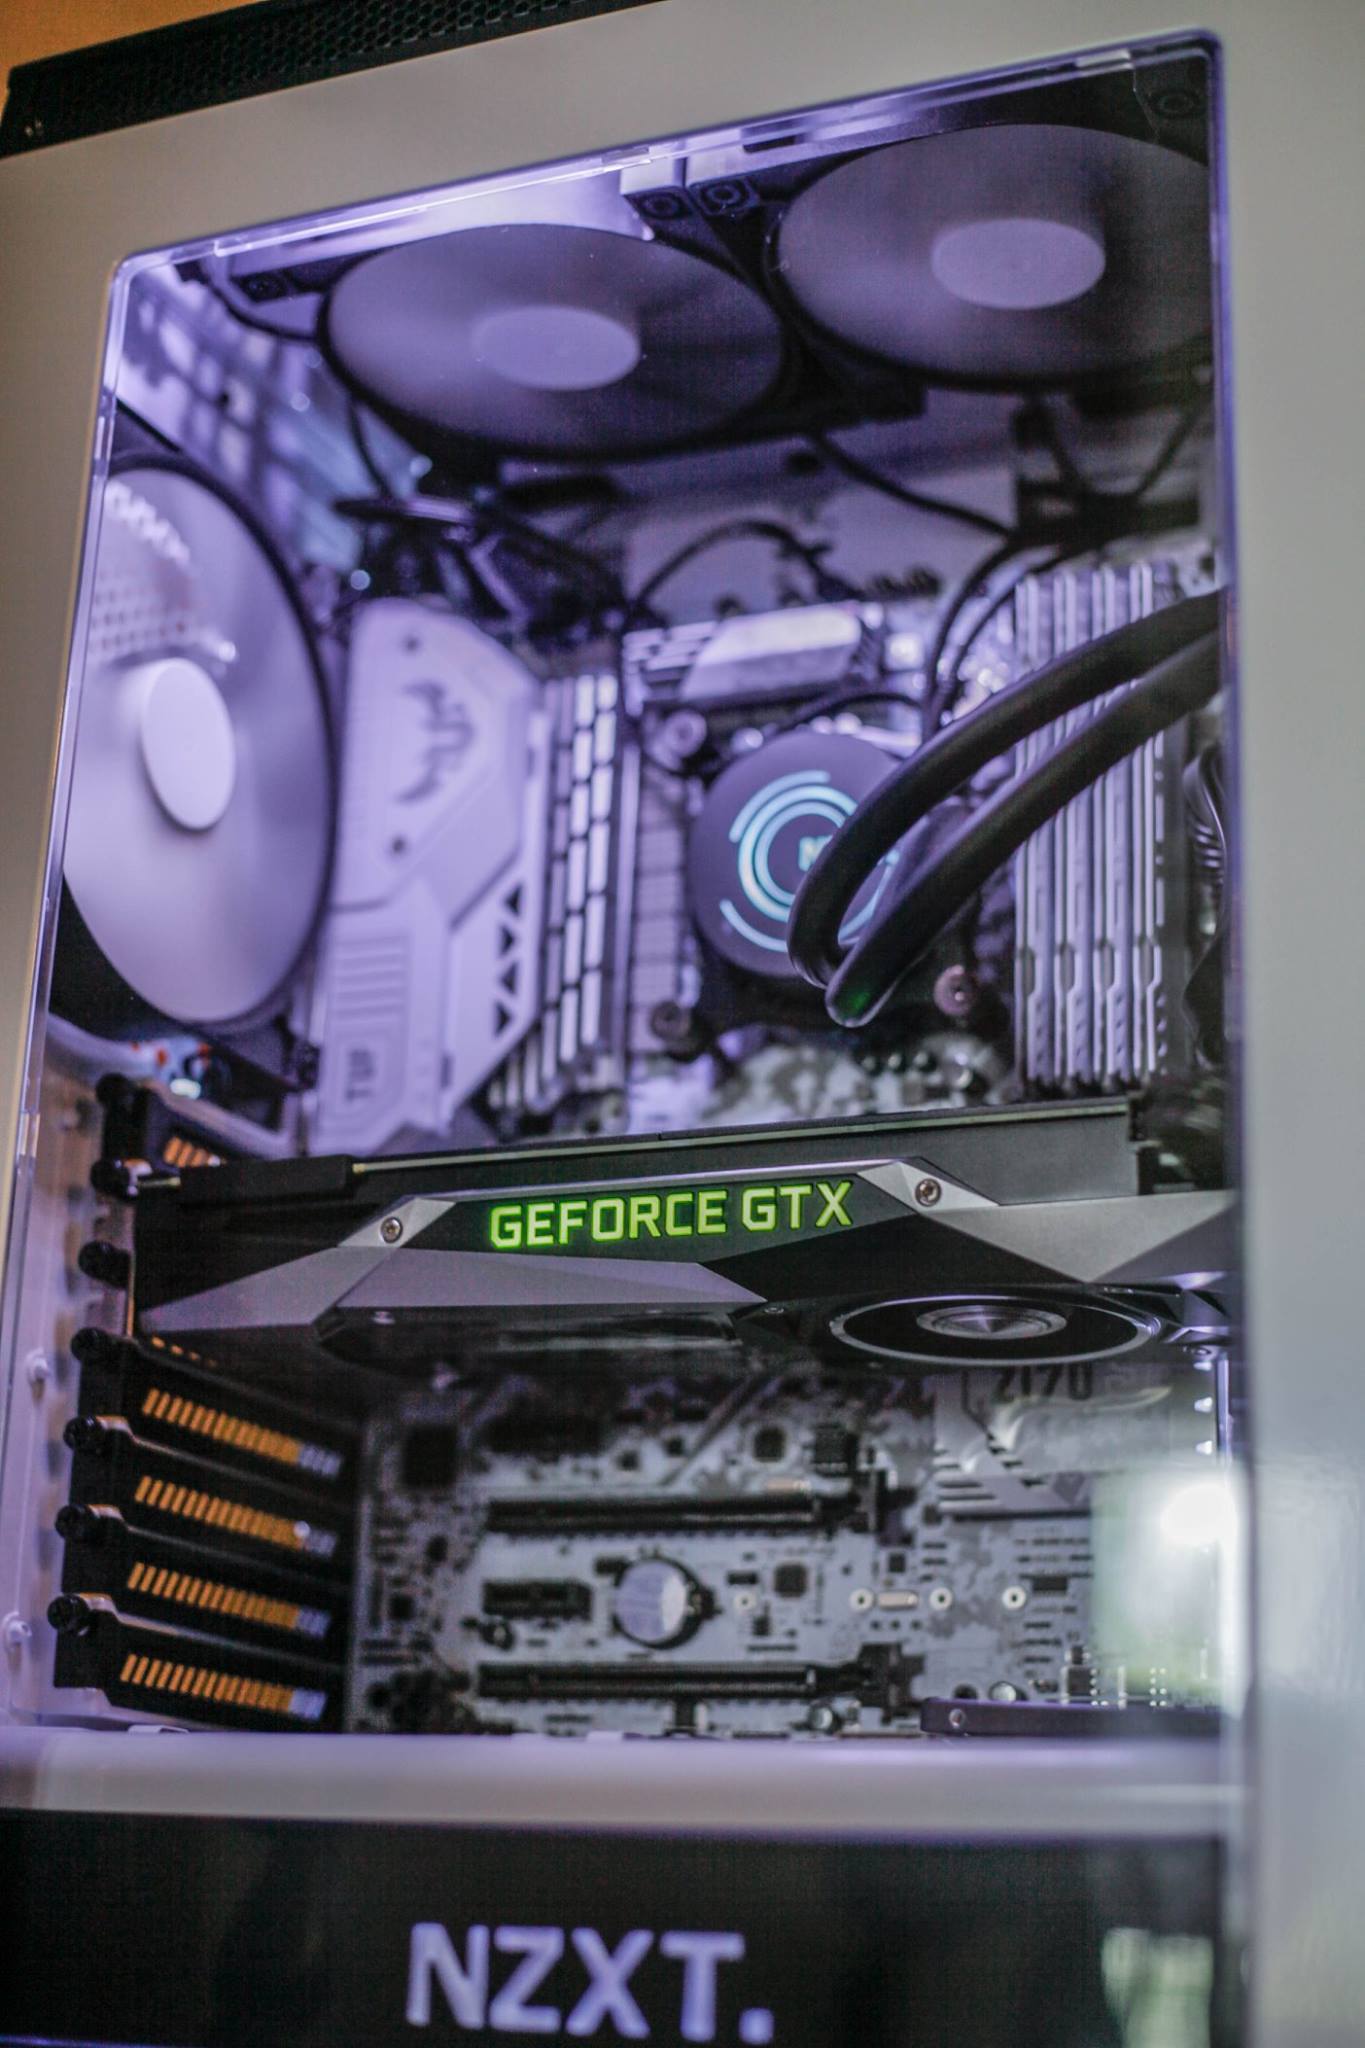
Build list
-X370 Msi gaming pro carbon
-A12-9800 am4 processor (will be upgrading to a ryzen 5 1600x)
-Asus strix GeForce gtx 1050ti
-650rmx corsair modular power supply
-2x Kingston ram 16gb 2133
-Samsung evo 250gb SSD
-3.0 thermaltake liquid cooler with a 240mm radiator
-NZXT s340 mid tower case
Rgb's are a pain to take pictures of. But here's one.

Sent from my iPhone using Tapatalk
-
What management are you planning on using? Wiring always sucks.
Stock Ecu and custom fuse box. Currently making one right now

Sent from my iPhone using Tapatalk
-
Figured this would visually appeal to some people.
I built my first pc this past couple weeks.


Sent from my iPhone using Tapatalk
-
-
-
Love the update and the plans you have!
Steel or alum for the suspension?
I see two points in your design that I would do differently with your suspension design but overall it looks good! Have you calculated Ackerman angle or modeled in the roll centers? Just curious. I know this isnt a racecar but im fascinated with your build
The control arms will be tube steel.
I have accounted for some of the angles. I will be running a very stiff spring rate. With low travel. With taller profile tires. So the tires absorb most of the bumps.
This is the look I'm going for.

I will be setting this car up for auto cross.
-
Alright first off I'm sorry. There's been a lot of change of plans from my last post.
1st off I stopped posting in wi Bimmers because my 540 I swap wasn't going to go through. the guy I was going to get the car from turned into a real dickhead and didn't want to sell it to me.
So I started exploring other power train routes I ended up picking up an aluminum LS 5.3.
And between all of this I realize making my own frame was not possible to be street legal.
so I also started exploring other frame options.
I was able to find a 1936 Buick touring sedan frame that came with the title. So I purchased it and it is registered with the state and I now have a legal frame.
Progress photos

Currently the car is sitting on the frame and I am fabricating door jams.


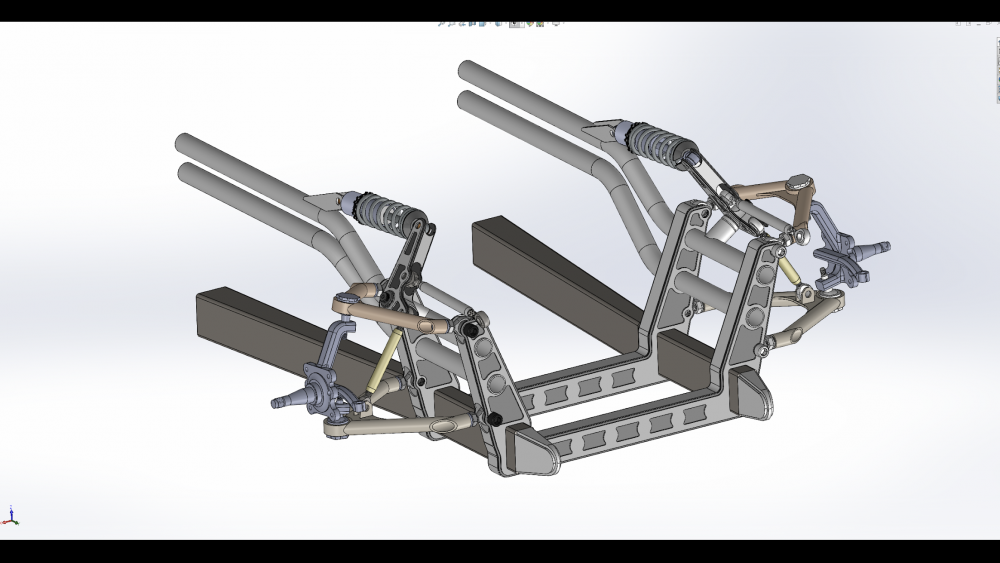
During this process I have been designing a front control arm independent suspension.
The purchase items that I will be using with the suspension will be
-mustang style 2 pinto spindles
-5/8 hiems joints
-pinto ball joints
- QA1coil over shocks.
There will be custom control arms.

So the reason I am posting all this is because I finally got the 540 I E 34 from the guy I was trying to purchase it from.
So I have been pondering these ideas for a while and I believe I can make the get rag 420 transmission bolt up to the LS motor.
Therefore I will be able to use the driveline, the rear subframe, Differential, and control arms out of the 540 I
The reason I am not going to using the M60 Motor is because I am concerned about the reliability.
But this morning I purchase the car. Had to tow it to my house put some new gas in it checked all the fluids and a new battery and turned the key and it started right up.
Runs and idles and there's no codes all around it sounds really healthy.
So I still have many plans for it and it will get finished.
- Bassboy3313, Earl and i_love_cars
-
3
-
That's what I have been told and read, but again oil consumption is one thing. The billowing clouds are another I would think.The m54 is know to burn oil.

Sent from my iPhone using Tapatalk
As far as I'm aware Oil consumption is mostly caused by burning oil where else is it going to go.
Sent from my iPhone using Tapatalk
-
The m54 is know to burn oil.
Sent from my iPhone using Tapatalk
-
makes no difference to the AWD system.What about different offsets?Sent from my iPhone using Tapatalk
Awesome I was under the impression that it was a no no situation.
Sent from my iPhone using Tapatalk
-
What about different offsets?
Sent from my iPhone using Tapatalk
-
-
Are you grounding it through the plug?
Yes
Sent from my iPhone using Tapatalk
-
Are you checking for power by grounding it through the circuit?
No exactly sure what you mean. Grounded to the chassis or to the plug.
Sent from my iPhone using Tapatalk
-
Standard protocol is to send donuts to those in the thread that contributed to a diagnosis
Alright sounds fair
Sent from my iPhone using Tapatalk
-
Well I went threw cleaned everything rest the codes. Drive about a 175 miles and SES light comes back. Plug in the scanner and it's the secondary air bank one and secondary air bank two. I have replaced the smog pump. Checked the evap valve with a vacuum pump. It was between 15" and 18" of vacuum so that's fine. So I then checked the vacuum control switch. No vacuum. Replaced the line and the switch. Still no vacuum. So next step was I check to see if I was getting power at plug for the vacuum control valve. There was power at the plug. I then tested the valve it self ran power to the control switch and the valve opened. I blew in one end air came out the other. Then I put it all back together and check it again this morning. Still no vacuum. Yes I check the fuses. Any help would be great. Good thing no more cam sensors check engine light.
Sent from my iPhone using Tapatalk
-
I know I'm late to the party and this recommendation is also potentially late... I know on my S-motor I replace the micro filter on my Vanos unit roughly once a year. It's super cheap, super easy to do, and I know a few people who have had a lot of luck with that preventing Vanos issues.
$0.02
Thanks for the info. I will also clean that filter.
Sent from my iPhone using Tapatalk
-
Fairly common.
Common fails or gets dirty.
Sent from my iPhone using Tapatalk


540i Swapped Rat rod Build thread
in Members BMWs
Posted
Yes the Cad software i use is Solid-works.
There is a couple reasons why I'm using a cantilever.
1. I have the coil-over mounted horizontally To Keep it Clear of road Hazards like Dirt, rocks, Ect.
2. I am using a under rated spring. So with the Cantilever allows me to achieve my desired spring rate with some sacrifice of overall suspension Travel. Because i honestly don't know what the project will weigh in at. I may have to re-fabricate the Cantilever Section. But This may be to stiff.
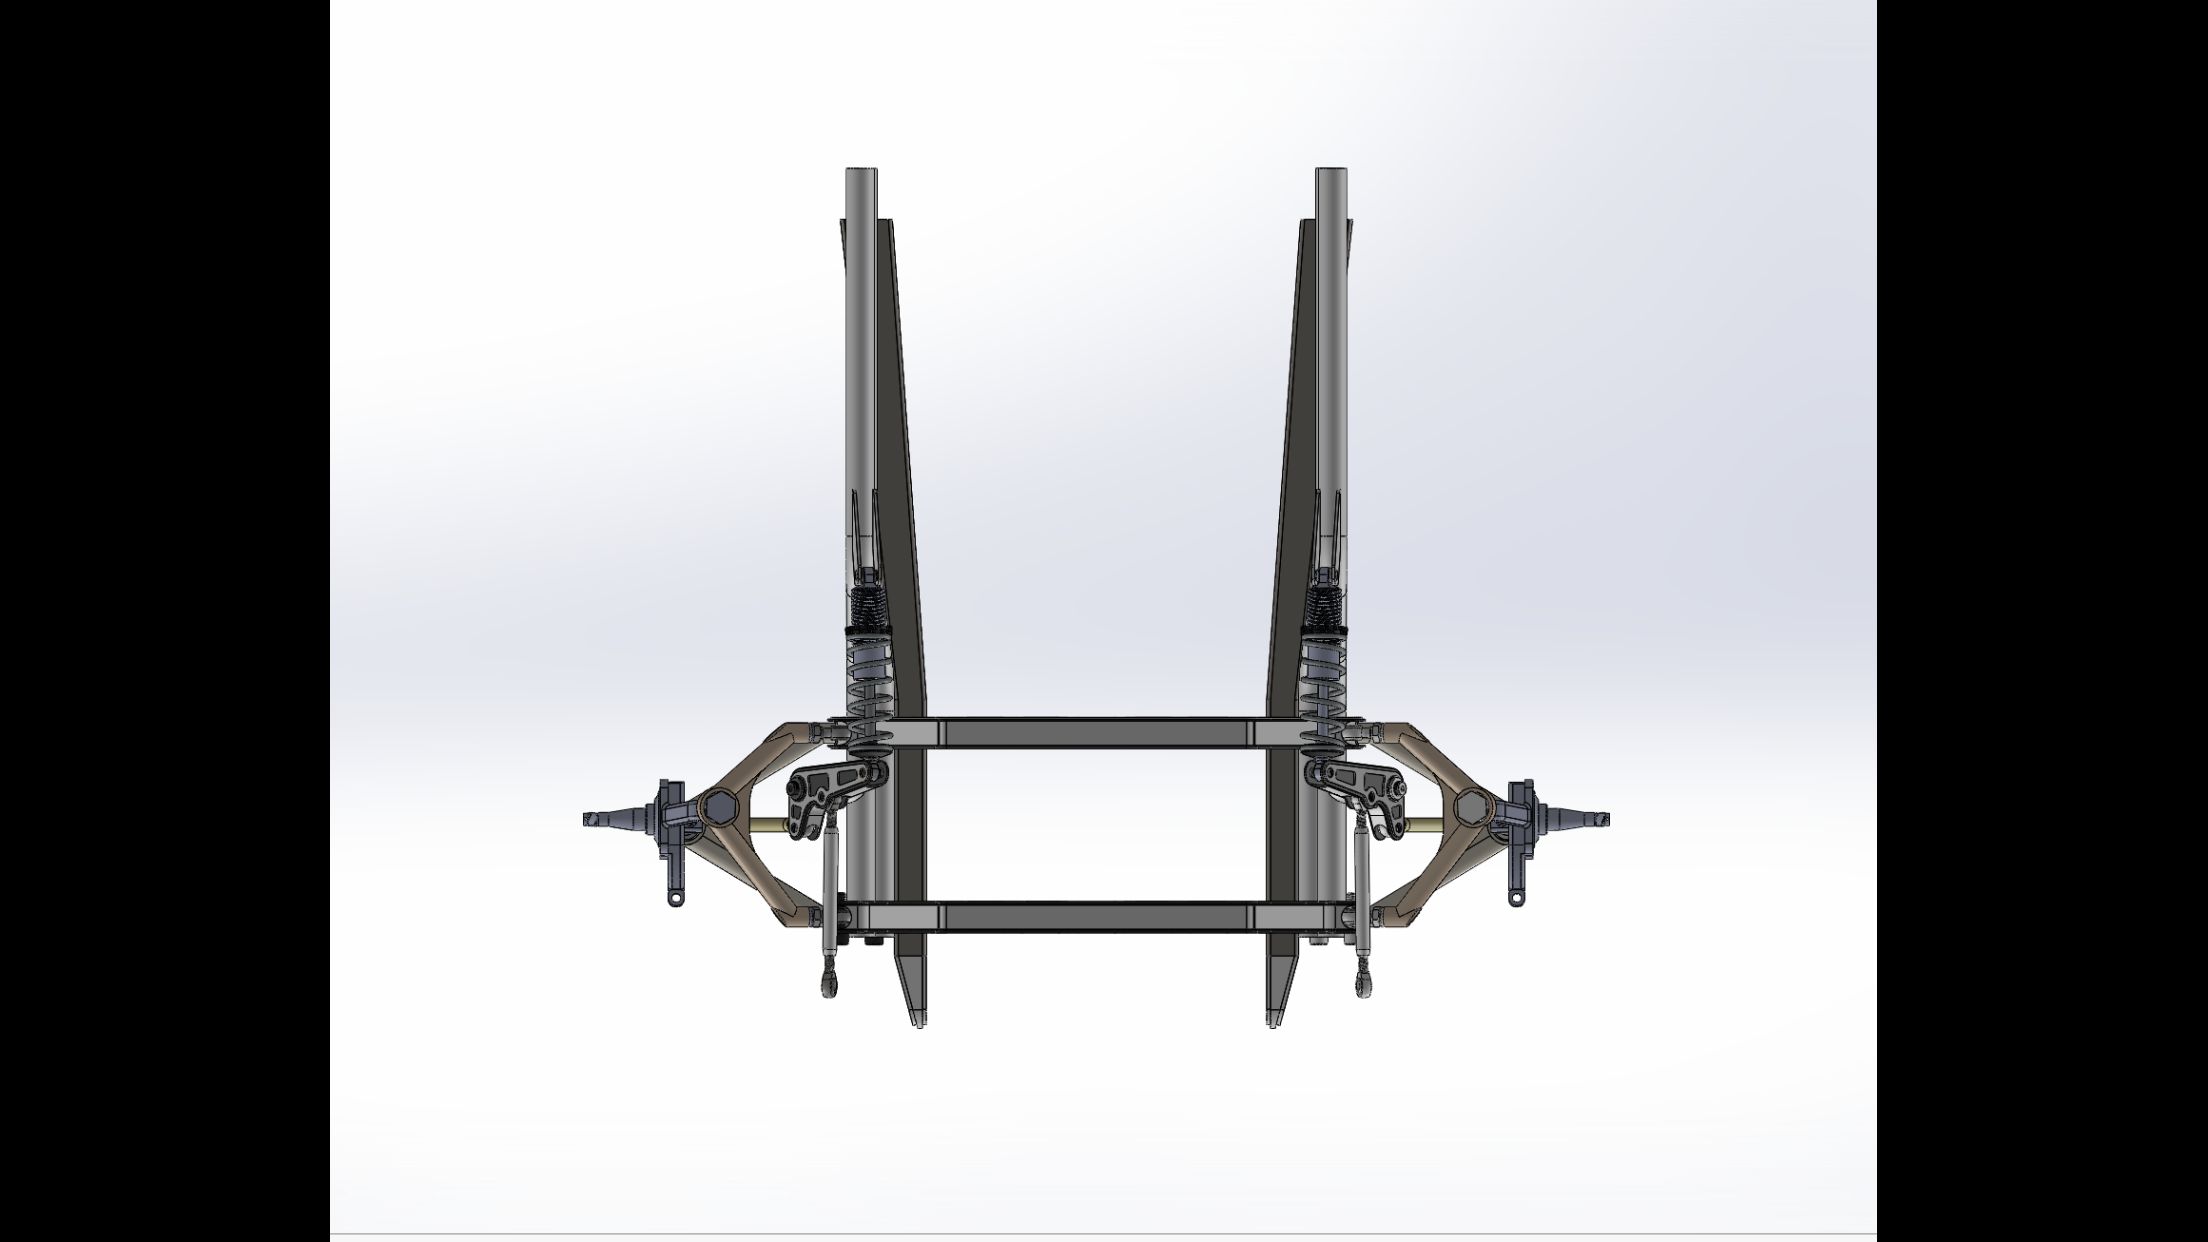
Attached is a image of a section View of the Cantilever.
The stack up is From the top Down.
Stripper Bolt (Shear Strength of 82,000 Psi (Roughly 28,000 Pounds or shear force))
Harden Washer
Thrust Bearing
Harden Washer
Normal Ball Bearing
Mounting piece (Gets Welded into the Cantilever)
Normal Ball Bearing
Harden Washer
Thrust Bearing
Harden Washer
Mounting Blacking (will get mounted to the end of the tubing, (Tubing will likely be gusseted in the future)