
AsparagusMike
-
Posts
258 -
Joined
-
Last visited
-
Days Won
26
Content Type
Profiles
Forums
Events
Gallery
Store
Posts posted by AsparagusMike
-
-
More updates!
For the last week I have been enjoying the nice warm weather of Arizona. I got back Saturday and on Sunday I headed on over to the shop and got a couple more things accomplished.
As for the rear end, I still had to re-install the brakes and got my e brake installed and dialed in, feels great!

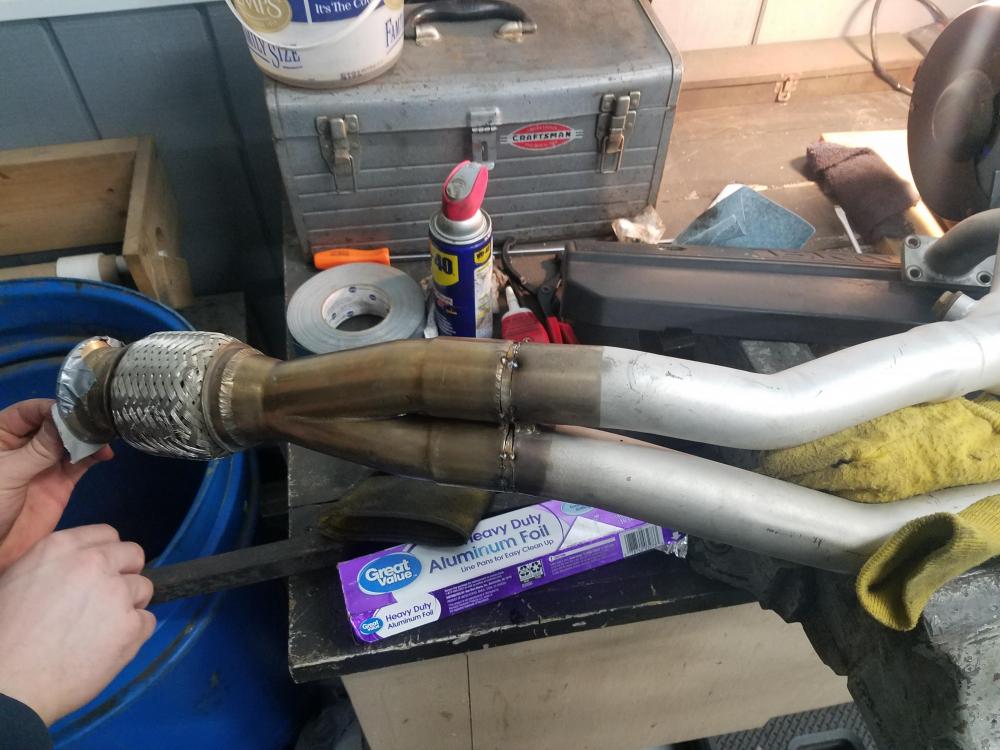
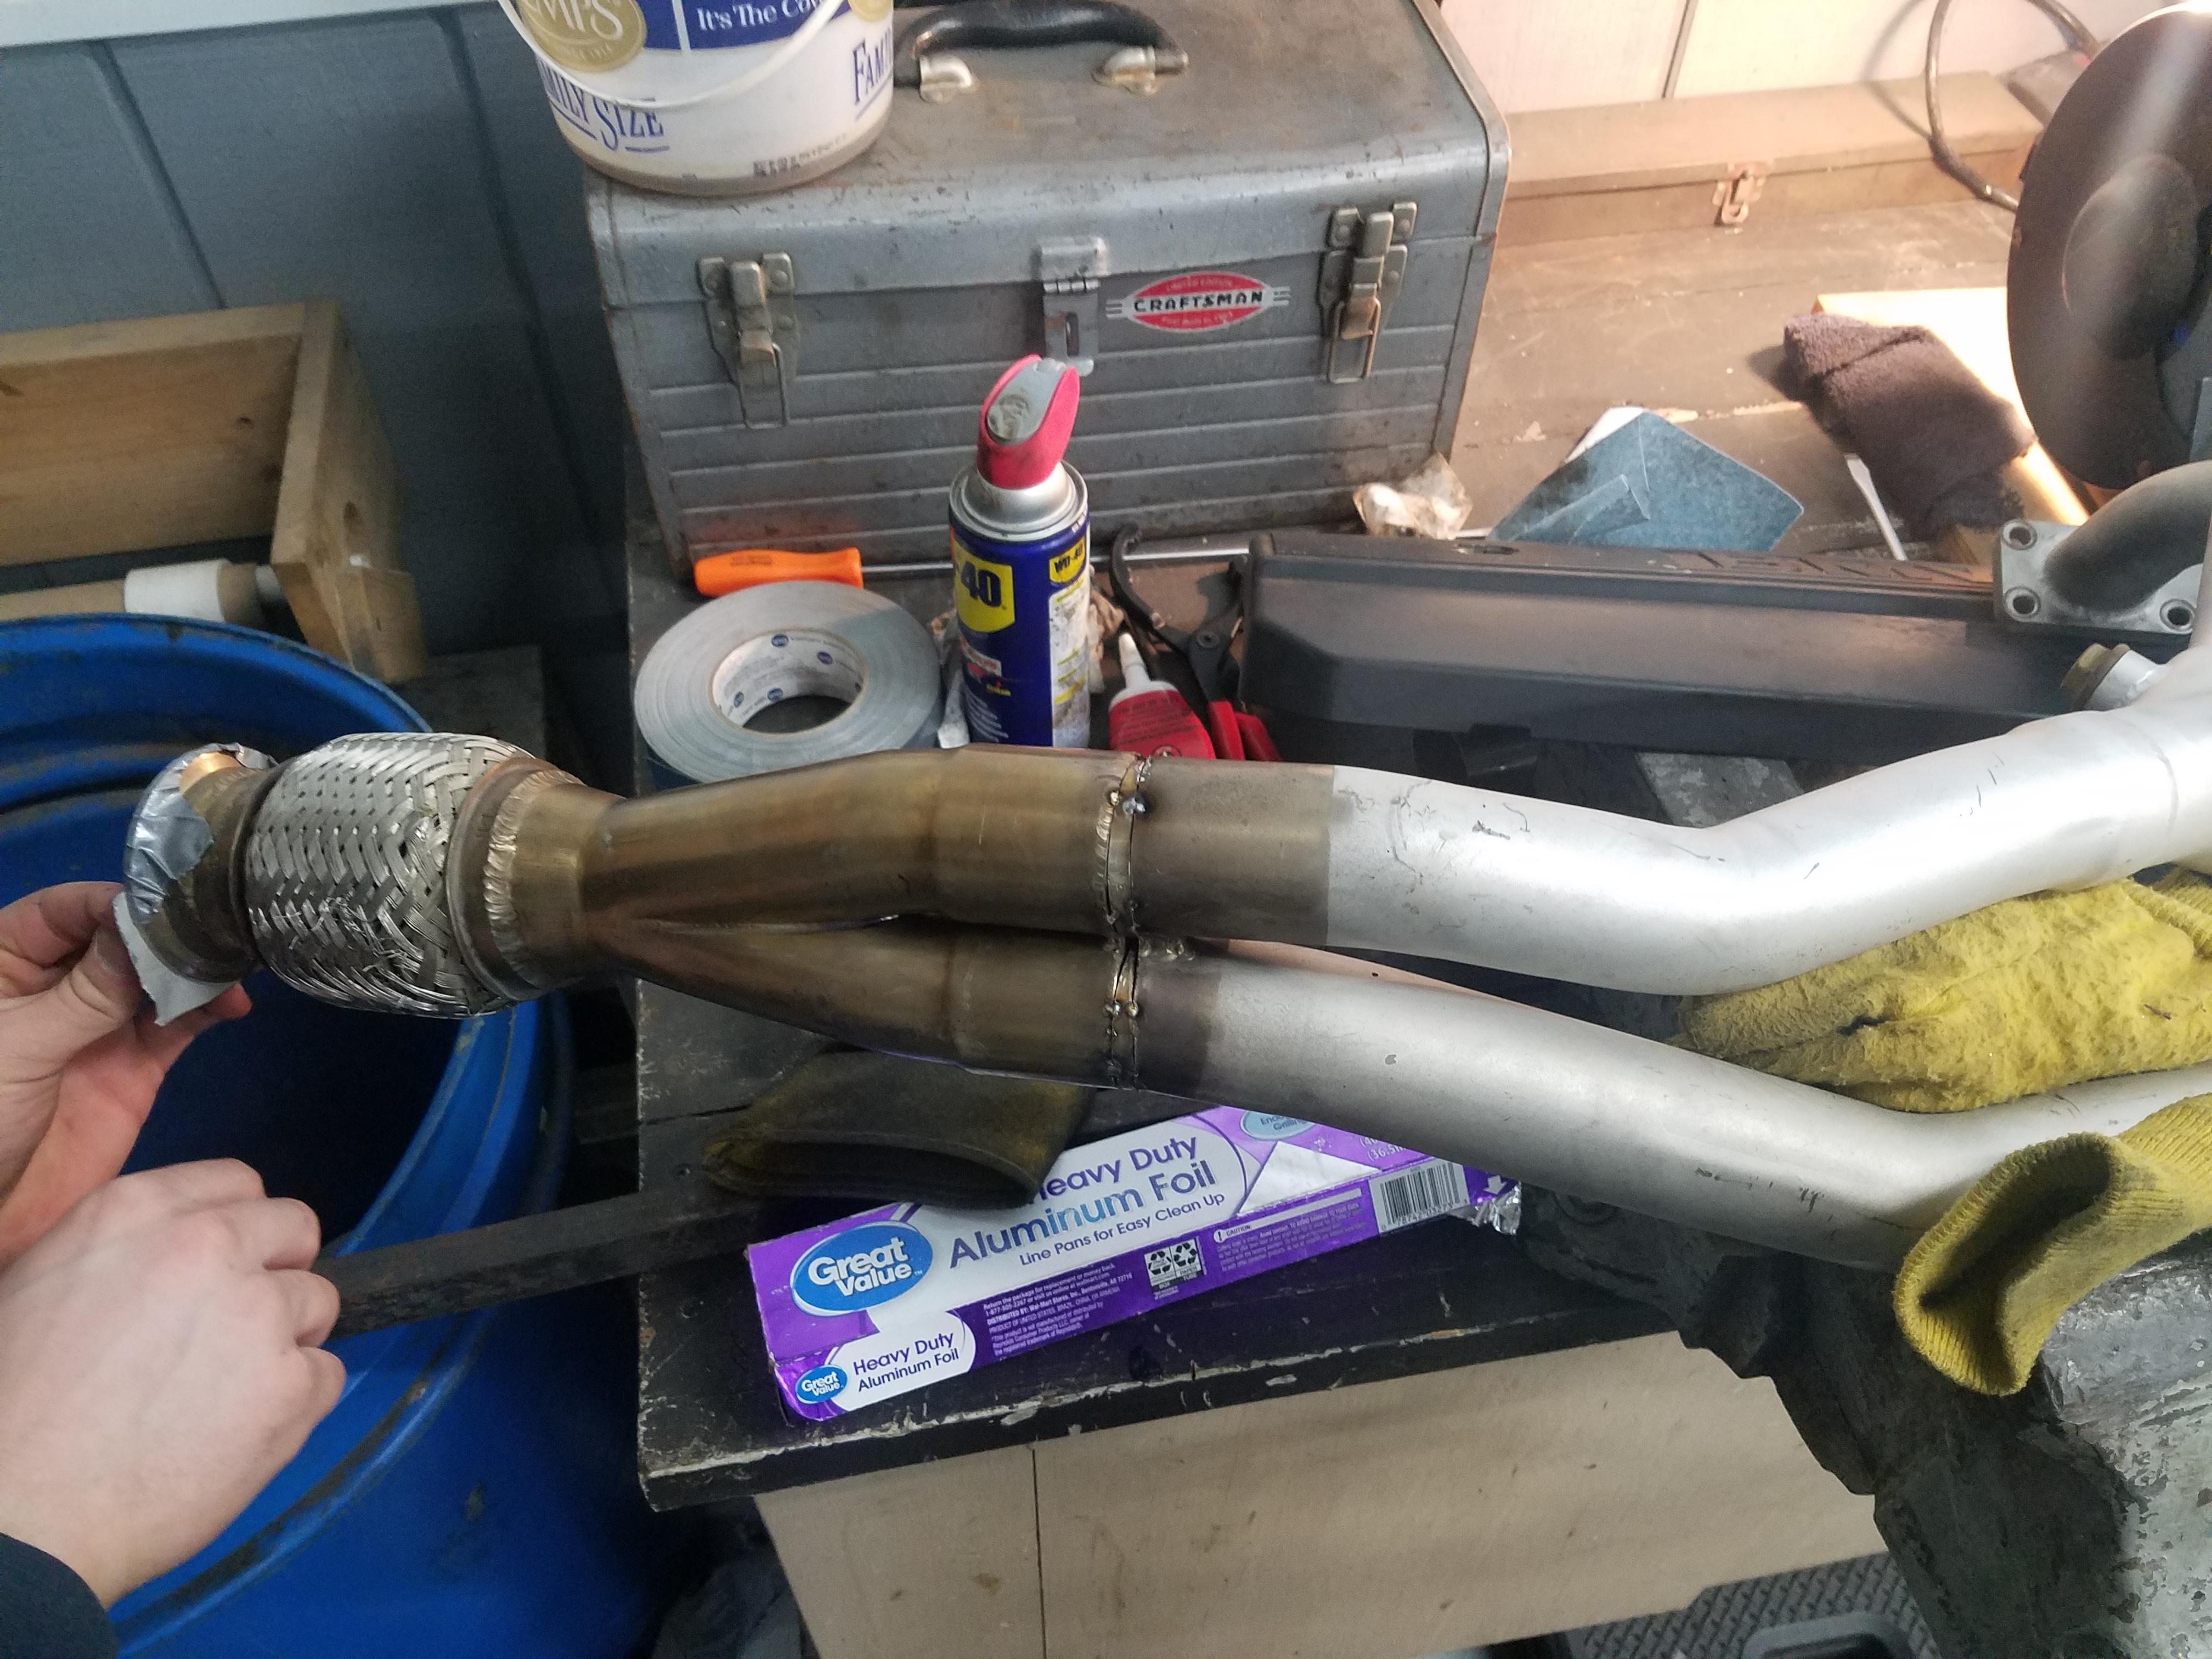
After going through and torquing everything in the rear end I moved on to the next big thing I needed to get out of the way, fixing the exhaust. After some cutting of the y-pipe my buddy stopped by and fab'd up some small pie cuts to raise it and then tacked them in place.
Once that was secured I got the fluids drained and everything disconnected on the motor to be pulled.

raised the motor enough to get the headers pulled with ease. Threw em on the bench and welded em back up.
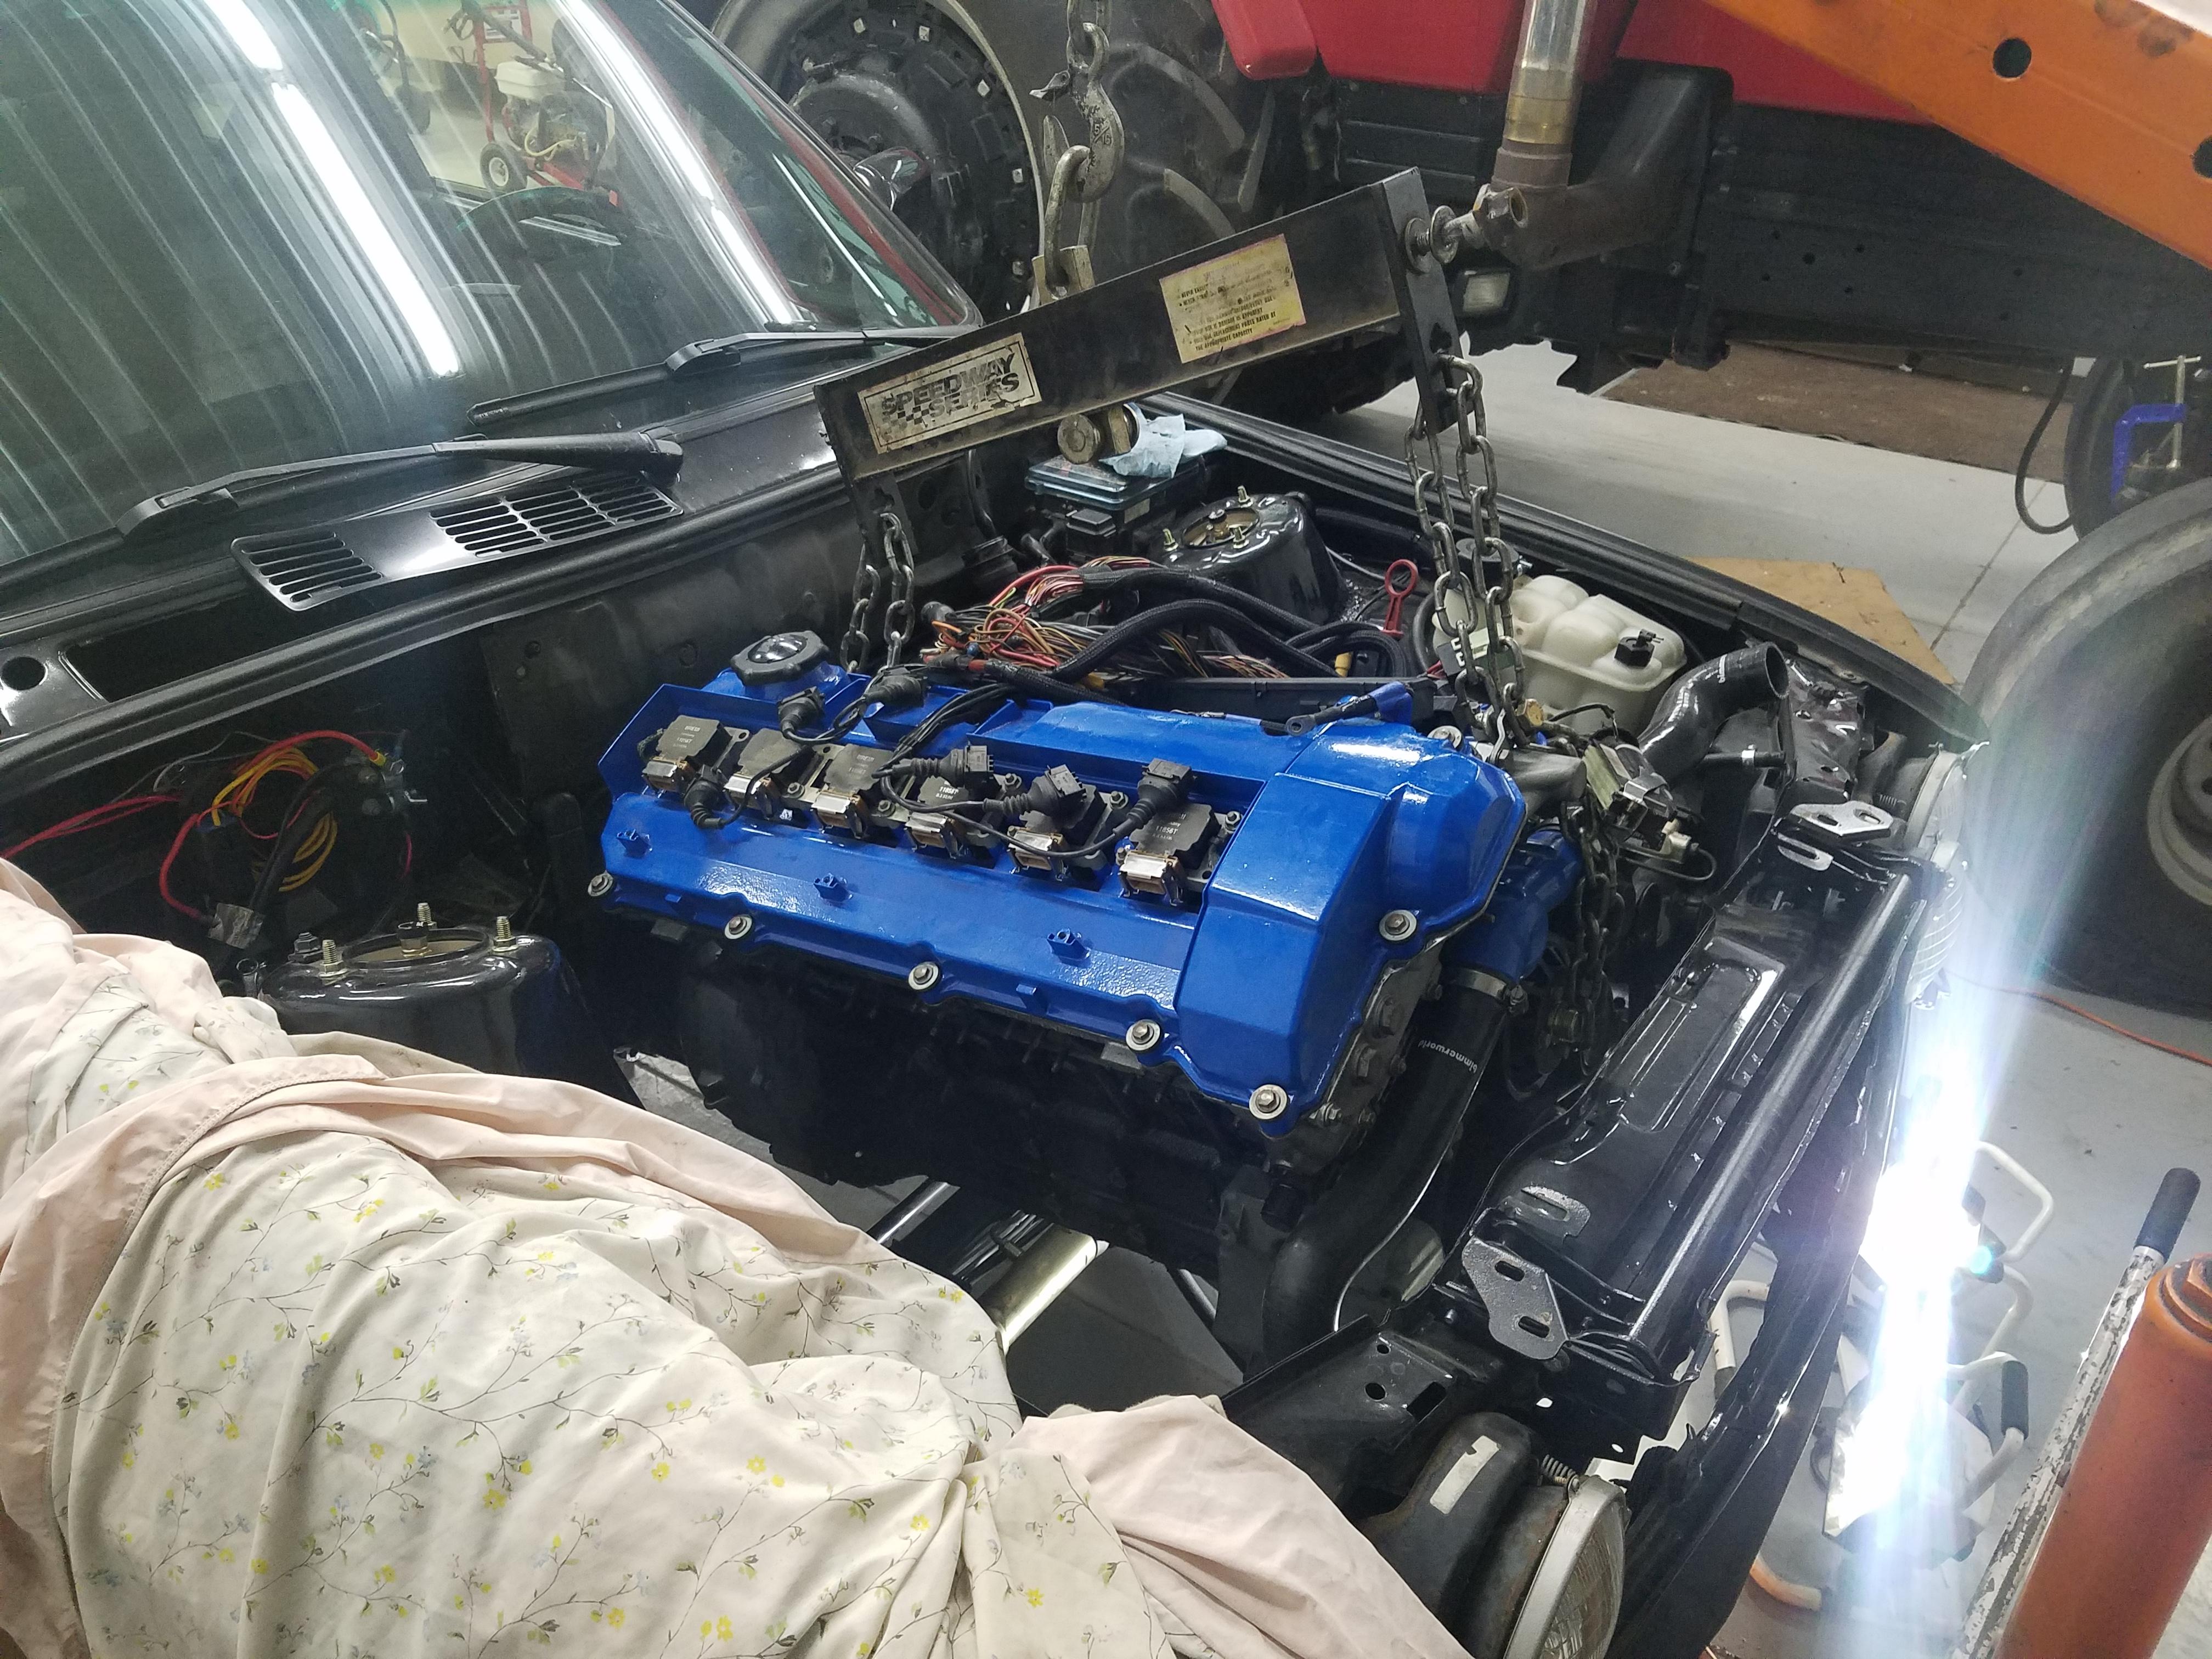
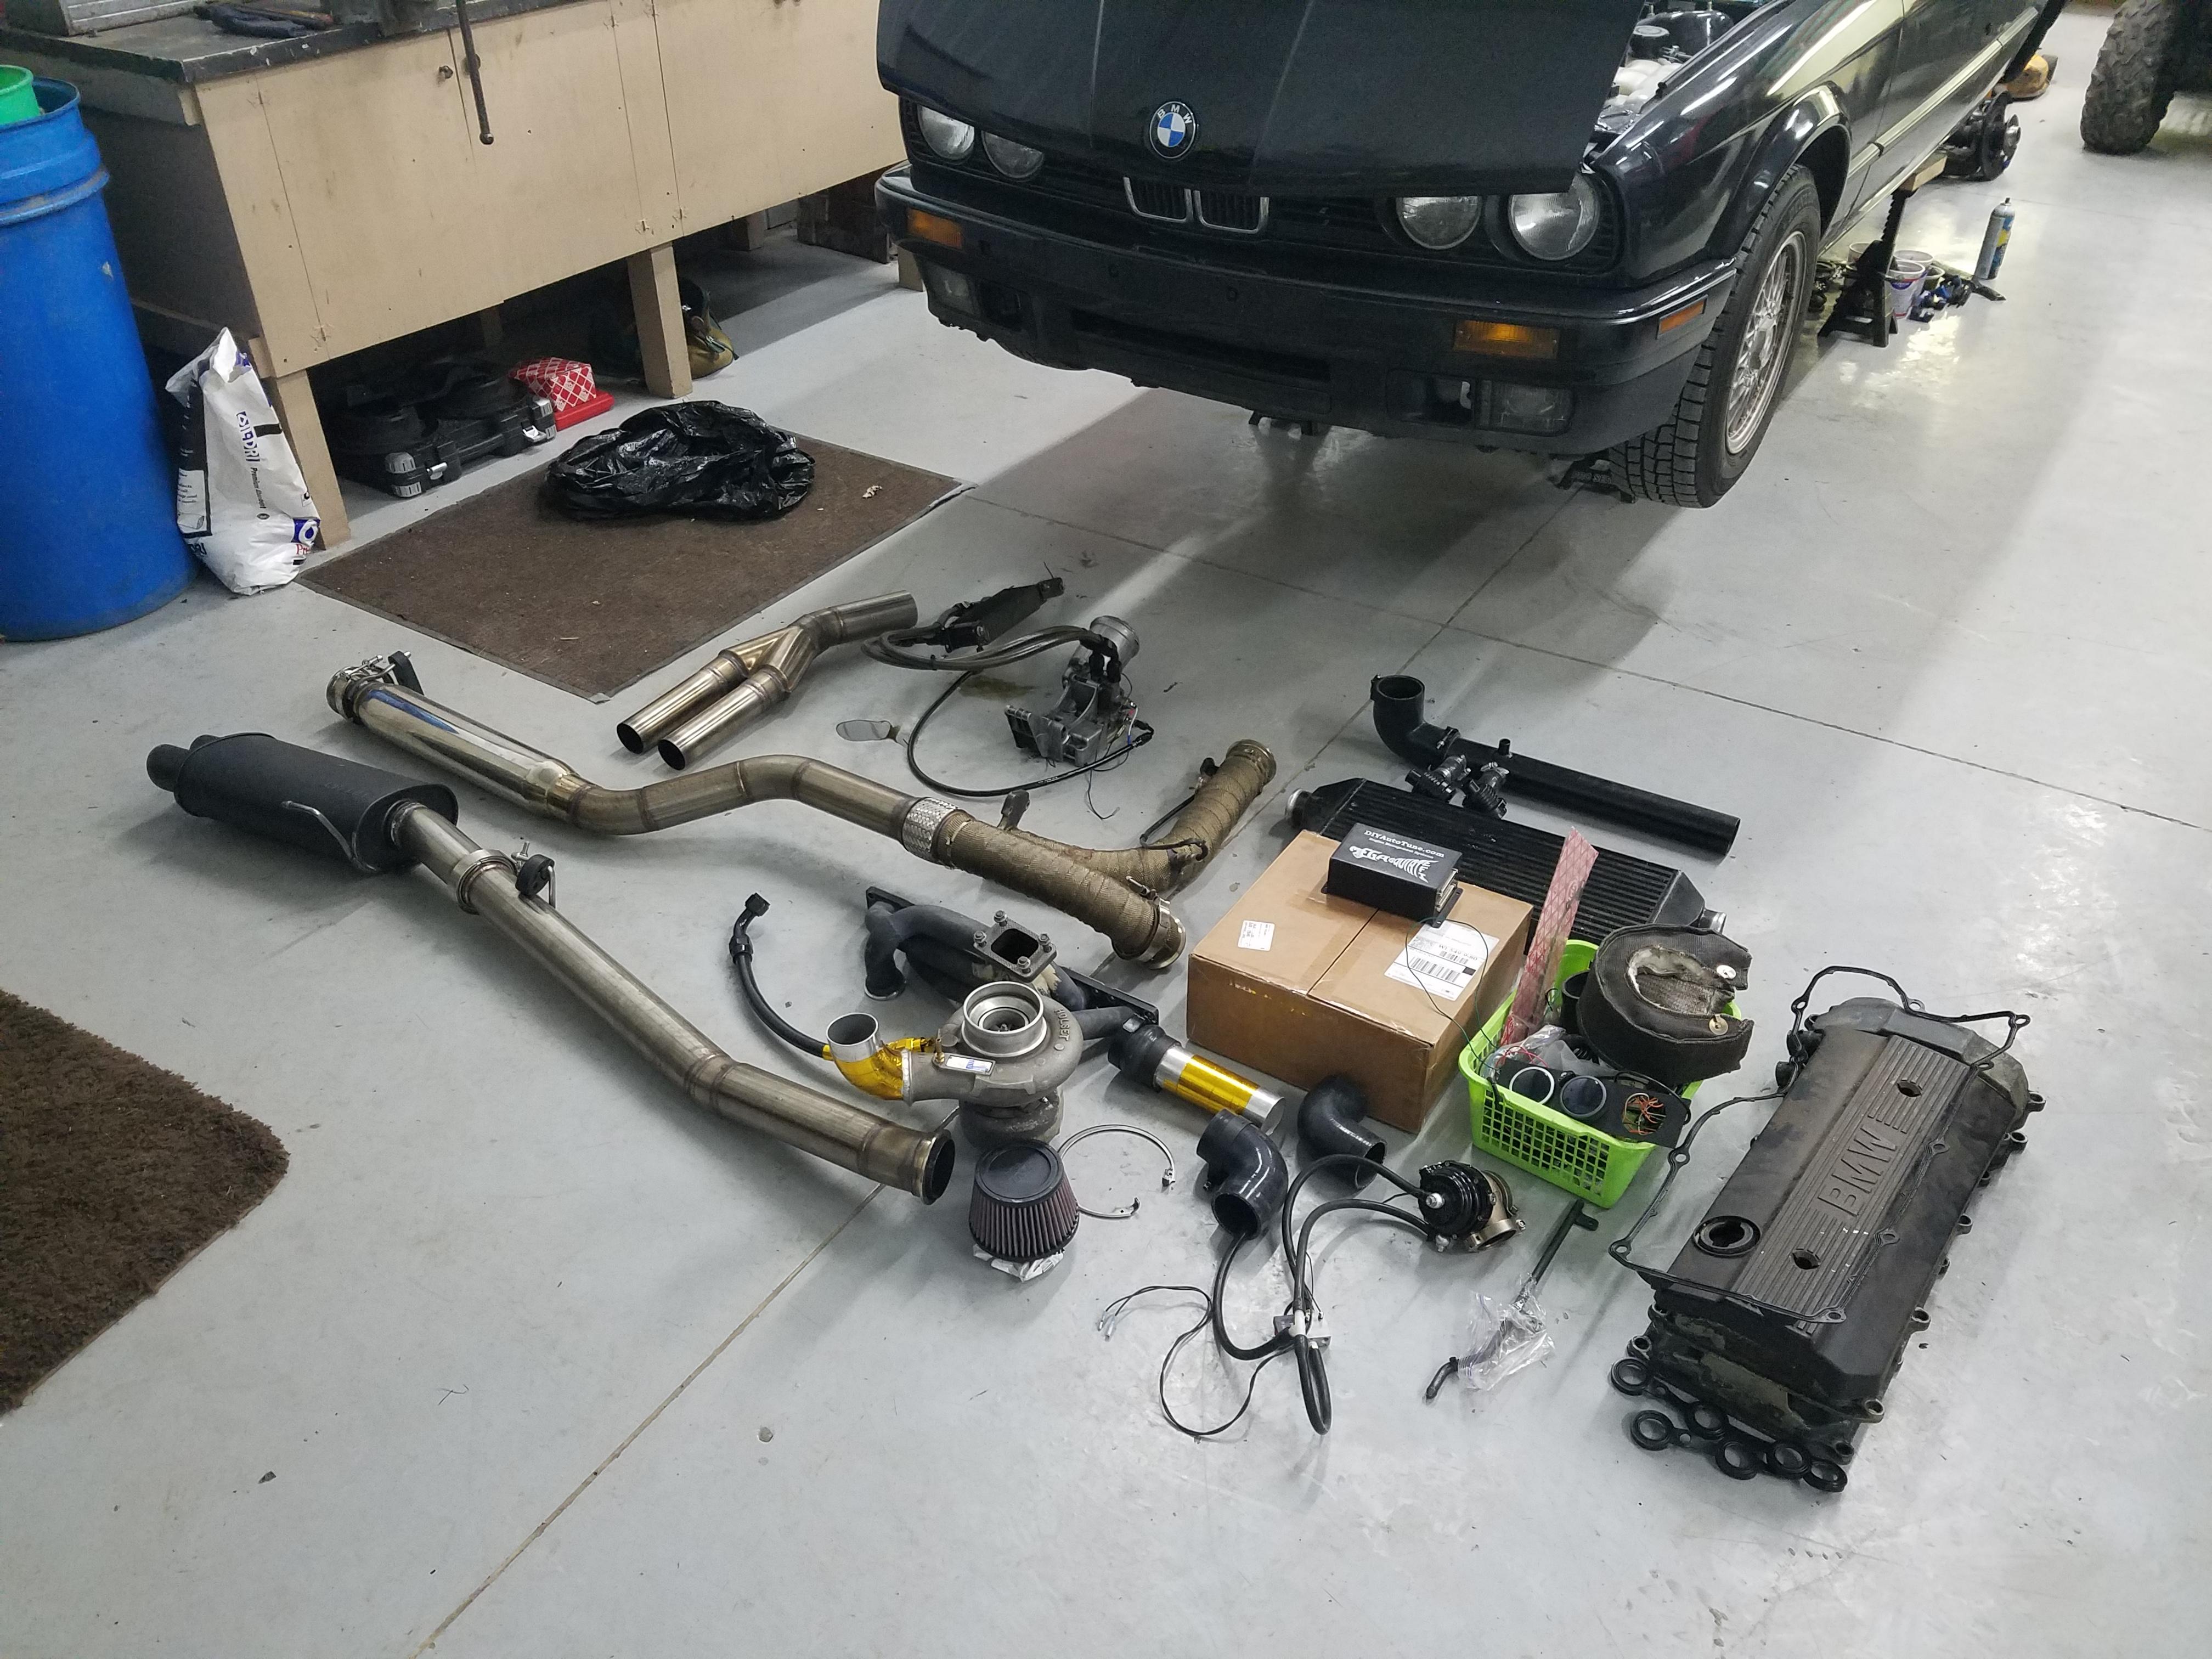
With the exhaust finished up and soon off to its new owner I can now turn my attention to getting the motor pulled and prepped.
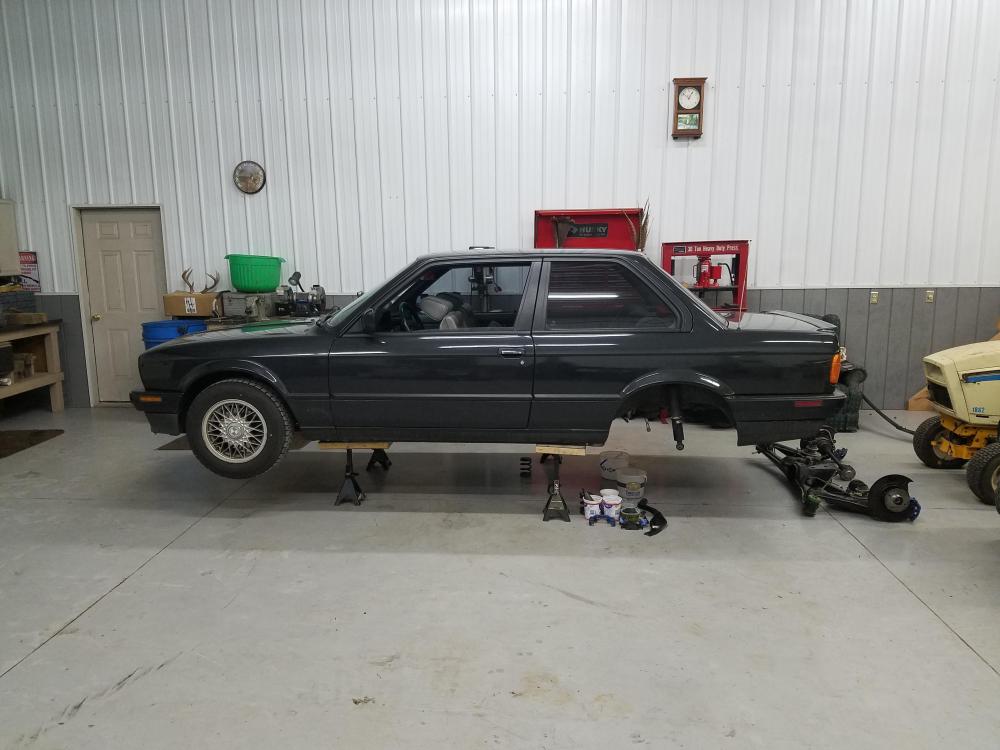
After I got out of class today, I spent a couple hours over at the shop getting the motor pulled completely out of the car. Ya, that's all I got done.

A few things on the to do list before she goes back in...
- Pull the valve cover and re-torque all the head studs
- Pull the oil pan off to weld in the fitting for the oil drain line as well as a baffle for the pick up
- Replace the s52 oil filter with s54 housing
- Pull the trans to replace the input shaft seal as well as inspect the clutch
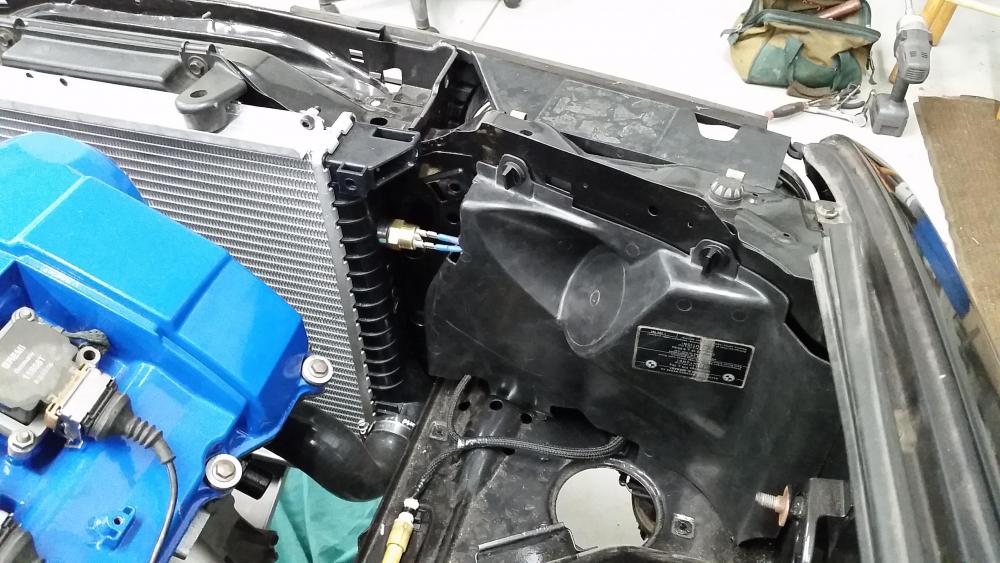
- Mount the turbo manifold and turbo
Also will need to do a bit of trimming to the battery tray in the engine bay to make room for the down pipe.
Progress is on hold tell this weekend where my goal is to hopefully get a few of these things done.
Stay tuned!
-
About time for another update...
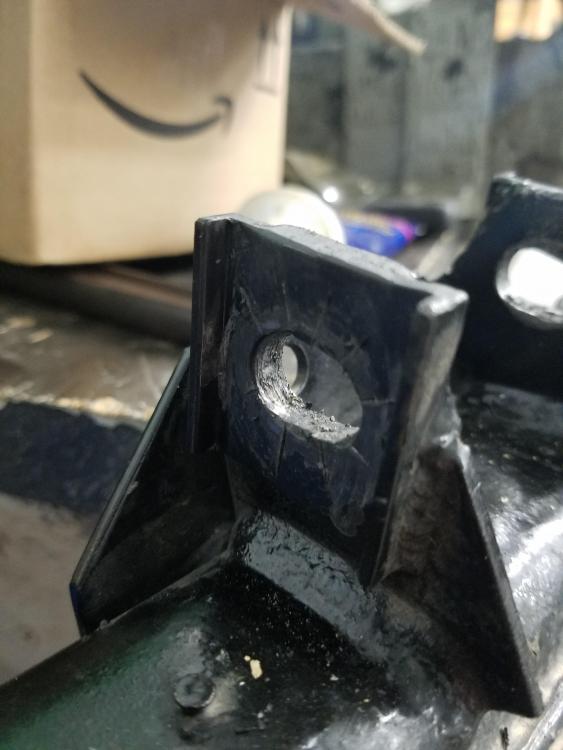
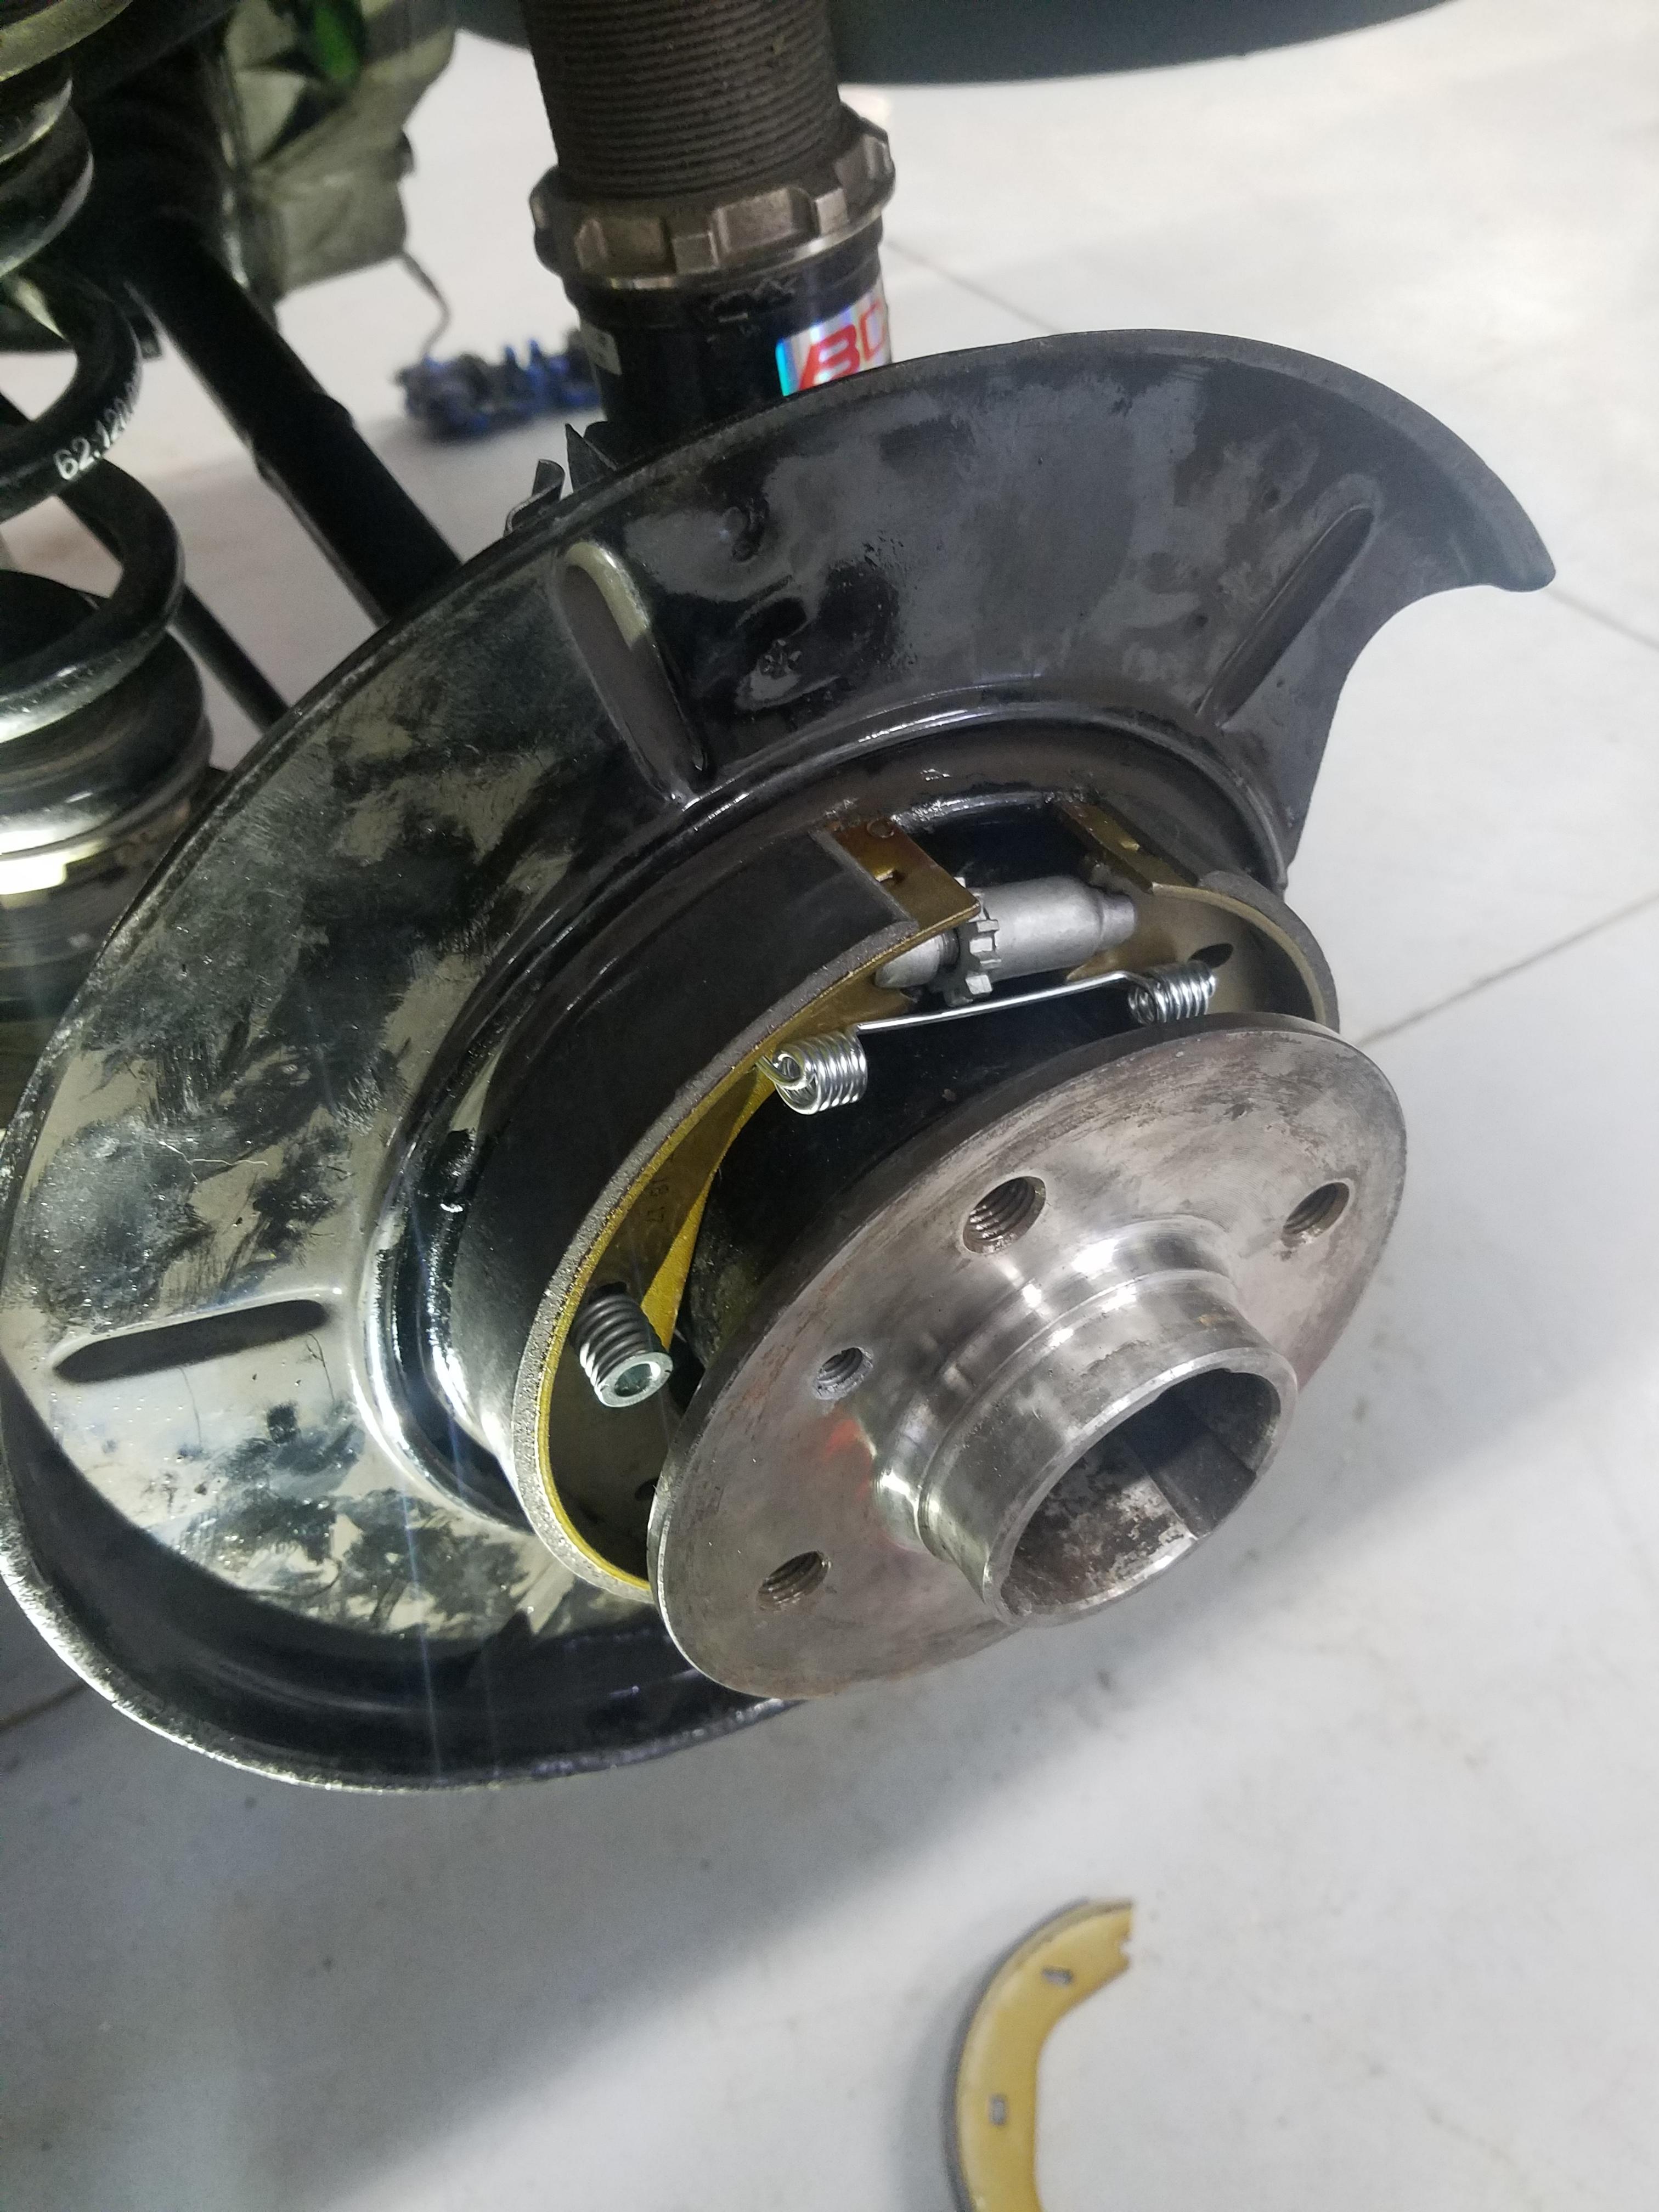
E brake dust plates are fixed. Originally my plan was to pull the wheel bearings and hub in order to replace with new until a friend a mine came up with an idea for just reinforcing the holes in order to save myself a lot of work of pressing in new bearings and what not. Simply just cut out 4 pieces with 14 gauge stainless to the shape of the inner con-caved area and cut a new shape for the holes where the pins come through. Welded them in and re-painted the area with por-15.
Before re-attaching the trailing arms I went ahead and pulled the RTAB's and re lubed them all.

Keep them nice and quite.
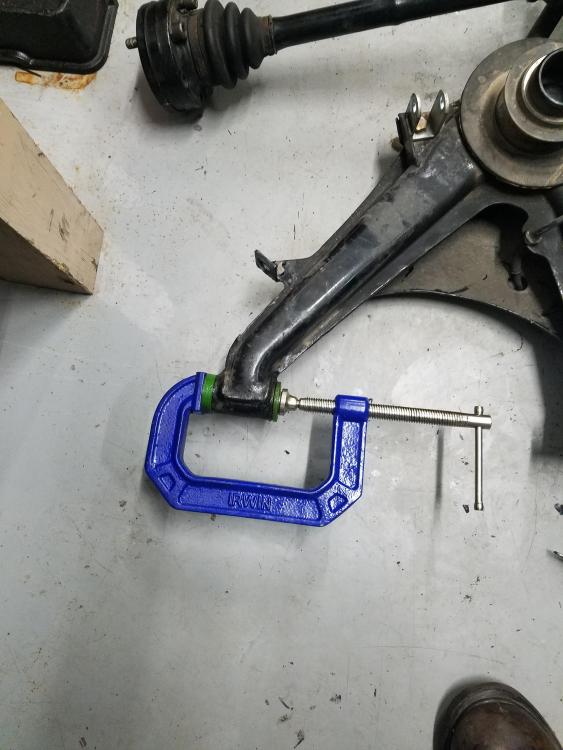
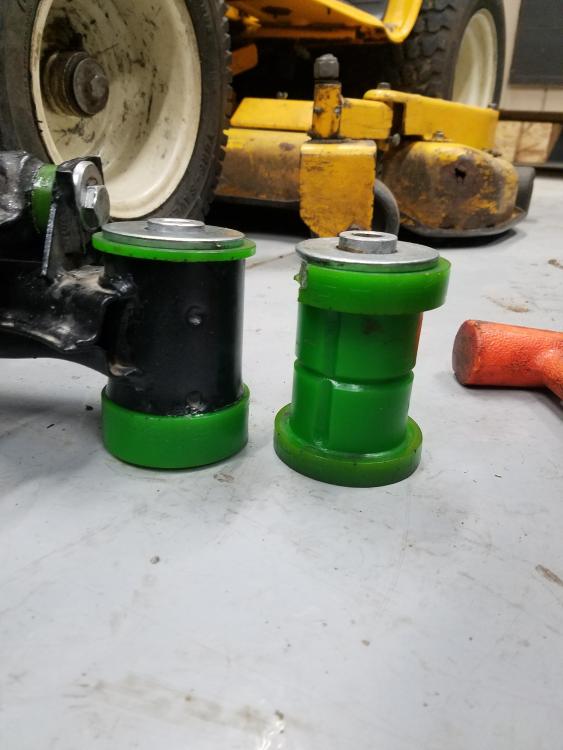
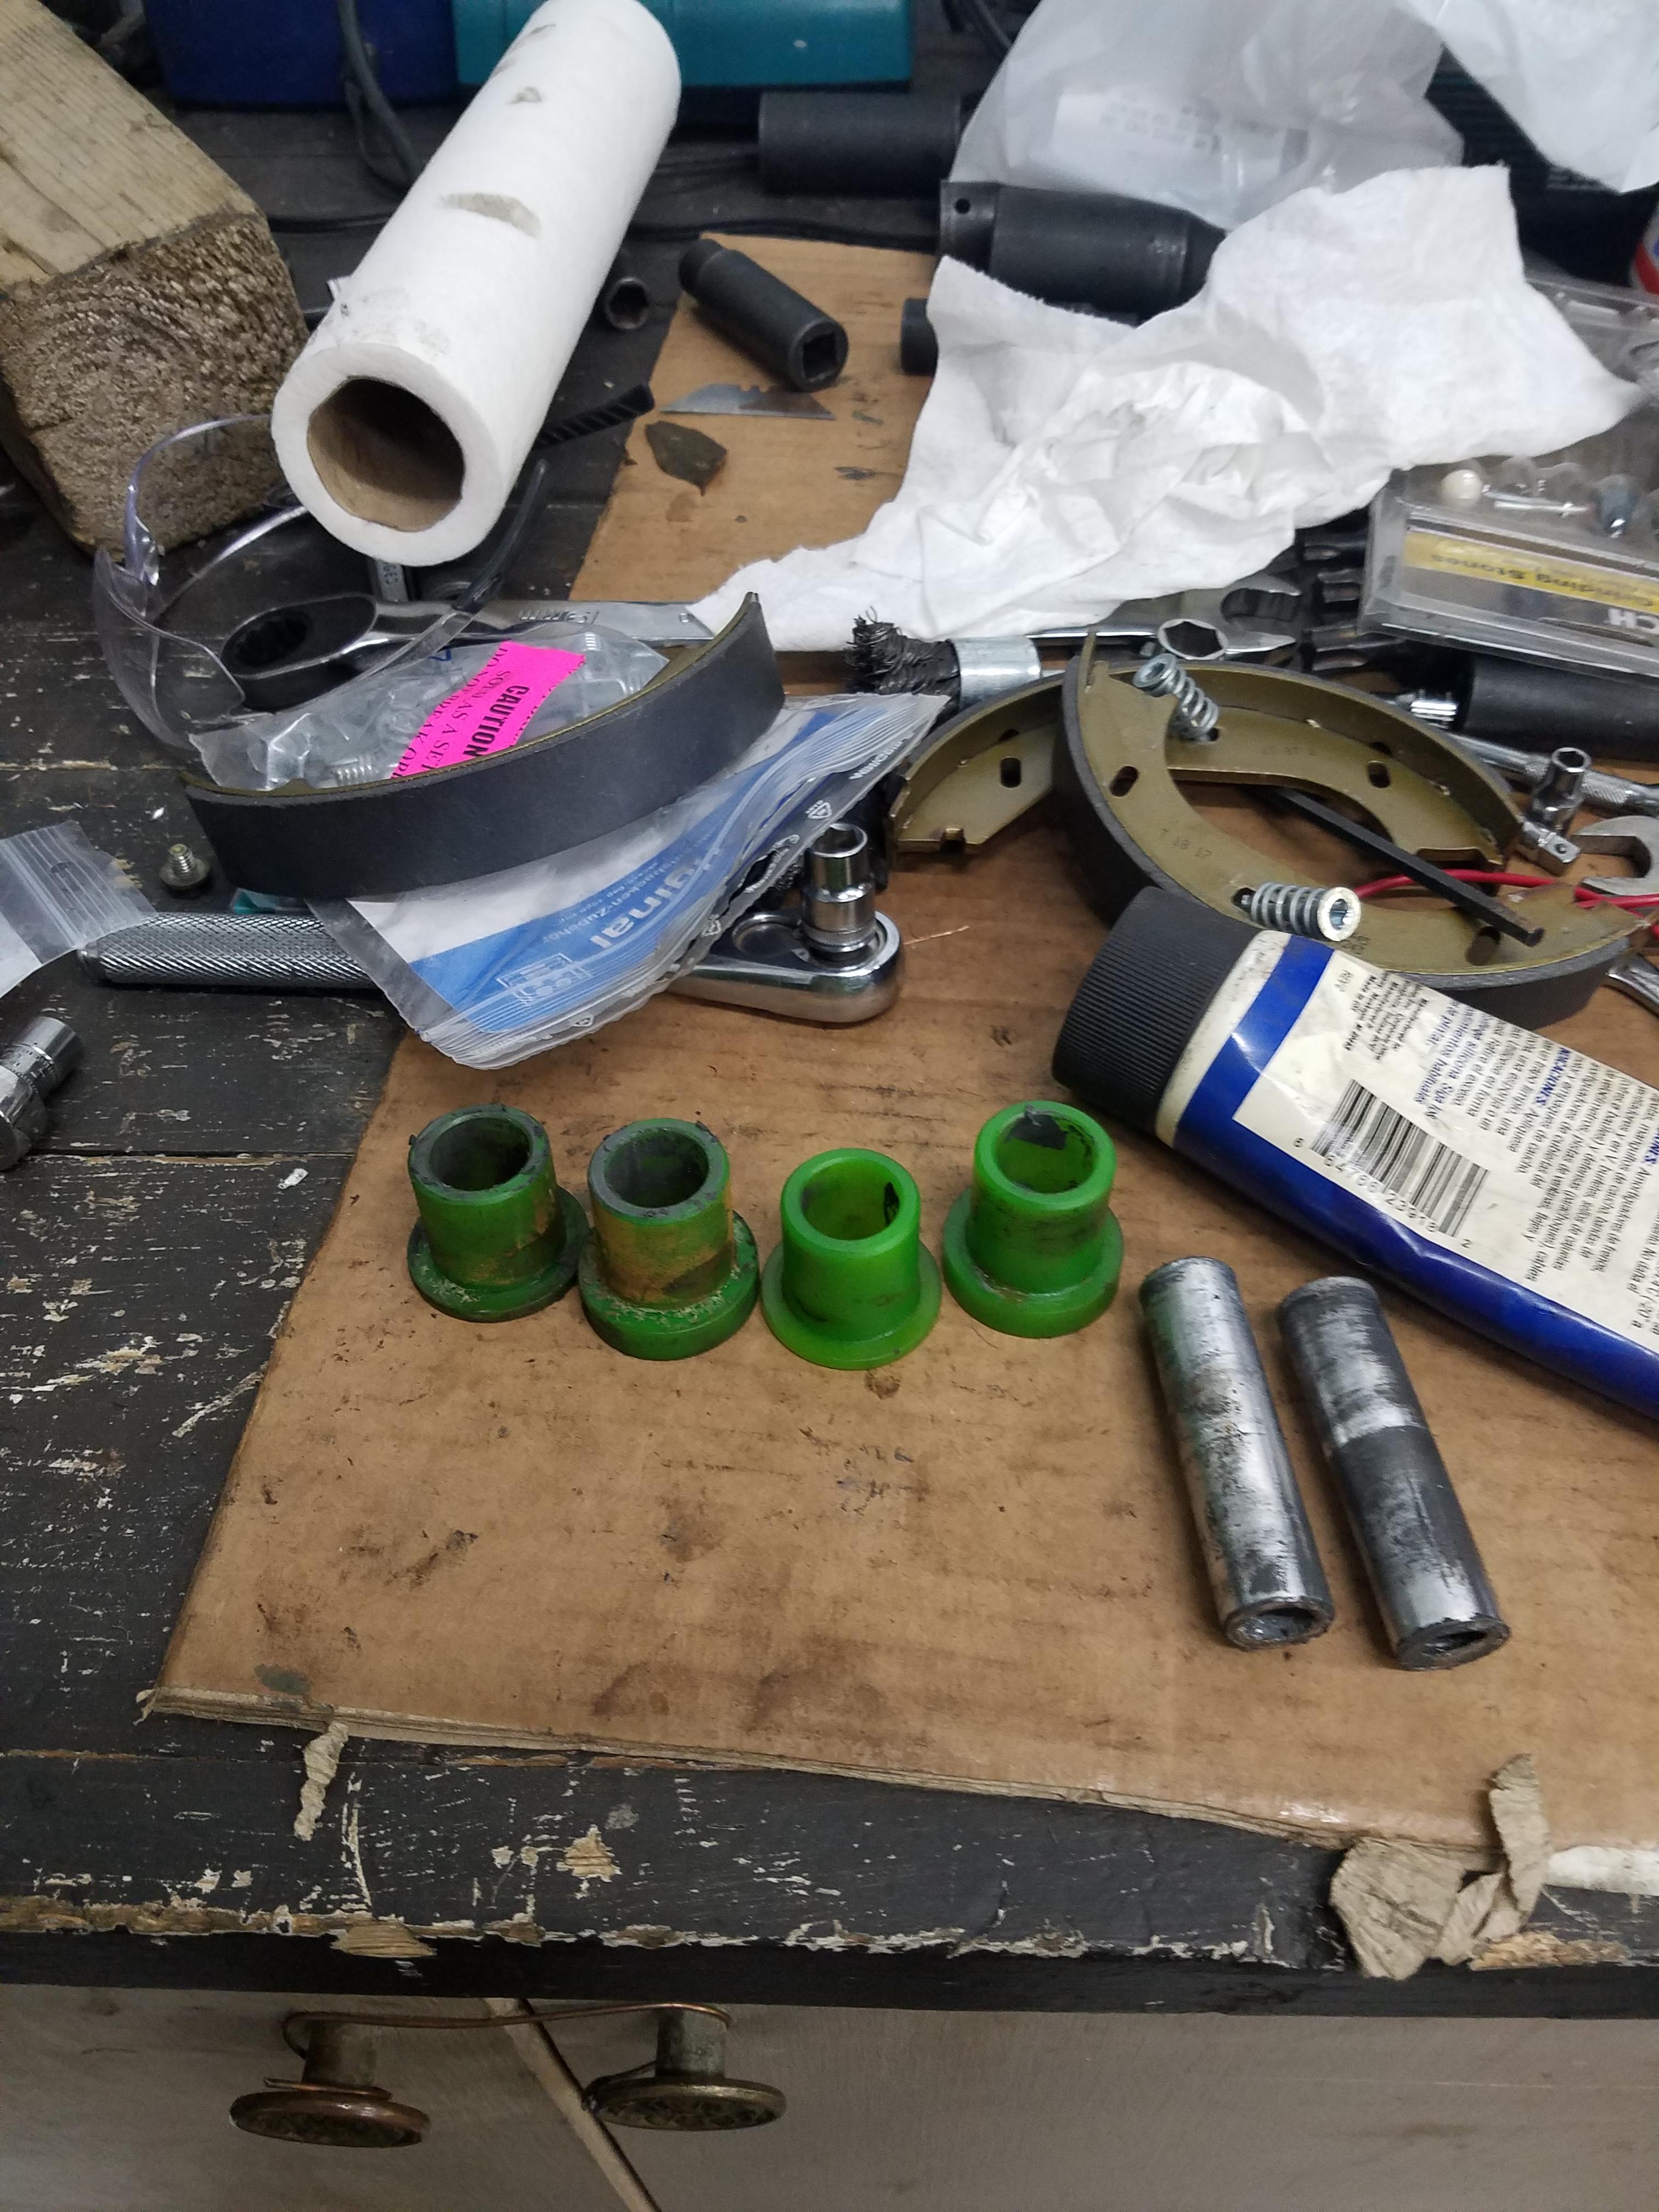
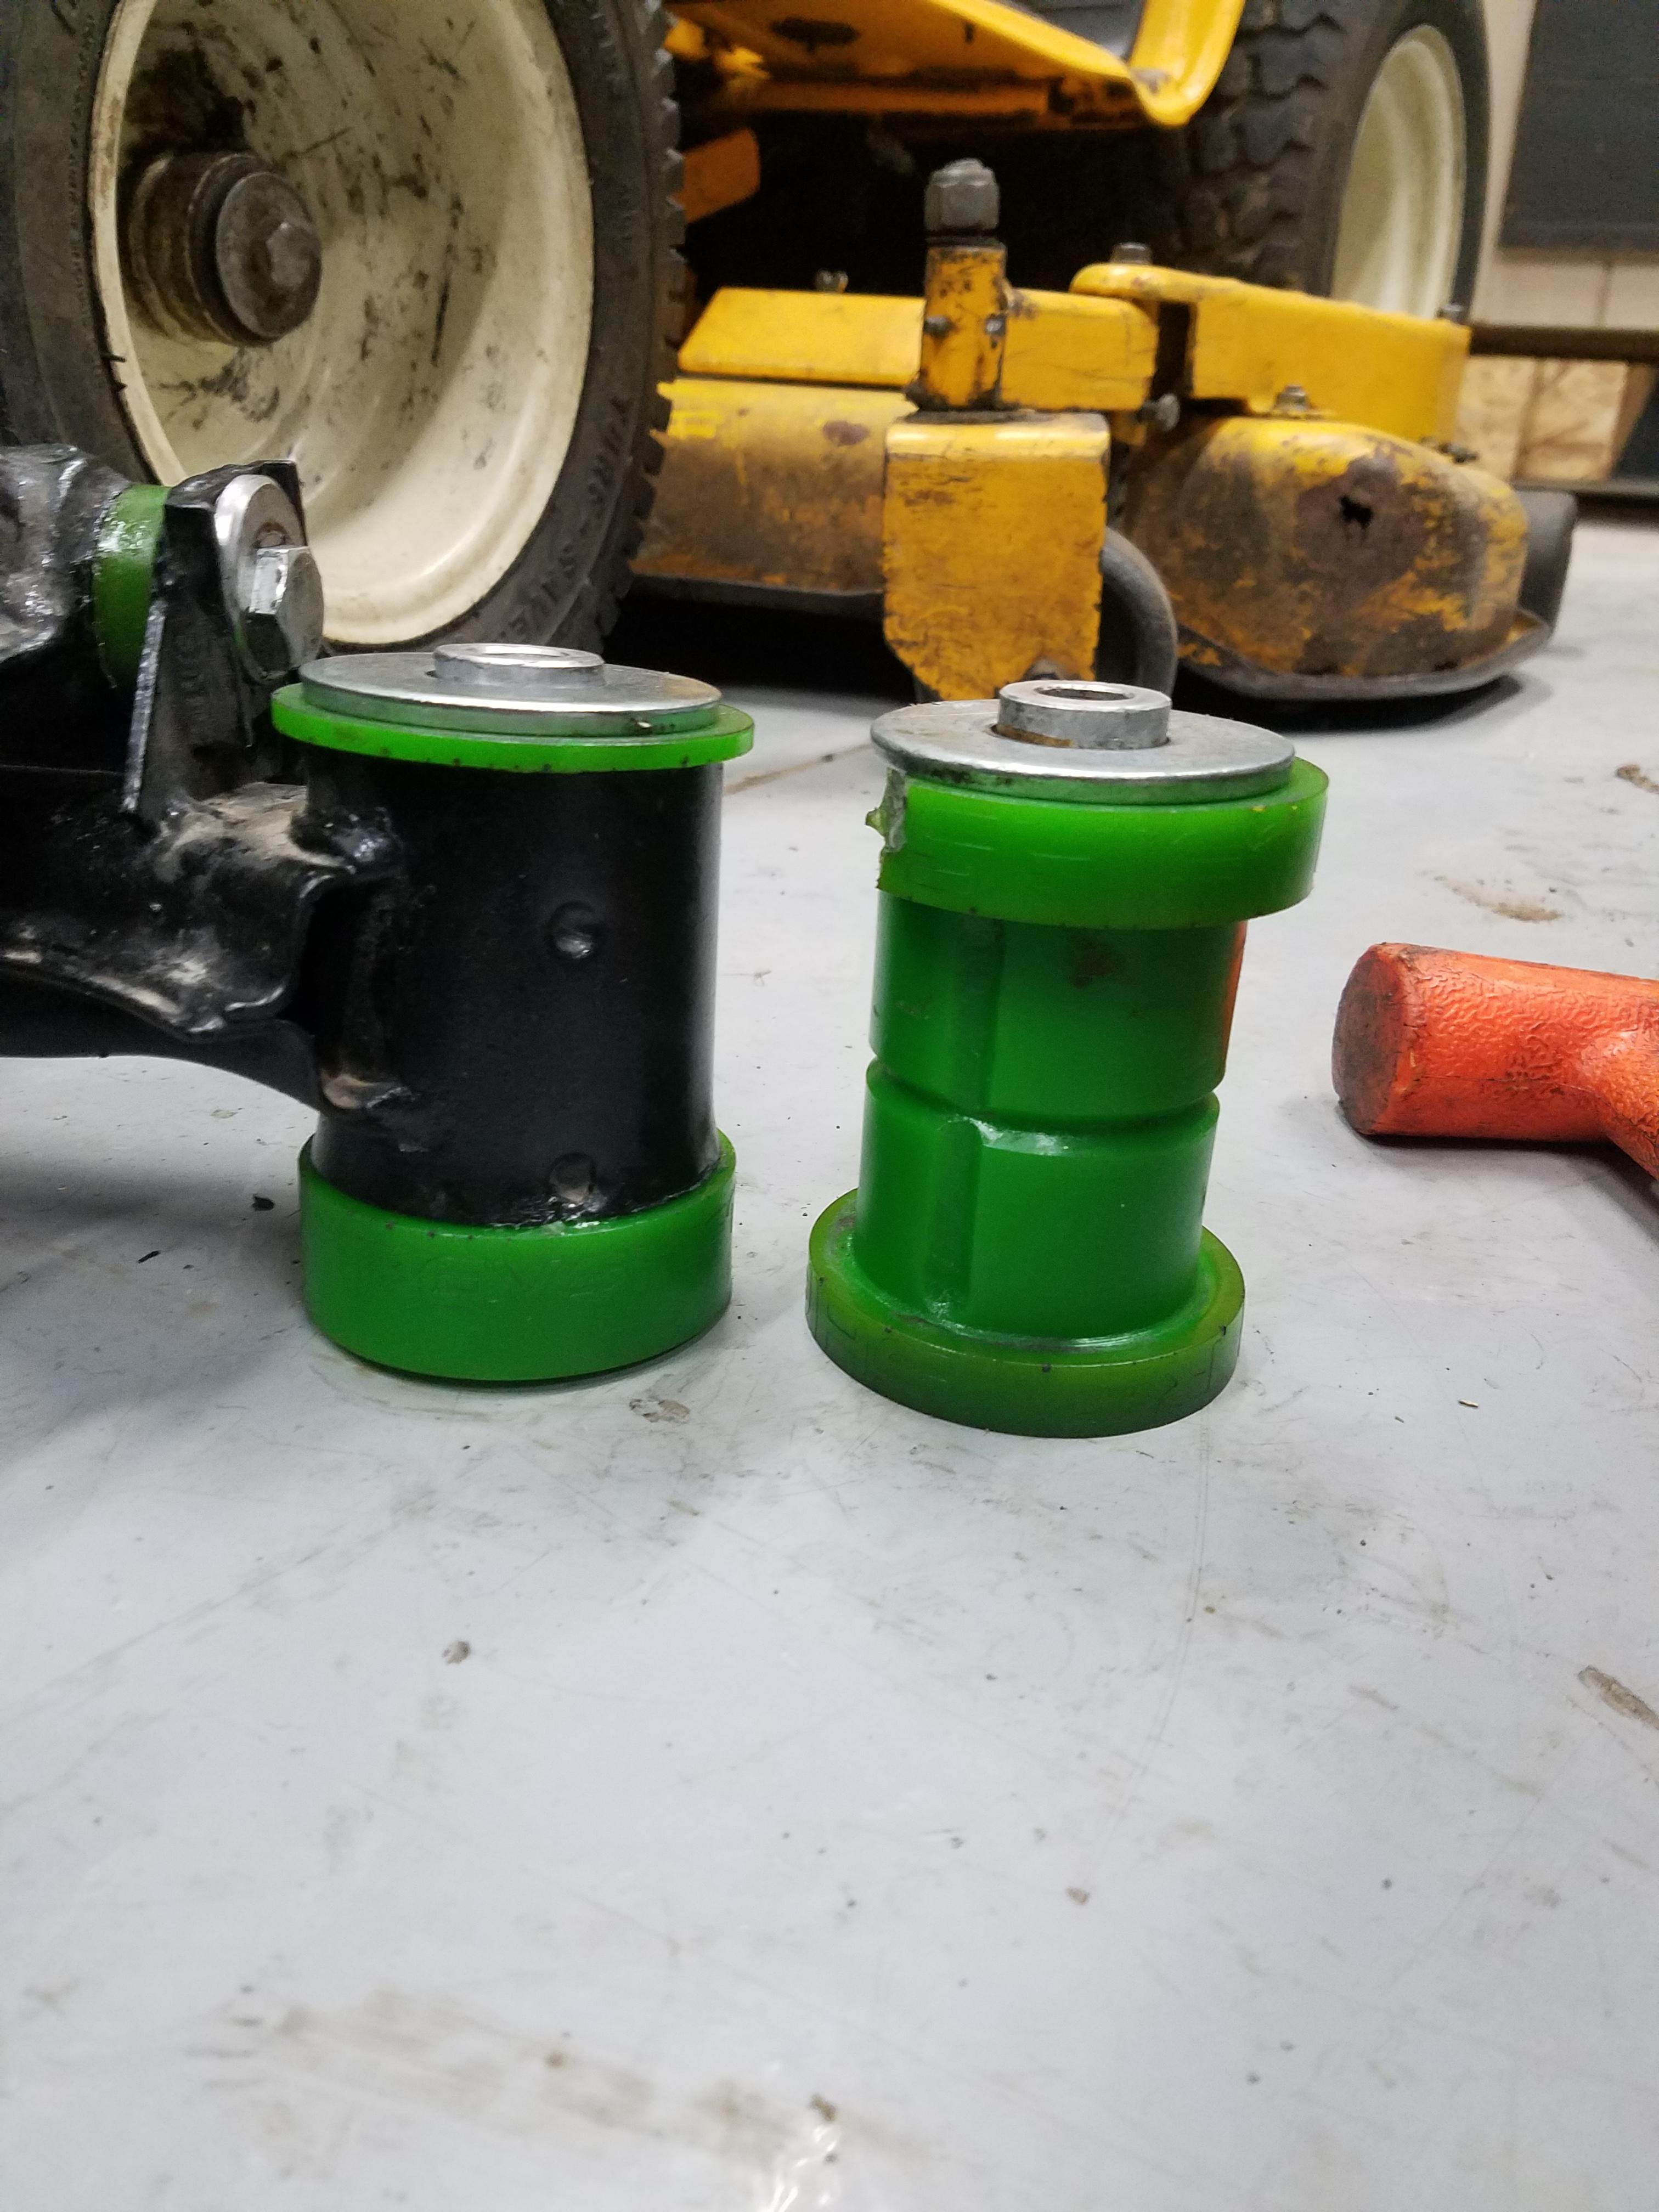
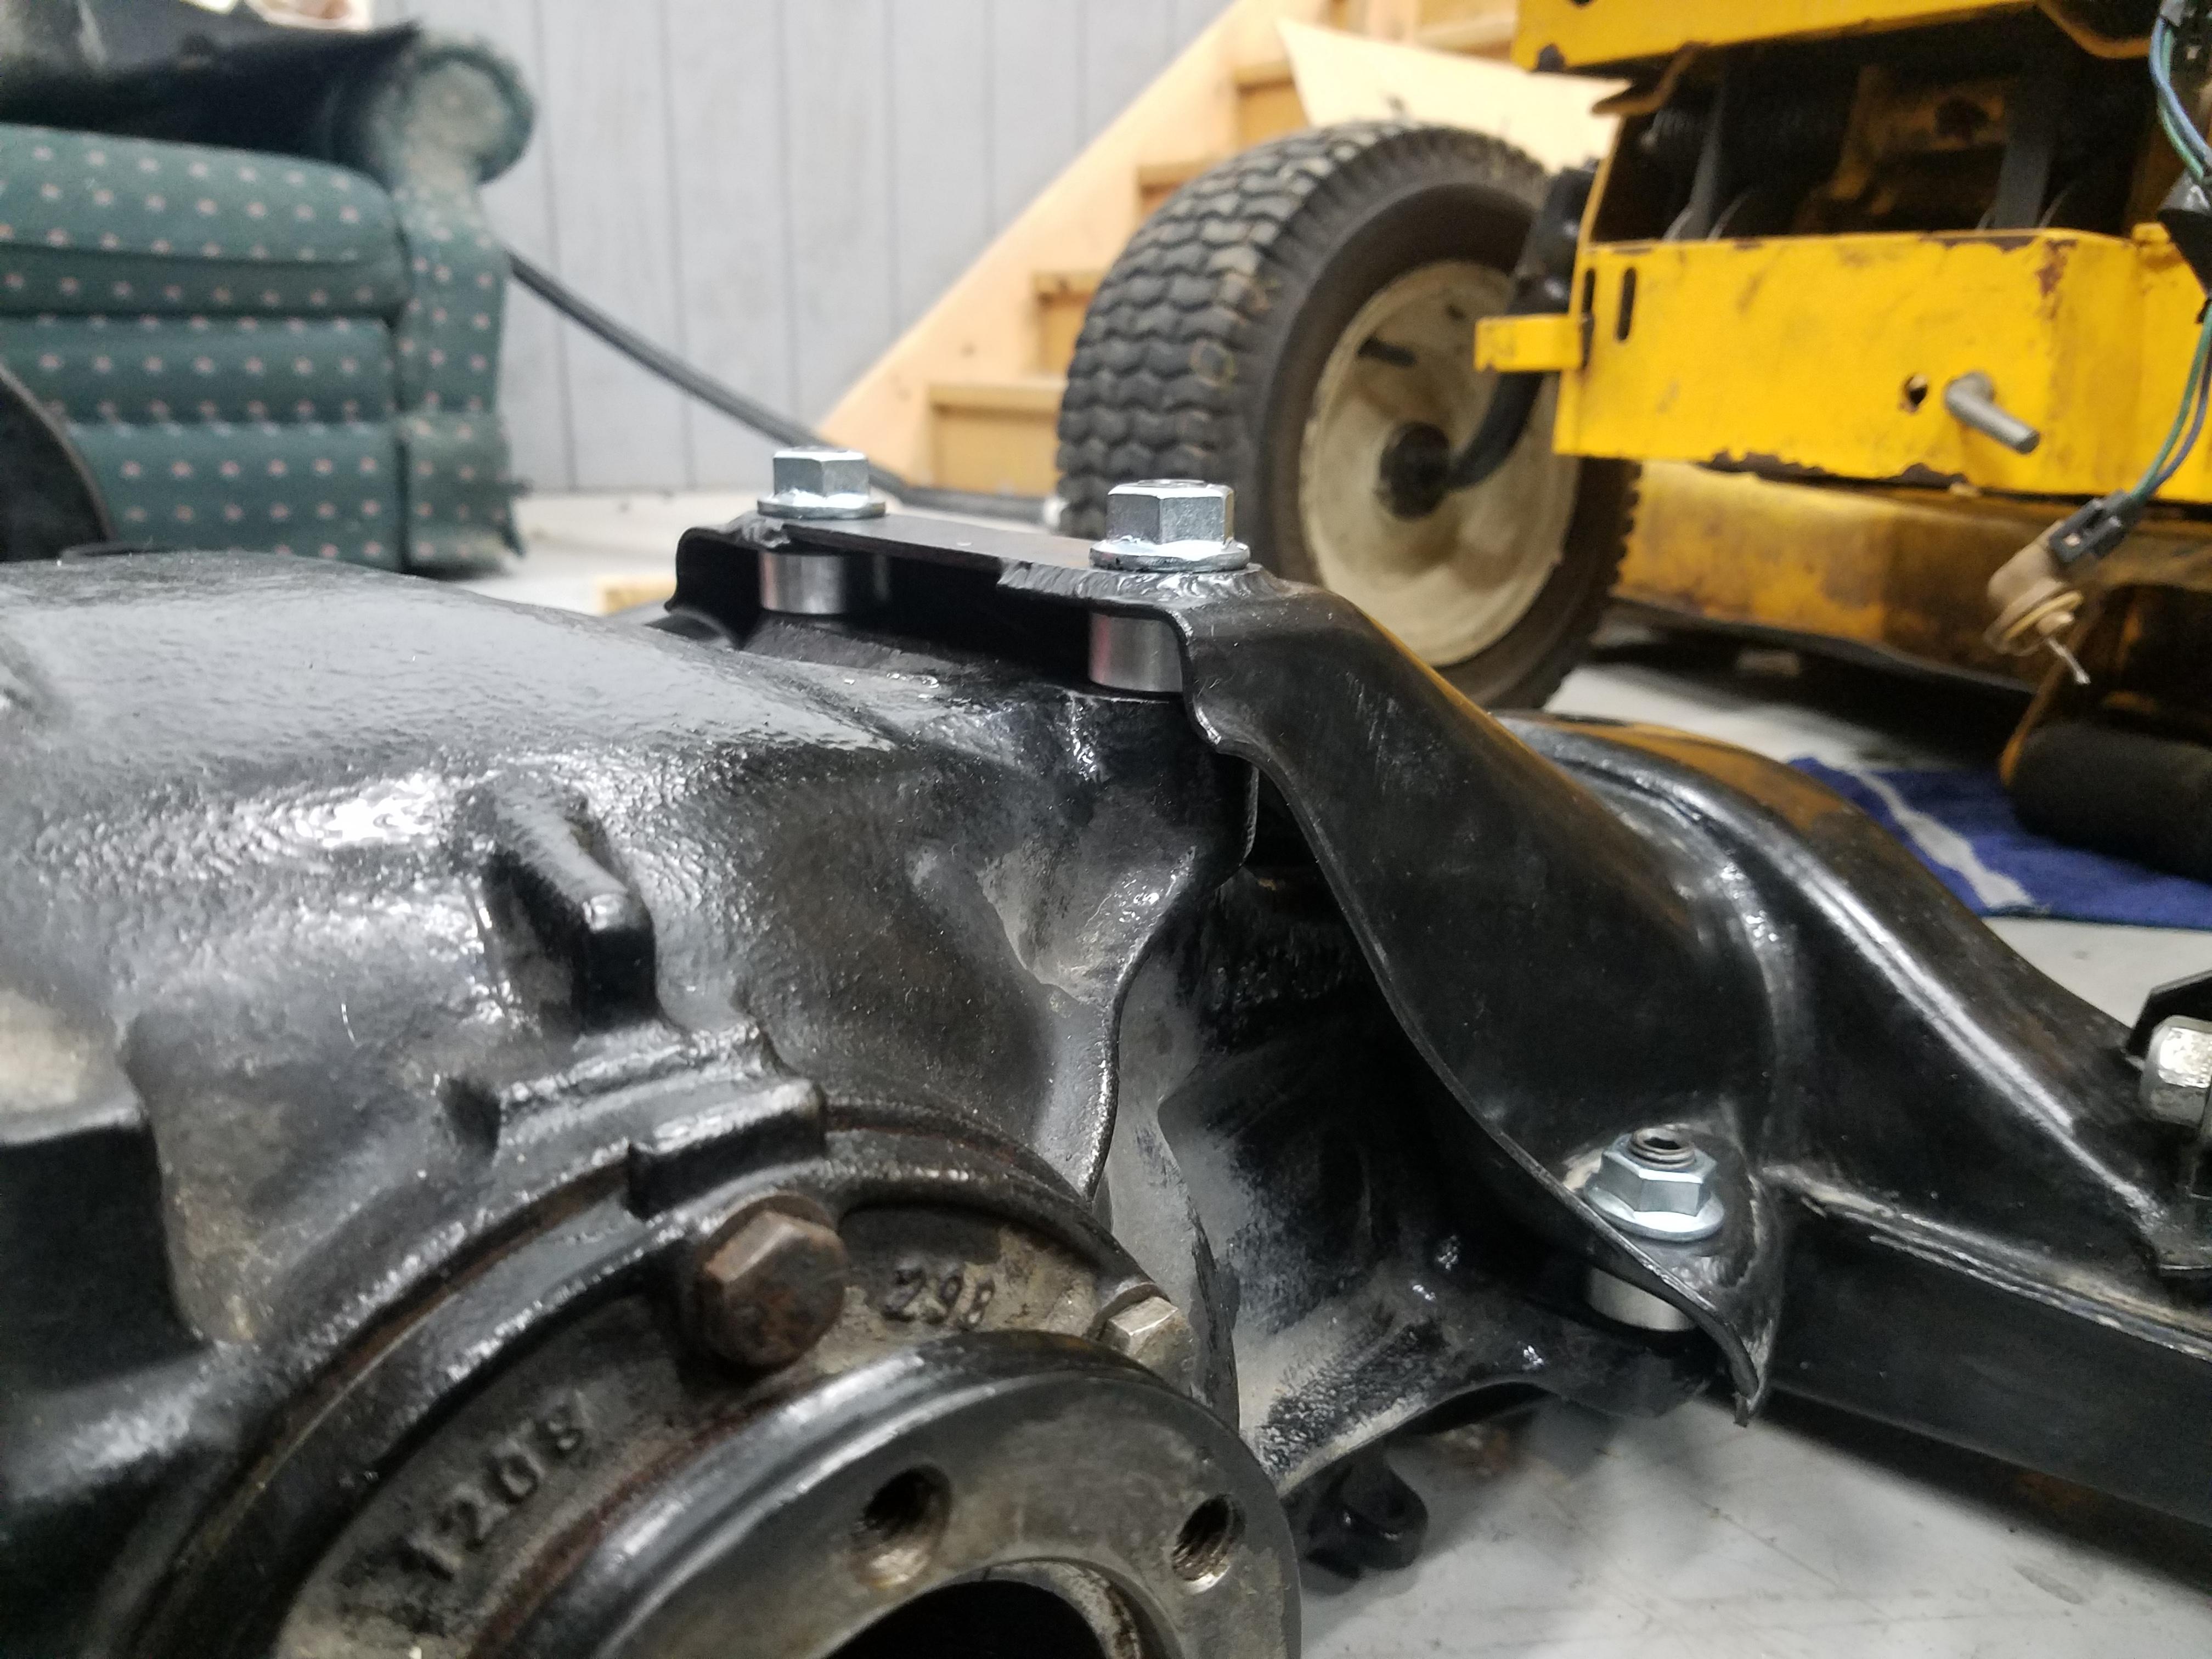
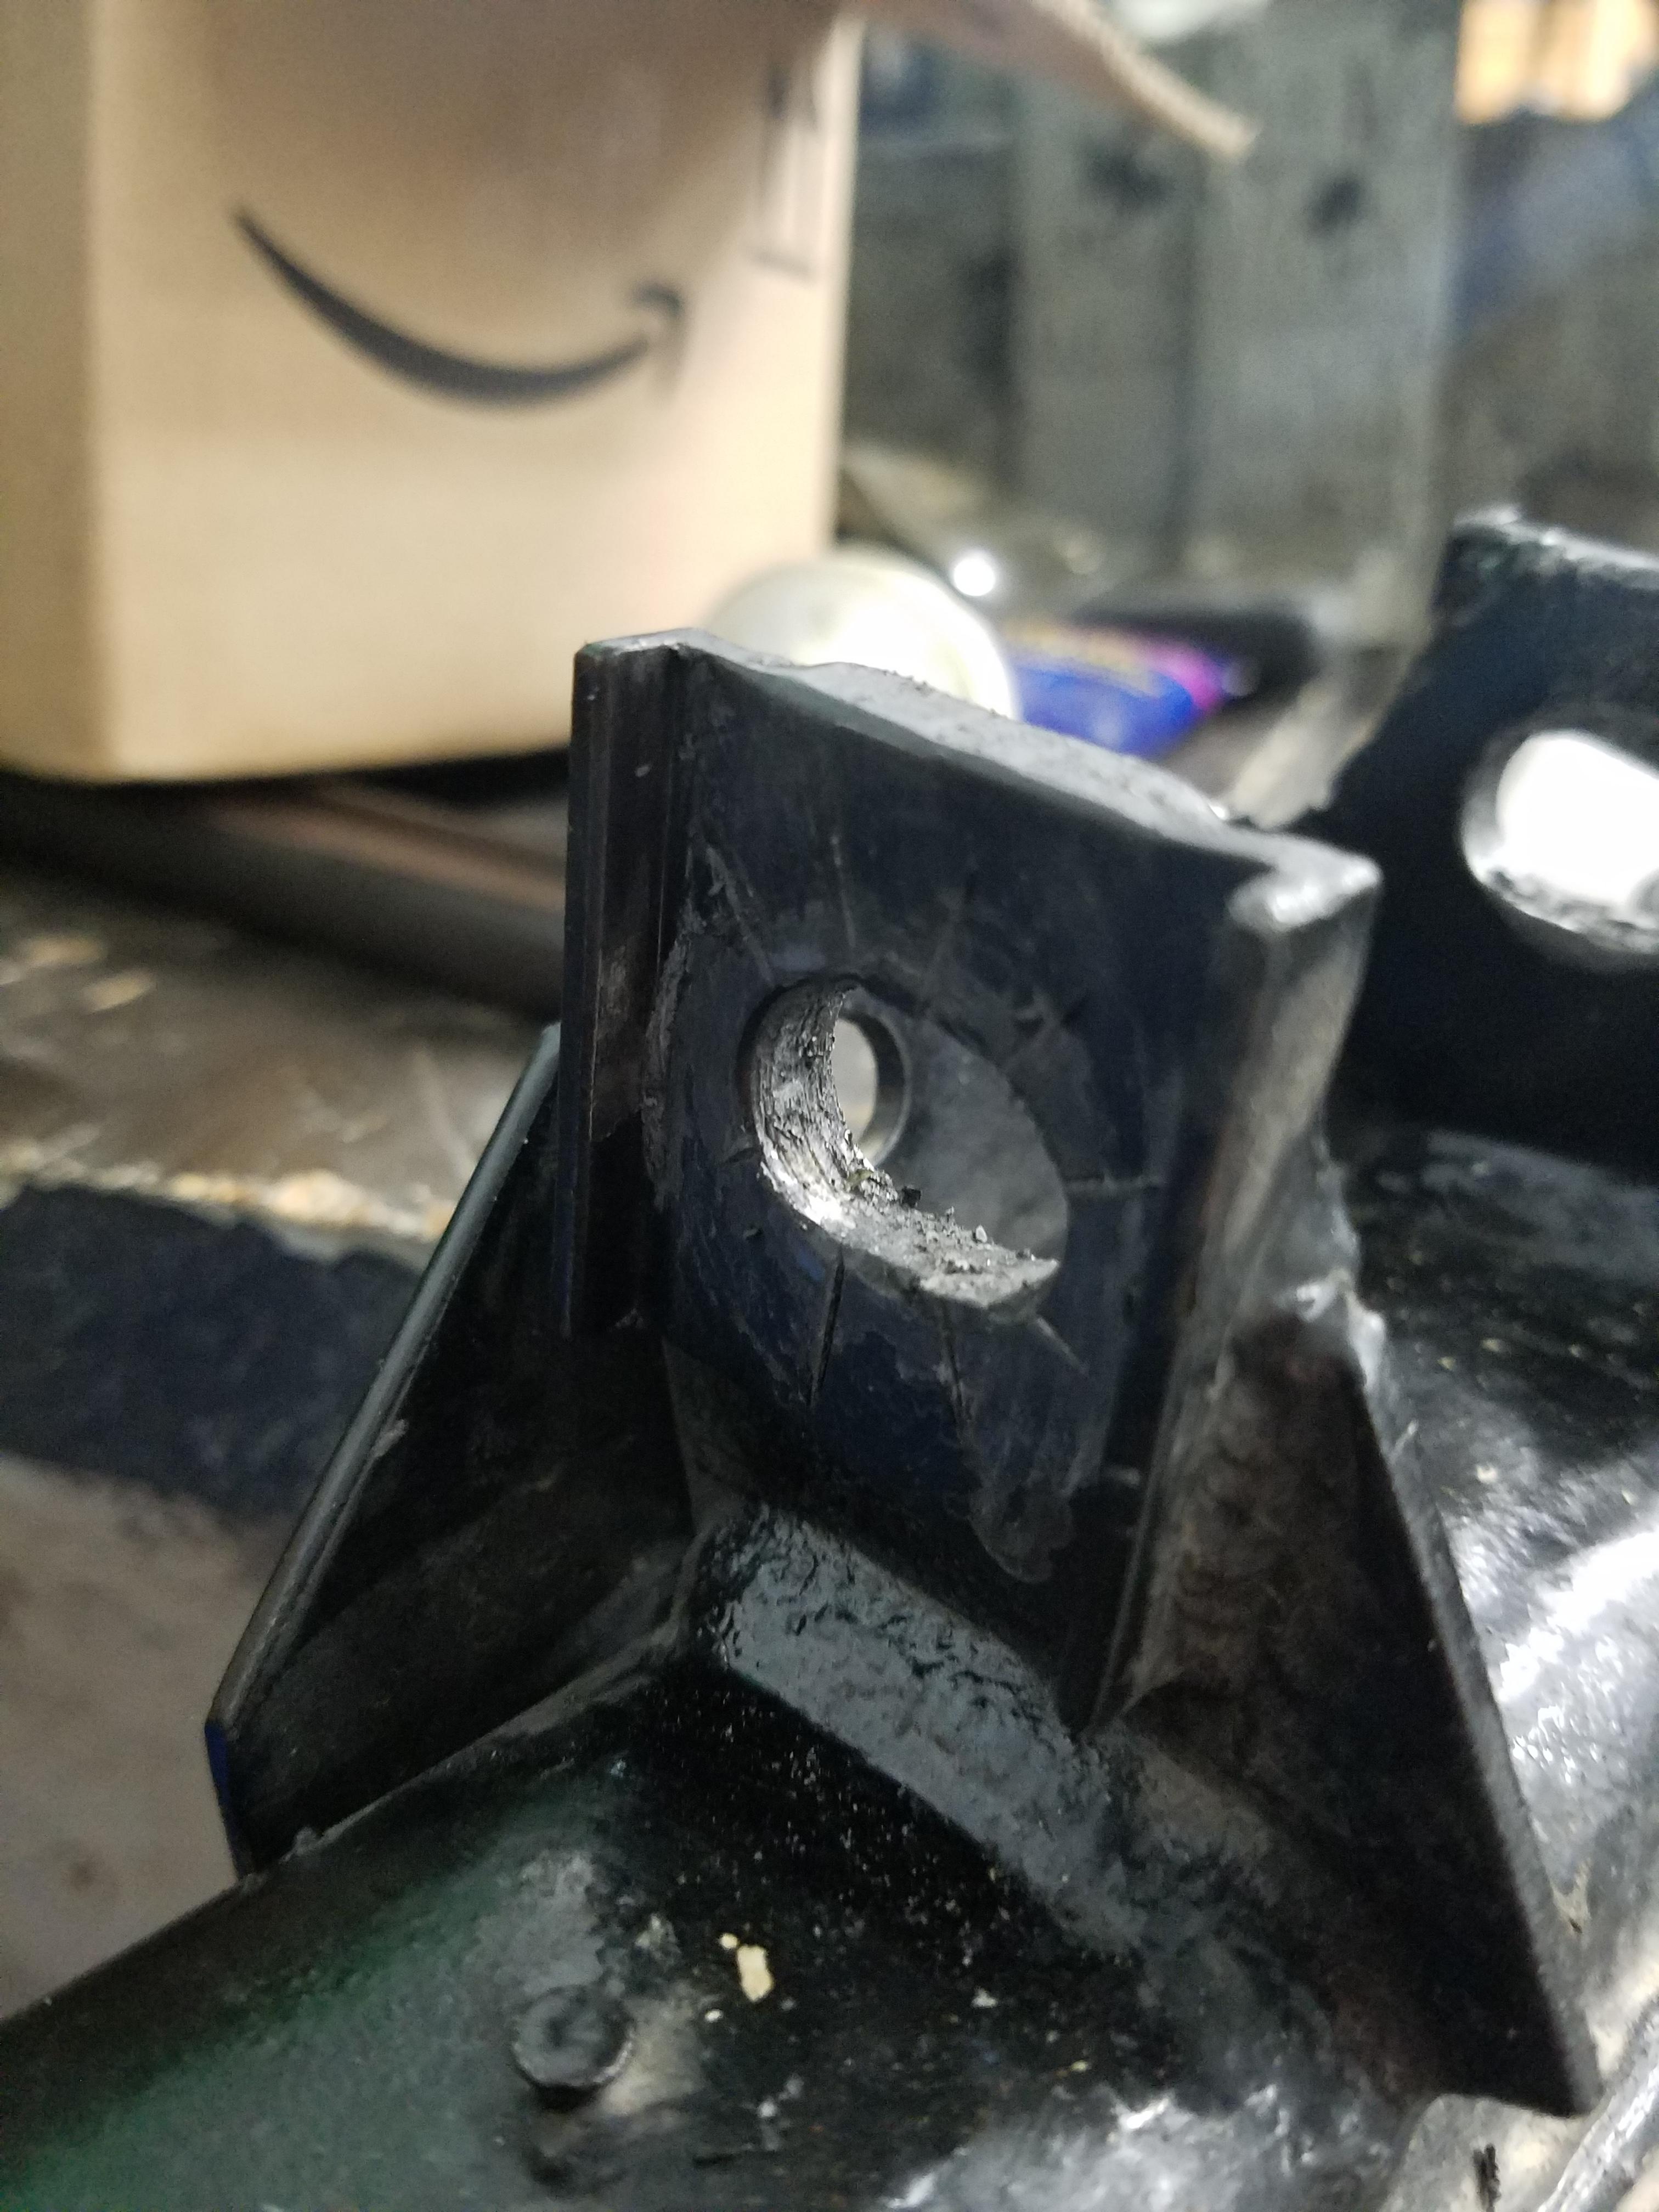
New modified sub-frame bushings lubed and pressed in as well as spacers for the differential.

With a couple extra helping hands we got er popped back in.
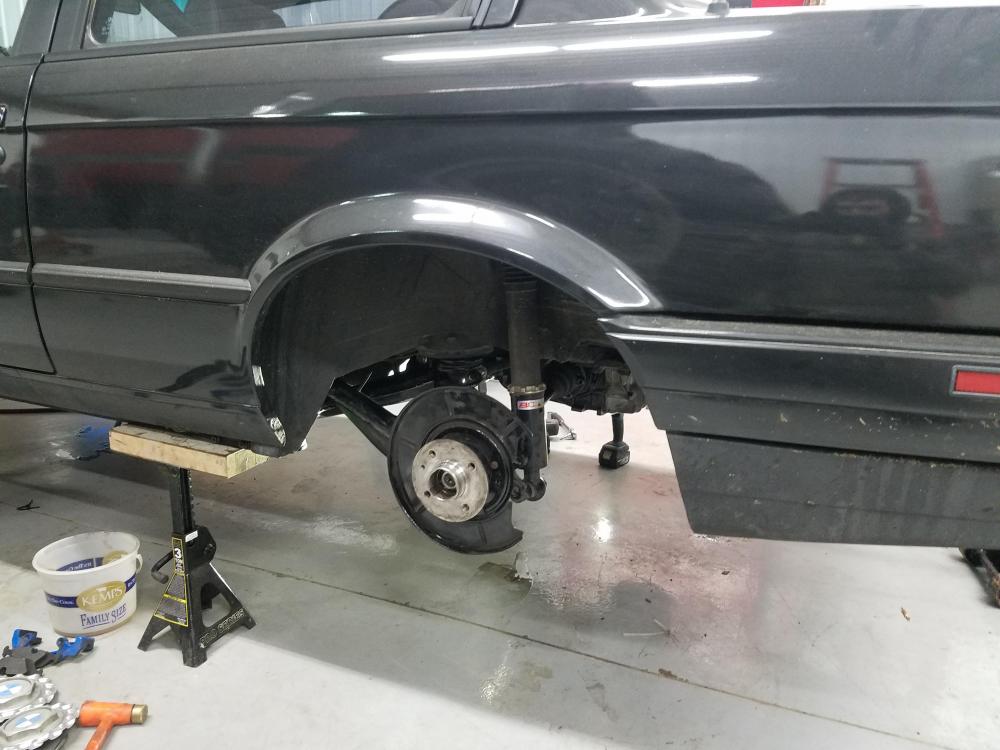
Super excited to see how she feels now that the eccentric hardware hopefully won't be walking all over the place and that I finally get my e-brake back.
Yup, that's about it.
O and one more thing... She's gettin a turbo 😀

-
Update!
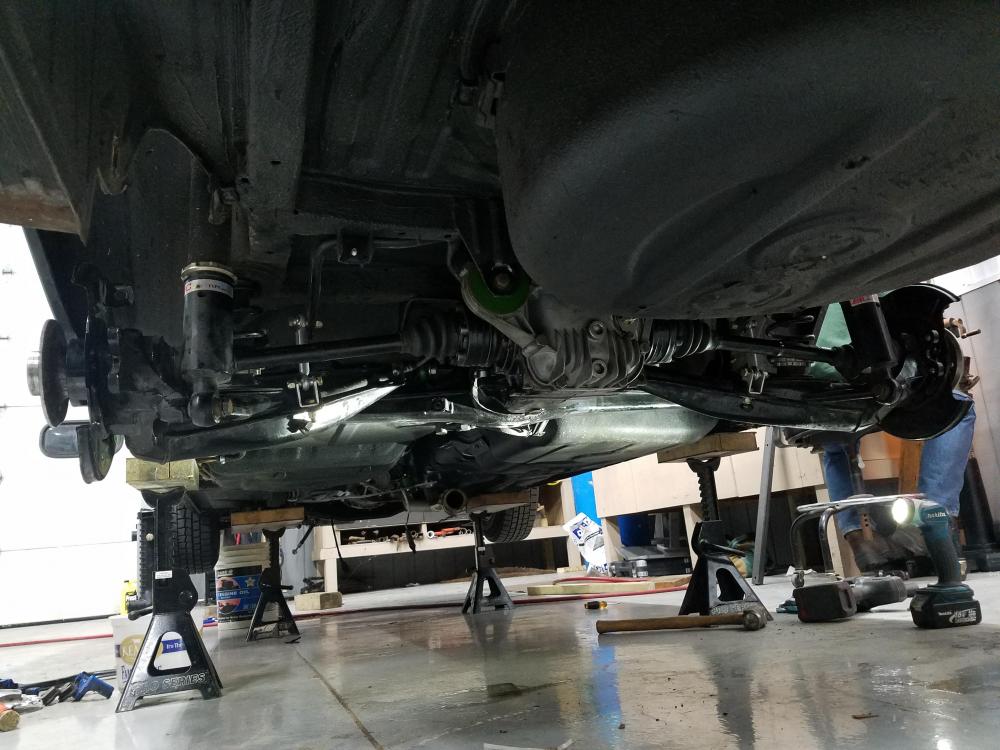
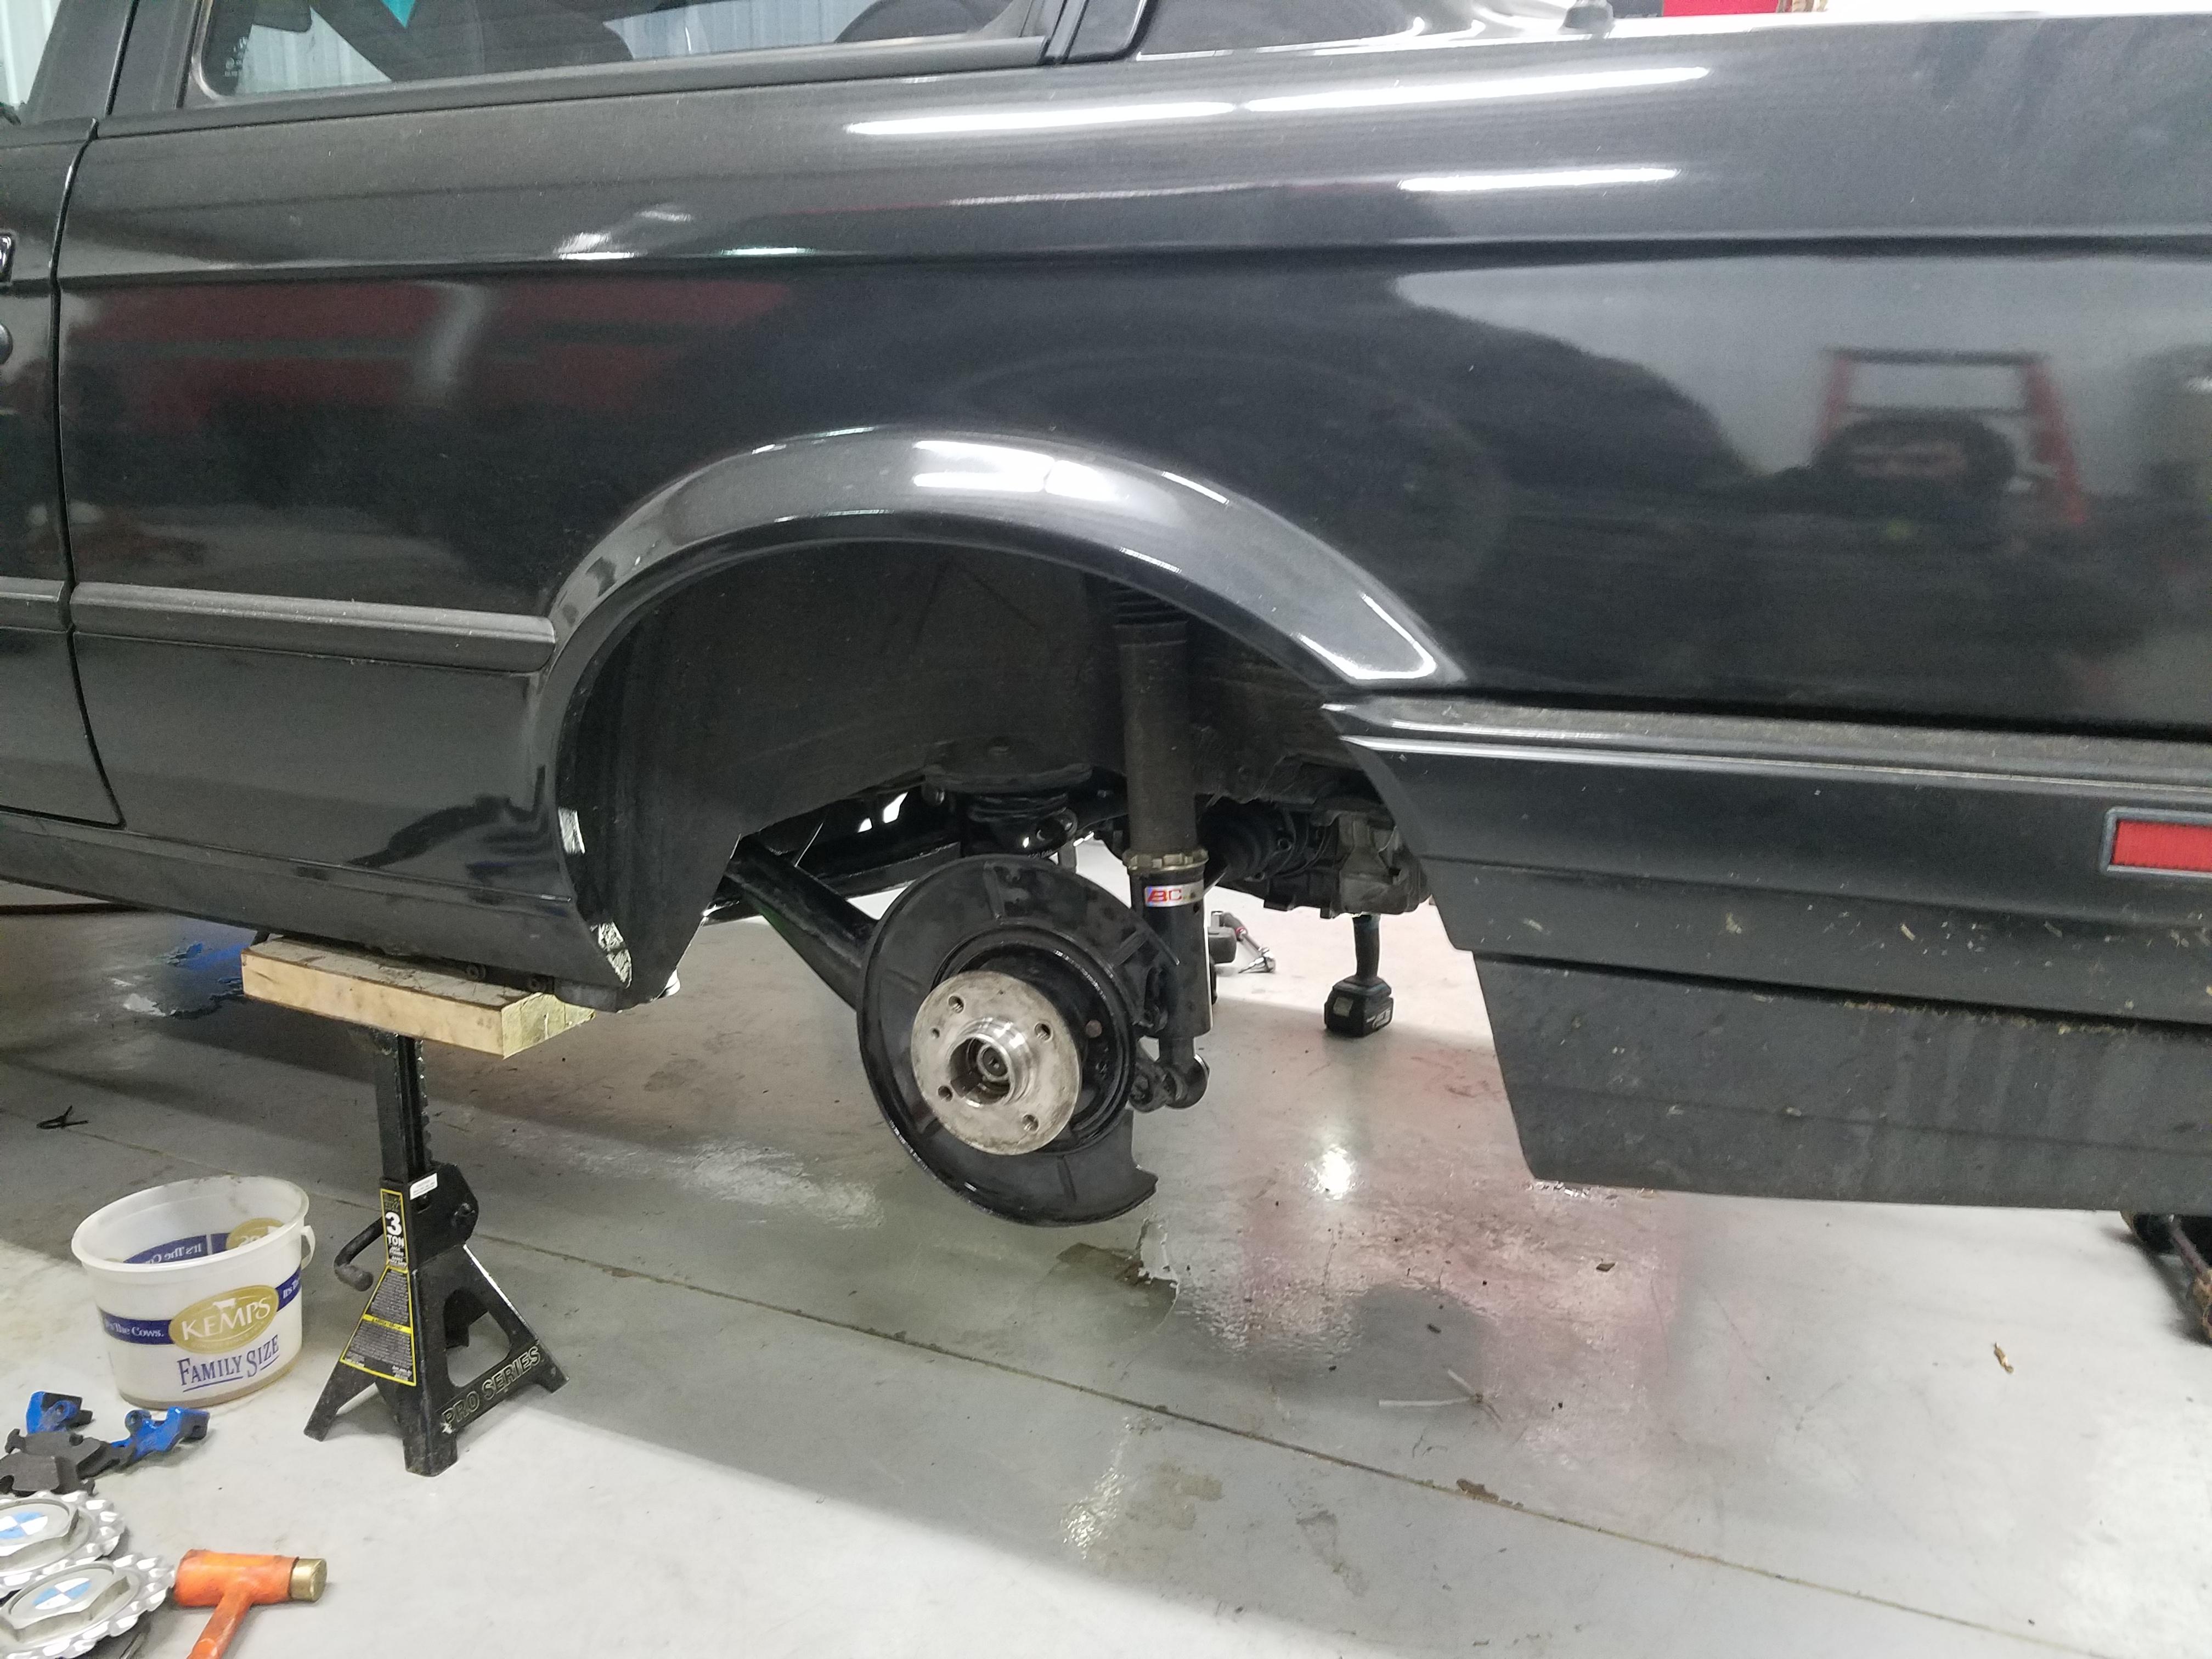
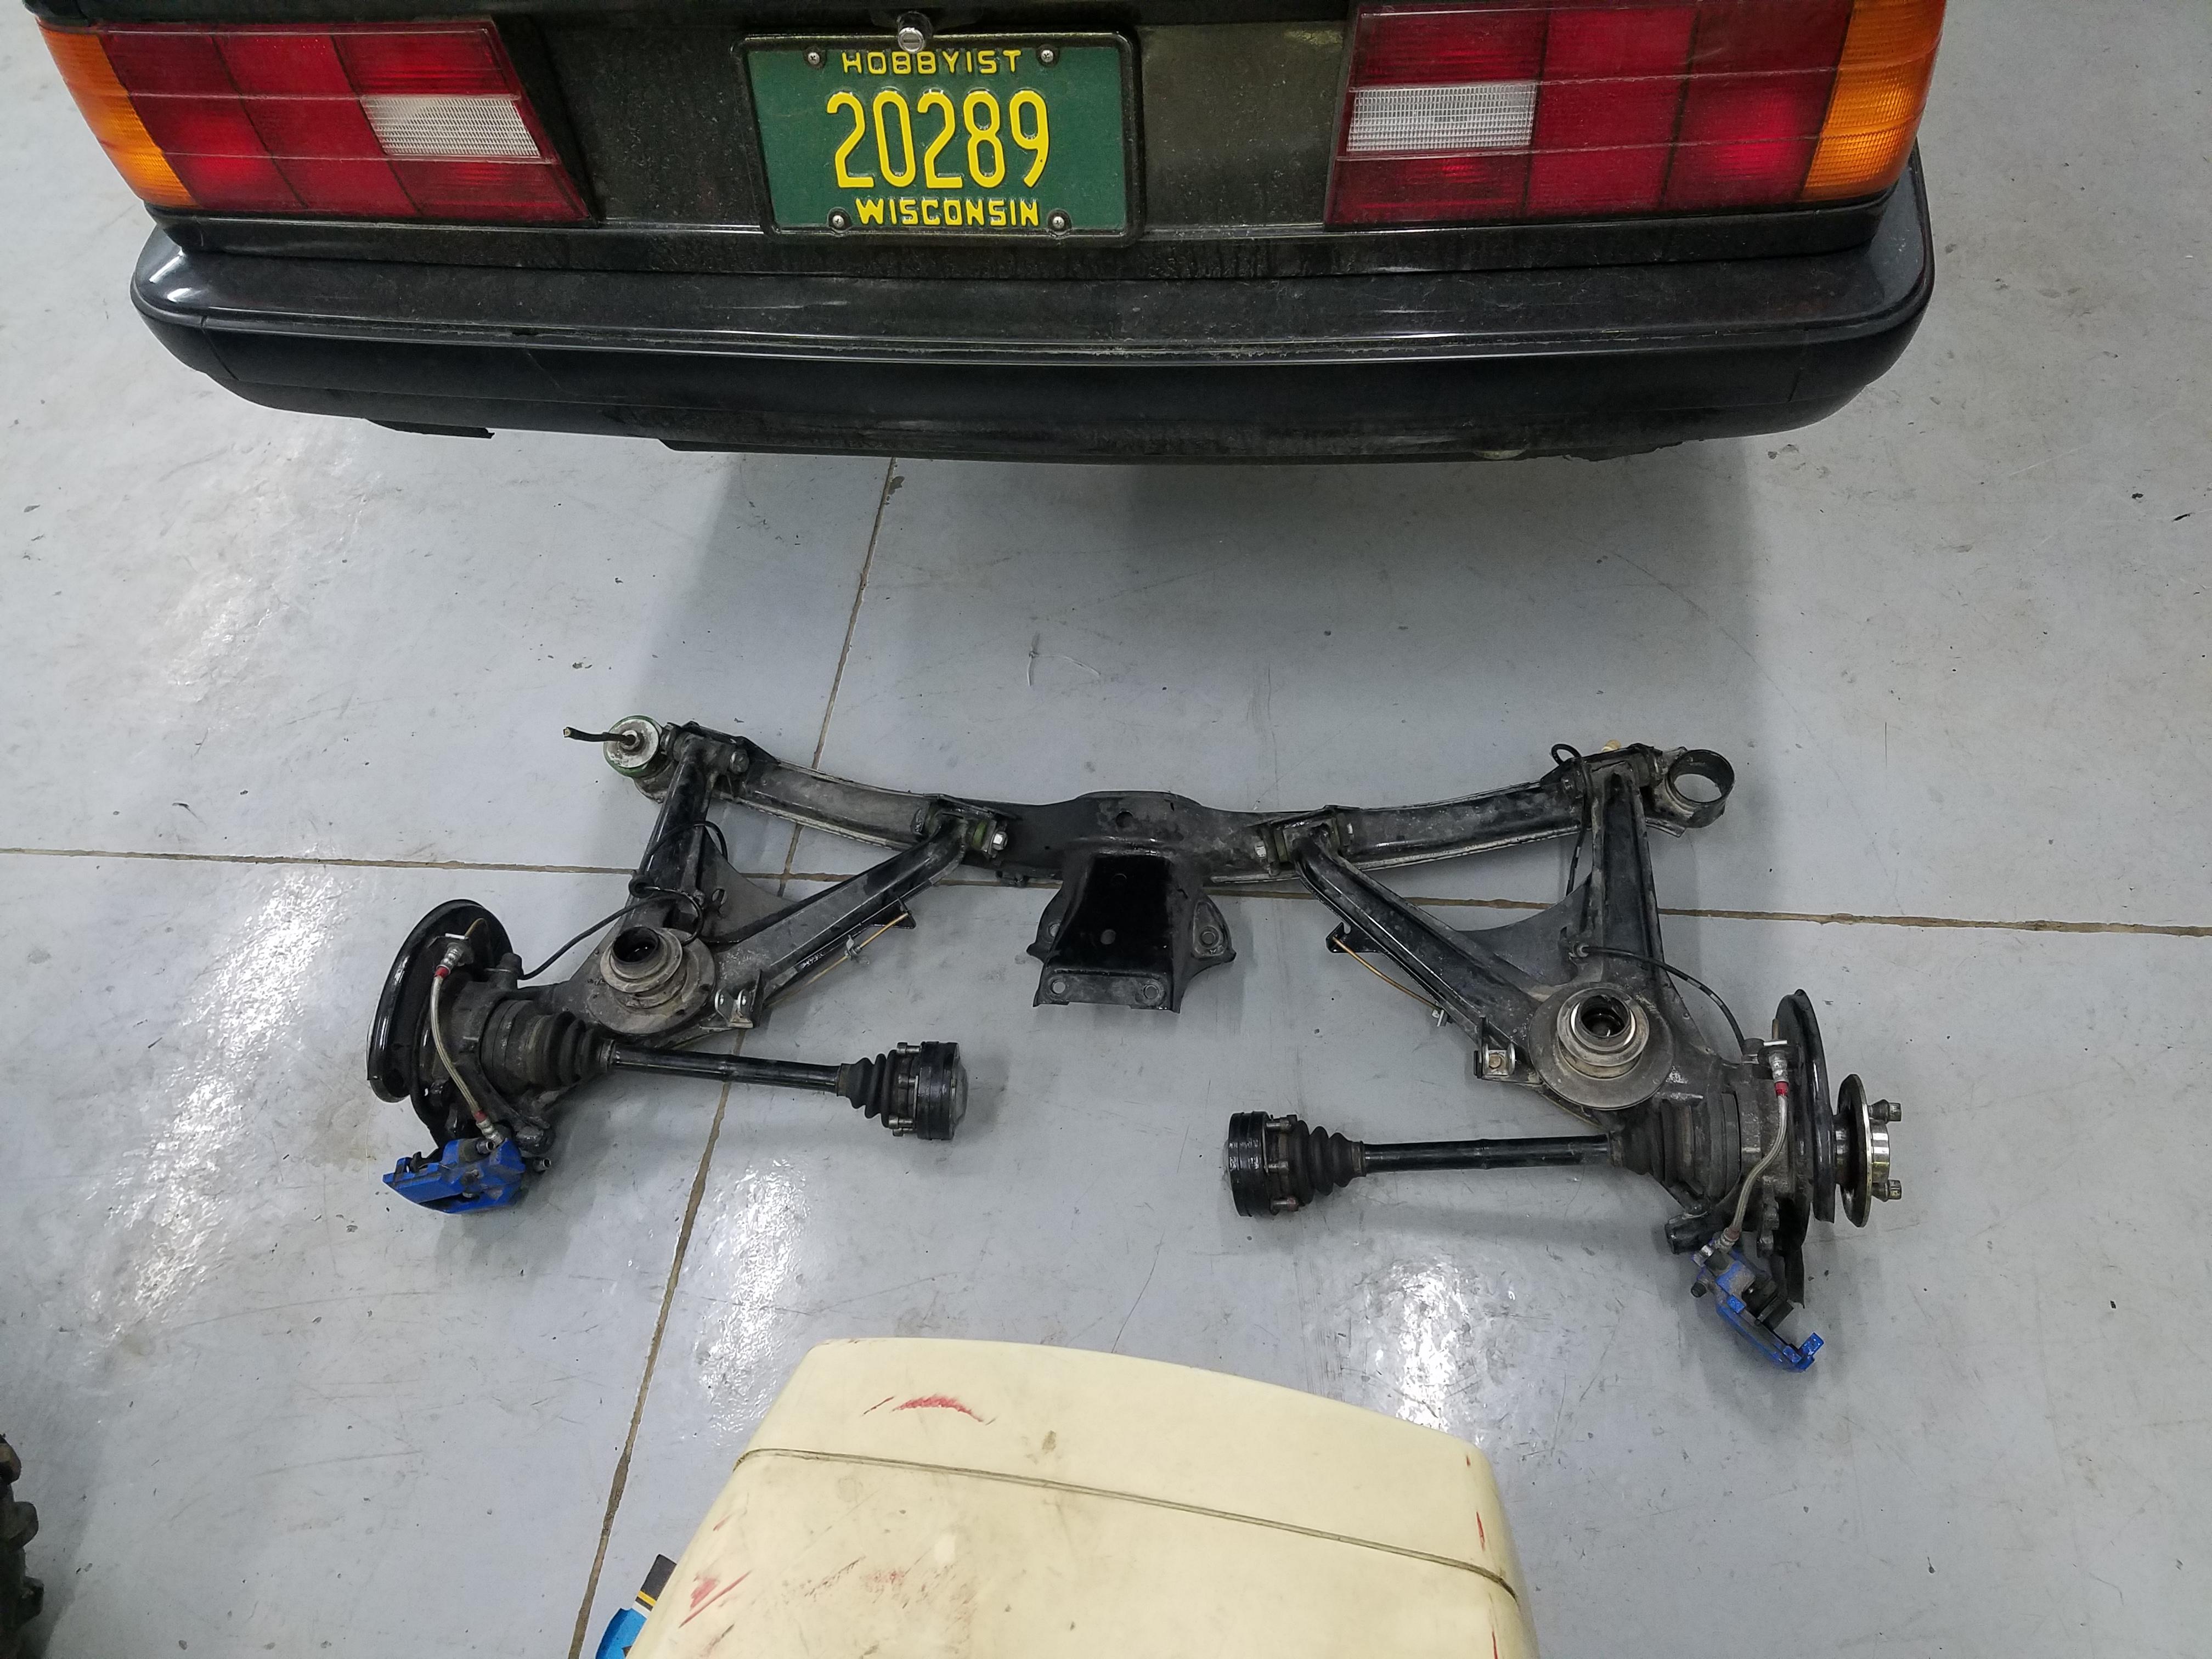
Got to work last weekend on pulling the rear sub frame.
Took me about an hour and a half total to drop out of the car, man is it nice when everything is fresh and easy to pull apart.
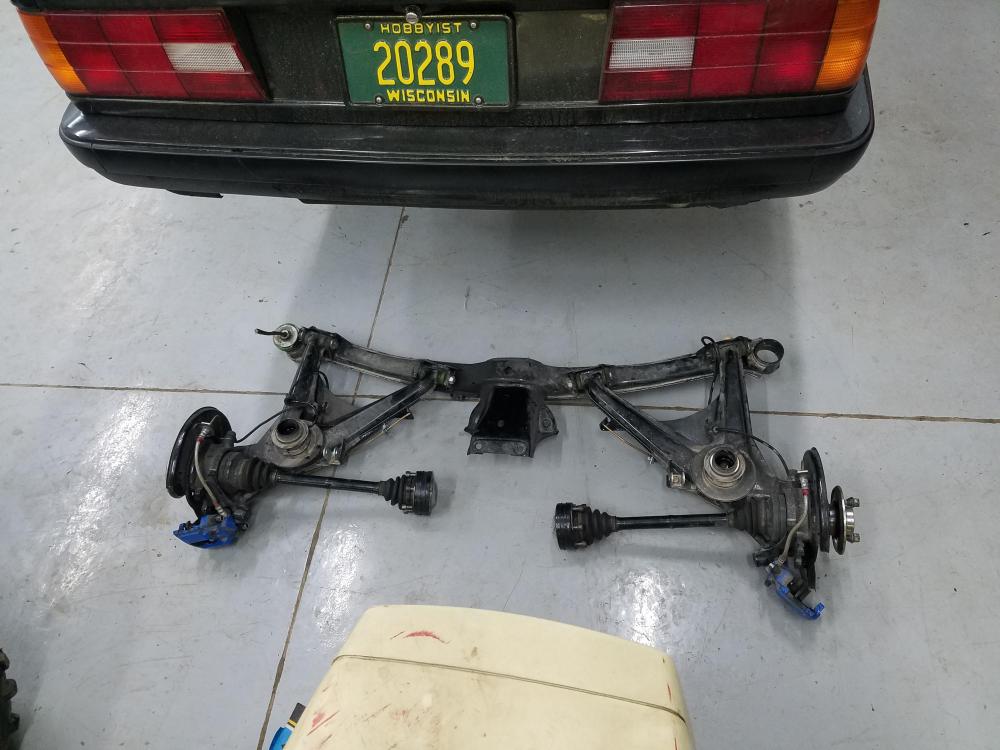
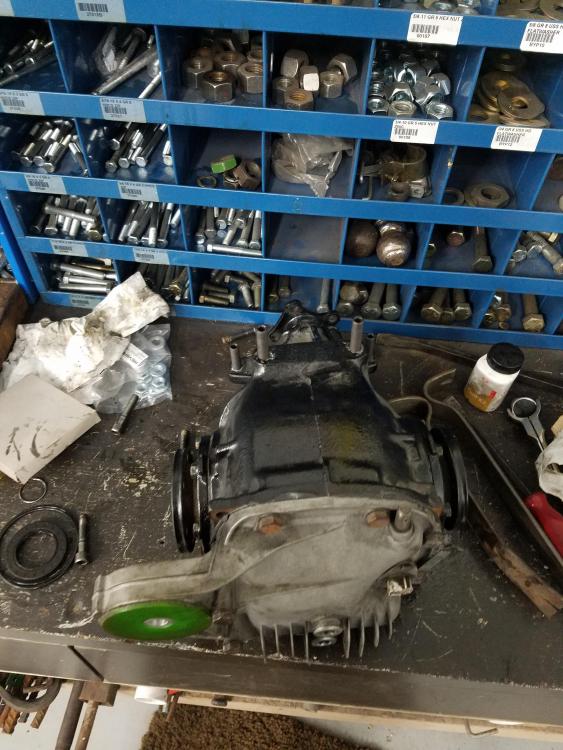
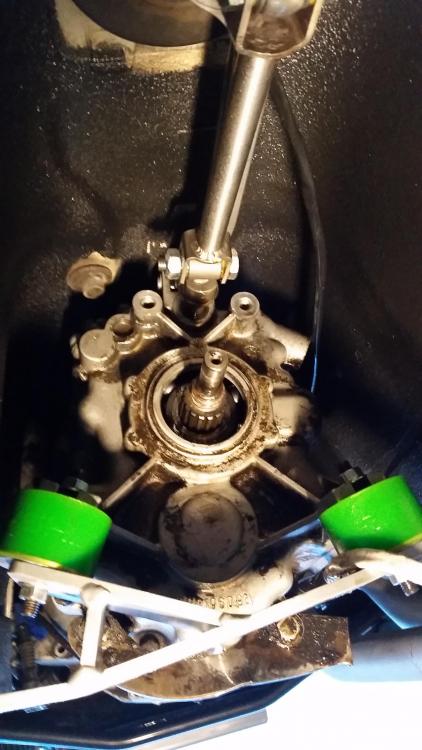
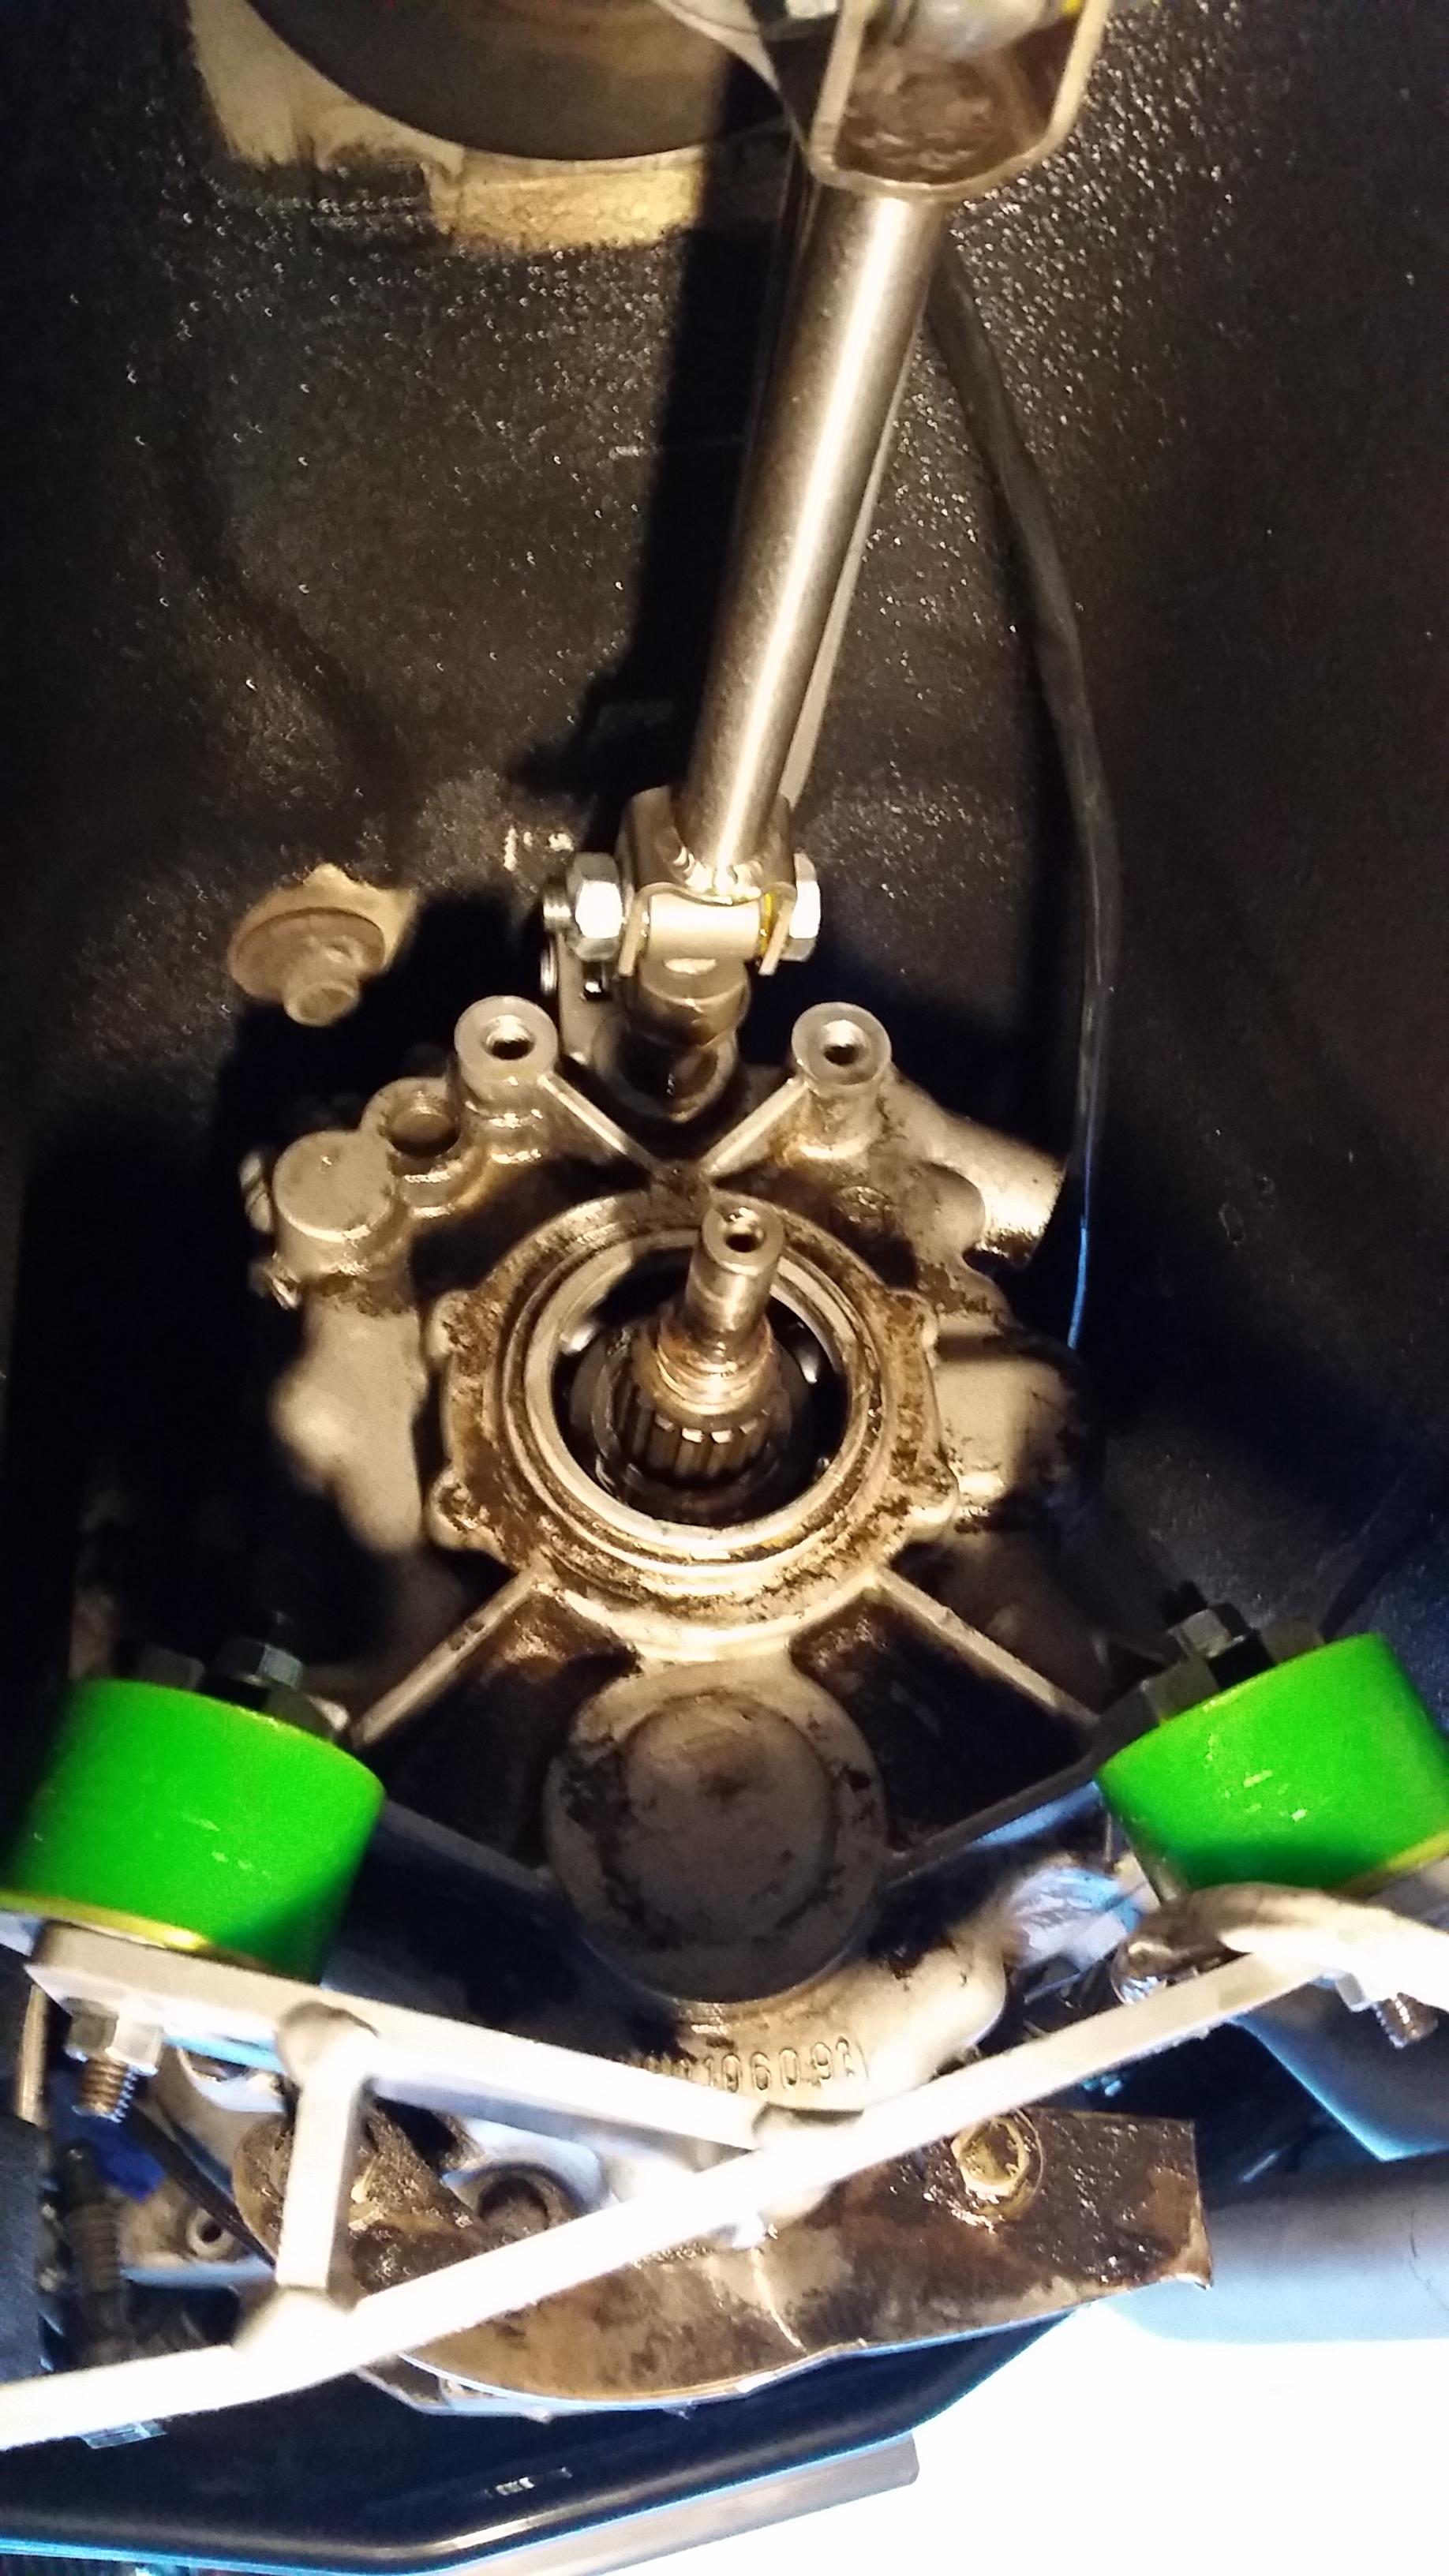
First things first, got the diff pulled out and got the new seals installed.
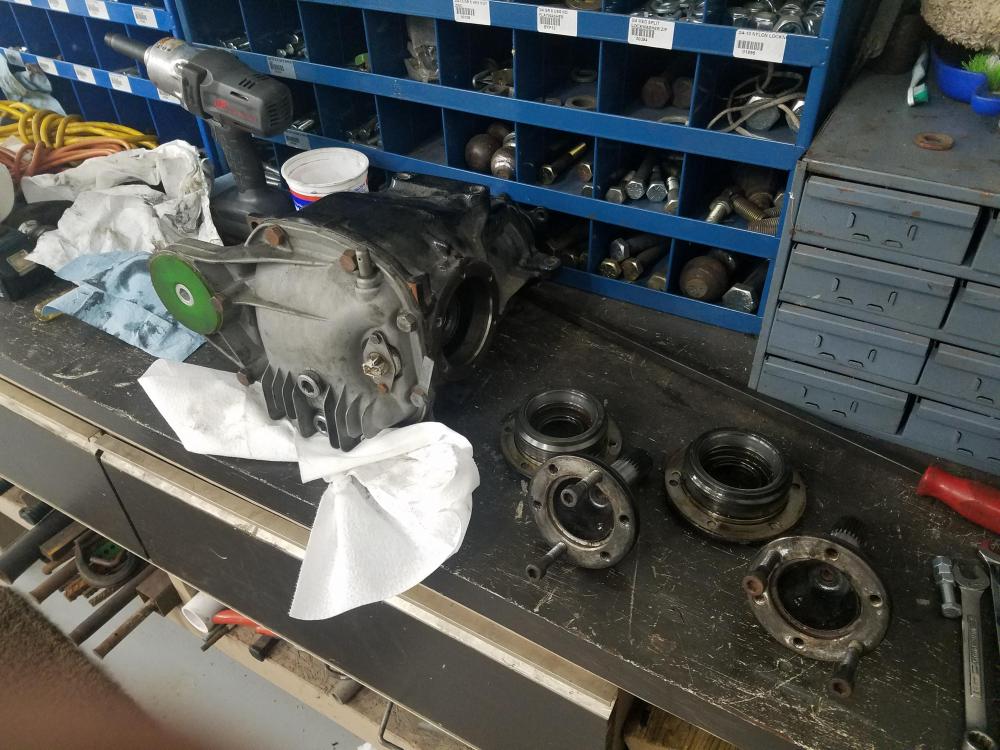
Replaced the output shaft seals and lock rings as well as the o-rings to seal the outer section.

Pulled the trailing arms off and came up with a little fix for my eccentric hardware.
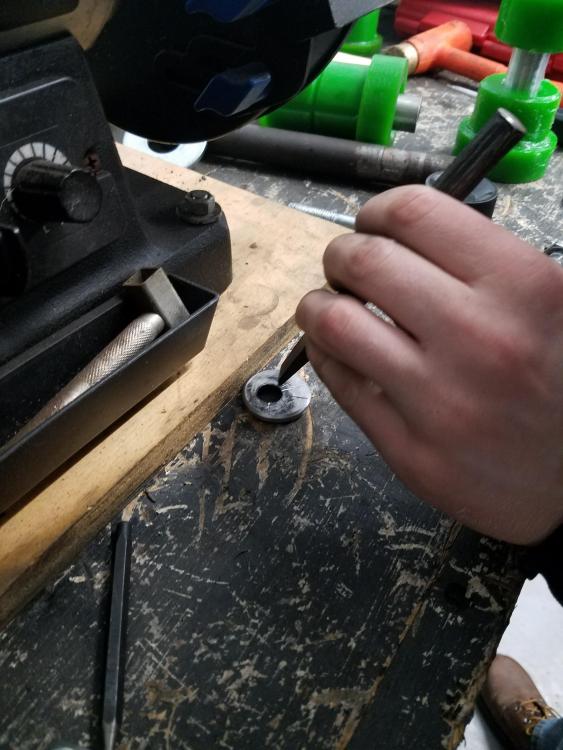
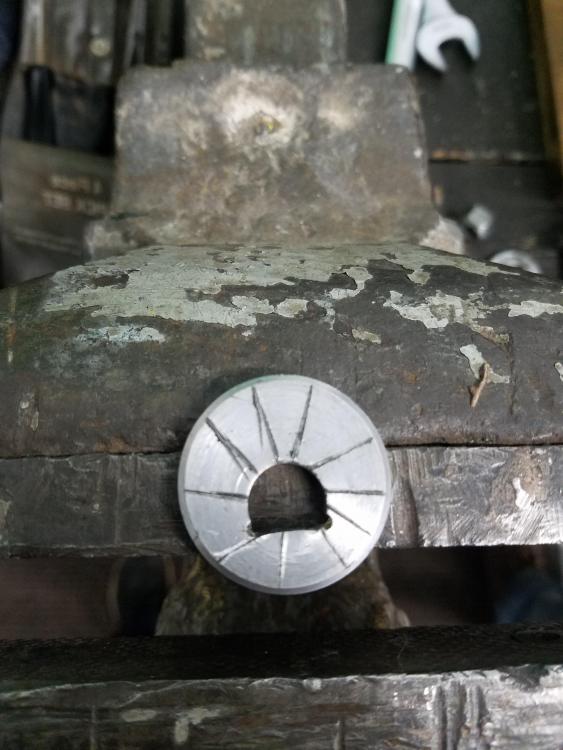
I bolted one arm back up and just lightly tightened it and wow, much better. Hopefully wont be having any more issues there.
Last thing I gotta do is figure my dust shields out so I can install my-e-brake system and then I can install the new bushings and slide the sub-frame right back in.
After this is in, I will be working on fixing the y-pipe on the exhaust.
-
On 1/4/2019 at 4:15 PM, straight6pwr said:
occam's razor: did you remember to take the paper towels out?
second idea: needs a proper bleed. i believe m42s share the challenges of e36 24v engines (get the front end up high, massage her gently, say sweet things into her ear)
the coolant system is relatively simple. clogged core, dead water pump, dead blower, and trapped air are the only things that will cause no heat.
Ya paper towels came out lol.
Water pump is solid
blower motor works fine
I suppose trapped air is a possibility but I thought I did a pretty good job using the air lift tool and the system held vacuum great with no leaks.
My guess comes down to either somehow a clogged heater core or possible faulty heater check valve, that is where I think I will start.
On 1/4/2019 at 6:21 PM, Boris3 said:Just in case, check to make sure you installed the new setup's hoses to the heater core correctly (inlet/outlet). With everything else going on in a swap, mix ups can happen.
I will definitely double check this but I am fairly certain I had them routed correctly.
-
On 12/29/2018 at 9:50 PM, Earl said:
Your o2 could have also been fouled if it's consuming enough oil to end up coming out of the tail pipe
o2 was definitely pretty dirty so I cleaned that up but I did another code check on the system and I no longer have either of the codes listed above and instead have one code, 1281 (control unit memory supply). Whats the chances that being anything other then a bad ecu?
-
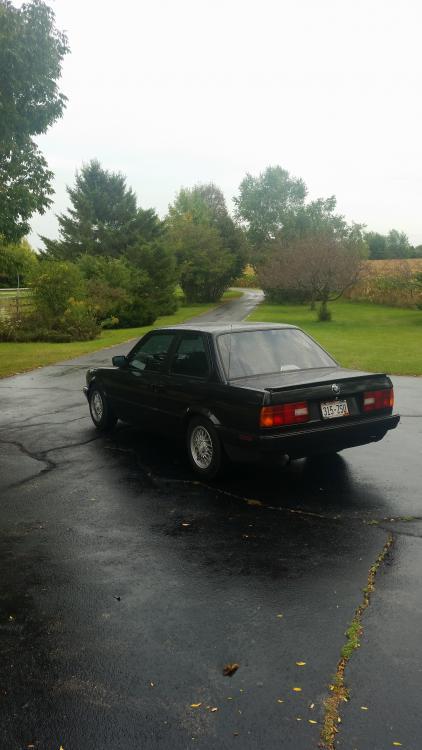
I have put just about 3500 miles on the car sense I put er into storage 2 months ago. Over the couple warm months I was able to enjoy it, I got some bugs worked out of her and figured out what needs adjusting/fixing and what I need to change/improve.
To follow up a bit from the last post, Trans leaks have been completely resolved. As for my temp issues, It seems that all is good now. My gauge reads slightly off. When I brought the car up to its op. temp. (the gauge read 210) I shot a temp gun at the cylinder head just past the thermostat housing and I was getting a reading of right around 192. The other day though, I took the car up to Appleton and all the way up the gauge stayed right below the 200 so I may take a look at the wiring to the gauges and see where there may be an interference or what may be causing this inconsistency otherwise I haven't been too bothered by it as the car hasn't been having any issues keeping itself coo
l.SO... I have compiled a list of everything I have noticed needs work and what I hope to accomplish over the project season. There will probably be more to add to the list but this covers the major things I want to get to.
Issue #1
Oil has been changed twice now and it looks that I burn just about ¾ of a quart every 1000 miles which is supposedly quite normal. Also, about every 100 miles I find that the rear bumper gets covered in oil spots. So, I have added a catch can to the list of parts to order to hopefully solve some of my oil consumption issues.
Issue #2 (still on going) Jumpy idle.
I have detected that the weird idle I get once in a while is a bit more serious then I figured.
After driving it for a while I did end up getting a CEL to pop up and immediately stomp tested the system to retrieve those codes. 2 codes were saved...
1263 (Purge valve)… not worried about this one as it makes complete sense why it is on since I don’t have it hooked.
1222 (Lambda control 1)… My cause for the idle issue. Big fix that I have read is the O2 sensor failing. Problem with this is the fact that my o2 sensor was brand new. I have not yet pulled it out and tested it but I have hi doubts it’s the cause. As for other things I have inspected/checked, I pulled the maf and thoroughly cleaned it as well as hooking it up to a power source and testing that its working properly. I pulled the IAC valve out and made sure it was clean. Reinstalled and confirmed good connections of all vac lines ( all lines are new anyways). An idea of mine is maybe I’m not getting a strong fuel pressure because of a possible original e30 fuel pump not cutting it for the s52’s requirements. Other possibilities may be injectors or a possible faulty ecu. We shall see.
Issue #3
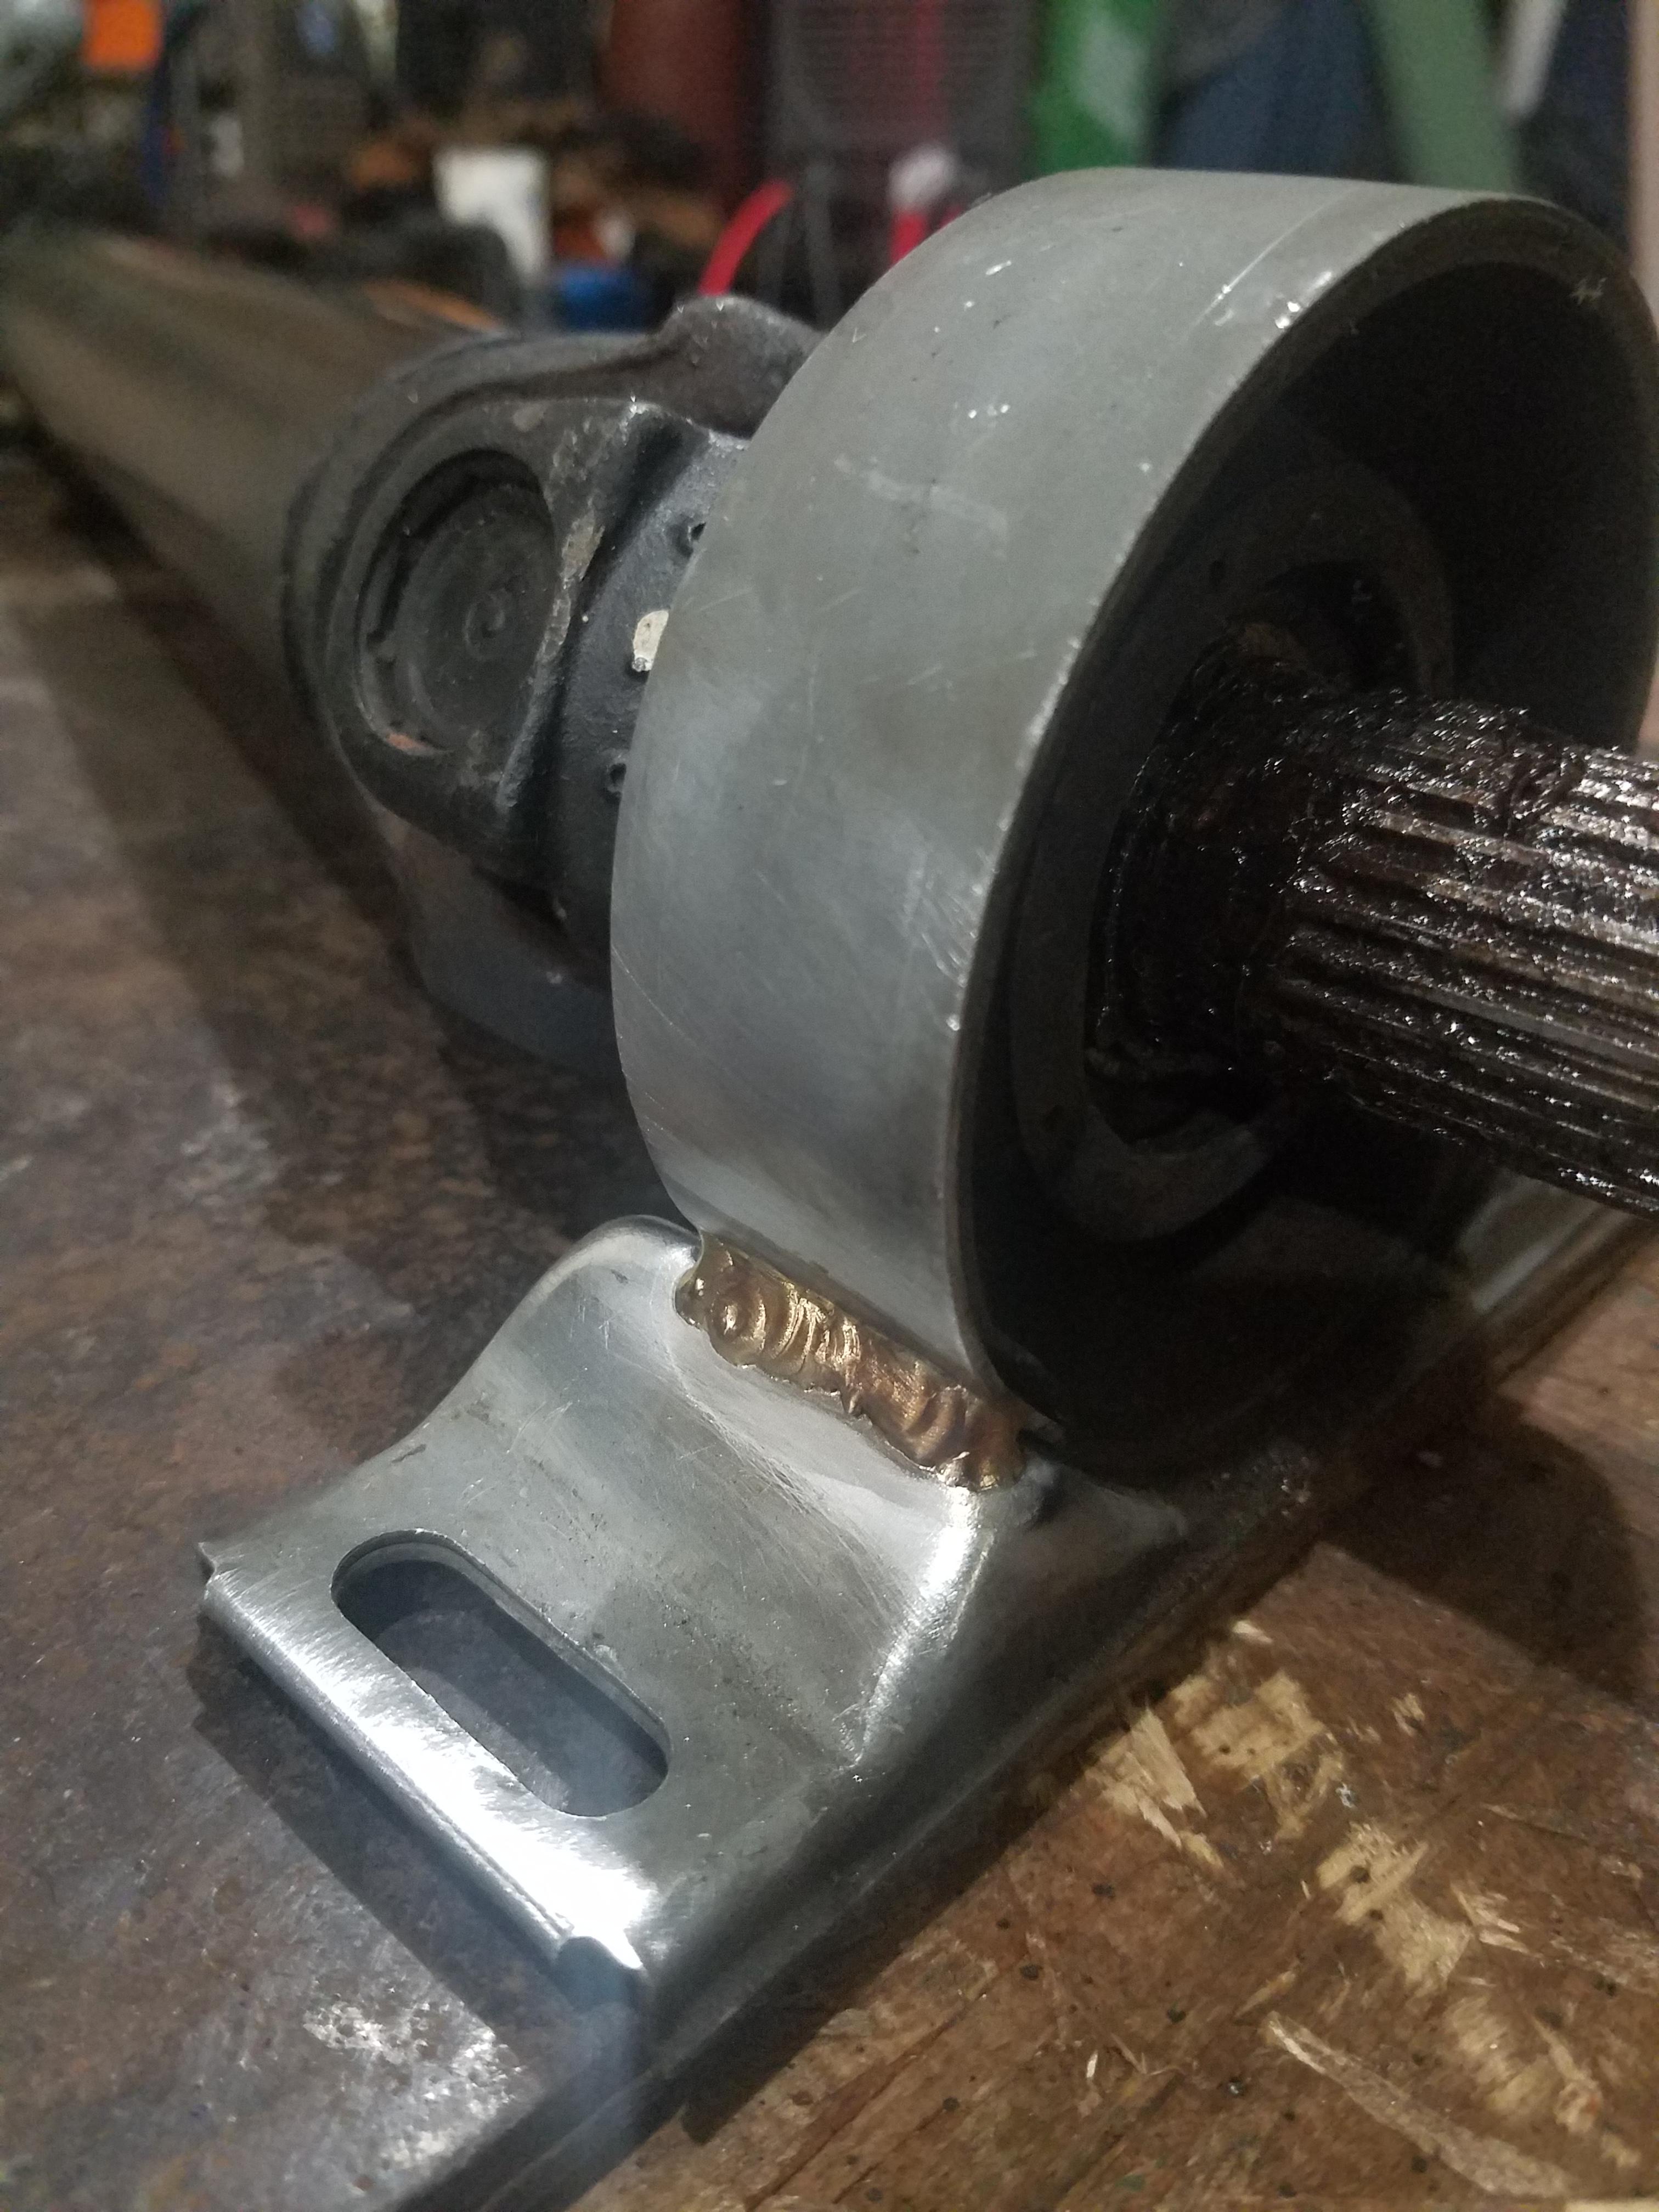
A while back I started noticing a squeaking noise coming from underneath the car in 1st and 2nd gear. At first I didn’t think much of it tell it started clunking more than squeaking. Lifted the car up and gave the drive shaft a little jerk and there was quite a bit of slop in the center and outside u joint. After pulling the heat shield off I was able to notice what really was causing the issue…
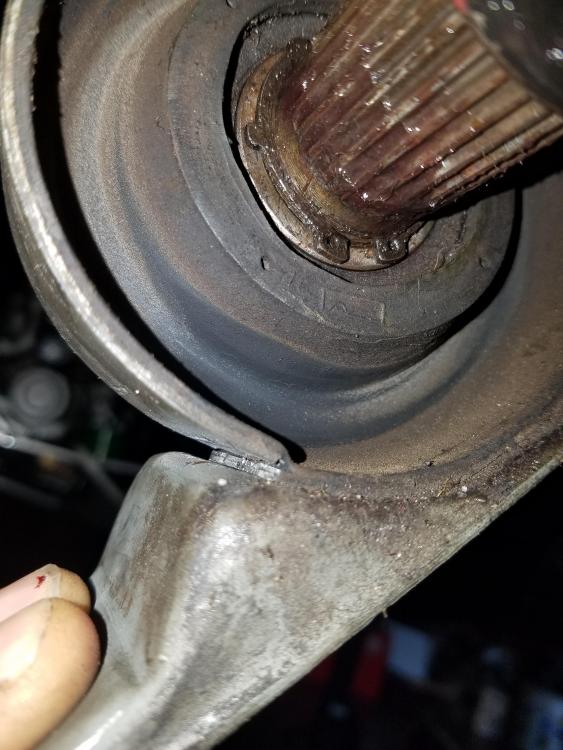
The same day I pulled the driveshaft out and brought it over to my buddies to weld up. Since I was worried about burning a lot of the rubber, we decided to braze it instead. There was still some rubber that burned of course but it was only minor and worked out well.

I haven’t had any issues since but I do notice the slop in the u joints when changing over from reverse to 1st so I am now on the lookout for another used or possibly a new driveshaft (for the perks of being able to service the u joints then).
Issue # 4, 5 and 6
Although the car was a blast to drive the alignment was just not right. Unfortunately, I installed the wrong rear sub frame bushings and earned myself a bit to much negative camber on the rear wheels. I found that there were bushings made for this to correct this issue when your car is lowered. These bushings are now in my hands so that will be the first thing I tackle this winter. Not only will I be fixing the sub frame bushings but also the eccentric hardware. Unfortunately, the garagistic’s smooth cams on their hardware like to walk quite often and its been throwing my rear toe and camber all out of whack. I have a couple ideas to solve this issue, but my plan is to center these and hopefully not have to mess with them at all as I have found that you can't properly tighten the outside bolts when the sub frame is in the car. With the trailing arms out, I will be messing with the rear dust shields, so I can install the e-brake system as that is something I have been greatly missing.
Issue # 7
I have no heat. Over the time that the car was being re-built I temporarily shoved paper towels in the heater core inlet and outlet ports to avoid any dirt getting in the heater core so I can't see it being clogged. Also, I do remember the heat working with no issues before the engine (M42) came out so I doubt it’s the heater core at all and the blower motor works without flaw, but I only get cold air. I will be starting with the heater controls and making sure its not something net working right there.
Issue #8
One part of the exhaust sits to low. When the y-pipe was welded in it angled lower then I wanted mostly because of the way the headers sat. The plan is to cut the collector off, fab up a pie cut to angle it correctly and re-weld. My plan is to drop the motor, trans, and sub frame as one to make it a bit easier to work around for welding.
Issue #9
Interior sucks. Will go into depth on what I want to do, still working on some ideas for what I want to do but changes definitely need to be made.
So far that’s it for major issues first on my list to get done. There is some painting needed to be done including re-doing all the trim on the exterior and re-undercoating the rocker panel and front and rear valance. Unfortunately, the old undercoat in those places faded because of exposure to the sun and the fix is spraying a layer of clear over for protection.
I also have a list of things I’d like to get ordered in terms of spicing up the look of the car.
Tonight and tomorrow I will be spending making a solid list of everything I need and getting that order out asap. Unfortunately I need to buckle down on making the most of the time I have as not only is my next semester's schedule going to be quite busy but my use of the shop this year is going to be limited, my grandfather owns the place and he has his own projects he wants to get to.
-
Replacing the output shaft seals on the diff might not be a bad idea while its out. Only saying that because mine have already begun to leak which is something I have to take care of sometime this winter.
-
-
17 hours ago, tsweers89 said:
Considering kbb is mid/upper 8s and people usually pay under Kelly's blue book for a vehicle that isnt special aka M car or such. Also this being only 2wd and can pick these up at dealer auctions for 6k with close to same mileage I'd say that's your issue.

The only thing I would have to disagree with is that I think the car definitely meets the criteria for Very Good condition rather then just Good.
(value reflects cars with just the standard options)

That being said, even in Very Good it doesn't quite meet the 10,000 mark but he his pretty negotiable.
-
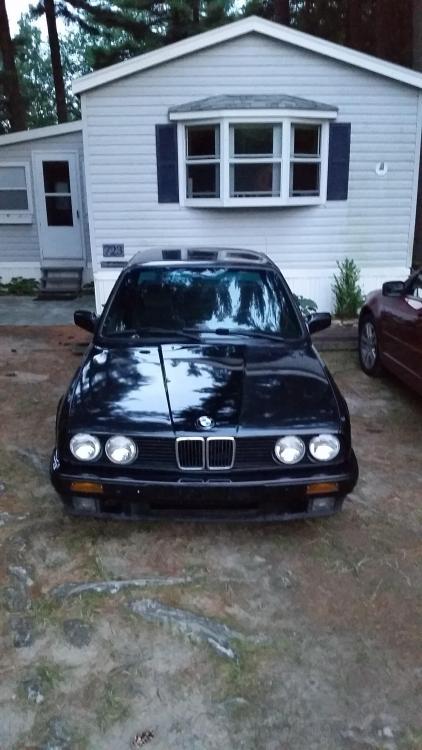
So a co-worker and good friend of mine is having a tough time trying to sell his bmw that he's owned for a couple of years now. He has had very little interest in it so far and feels that his price is pretty fair but is not really sure and is wondering that maybe its just a tough time of year for selling that particular car. I'm just trying to seek out some advice/opinions on what you guys think of the car or what you know about that particular model and year already that may be a reason for why its not particularly selling as fast as he was hoping.
Just from my own personal experience, this car is super clean and he is the type of guy that is nit picky about all the little things and takes very good care of what he owns. He has had zero trouble with the car as a whole throughout his ownership and the car has proved to be very reliable for him.
https://appleton.craigslist.org/cto/d/2011-bmw-528i-2-sets-of/6739816865.htm
-
-
Honestly the biggest thing with bench bleeding is to help avoid running into a situation where there is trapped air in the master cylinder that won't be easily bled out through the calipers. When I install a new master I'll go ahead and do the bench bleeding procedure and then leave the fittings and hoses on until I have the master mounted in the car and ready to hook up the lines to avoid it all coming out and making a mess.
You can probably get away with skipping the bench bleeding as most of the time your going to be able to get all the air out of the system no problem, just a easy precaution to avoid any troubles.
-
2 hours ago, SteelBlue said:
Probably the best idea. I’ll start doing some research, but for some preliminary readings, how much of a pain in the ass is it? From some of my browsing, doesn’t look too terrible.
+1 on replacing it.
Its really not that bad. Biggest challenge is getting those rusted nuts and bolts out that hold it in place. Once they are out your pretty much home free.
-
-
-
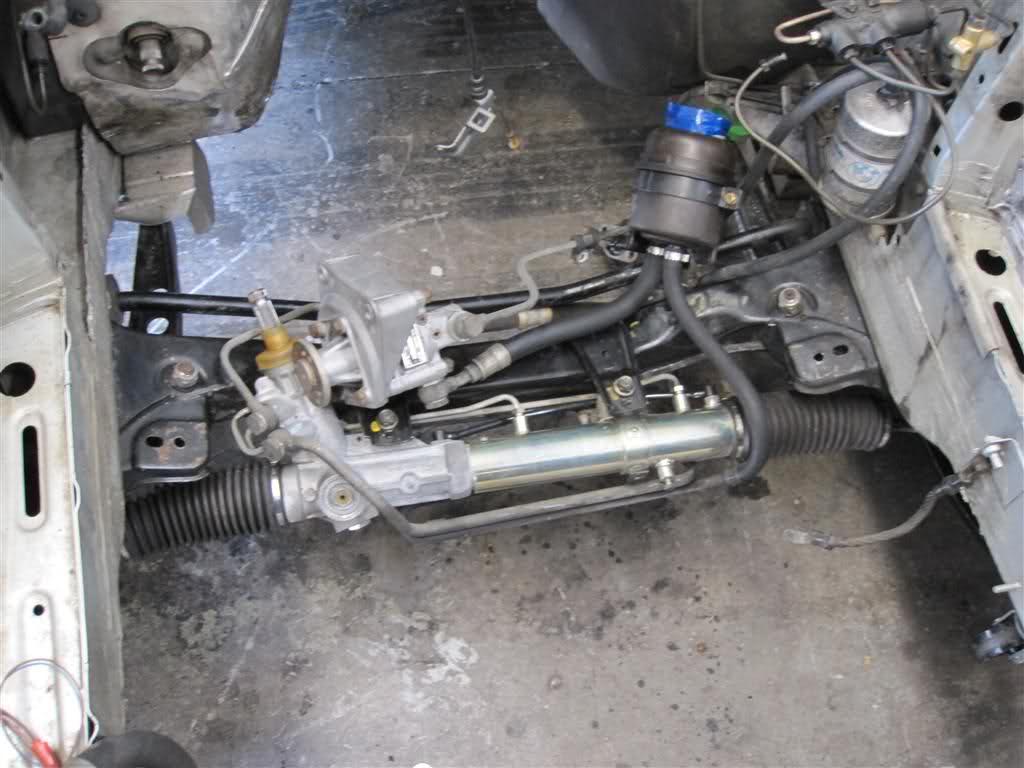
I used their steering rack spacers when I went z3 rack and had zero issues with them. The reinforcement kit is also not all that bad. Yes they did take some tweaking (drilling out holes to bigger size, modifying rear sway bar reinforcement to fit correctly as @straight6pwr has pointed out) to make work but, for the price it was worth the little bit of hassle over trying to make my own.
Although, I am not having very good luck with their eccentric hardware for the rear sub frame. The installation was straight forward and the hardware fit well but the outside cam bolts are impossible to get tight when the sub frame is in the car and they consistently walk all over the place throwing the whole car out of wack which leaves me to have to drop the subframe once again and come up with some kind of fix for it. NEVER AGAIN!
-
15 hours ago, GunMetalGrey said:
dive head first into this thing

- Jdesign, SteelBlue and GunMetalGrey
-
 1
1
-
 2
2
-
I have a trans brace sitting in a box around here I am not gonna be using anytime soon.
-
-
-
I took the car up to my trailer again Tuesday night and it was fairly cool outside cruising right around 70 and even with the fan flipped on at that speed the thing was still staying right around 205-208. Slowing down up to 210 but never any higher. Thing ran like a charm though.
Tomorrow I'm gonna take a temp gun to the thing and make sure that the temps are matching what the gauge is reading. If they are, I'm wondering if that small kink on the section where the spider hose runs into the header core is possibly causing some unnecessary restrictions. Otherwise I'm just gonna have to assume that it likes to run crazy hot and will have to consider switching to a lower degree thermostat in the near future.
Also, my occasional jumpy idle is back... again😡
-
There are just about 500 miles on the motor so far, thing has been spectacular. I've been dailying it for that last week or so getting a feel for everything and working any existing bugs out. As of yesterday I haven't been seeing the jumpy idle at all, hoping the ecu figuring itself out was all it was.
On the other hand though, My operating temp has sort of been pissin me off.
As I said before, it seems its happy place is right around 200 for the water temp. Well, its sort of moving itself up a bit towards more like 205 while running down the highway or speeds higher then 35 especially in 80+ degree weather. Cooler times at night it will sit around 200 though. Coming through town I'm looking at something closer to 208-210 and even with the fan on it doesn't want to come down.
That being said it never gets above 210 when running even sitting at idle on a hot day so I guess it isn't the worst but once I give er juice going down the on ramp she comes back down to 200ish. I just wish for driving it around not pushing it to hard that it would stay somewhere more in the 190's area. How others are keeping their temps lower is beyond me. I have a solid water pump, csf rad, and a good fan. What else can i do? Can putting a 80 degree Celsius thermostat in do me any good here?
Went ahead and did the main output seal on the trans last week Wednesday.
I immediately noticed that the shifter selector rod seal is also leaking and may be the major player in the leaking issue as well as it is still leaving a small puddle same as before. I did go ahead and order a selector rod seal late last week from FCP that showed up today.

Still waiting on a tube of curil k2 sealant I ordered a few days back, once it shows up I'll go ahead and tackle this thing and hope I don't have to look at it again.
Other things done:
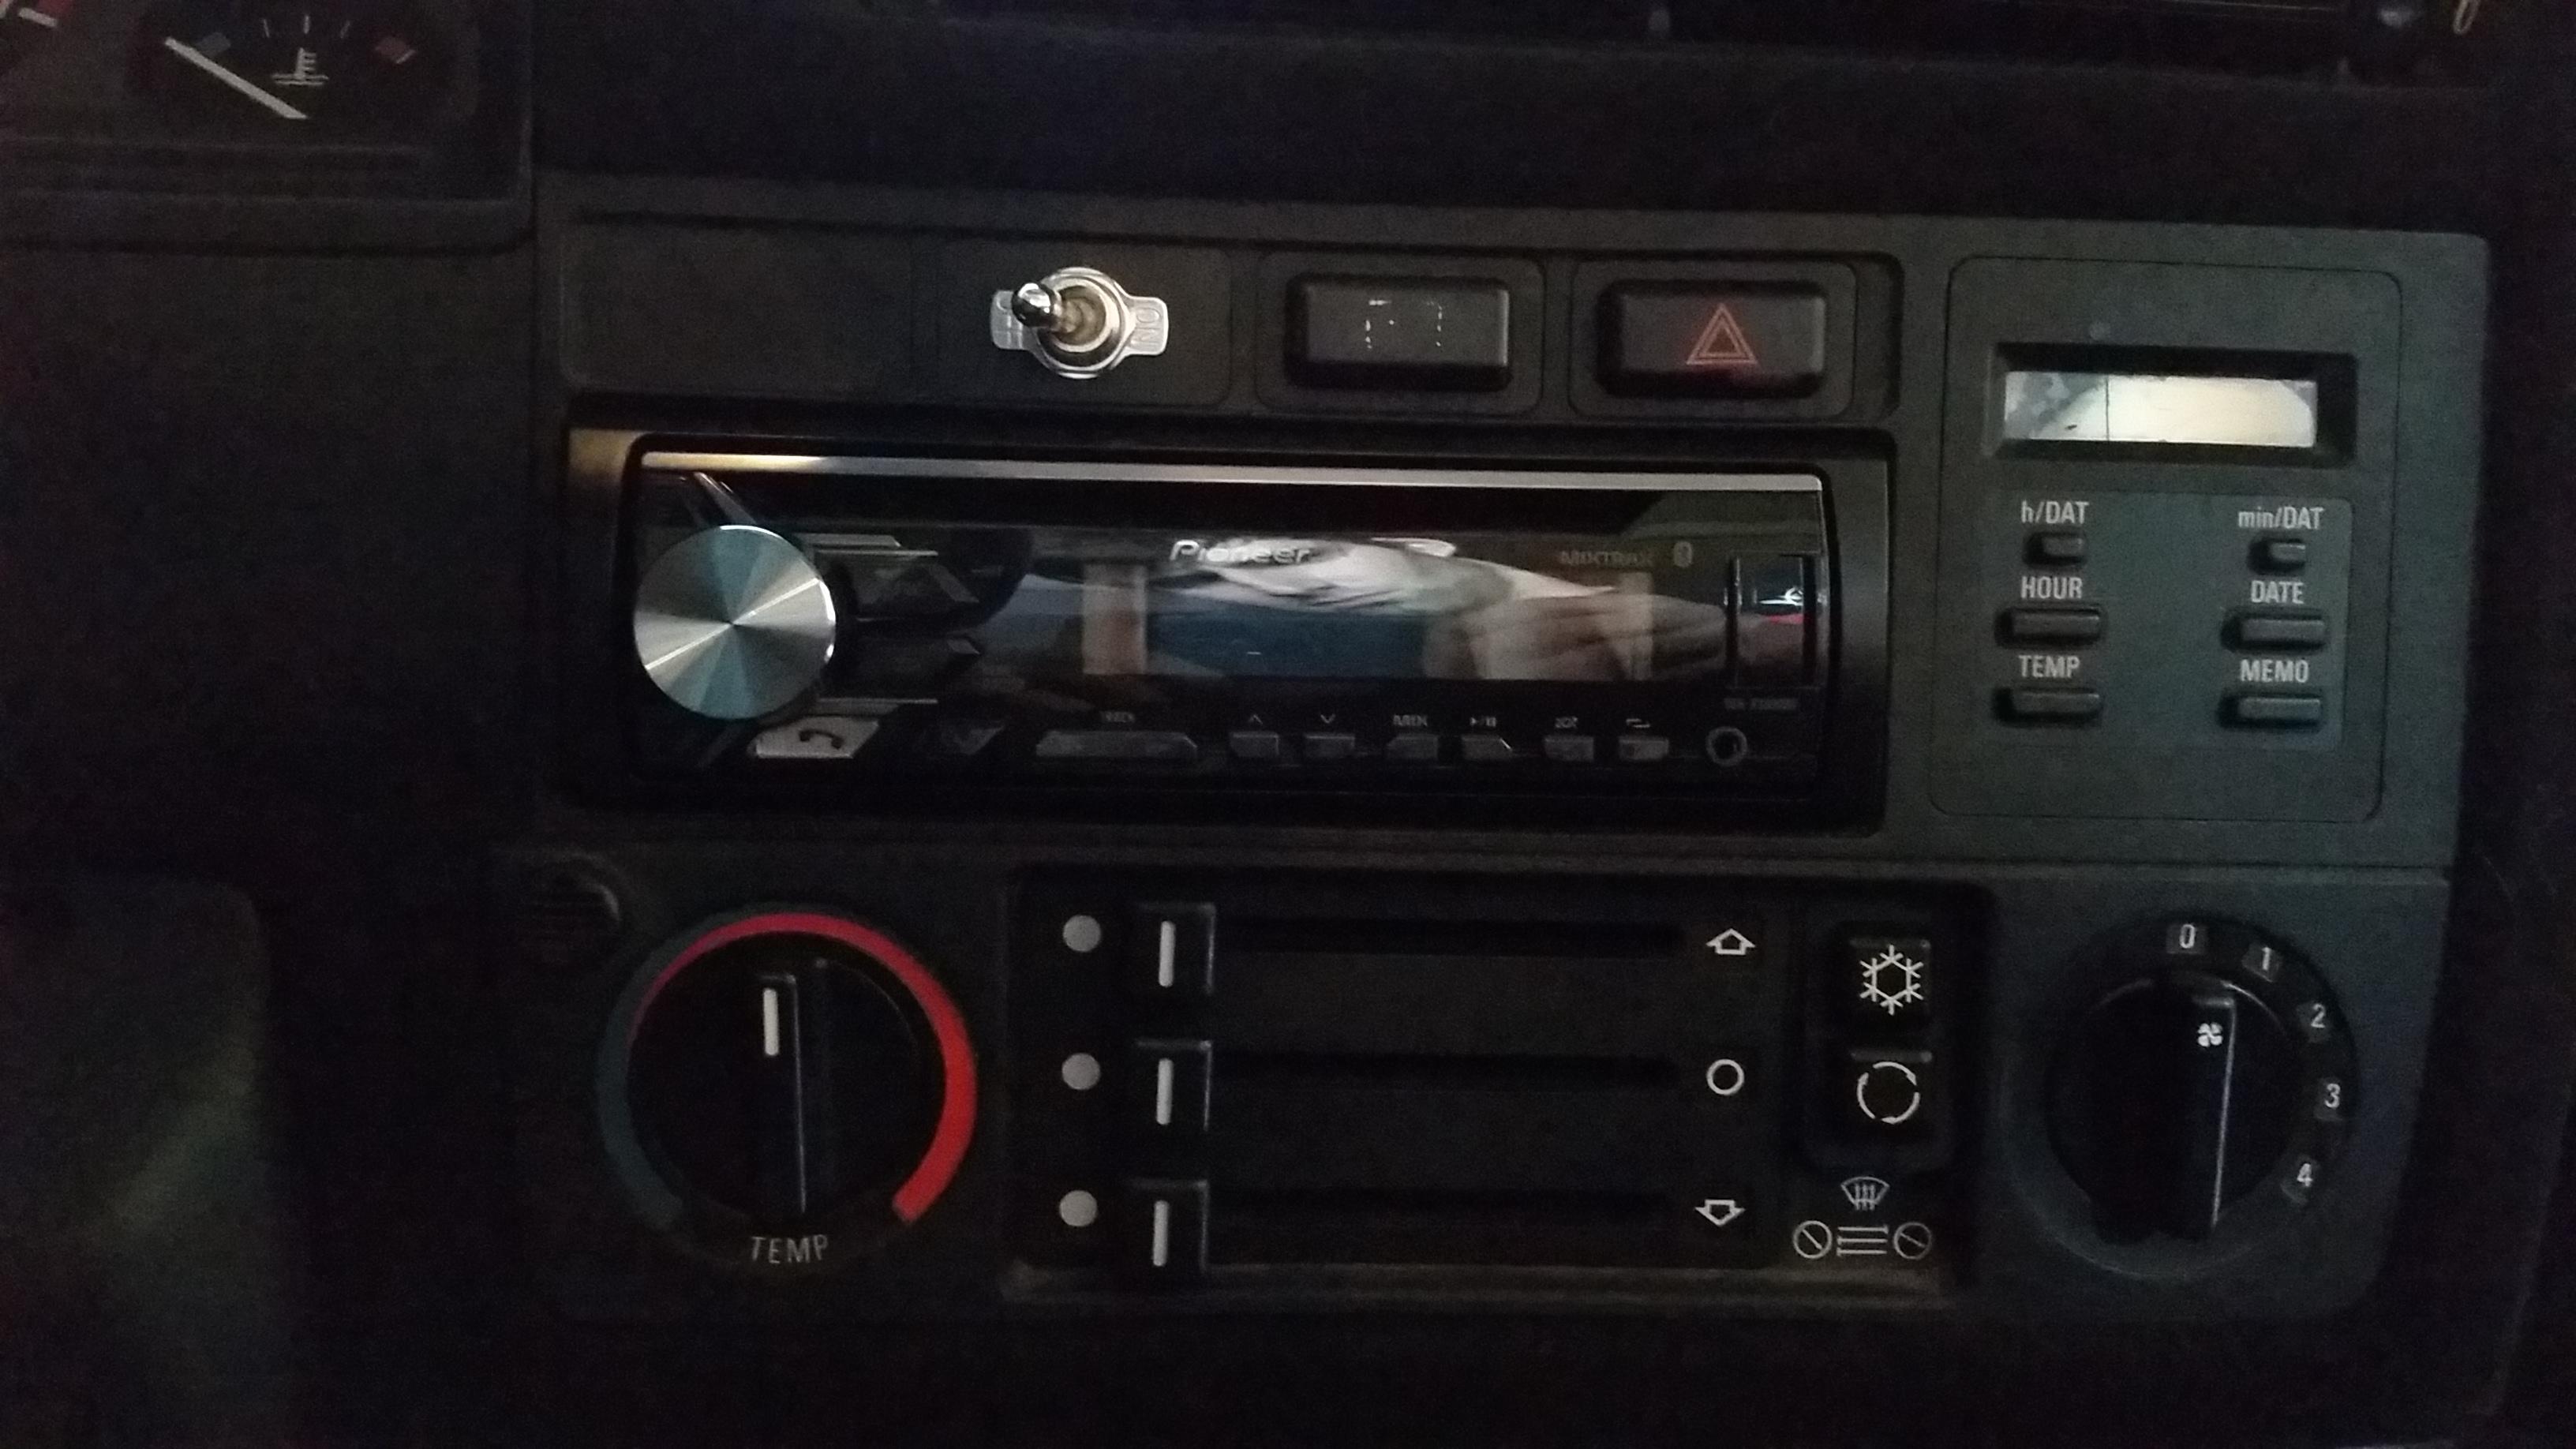
I picked up a toggle switch from my local auto parts store and spliced it in to the circuit as an override. For now that is all I have to turn the fan on. It seems kind of inconvenient as it's one more thing to keep an eye on but I don't mind it and only really utilize it when going through town and slower traffic.
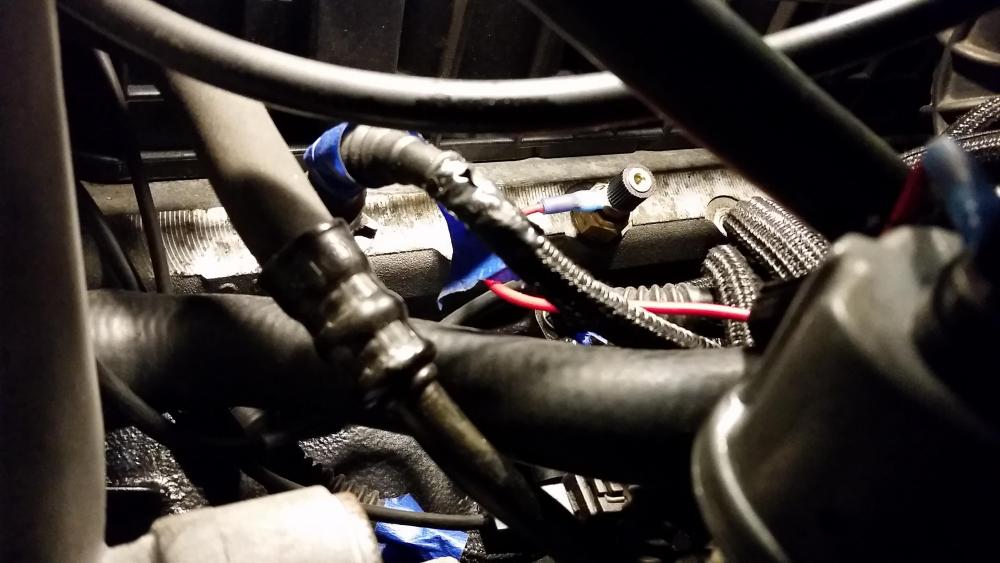
I spent most of my morning last Sunday giving the car a thorough cleaning inside and out that was well over do.

Wrapped up the main part of the harness to hide that huge cluster of wires, much better now. (Would have been an alright picture if hadn't been for my stupid finger)
-
-
Updates have been lacking as usual. A lot has happened in the last couple weeks so it's been tough for me to get enough motivation to finally type out an update and get yall caught up.
Enough with the blah... Yets go back to where we left off.
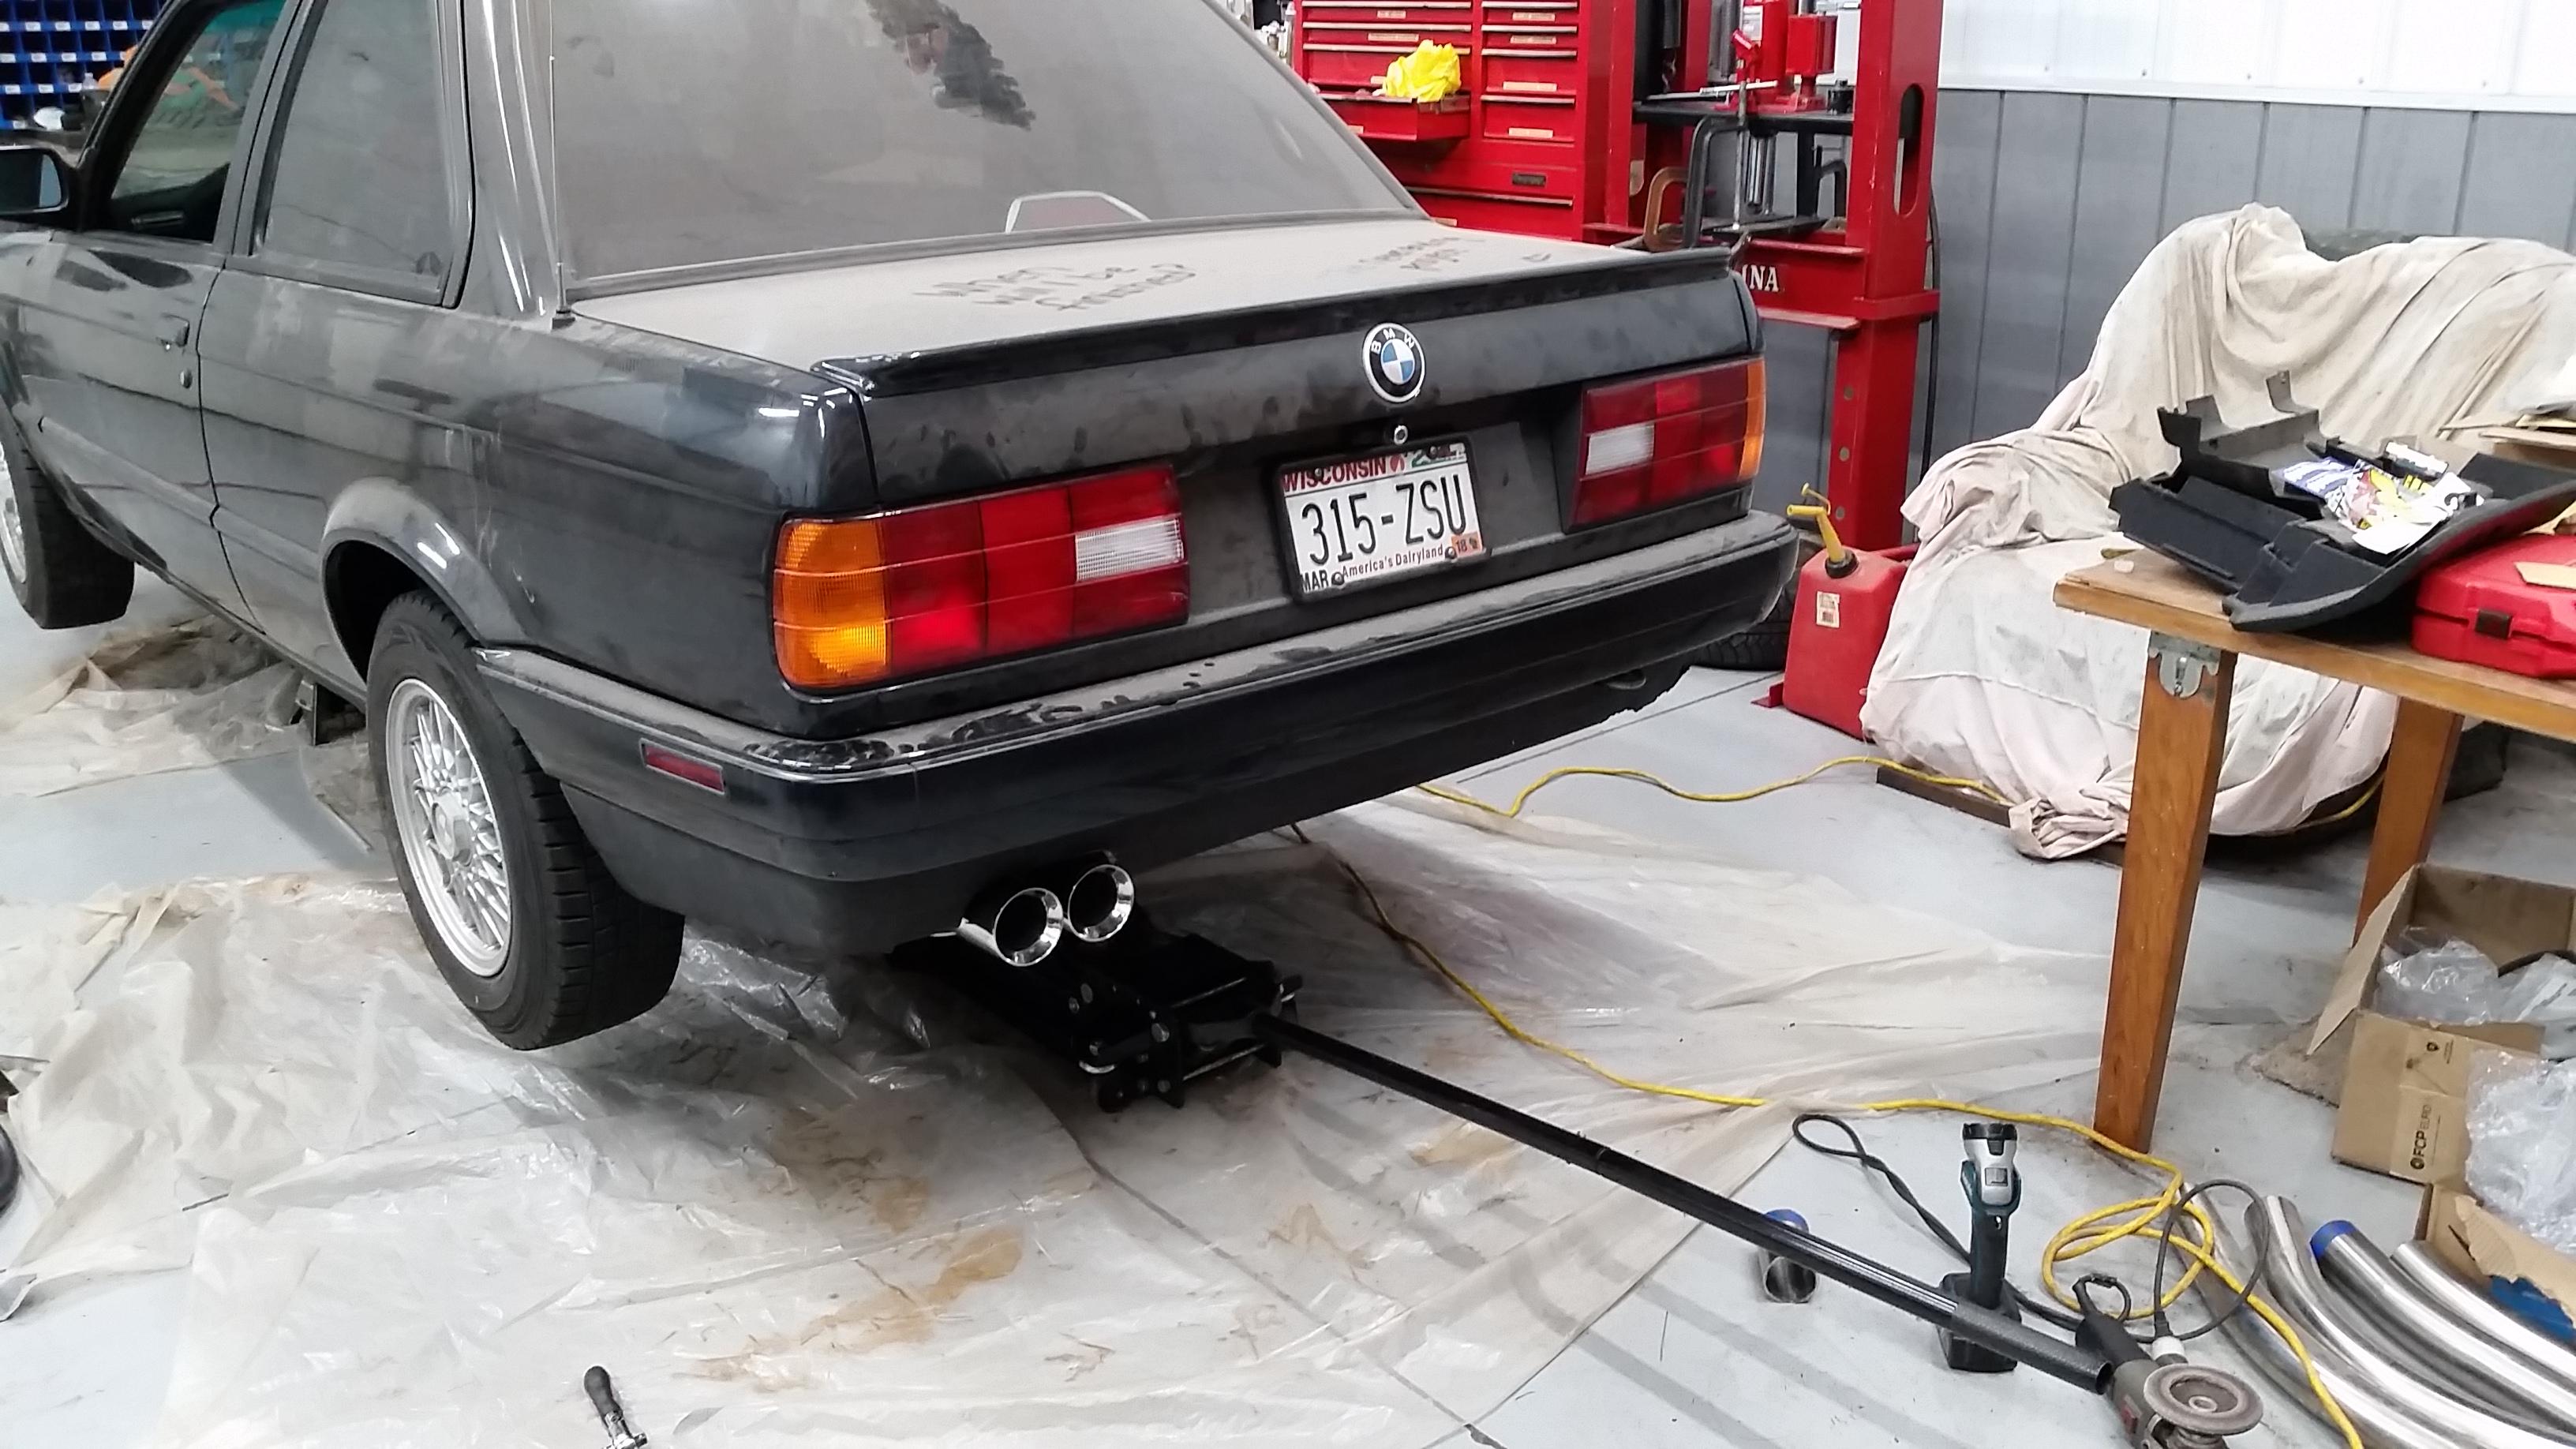
Muffler/exhaust finished up.
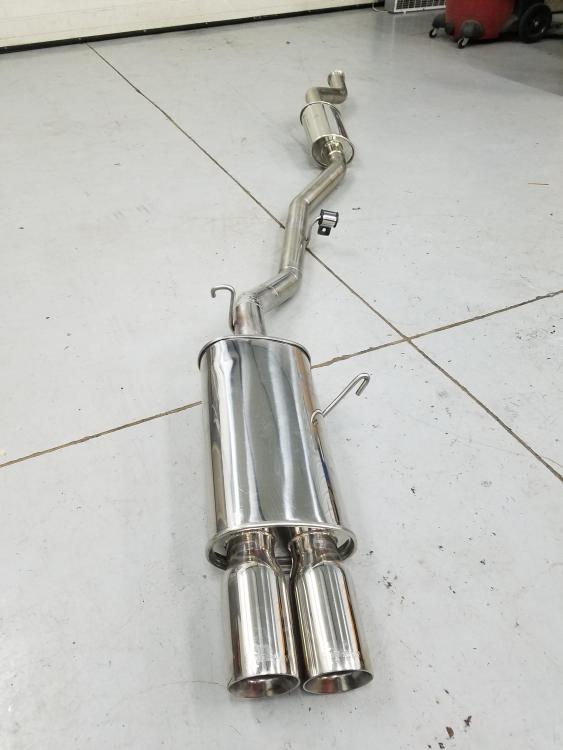
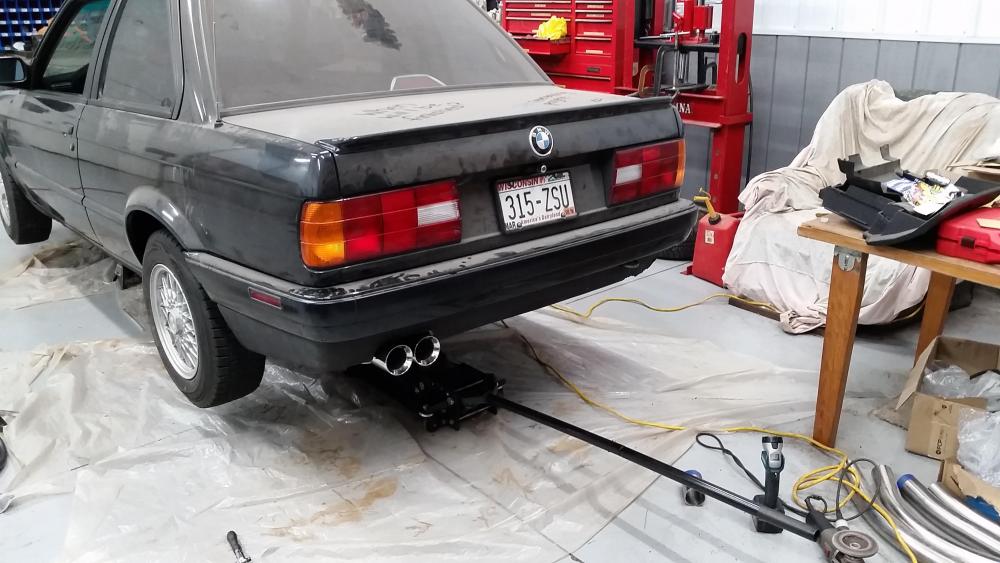
Couldn't be more happy with the final results and the sound is exactly what I wanted. Being that this was a 318, I did have to cut the exhuast hole on the rear valance larger so I could fit the two muffler tips through.
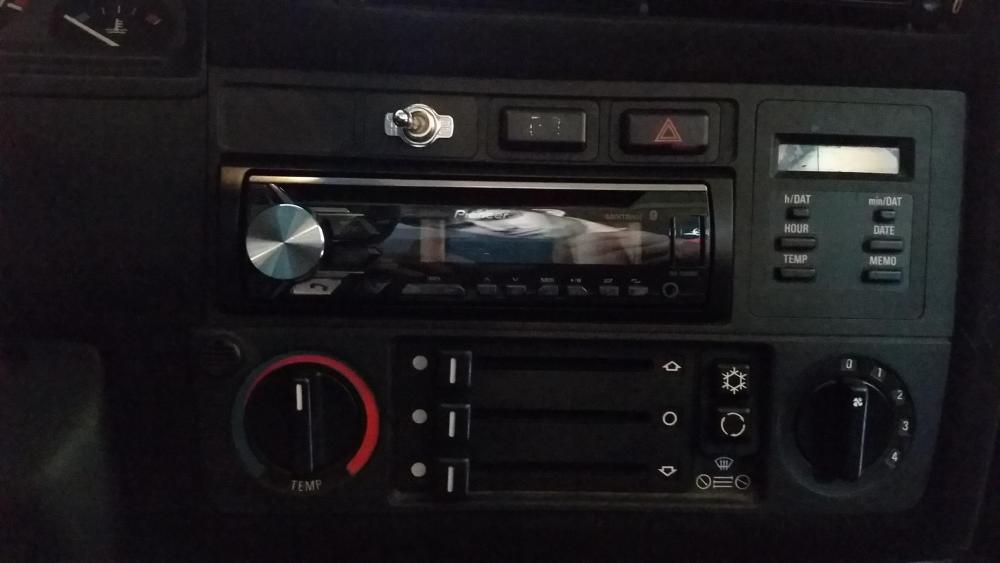
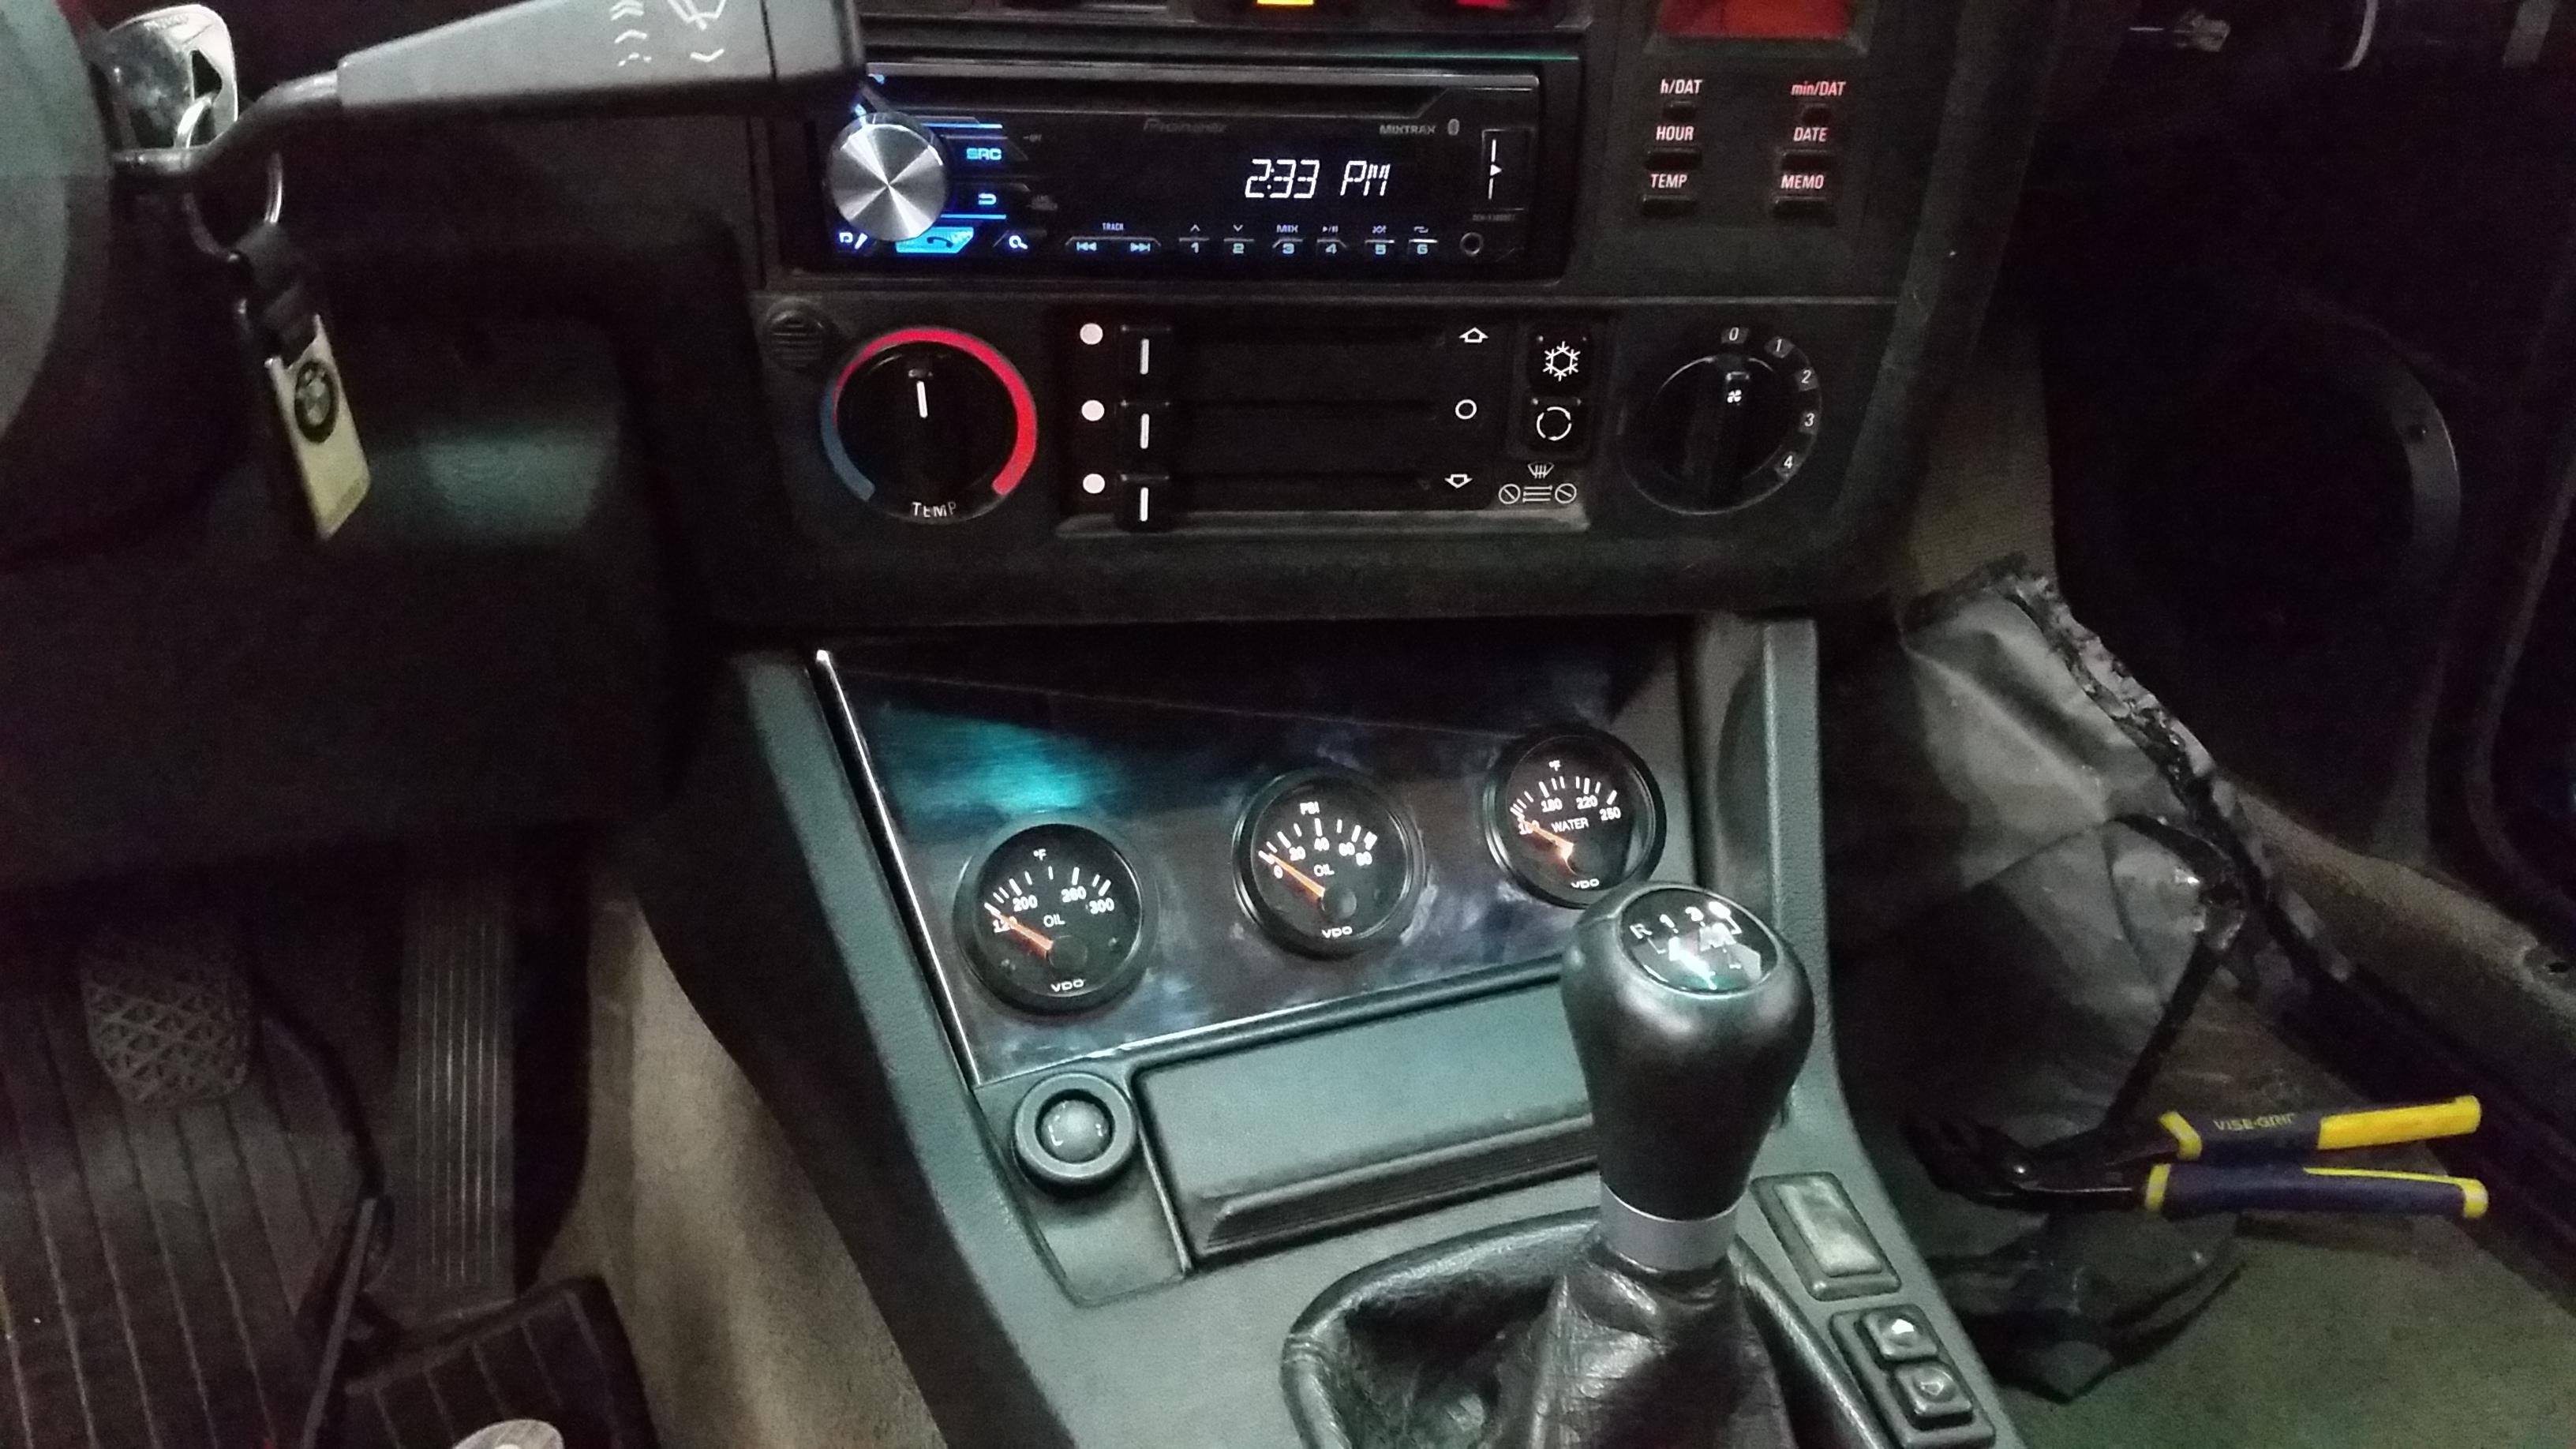
Gauges wired up and installed.

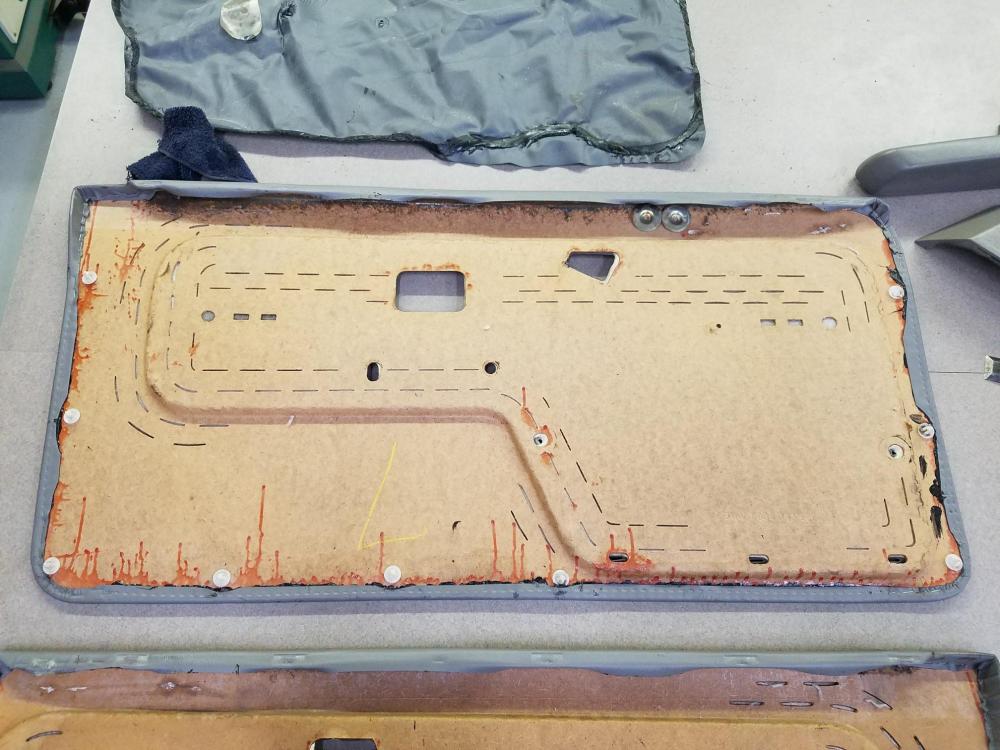
I did end up finding some 3m weatherstripping adhesive at my local auto parts store that I was recommended to try for the vinyl on the door cards and it worked perfect. The stuff is fairly expensive but it was well worth it, I don't see this stuff coming lose ever again now.
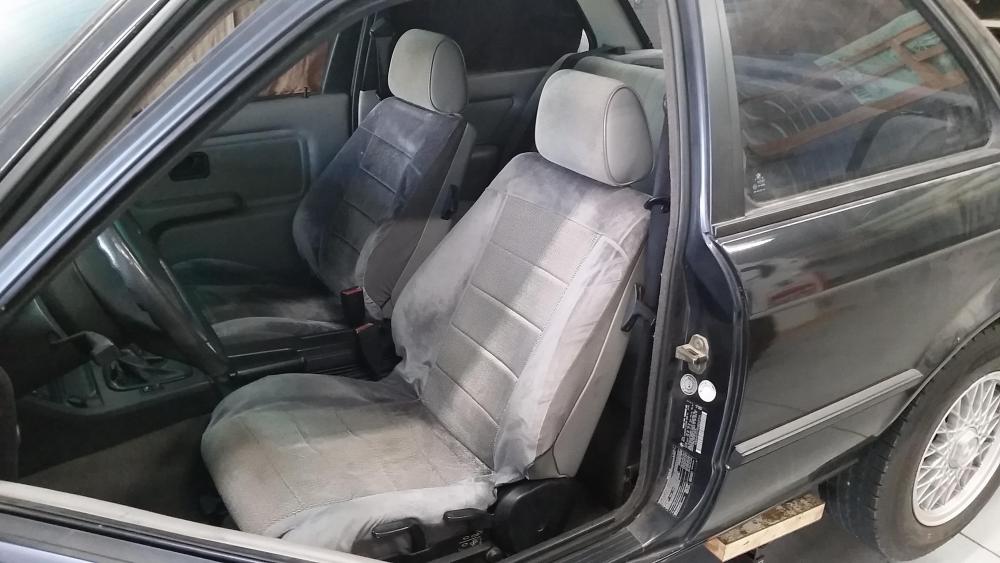
Seats covered and installed. Had to take some of the pieces off the old seats to make these ones fit in and make all the adjustments work properly. Not the best but it will do for now.
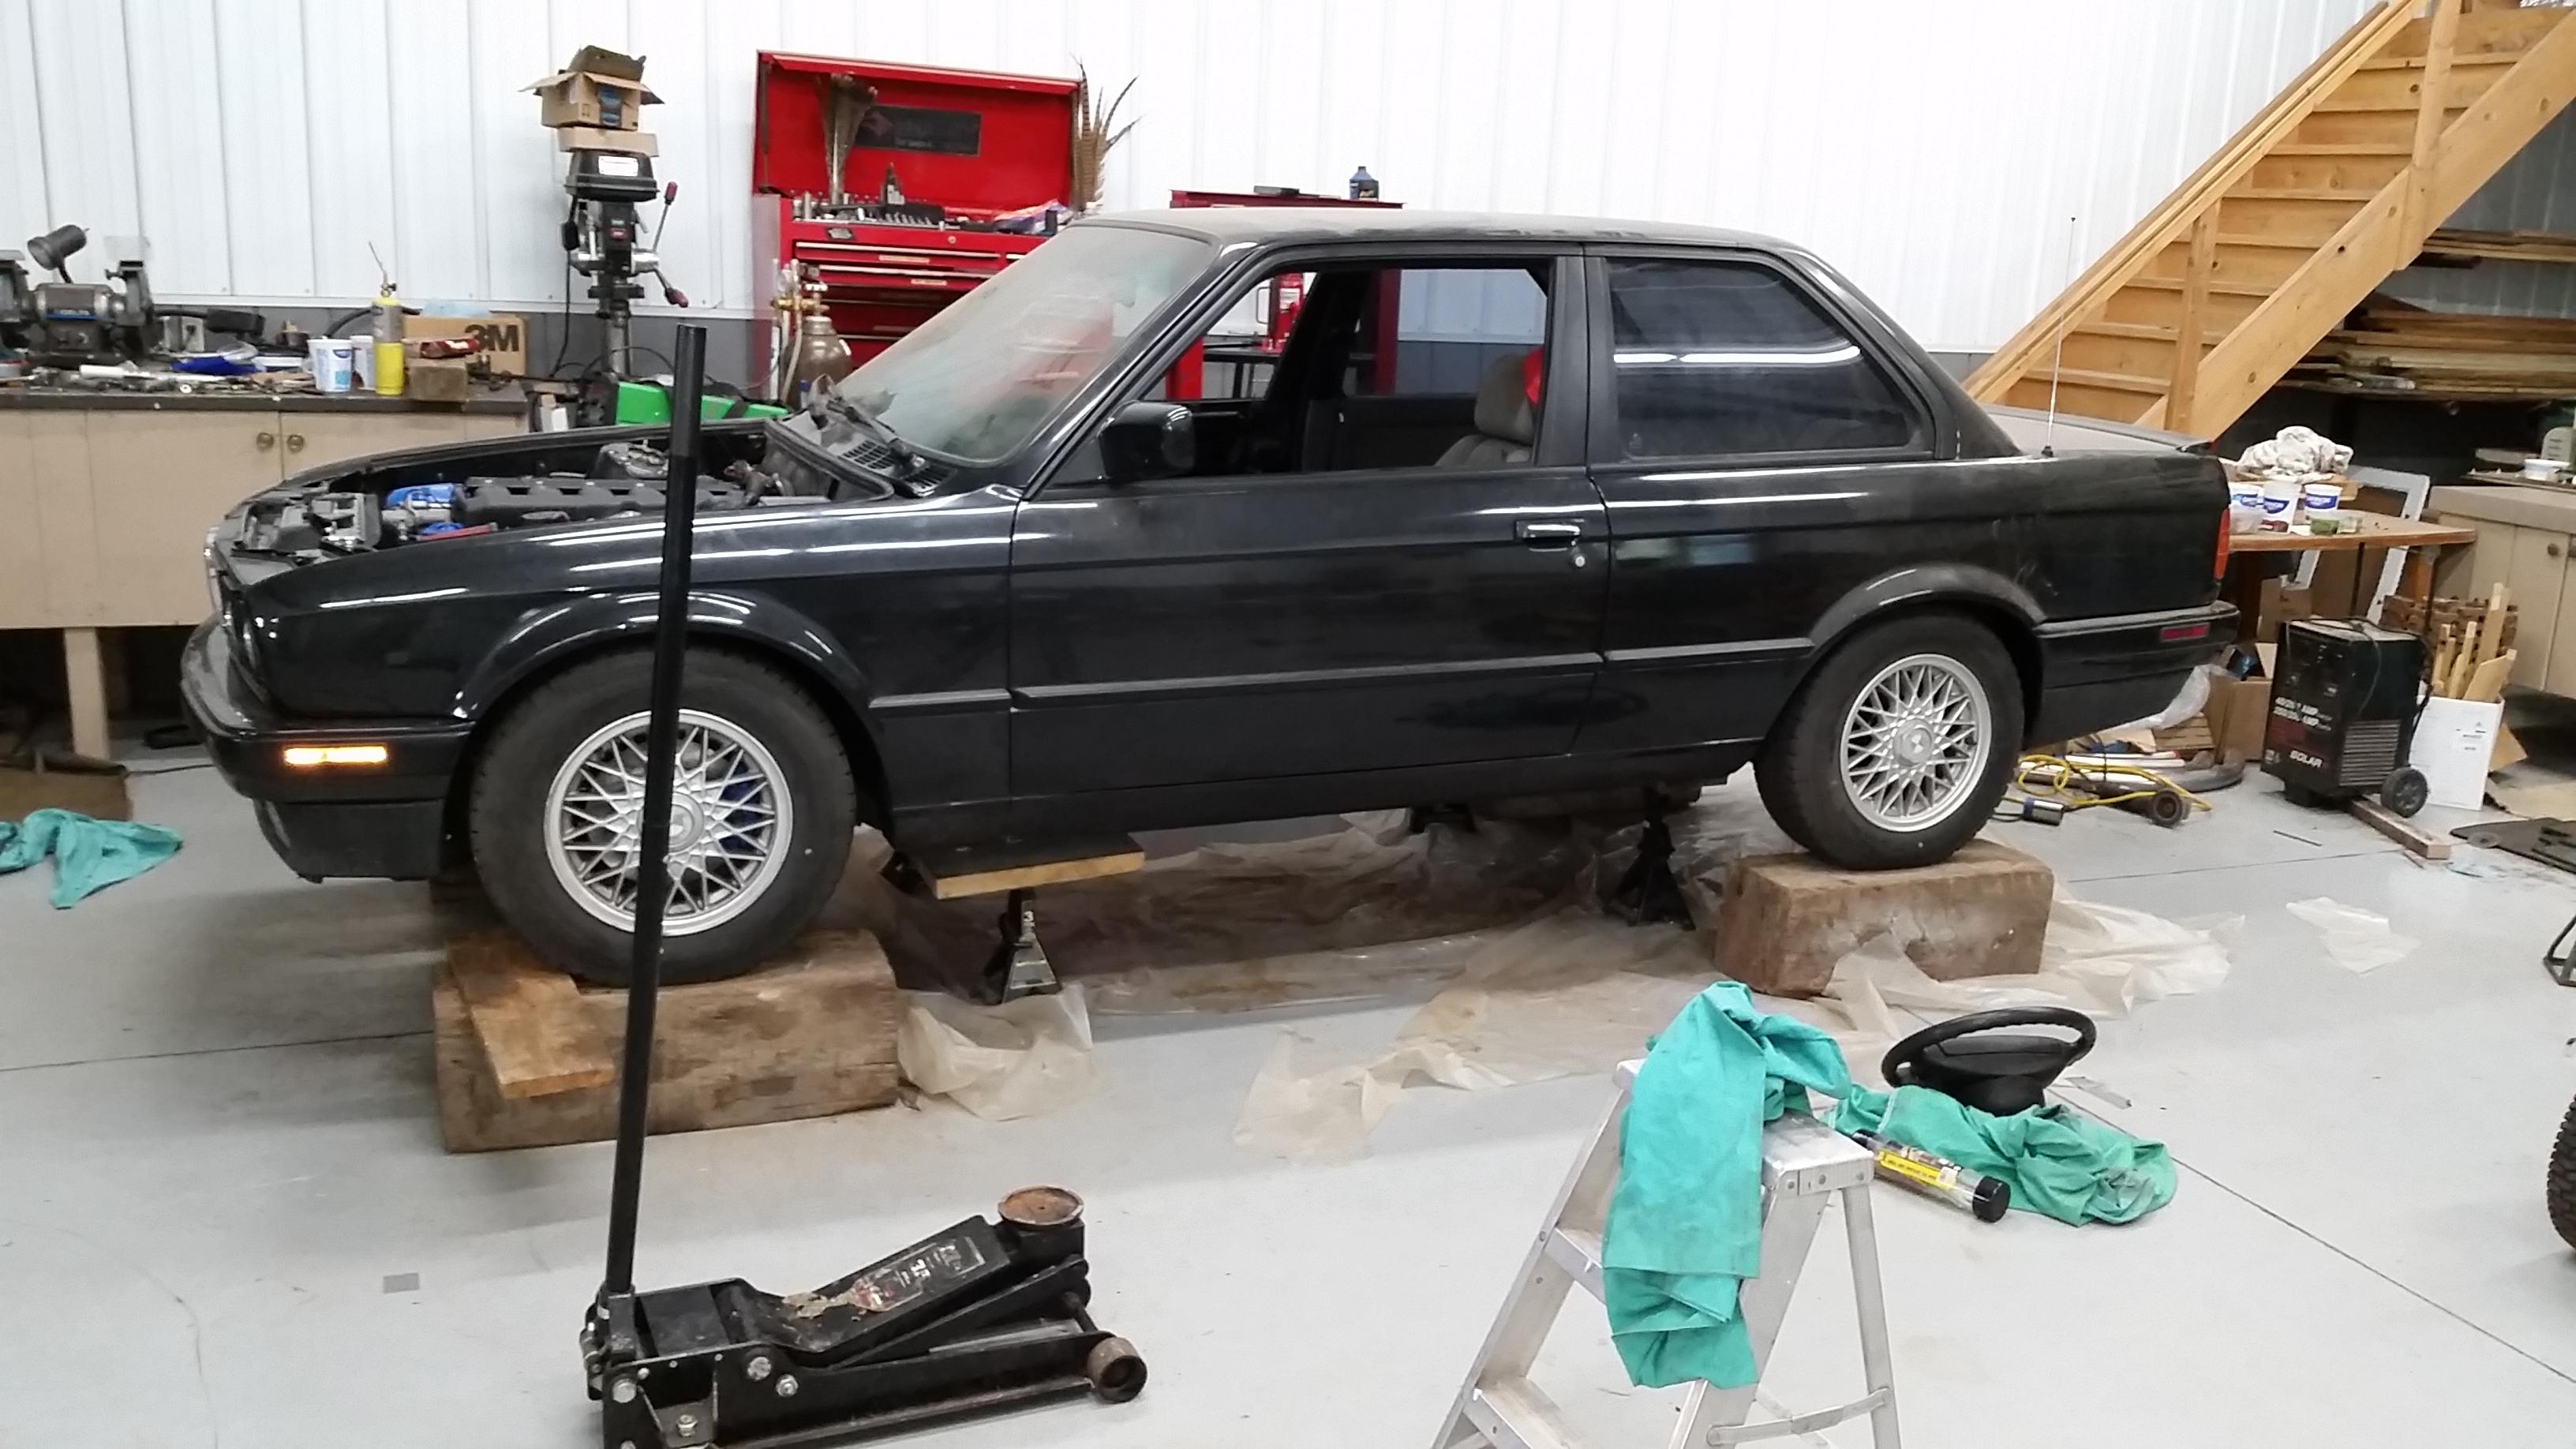
After installing the seats and exhaust I went ahead and placed the car on 4 wood blocks we had laying around the shop and set the pre-load on the swaybars.

After pre-load was set I went ahead and placed it back on the ground and took it out for a little test drive around the block to break the motor in.
I ran it for two 25-30 minute sessions letting the engine cool down completely in between. Engine ran great both times and felt awesome! No I didn't baby it while I was driving it around and in fact did the exact opposite and did several strong pulls in 2nd and 3rd gear letting off the gas and letting the engine slow the car down to help pull the piston rings out and bed in properly. After the second session I gave my head gasket leak a good inspection, still leakin

So, out of frustration I took the following day off work and decided to get the dumb thing whipped out so I can put it behind me and move on to other things.
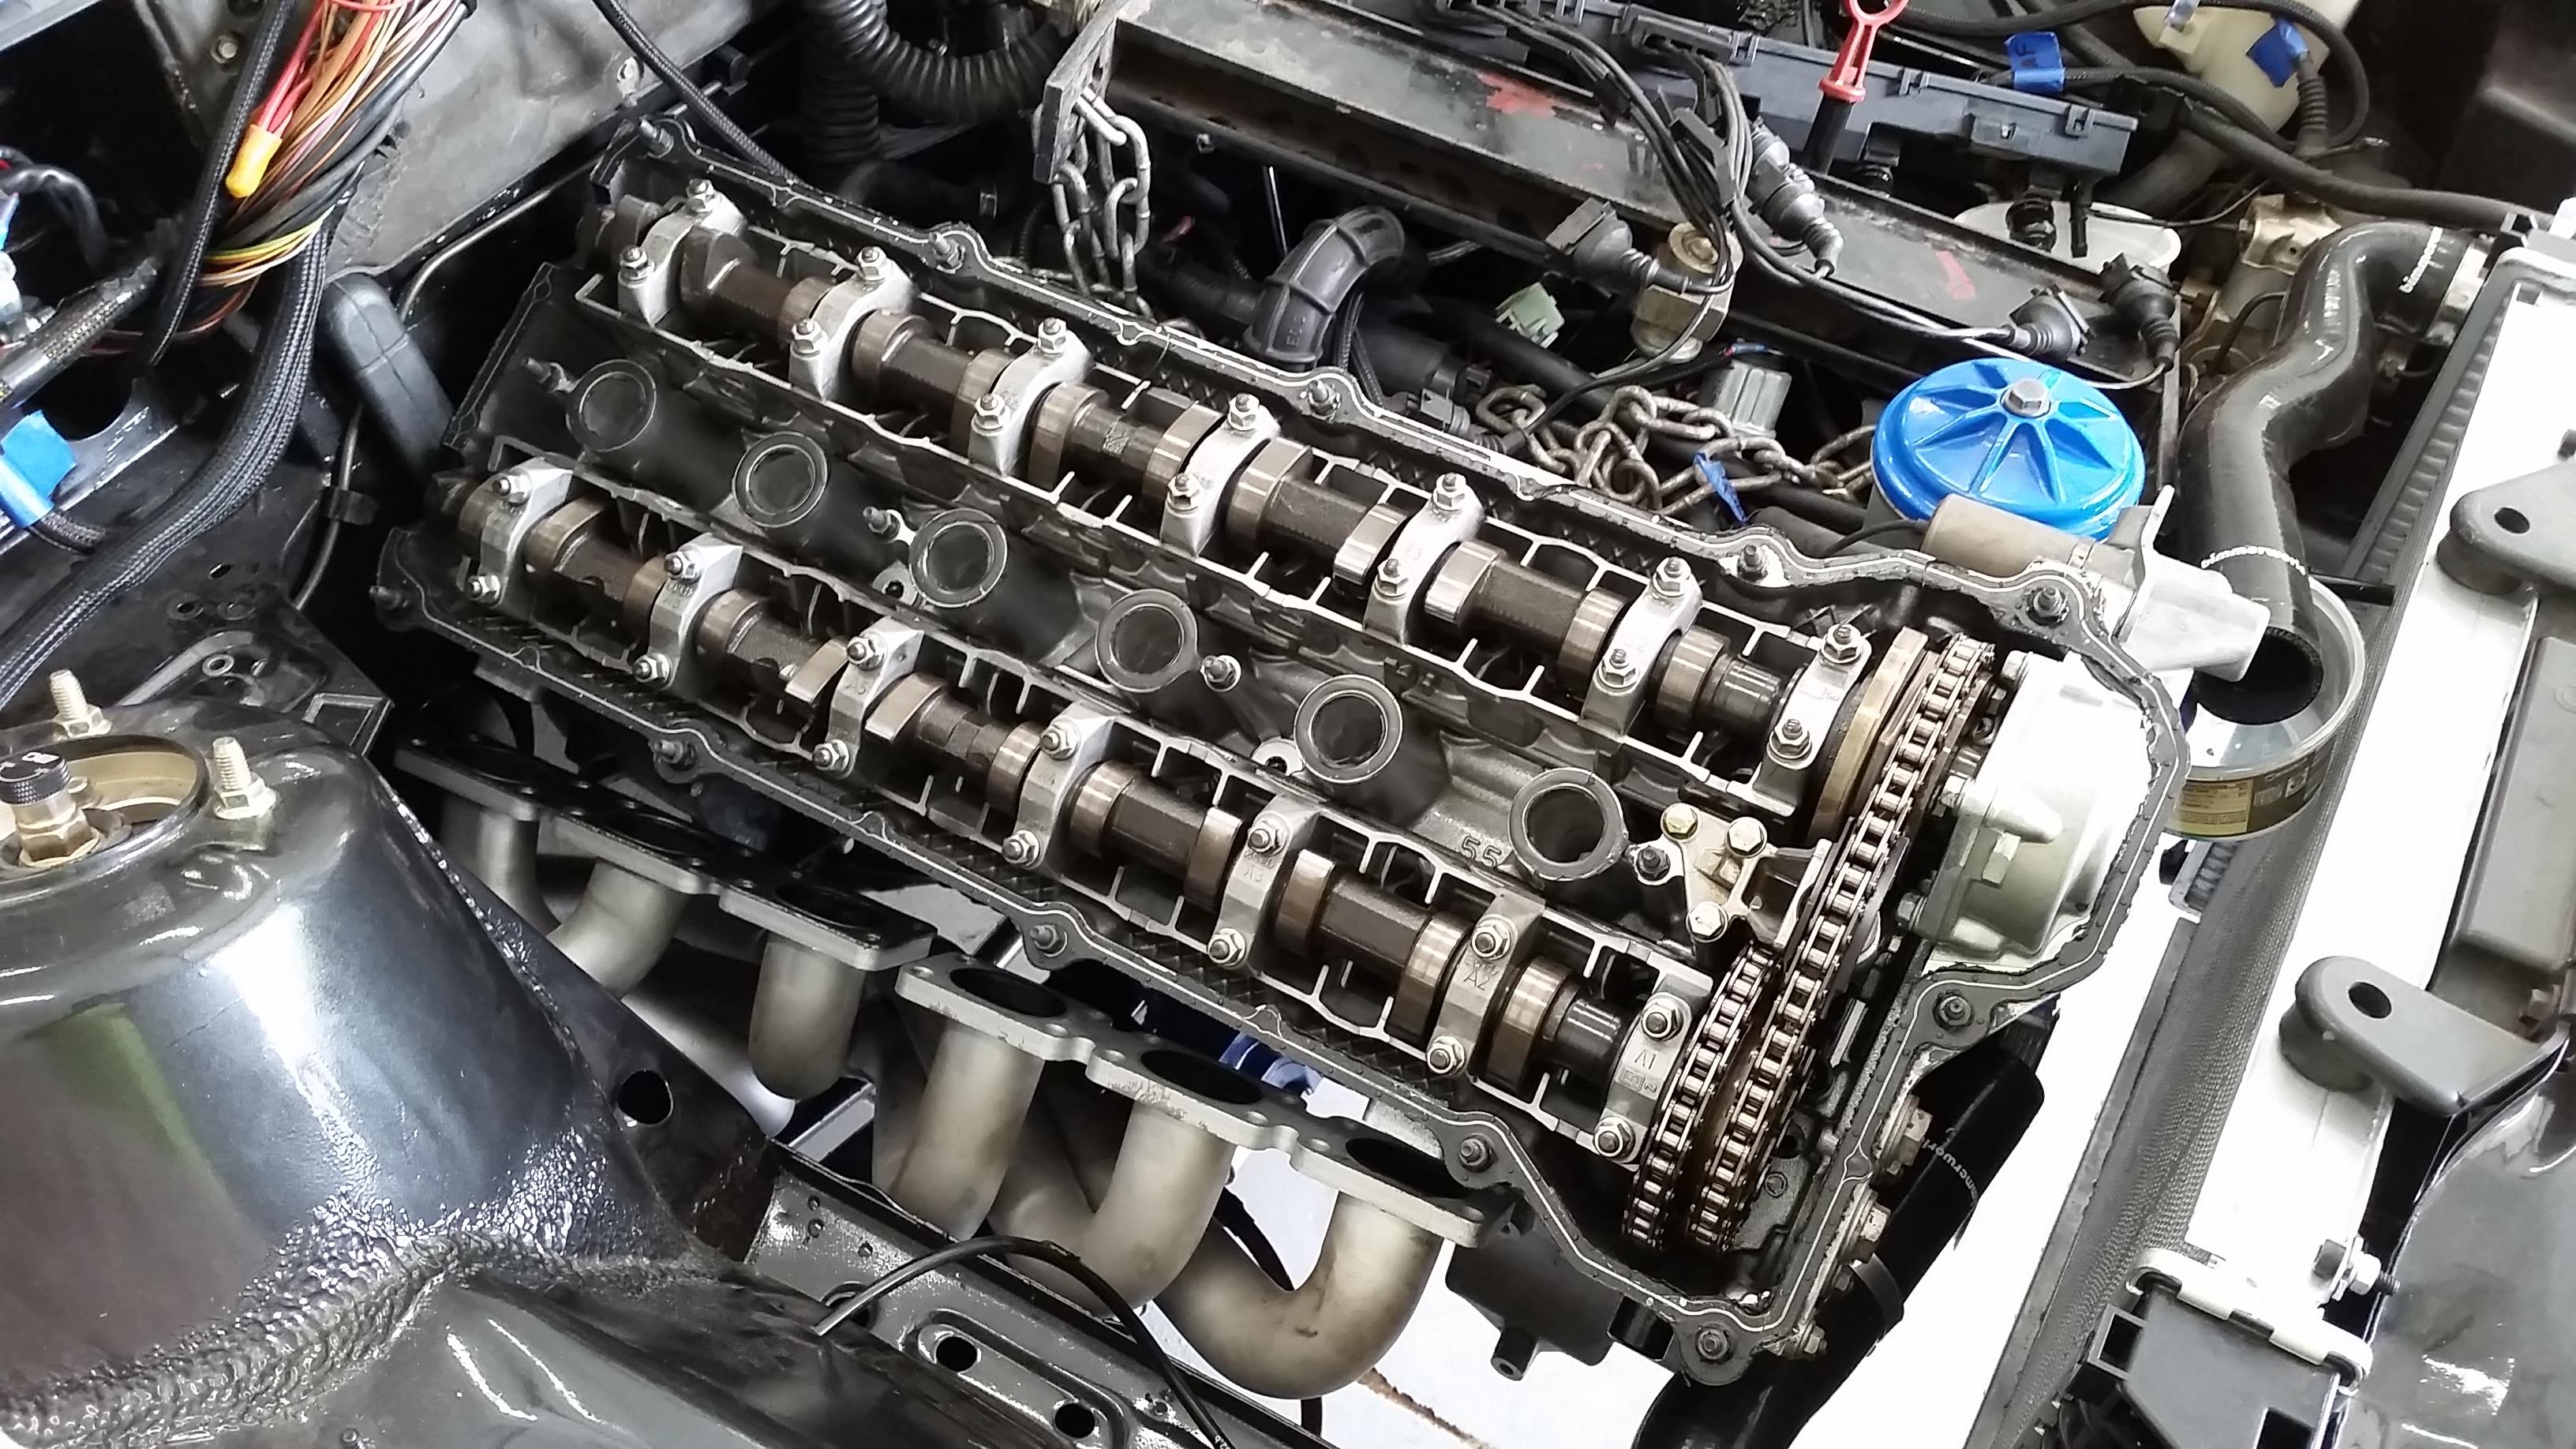
I started bright and early and began dissembling the engine to get ready to pull the head.
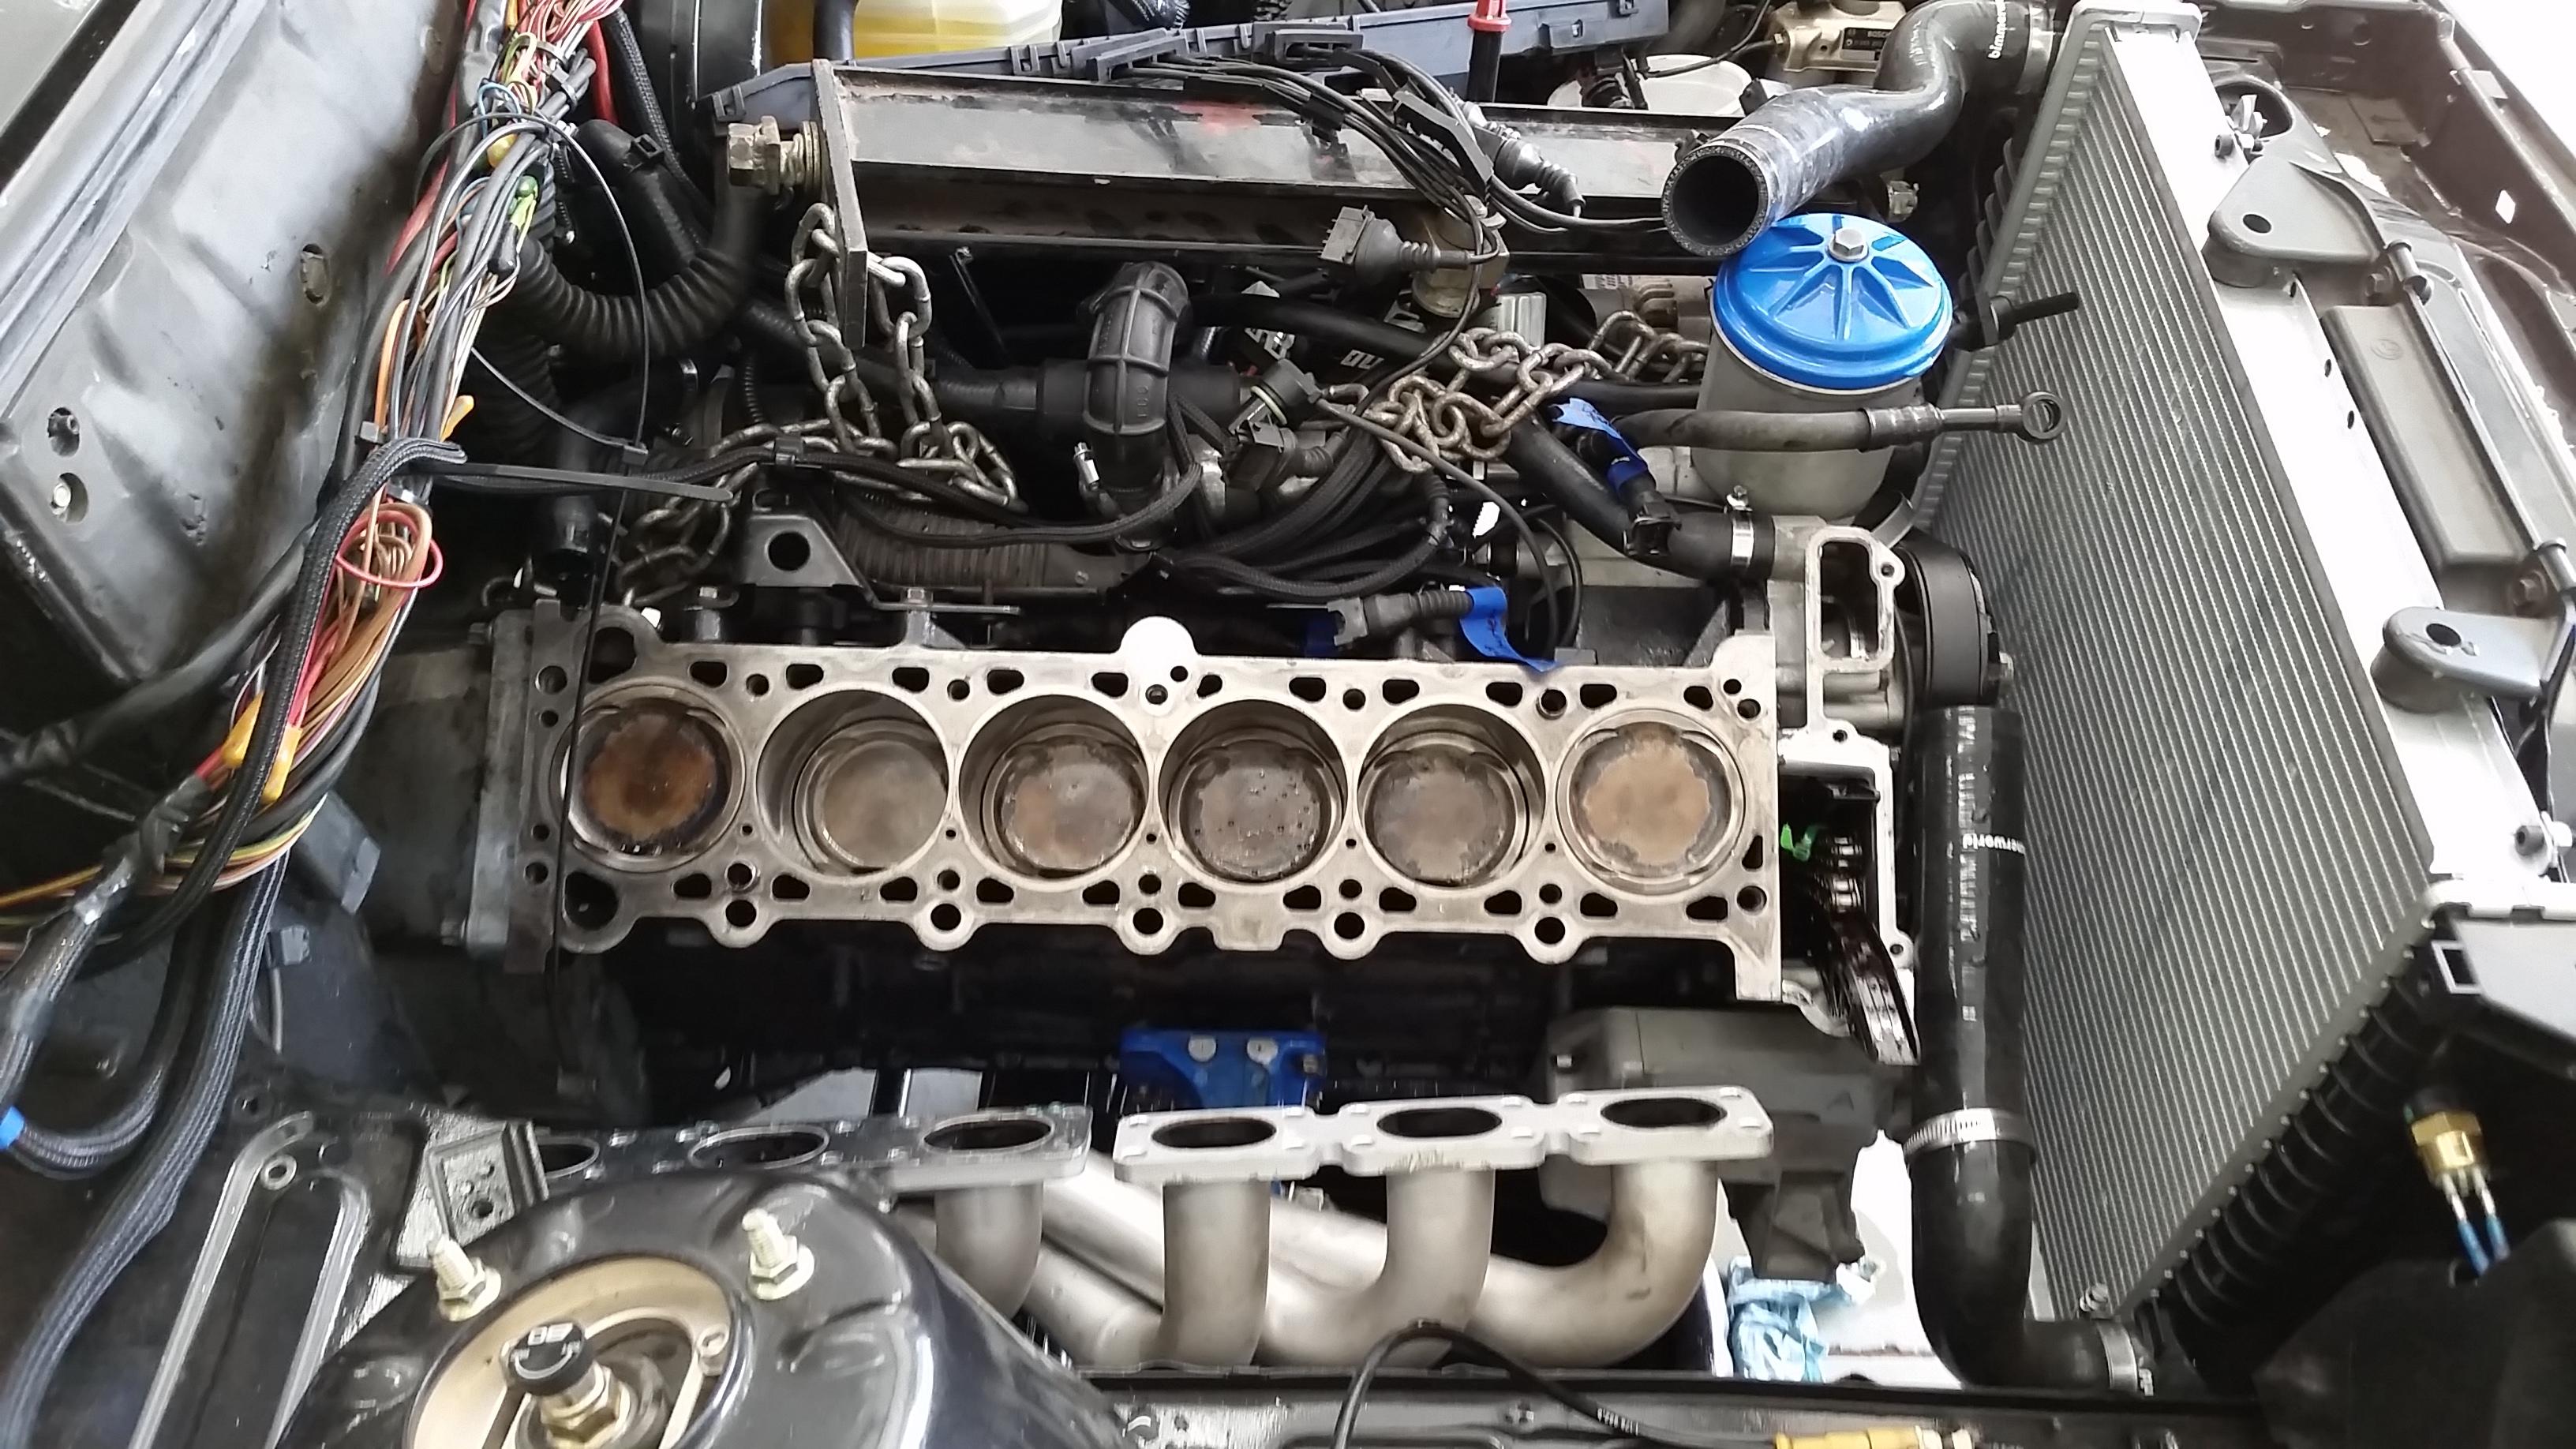
It took me tell about lunch time to get everything dissembled and ready for the head to be pulled off... and done.

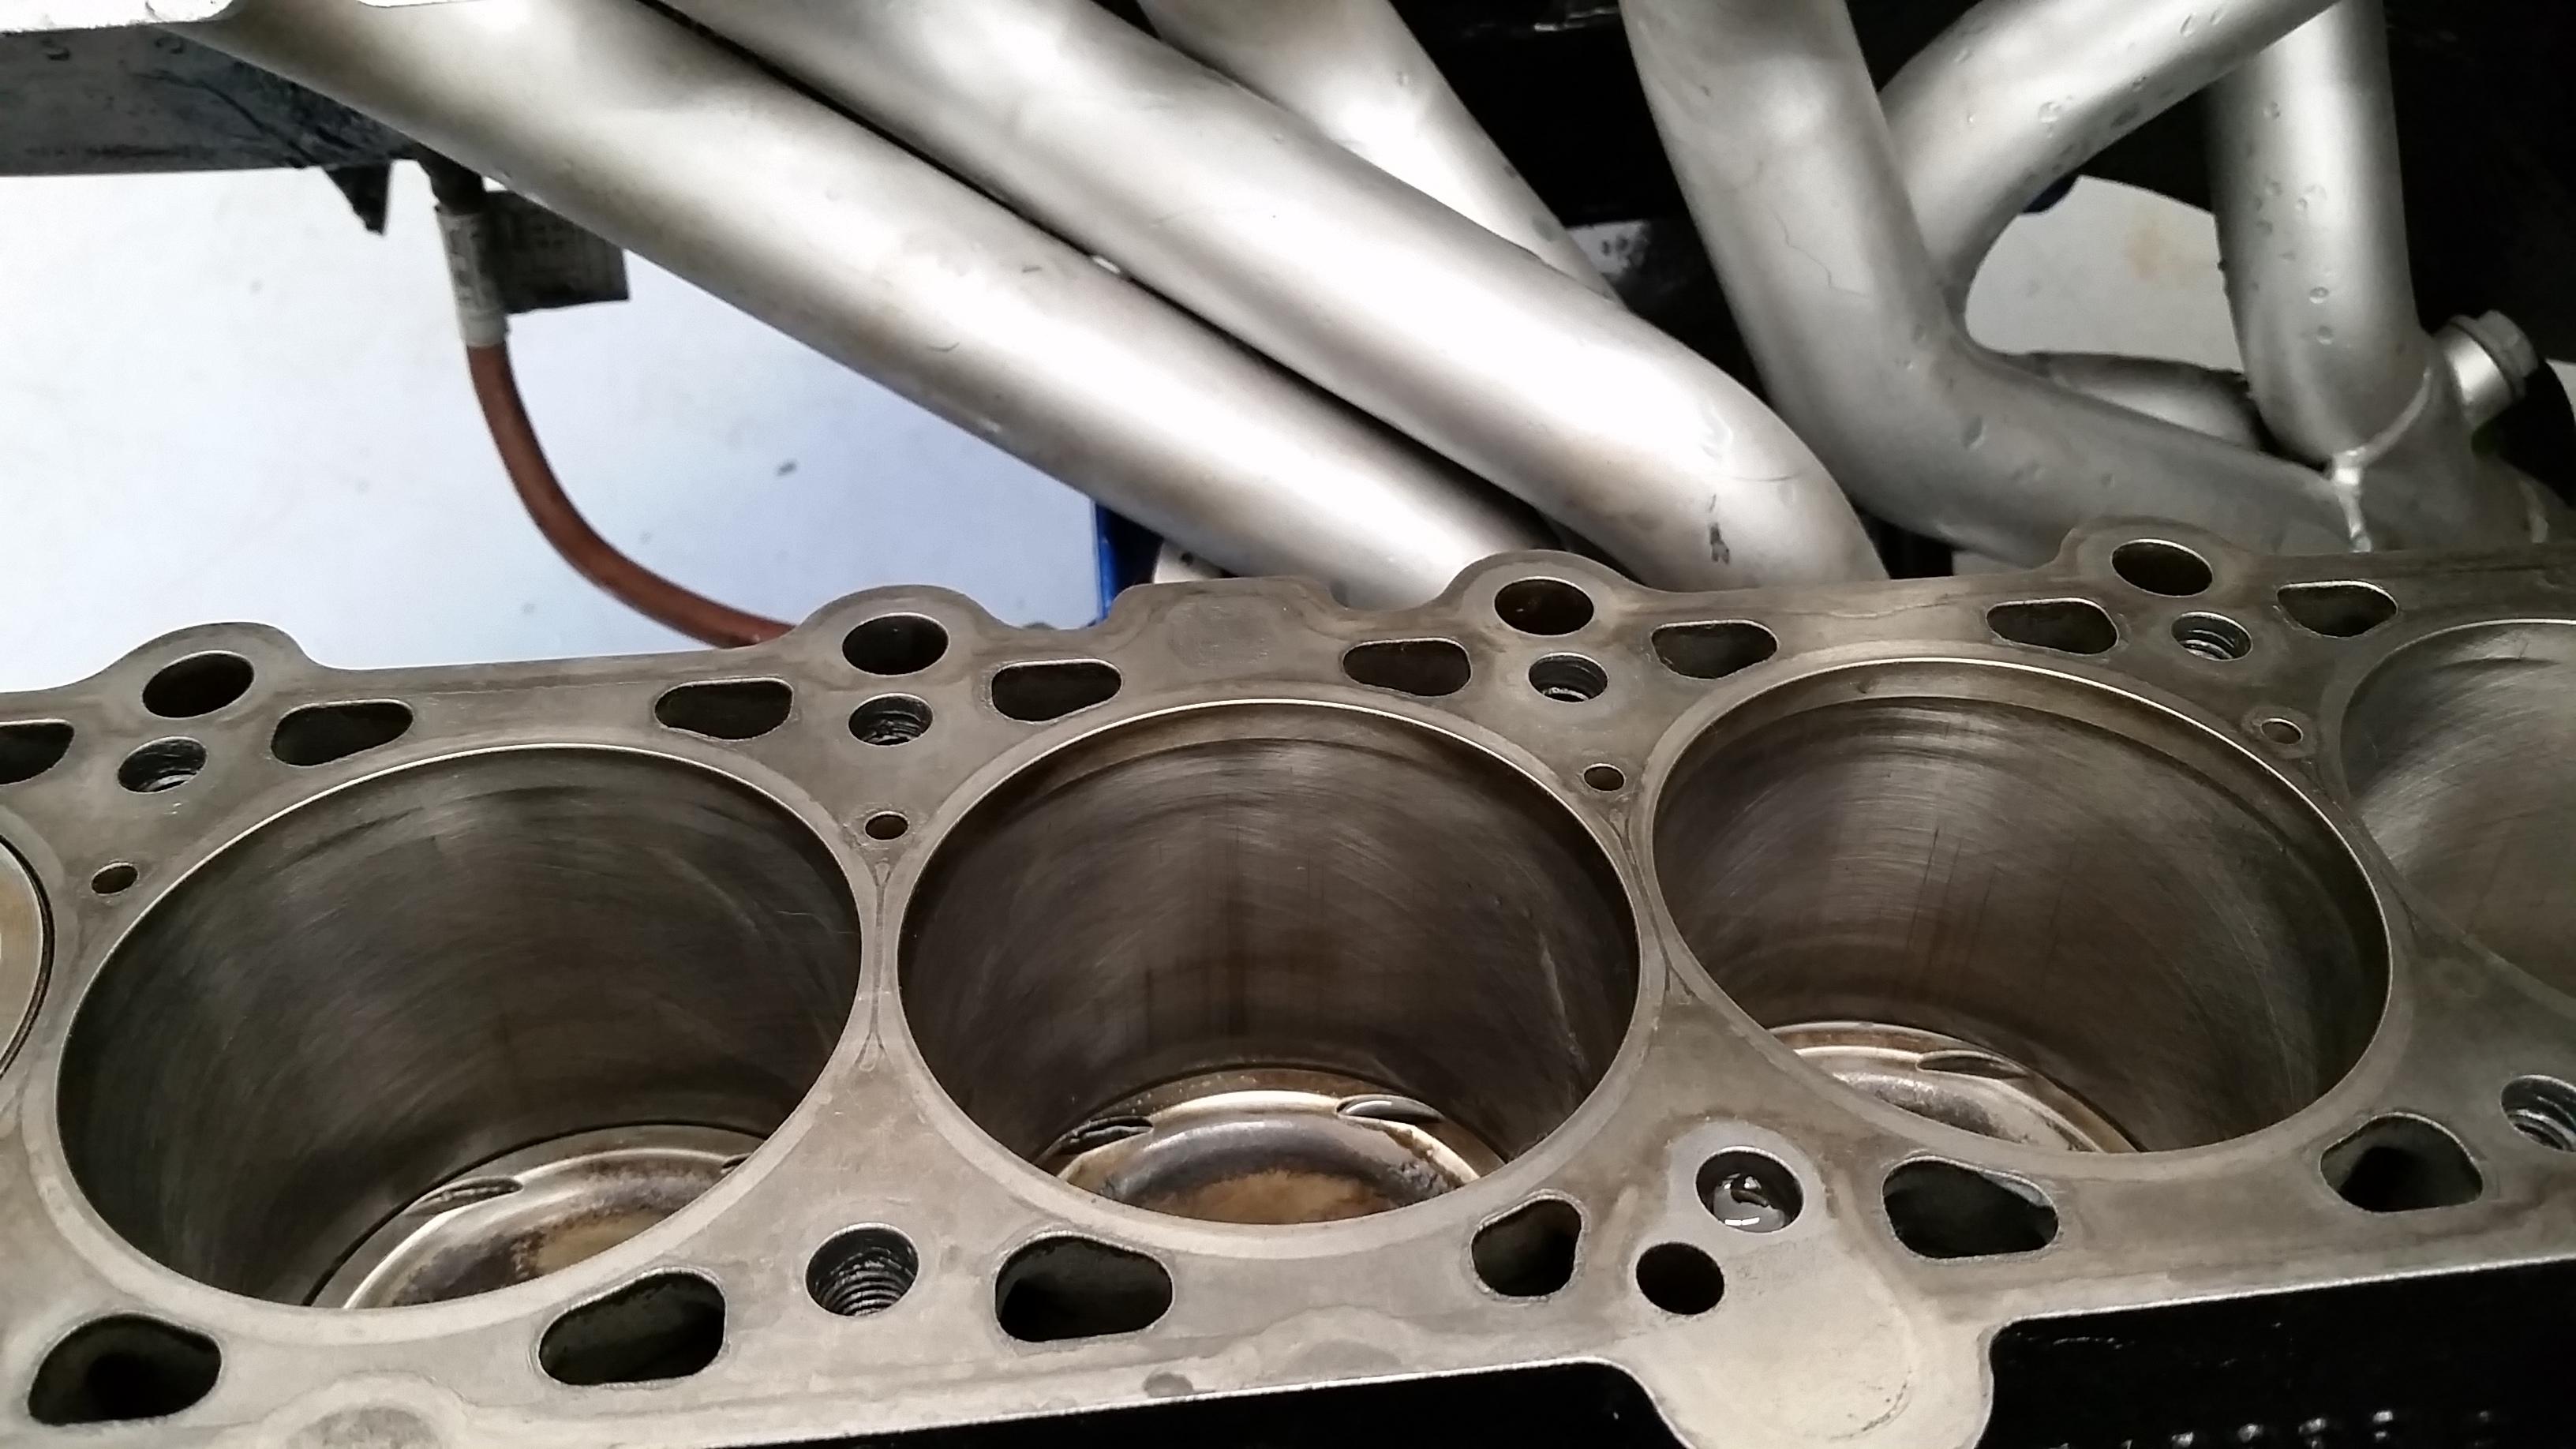
I took time to look over every cylinder and check for any odd stuff going on.
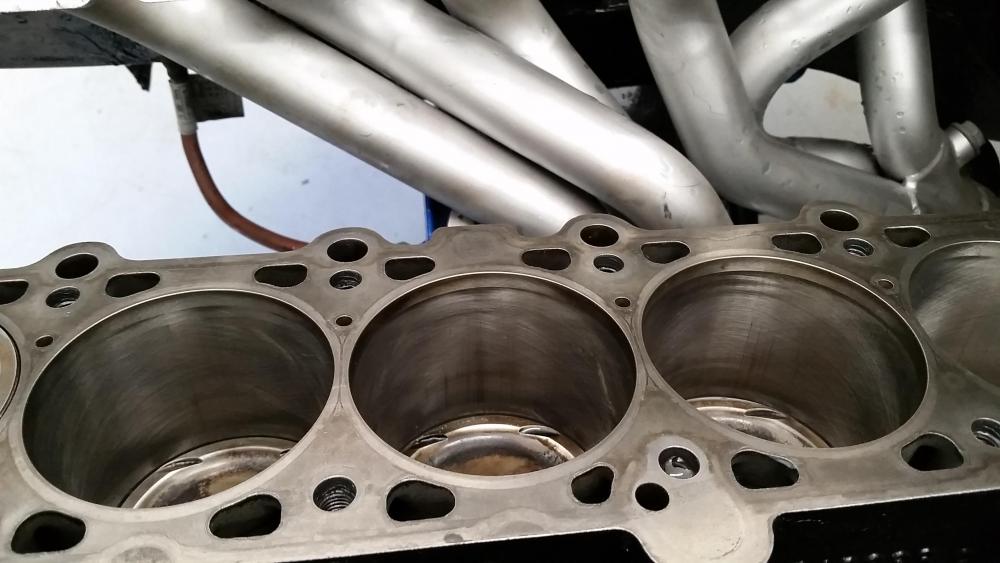
Nothing unusual was found. There was some light vertical scratching on all the walls though, I assume that's just from the rings bedding themselves in.After wiping down both surfaces with acetone, I laid down a fresh new head gasket with some rtv on the timing cover area to seal up that area where it was previously leaking and layed the head back on the block.
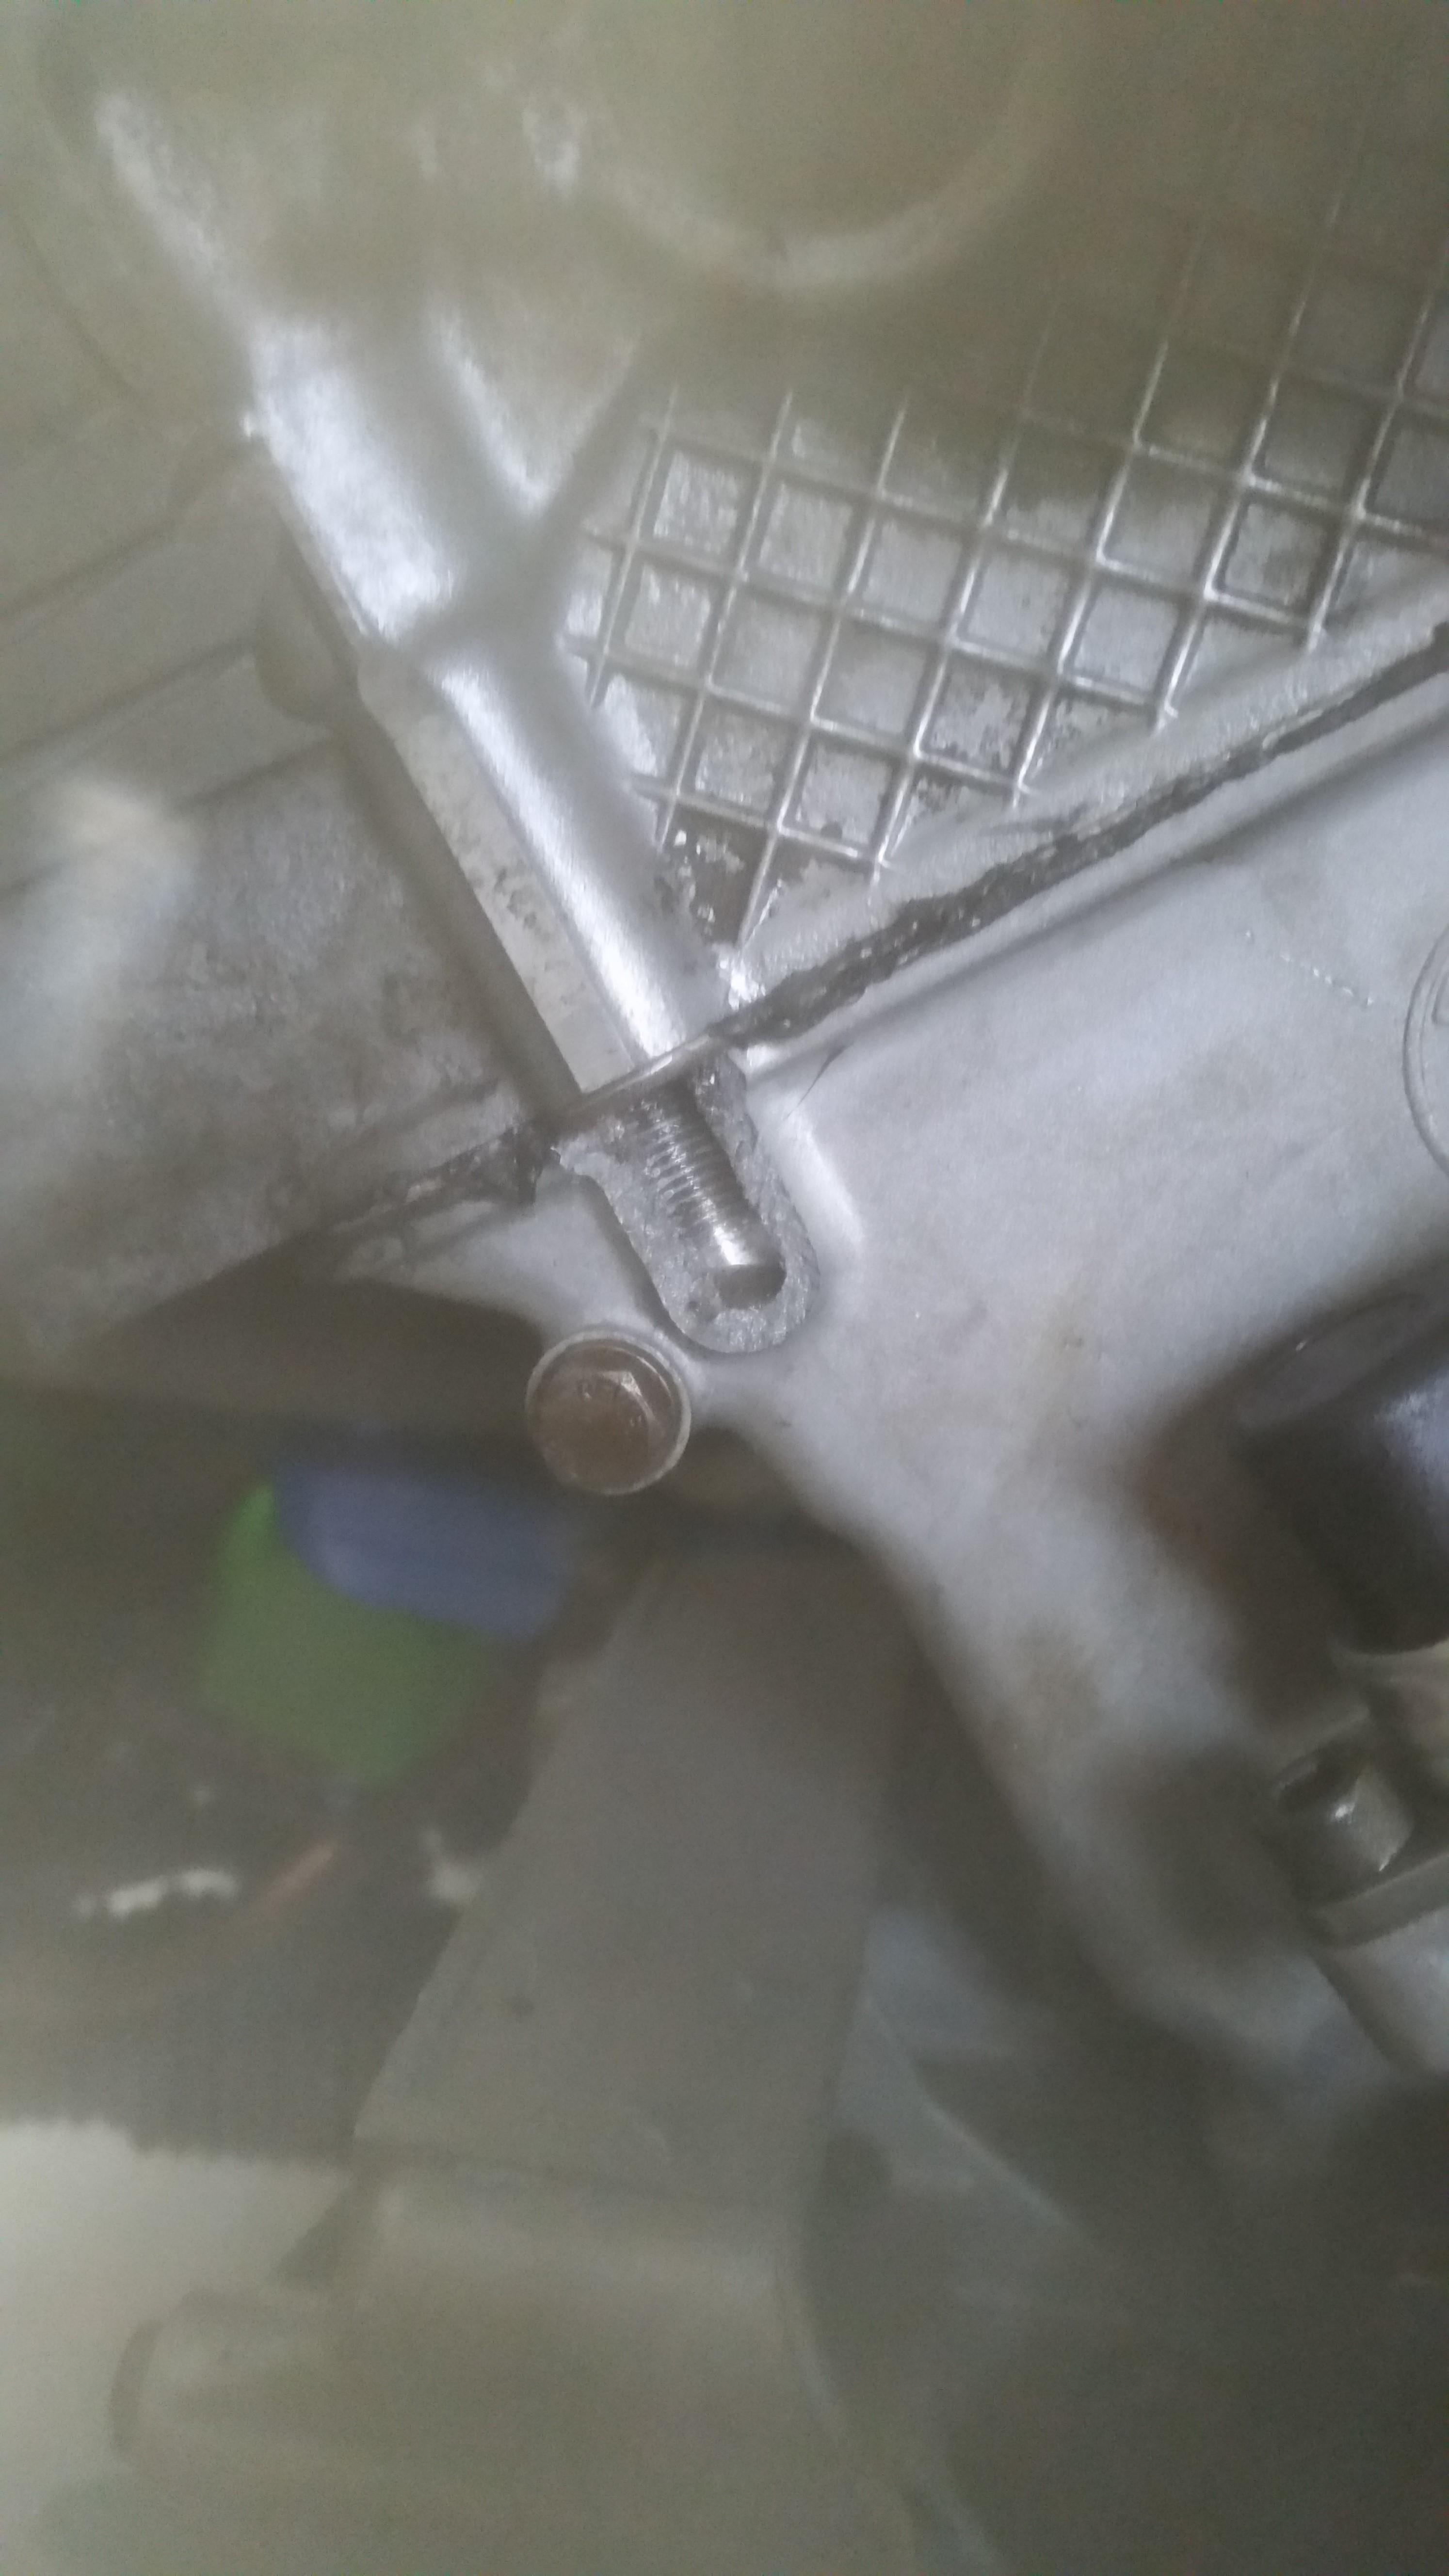
After re-torquing it to spec I went to the front to tighten down the front three m6 torque head bolts.
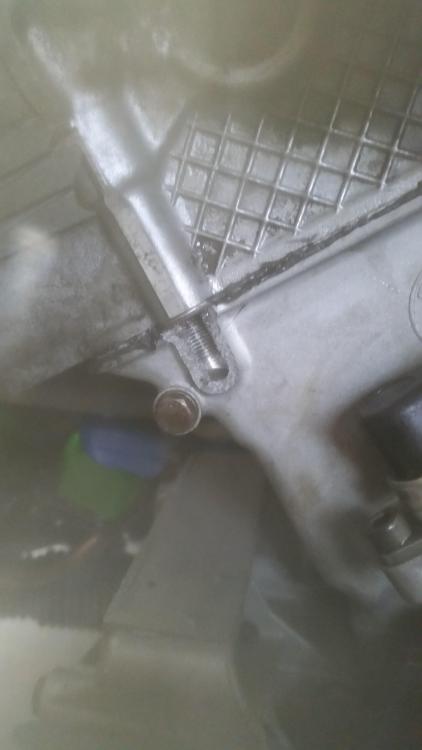
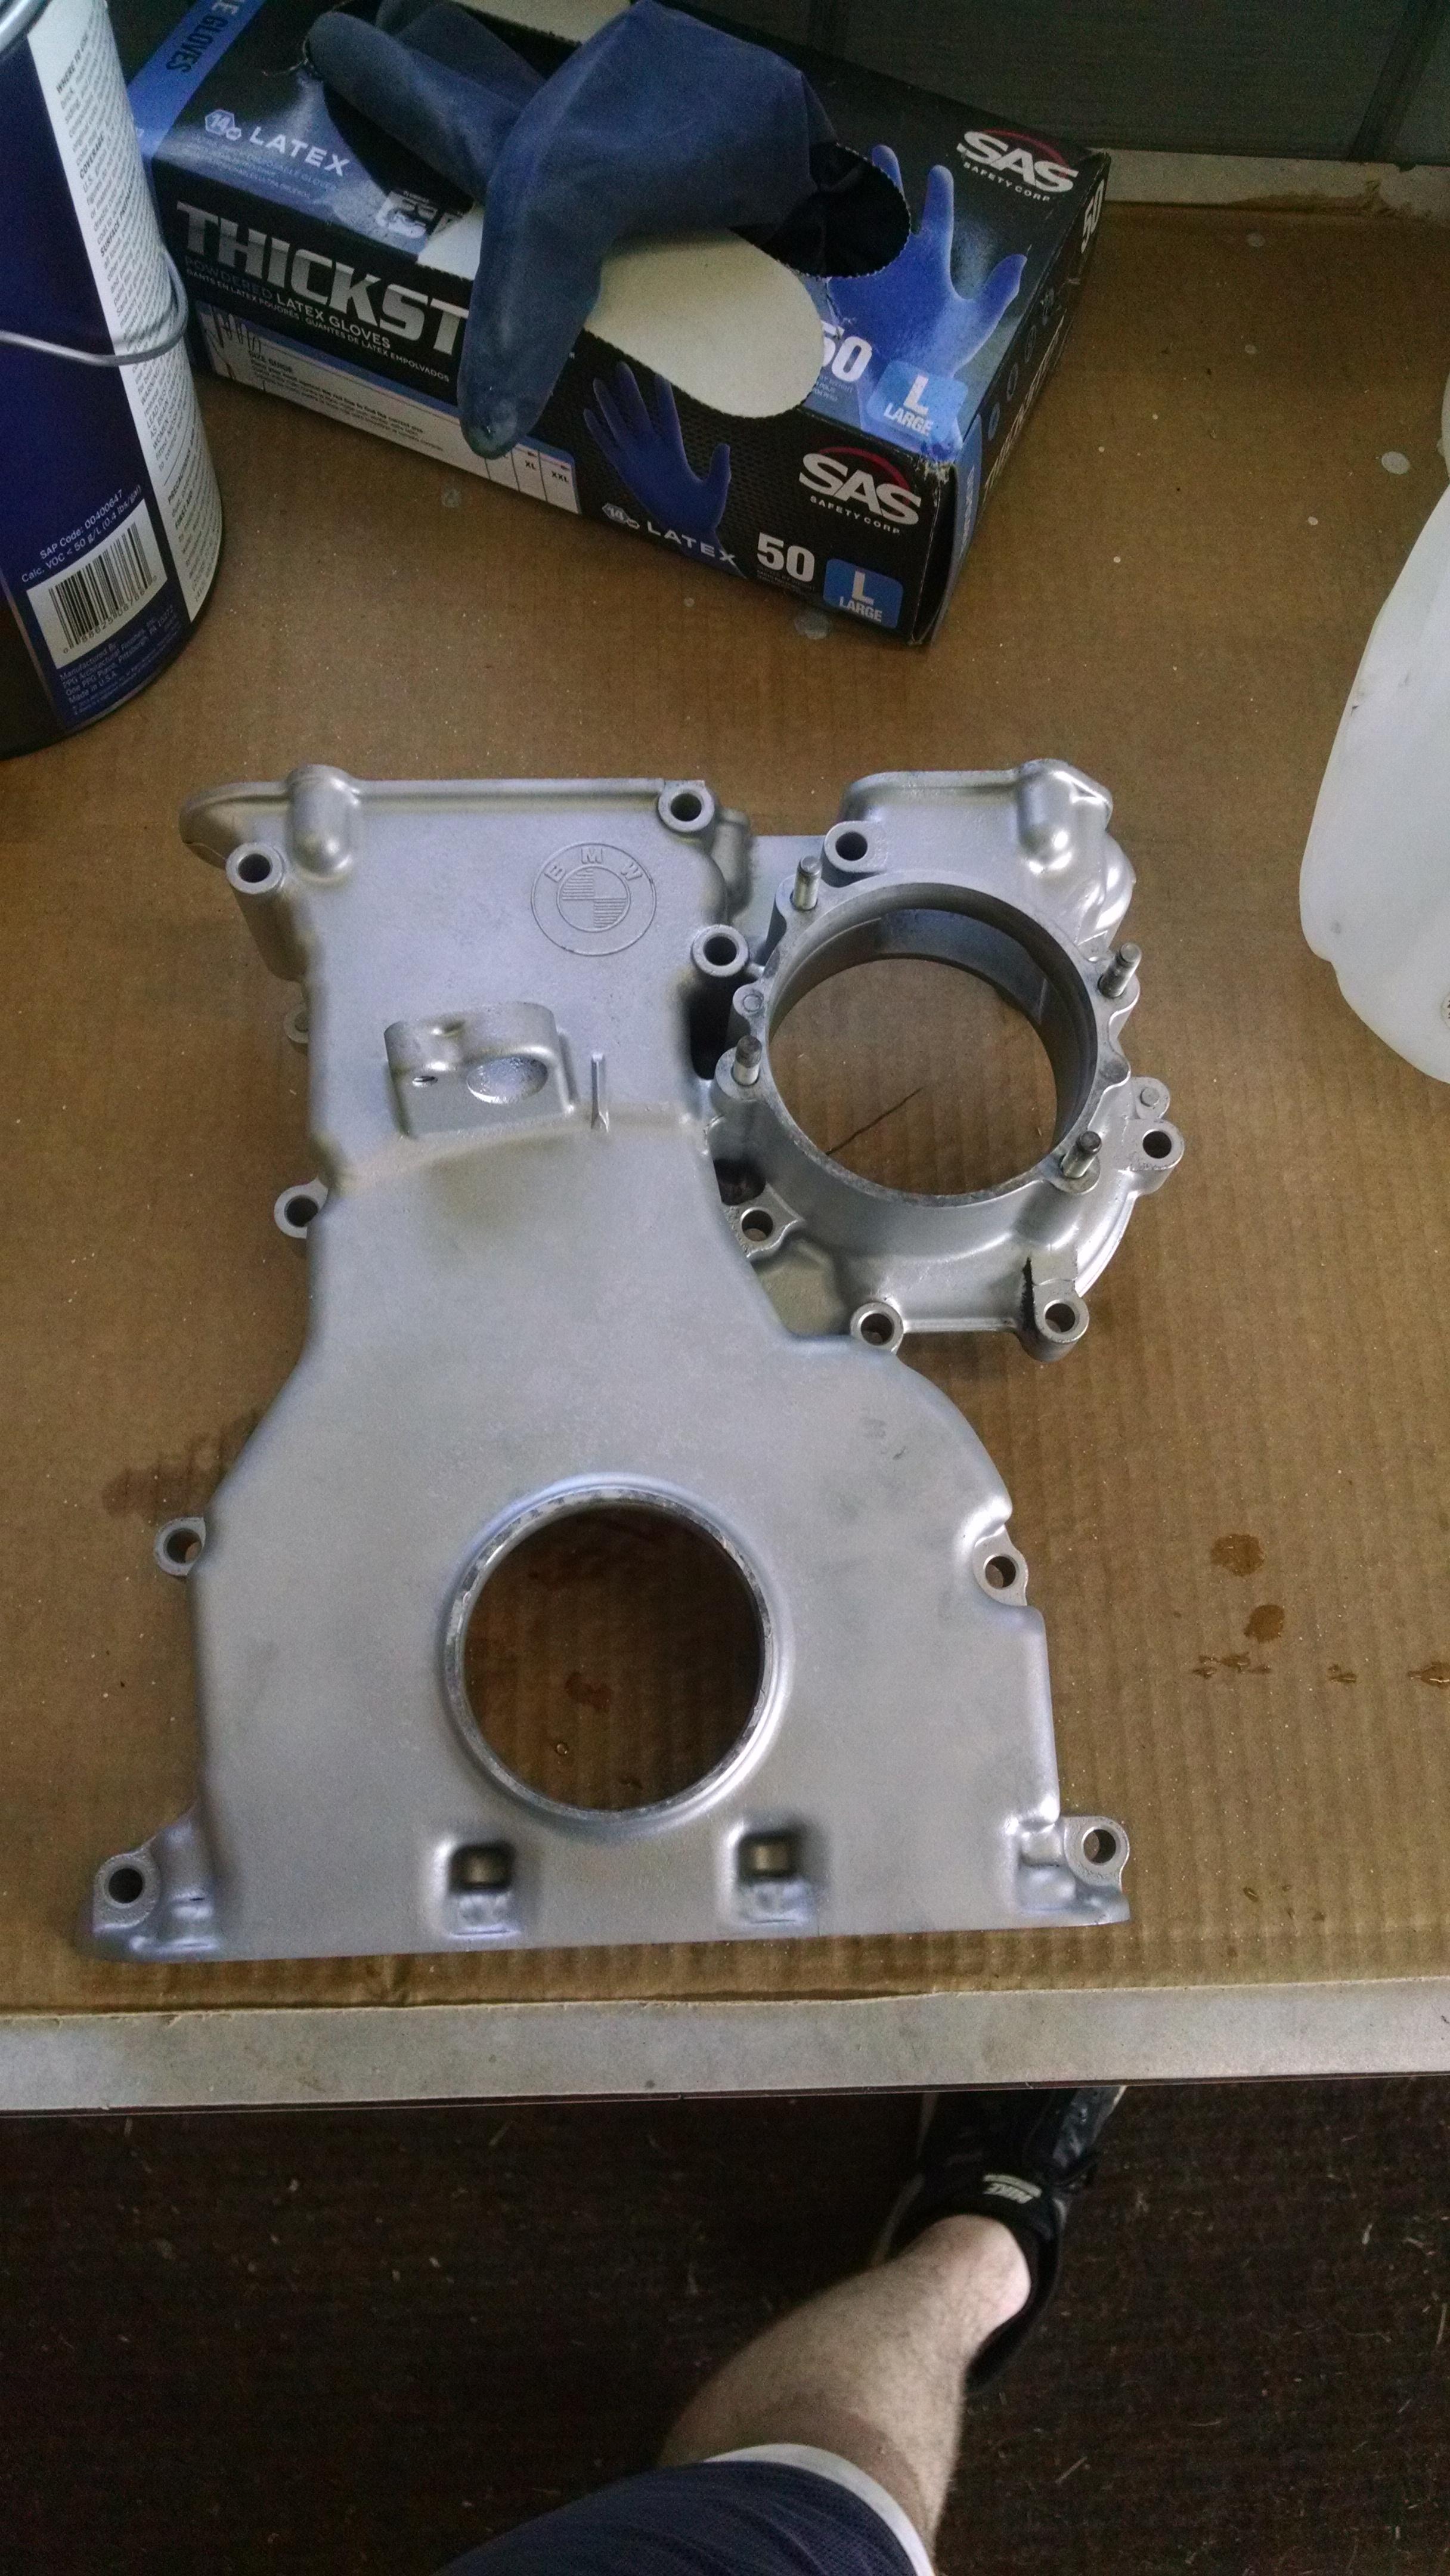
I pretty much just sat there kicking myself thinking of how I could have avoided this. After fighting myself for a while I decided to just take a break and let it sit for the rest of the weekend so I could clear my head. Monday rolled around and after getting out of work I went straight to Gibson's salvage yard and got myself another timing cover out of an M50. After thoroughly degreasing it I dropped the cover off at my buddies house who took it with him into work the following day and bead blasted it. During that time I went ahead and pulled the head back off the block, Removed the timing cover and started cleaning off all the old gasket material. Ordered fresh timing cover gaskets and another head gasket, may not have been totally necessary but its really not worth the risk of the other one potentially leaking after all this work.
Picked up the timing cover the following day.
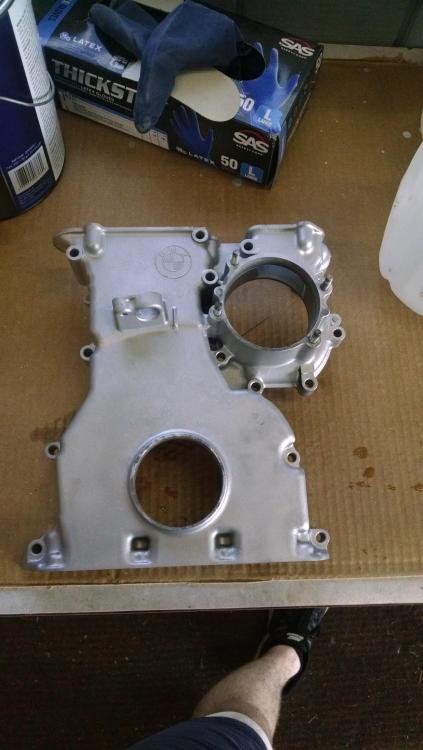
Right away I drilled out the center hole and heli-coiled the threads so I can avoid repeating what I had to deal with when I installed the head for the first time. I ran a tap through the outside holes to make sure the threads are clean, I believe the reason I broke the original timing cover was because some of the rtv I had put along the timing cover had squeezed into the hole and dried so when I went to thread the bolt in it caused resistance along the threads causing the cover to break.
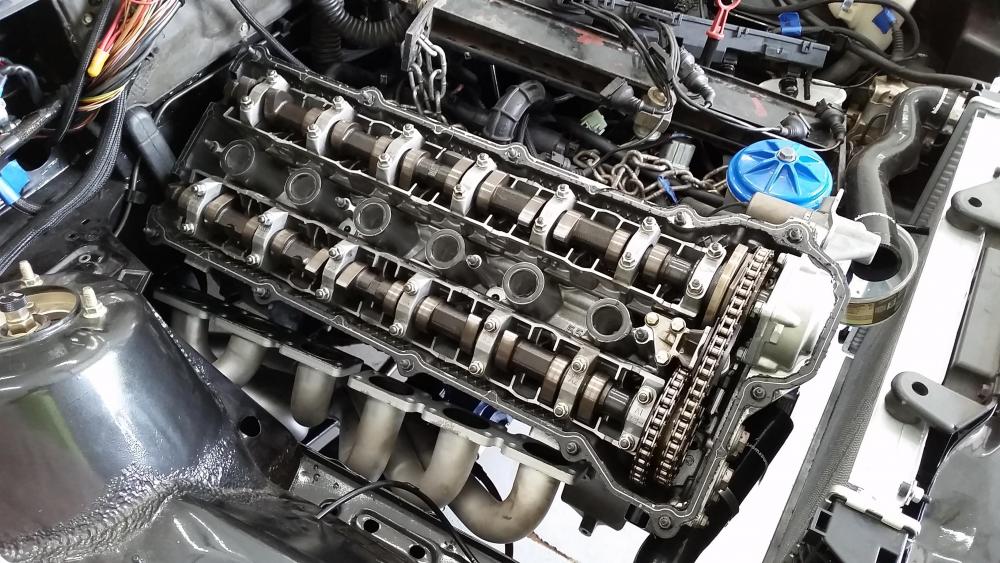
Reinstalled the cover and then the cylinder head. After getting the head bolts halfway through the torque sequence I moved to the front and shined the light down each hole to make sure no gasket seeped down the hole. Each bolt got a dab of blue loctite and torqued to 6.5 ft lbs. After I got every bolt to spec I went ahead and torqued down the rest of the cylinder head. Now that the hard part was behind me I covered the motor up and finished installing the rest of the components the following day.
Before reinstalling the intake I swapped out the stock coolant sending unit for the cluster to the vdo unit for the water temp gauge. Much better.
(Ya the intake is already on in this pic, this is an after the fact shot as I forgot to snap a pic of it before)
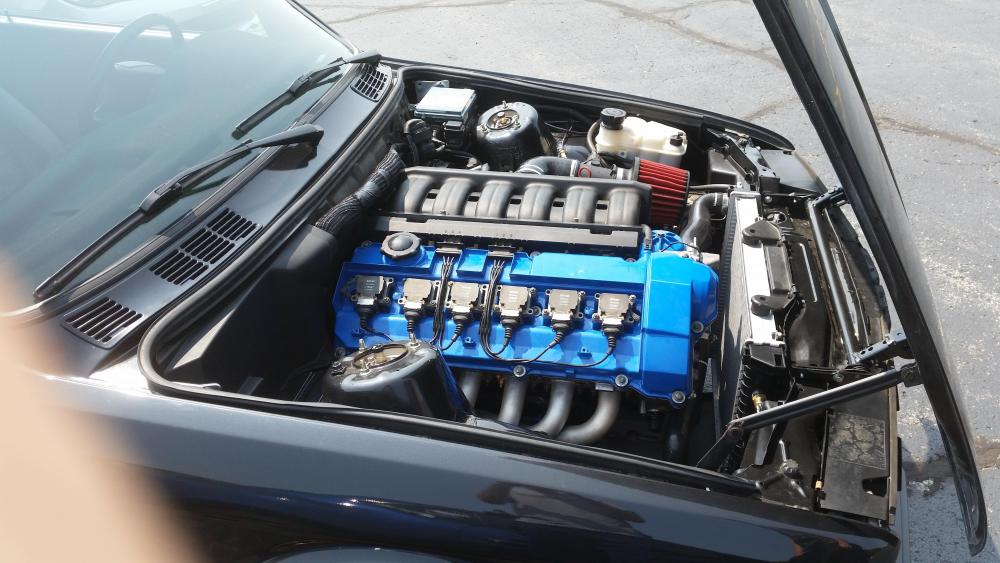
Now that everything was hooked back up I dropped in 7 quarts of 10w-30 Quaker state oil, a bottle of Lucas oil zddp additive and a fresh mahle oil filter. Went ahead and cranked the engine over a few times to prime the oil pump, did the same with the fuel system. Plugged the fuel pump relay back in, hopped in the car, only took a couple cranks and she popped right off once again sounding just as good as before but this time, no leaks
")
I let the car reach temp keeping an eye on all the gauges which everything was looking perfect so I decided to take the car out for a short spin that night. Everything is working great, Engine was running awesome! I didn't take the car far as it was already late so I parked it back in the shop tell the next day.
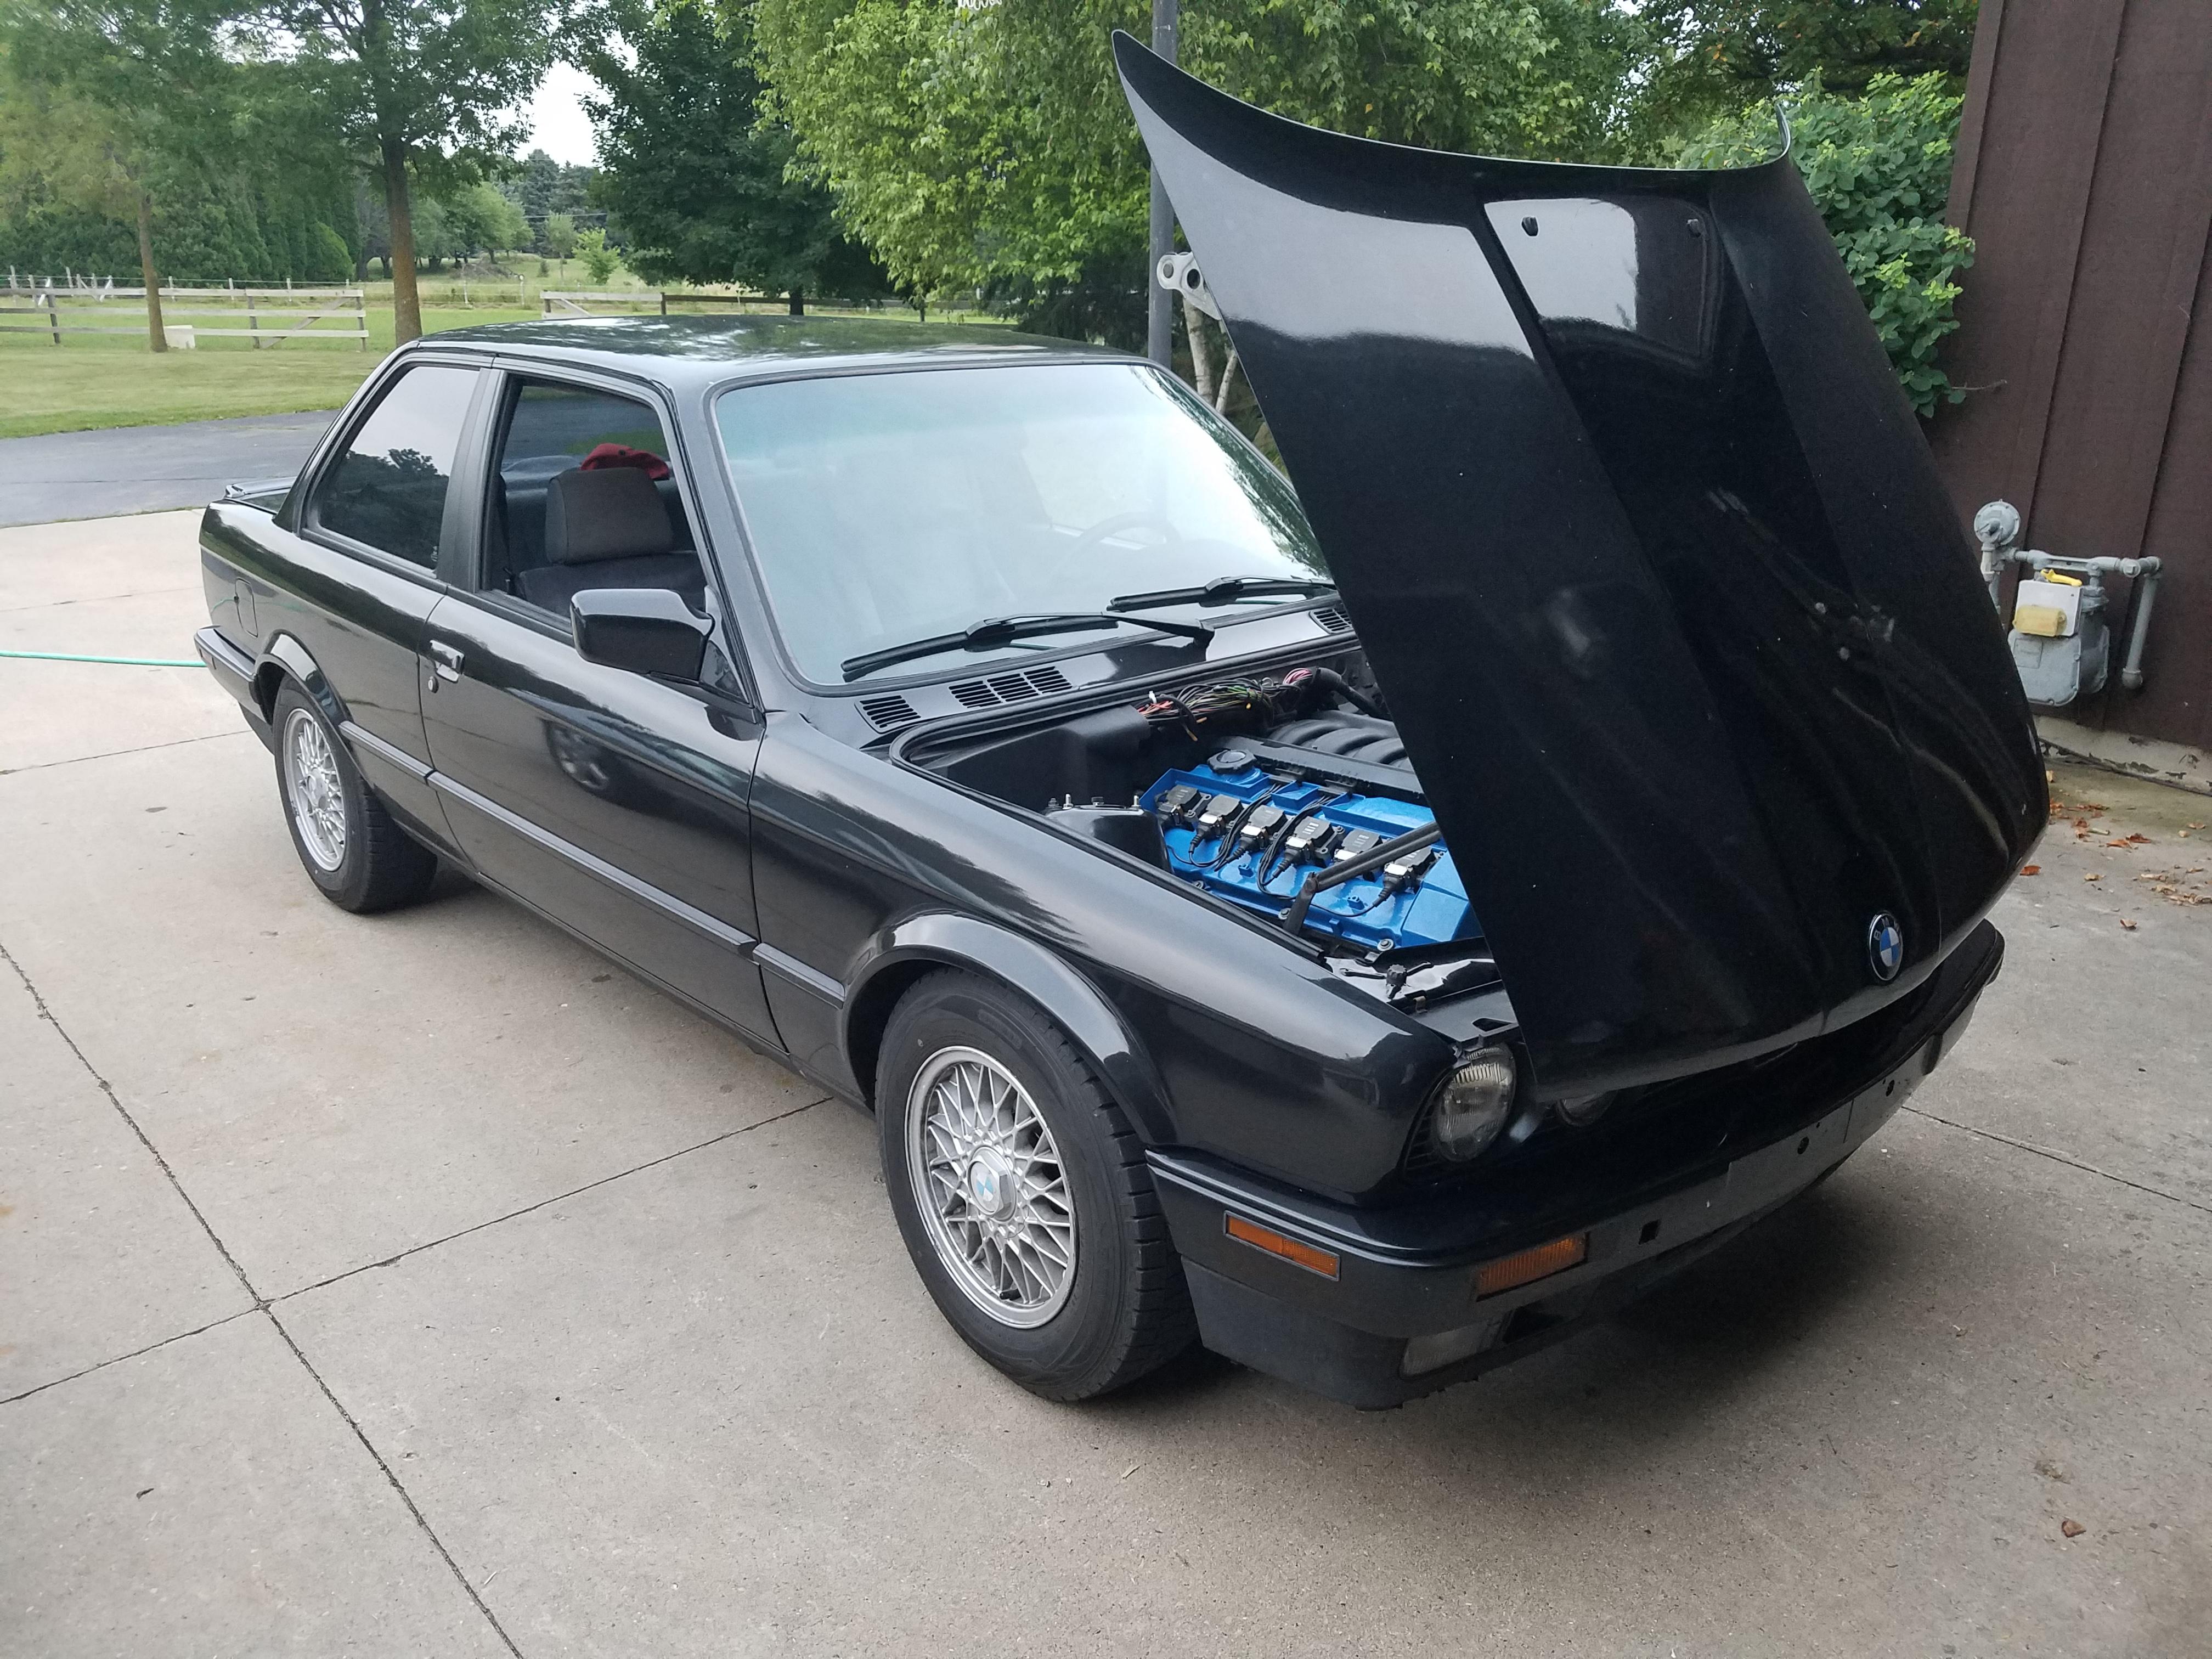
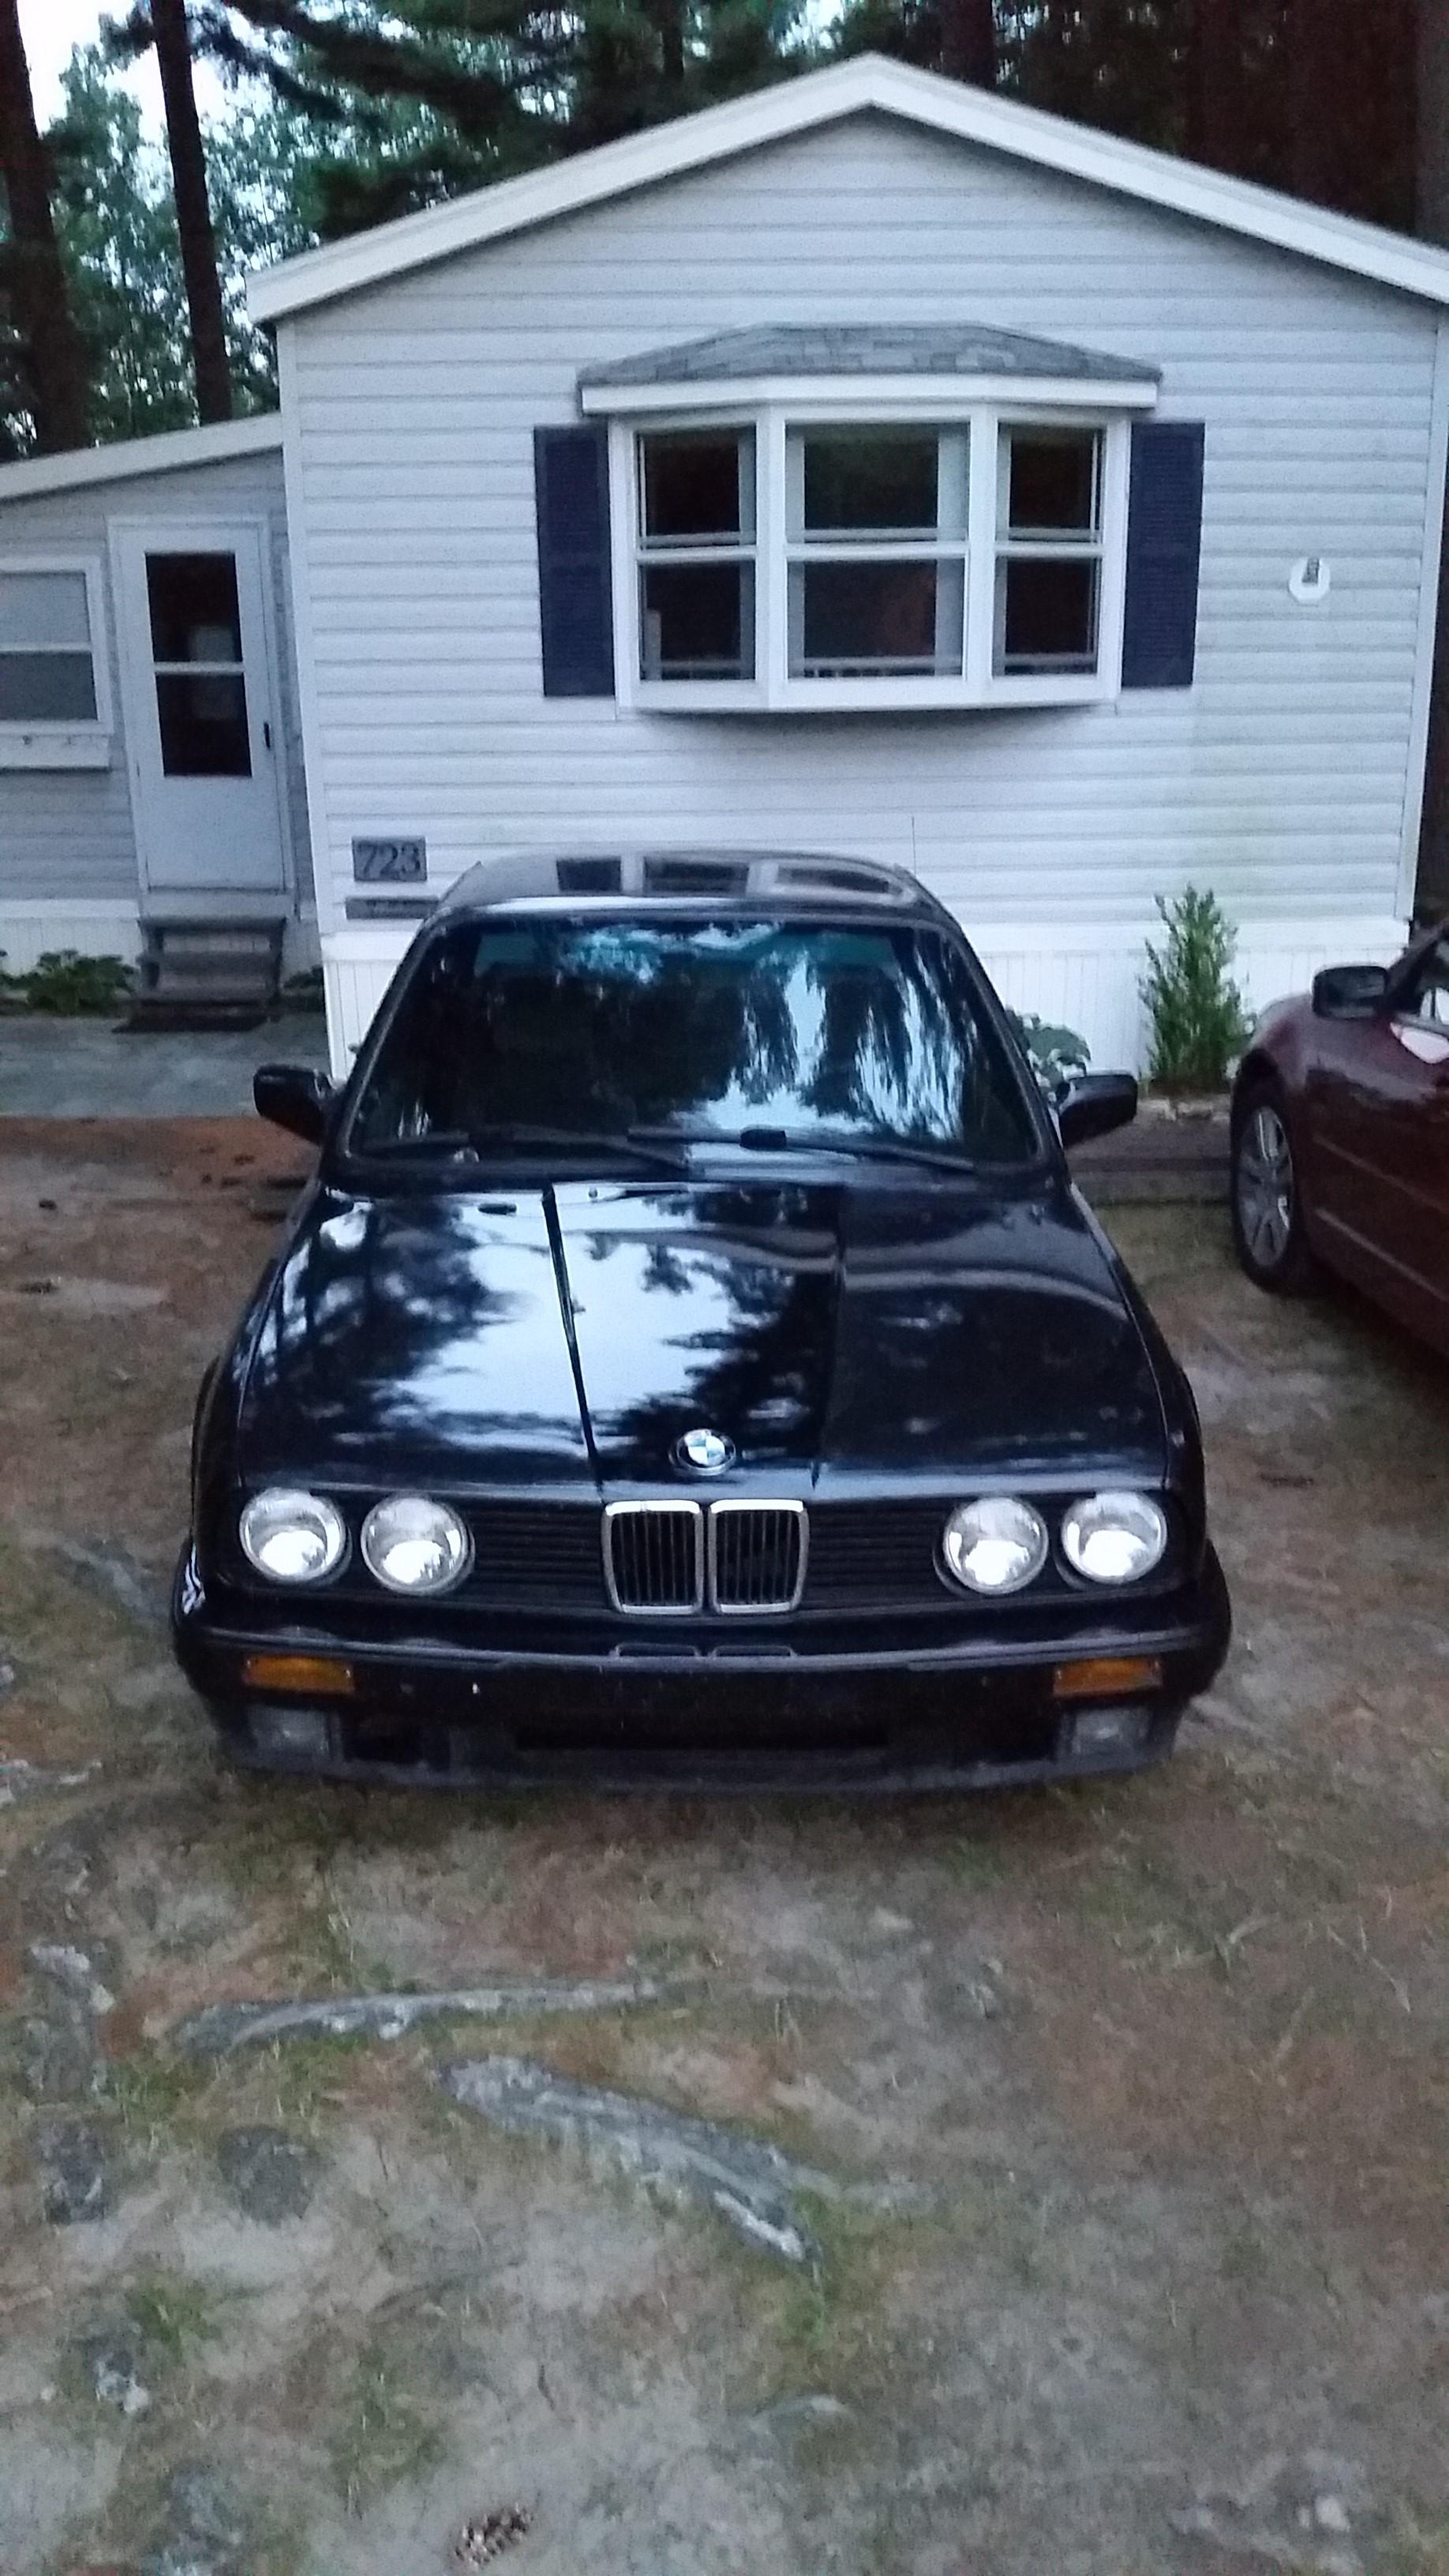
The following day after work I cleaned up the shop and got the hood installed. After thoroughly looking over the whole car and drive line for any unusualness I brought the her home.
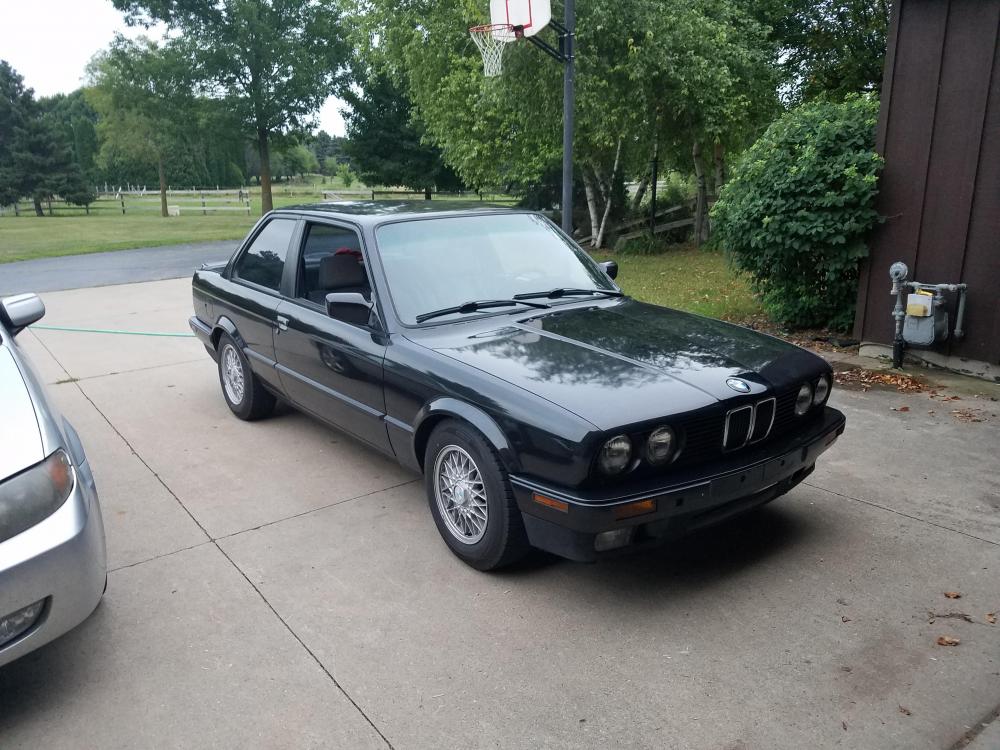

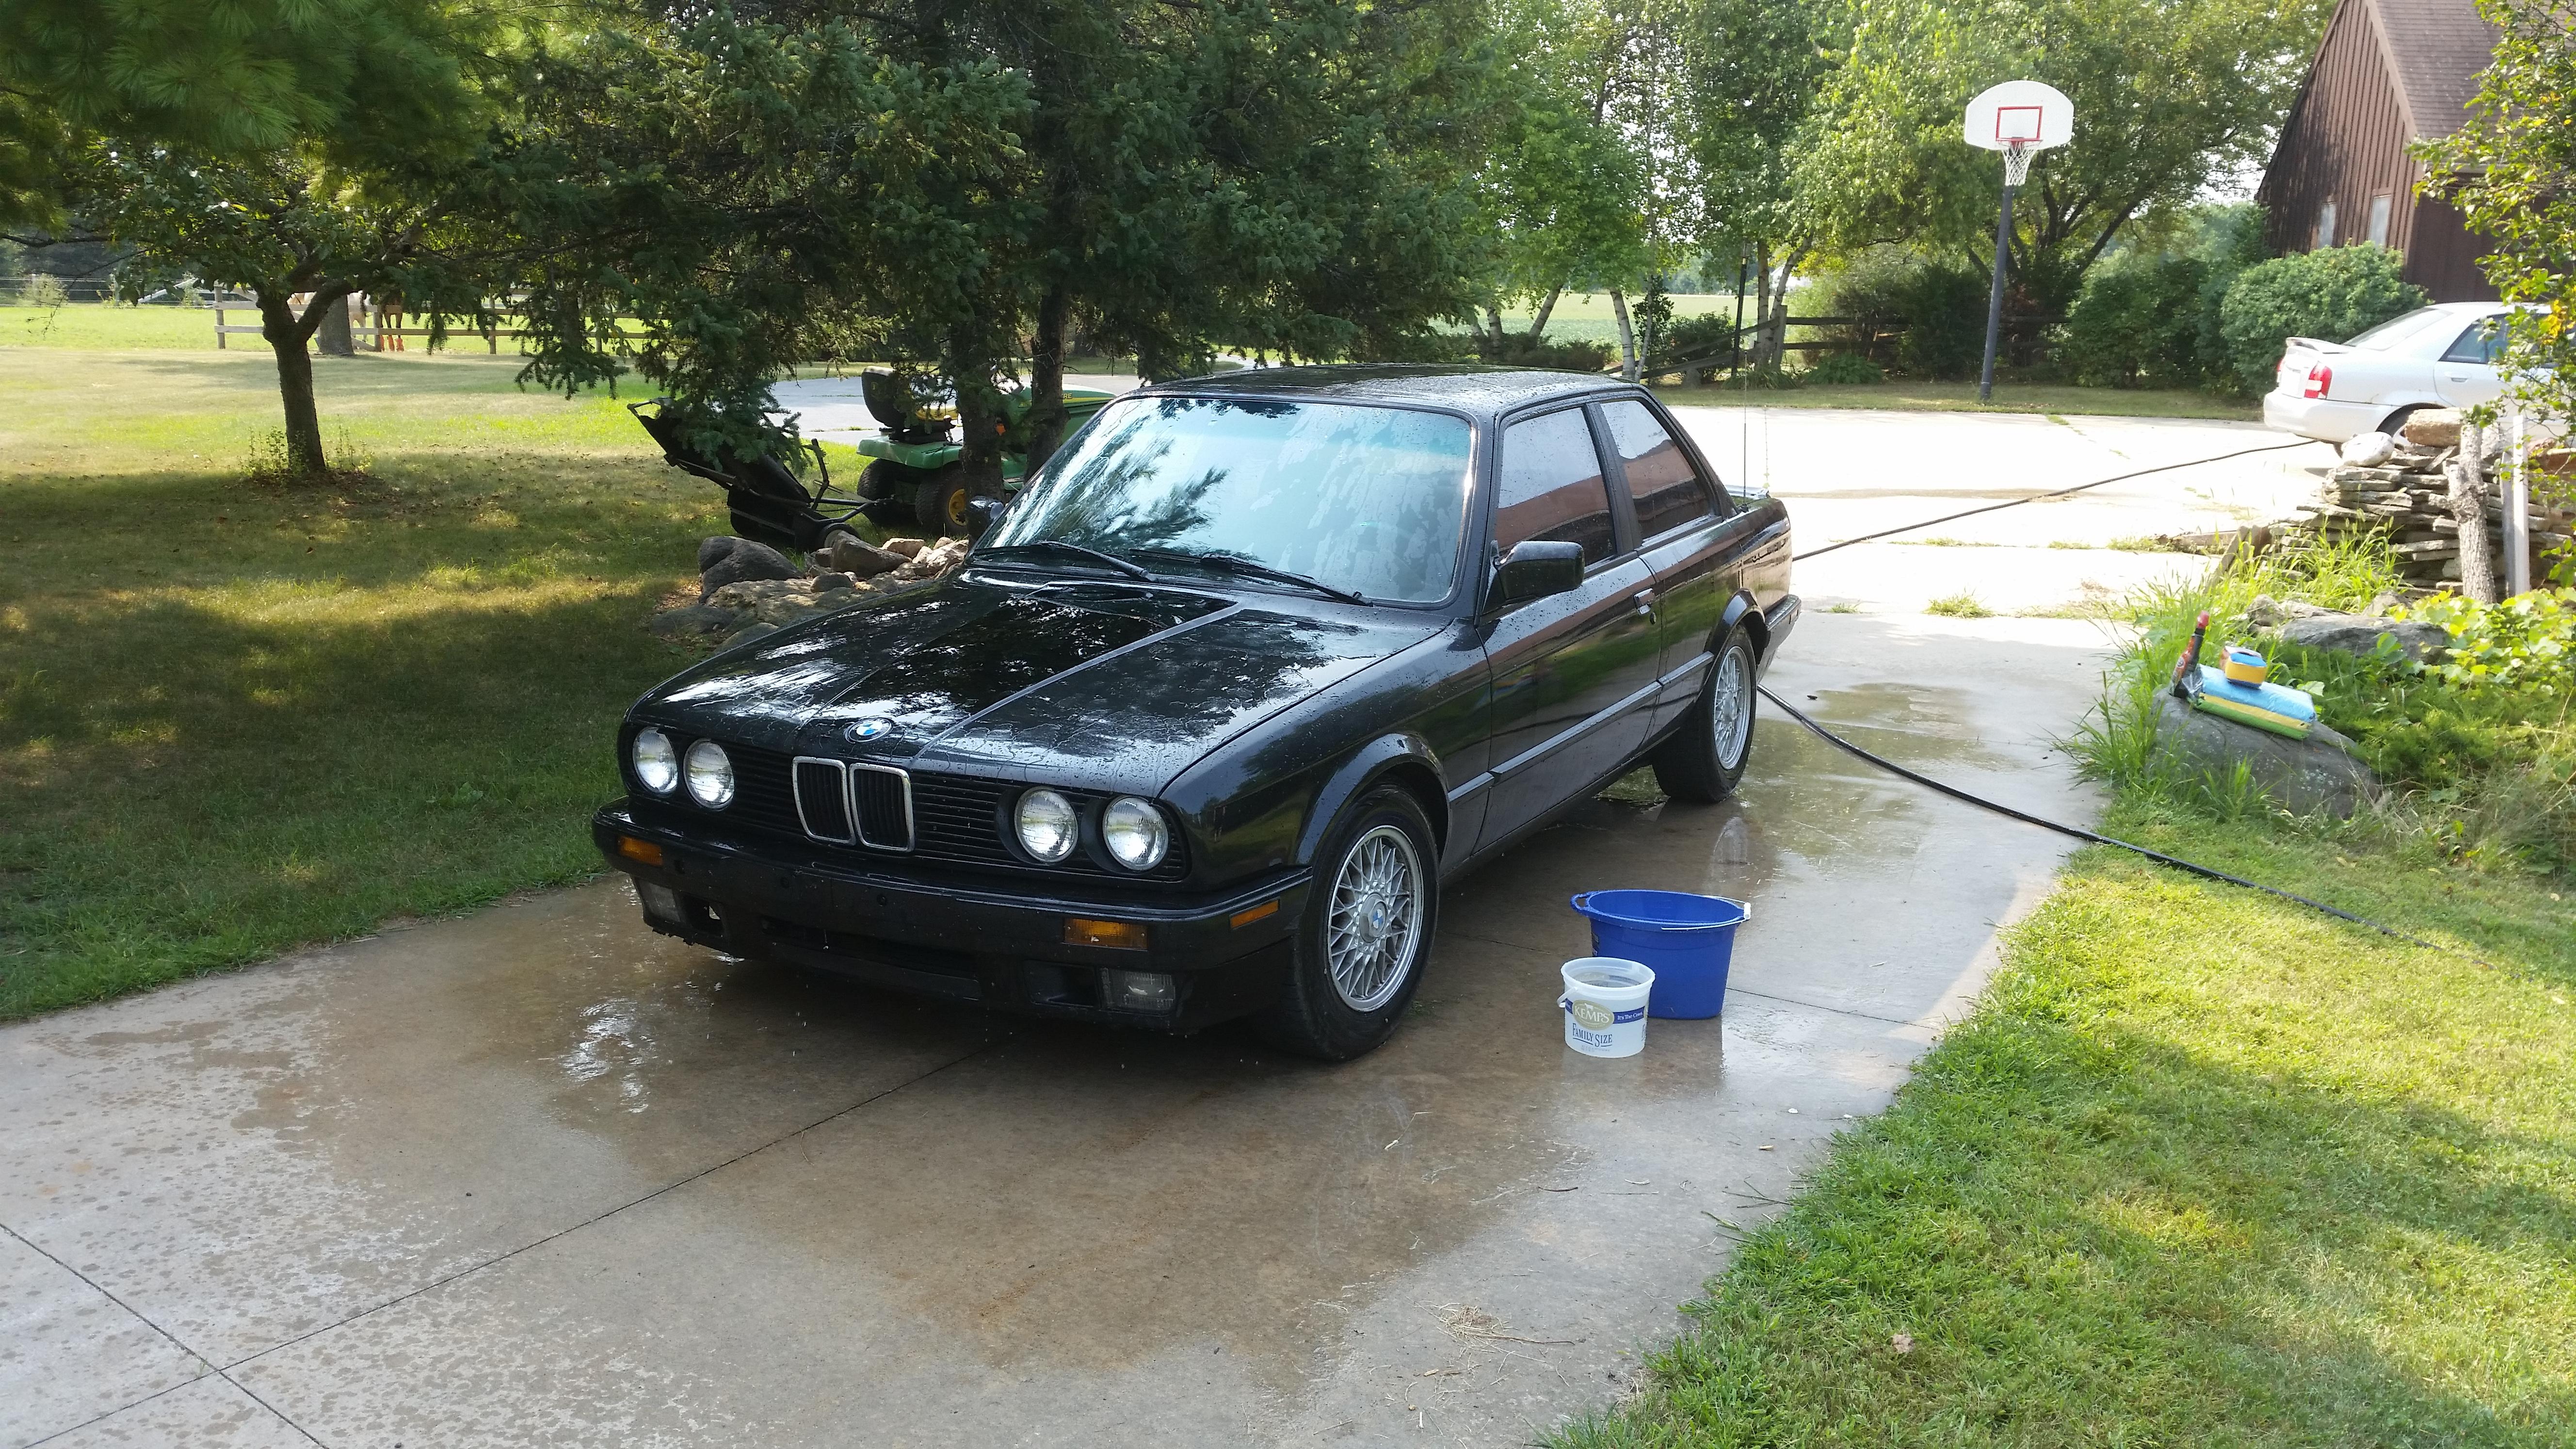
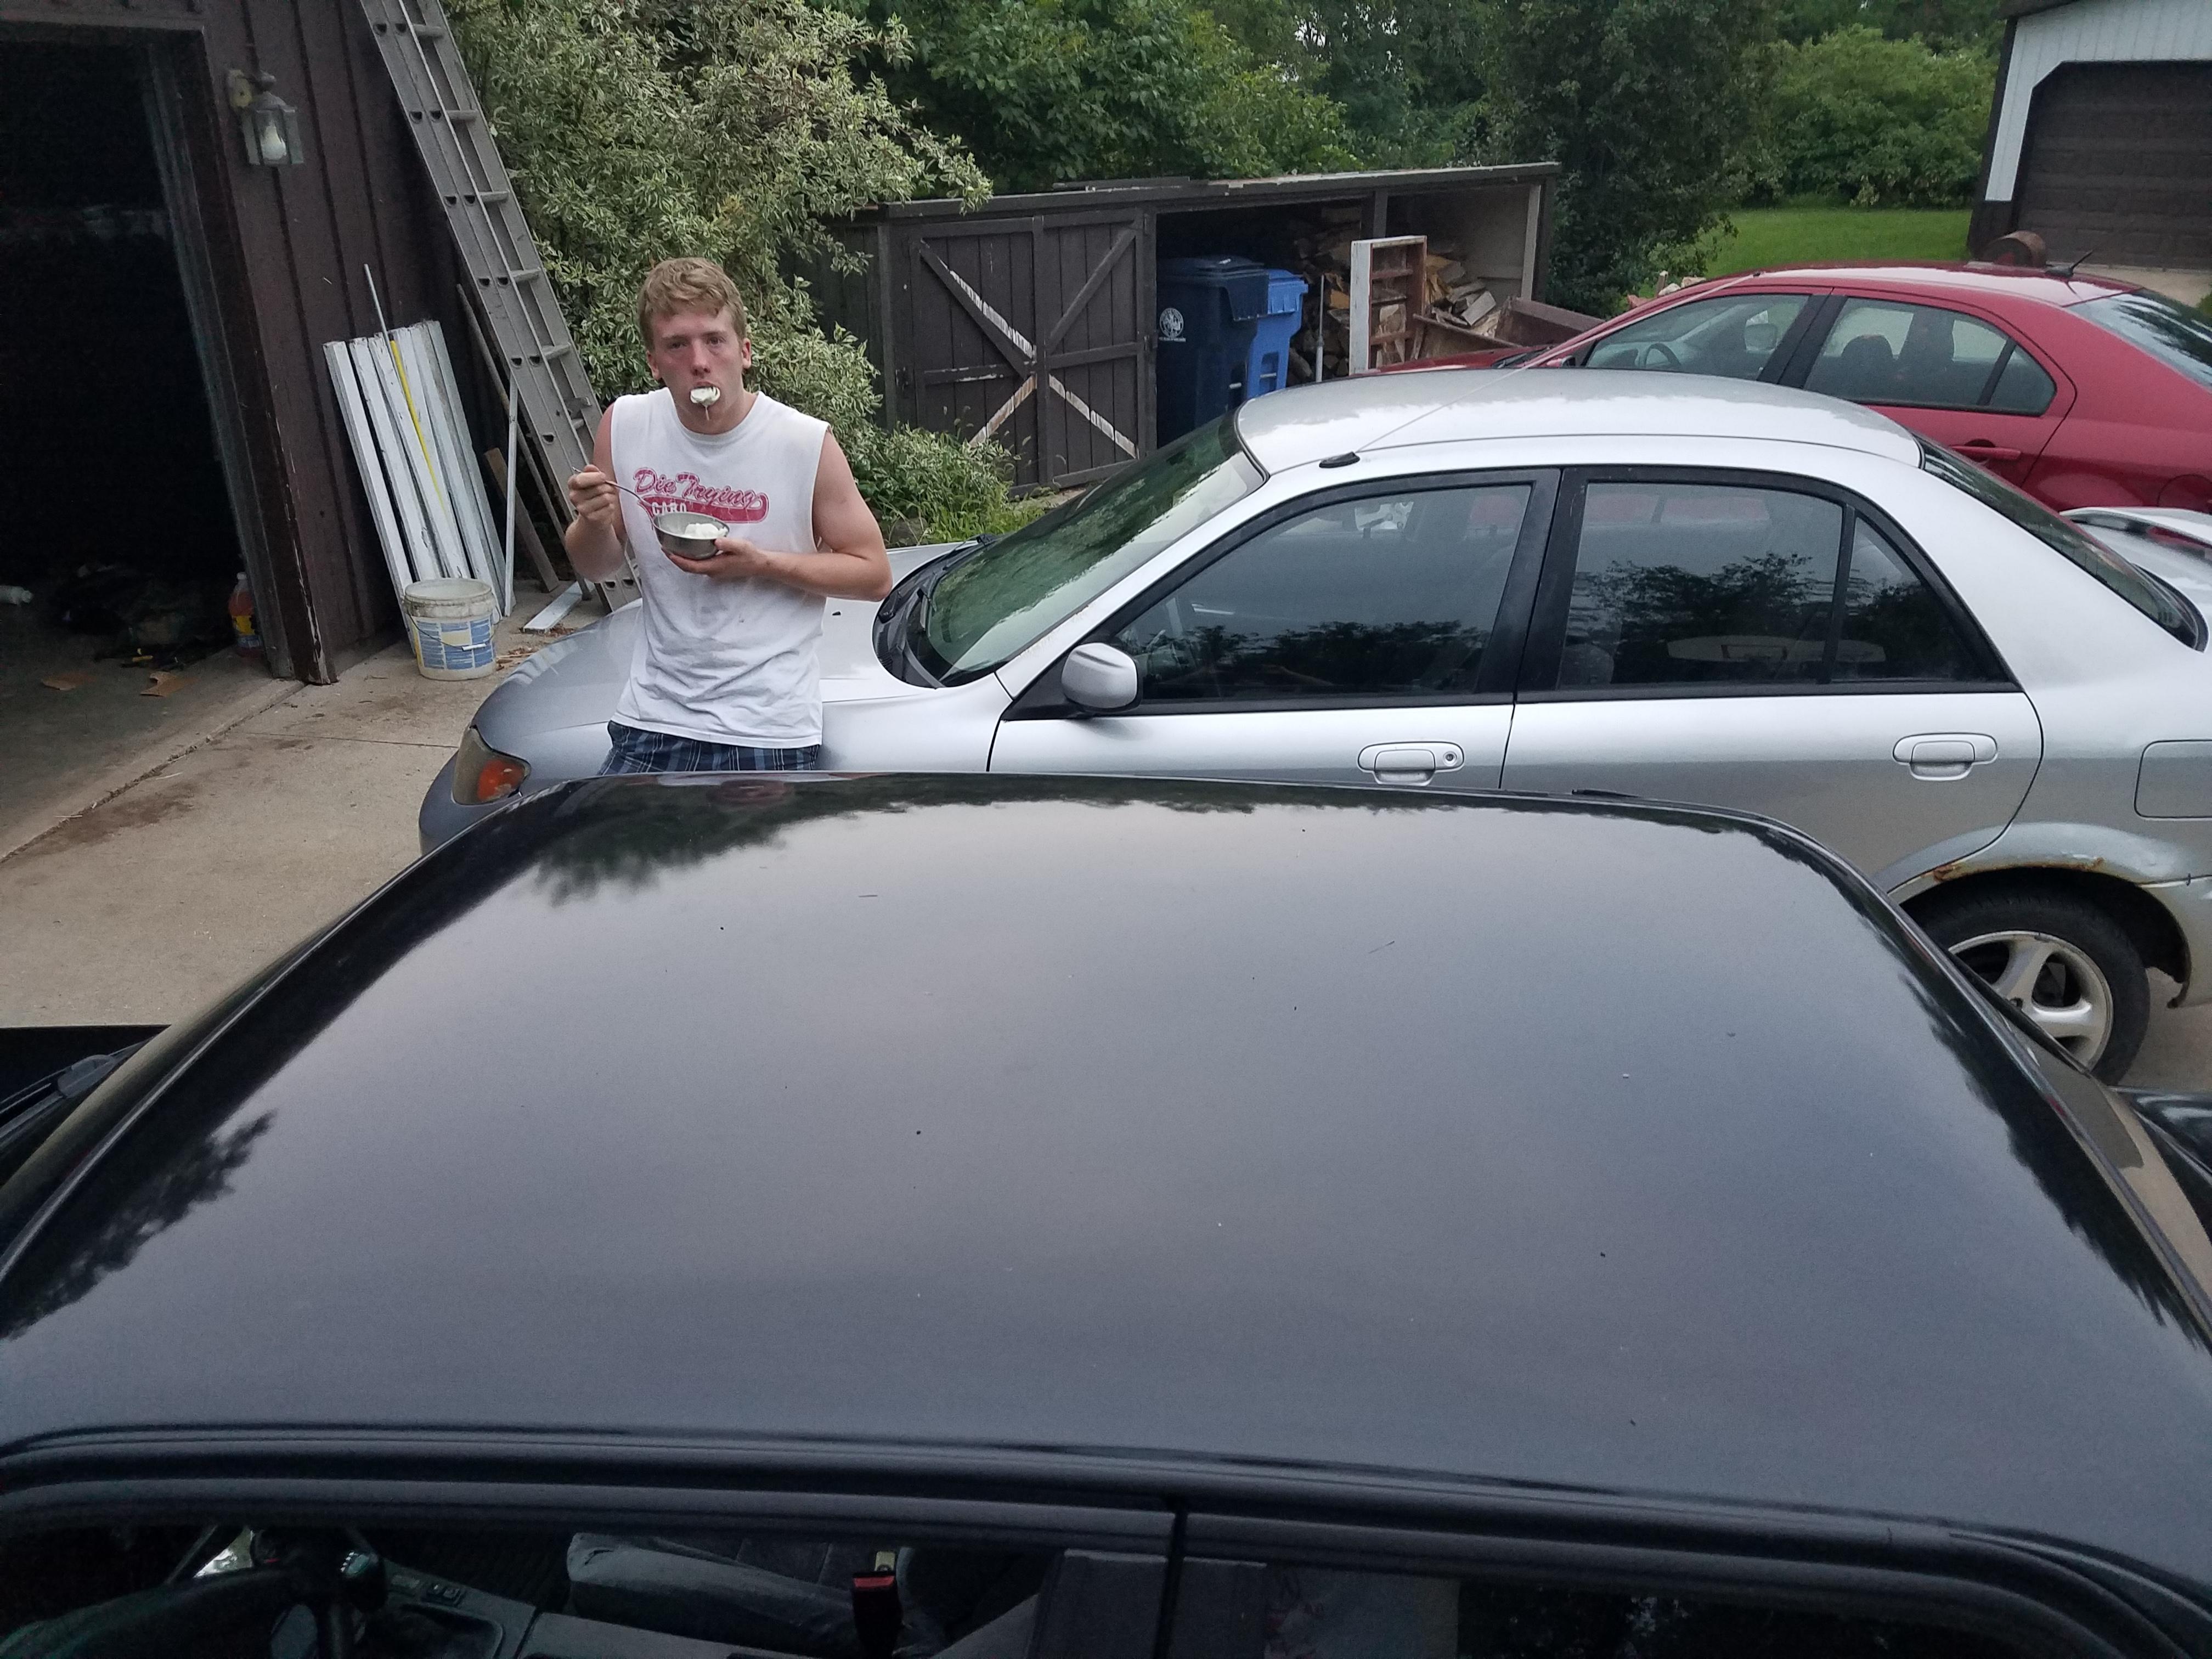
After taking time to enjoy the fact that it was finally home for good I went ahead and gave the car a good scrub down removing all that 8 month old dust. Once rinsed off I noticed that all the drawings and comments were still etched into the paint (as expected). so I grabbed some meguiar's medium cut buffing compound I had laying on the shelf, a polishing rag and some elbow grease and went at it. Took everything off really well and made the paint look quite a bit better.
Pic of the roof where most of the markings were. (Someone likes his creamy cucumbers, lol)
That following Friday I dropped the car off at accurate in Appleton to get a 4 wheel alignment and straighten up that steering wheel. Picked the car up after work the same day.
Saturday rolled around and I had planned to go up to our trailer with a few friends for a nice two days of swimming and cooking out. What better way to enjoy it then bringing the car along with me.
It's about a 50 mile drive there (just about an hour) and the car drove all the way up there and back like a champ. There are a few areas where the roads get twisty and it gave me a great opportunity to test out the z3 rack with fresh suspension and brakes. It was really quite a wonderful thing and gave me all sorts of goosebumps keeping a smile on my face the entire time.
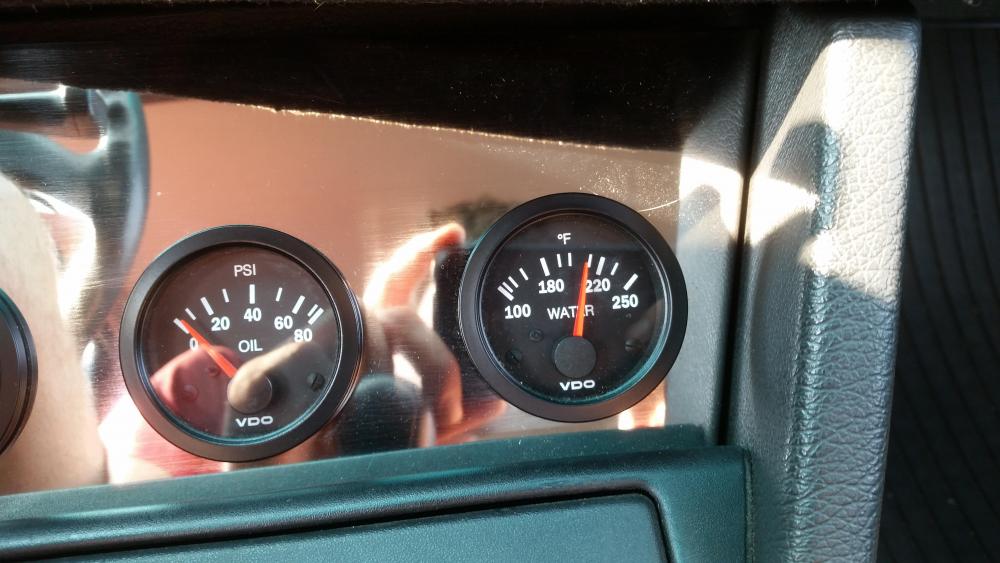
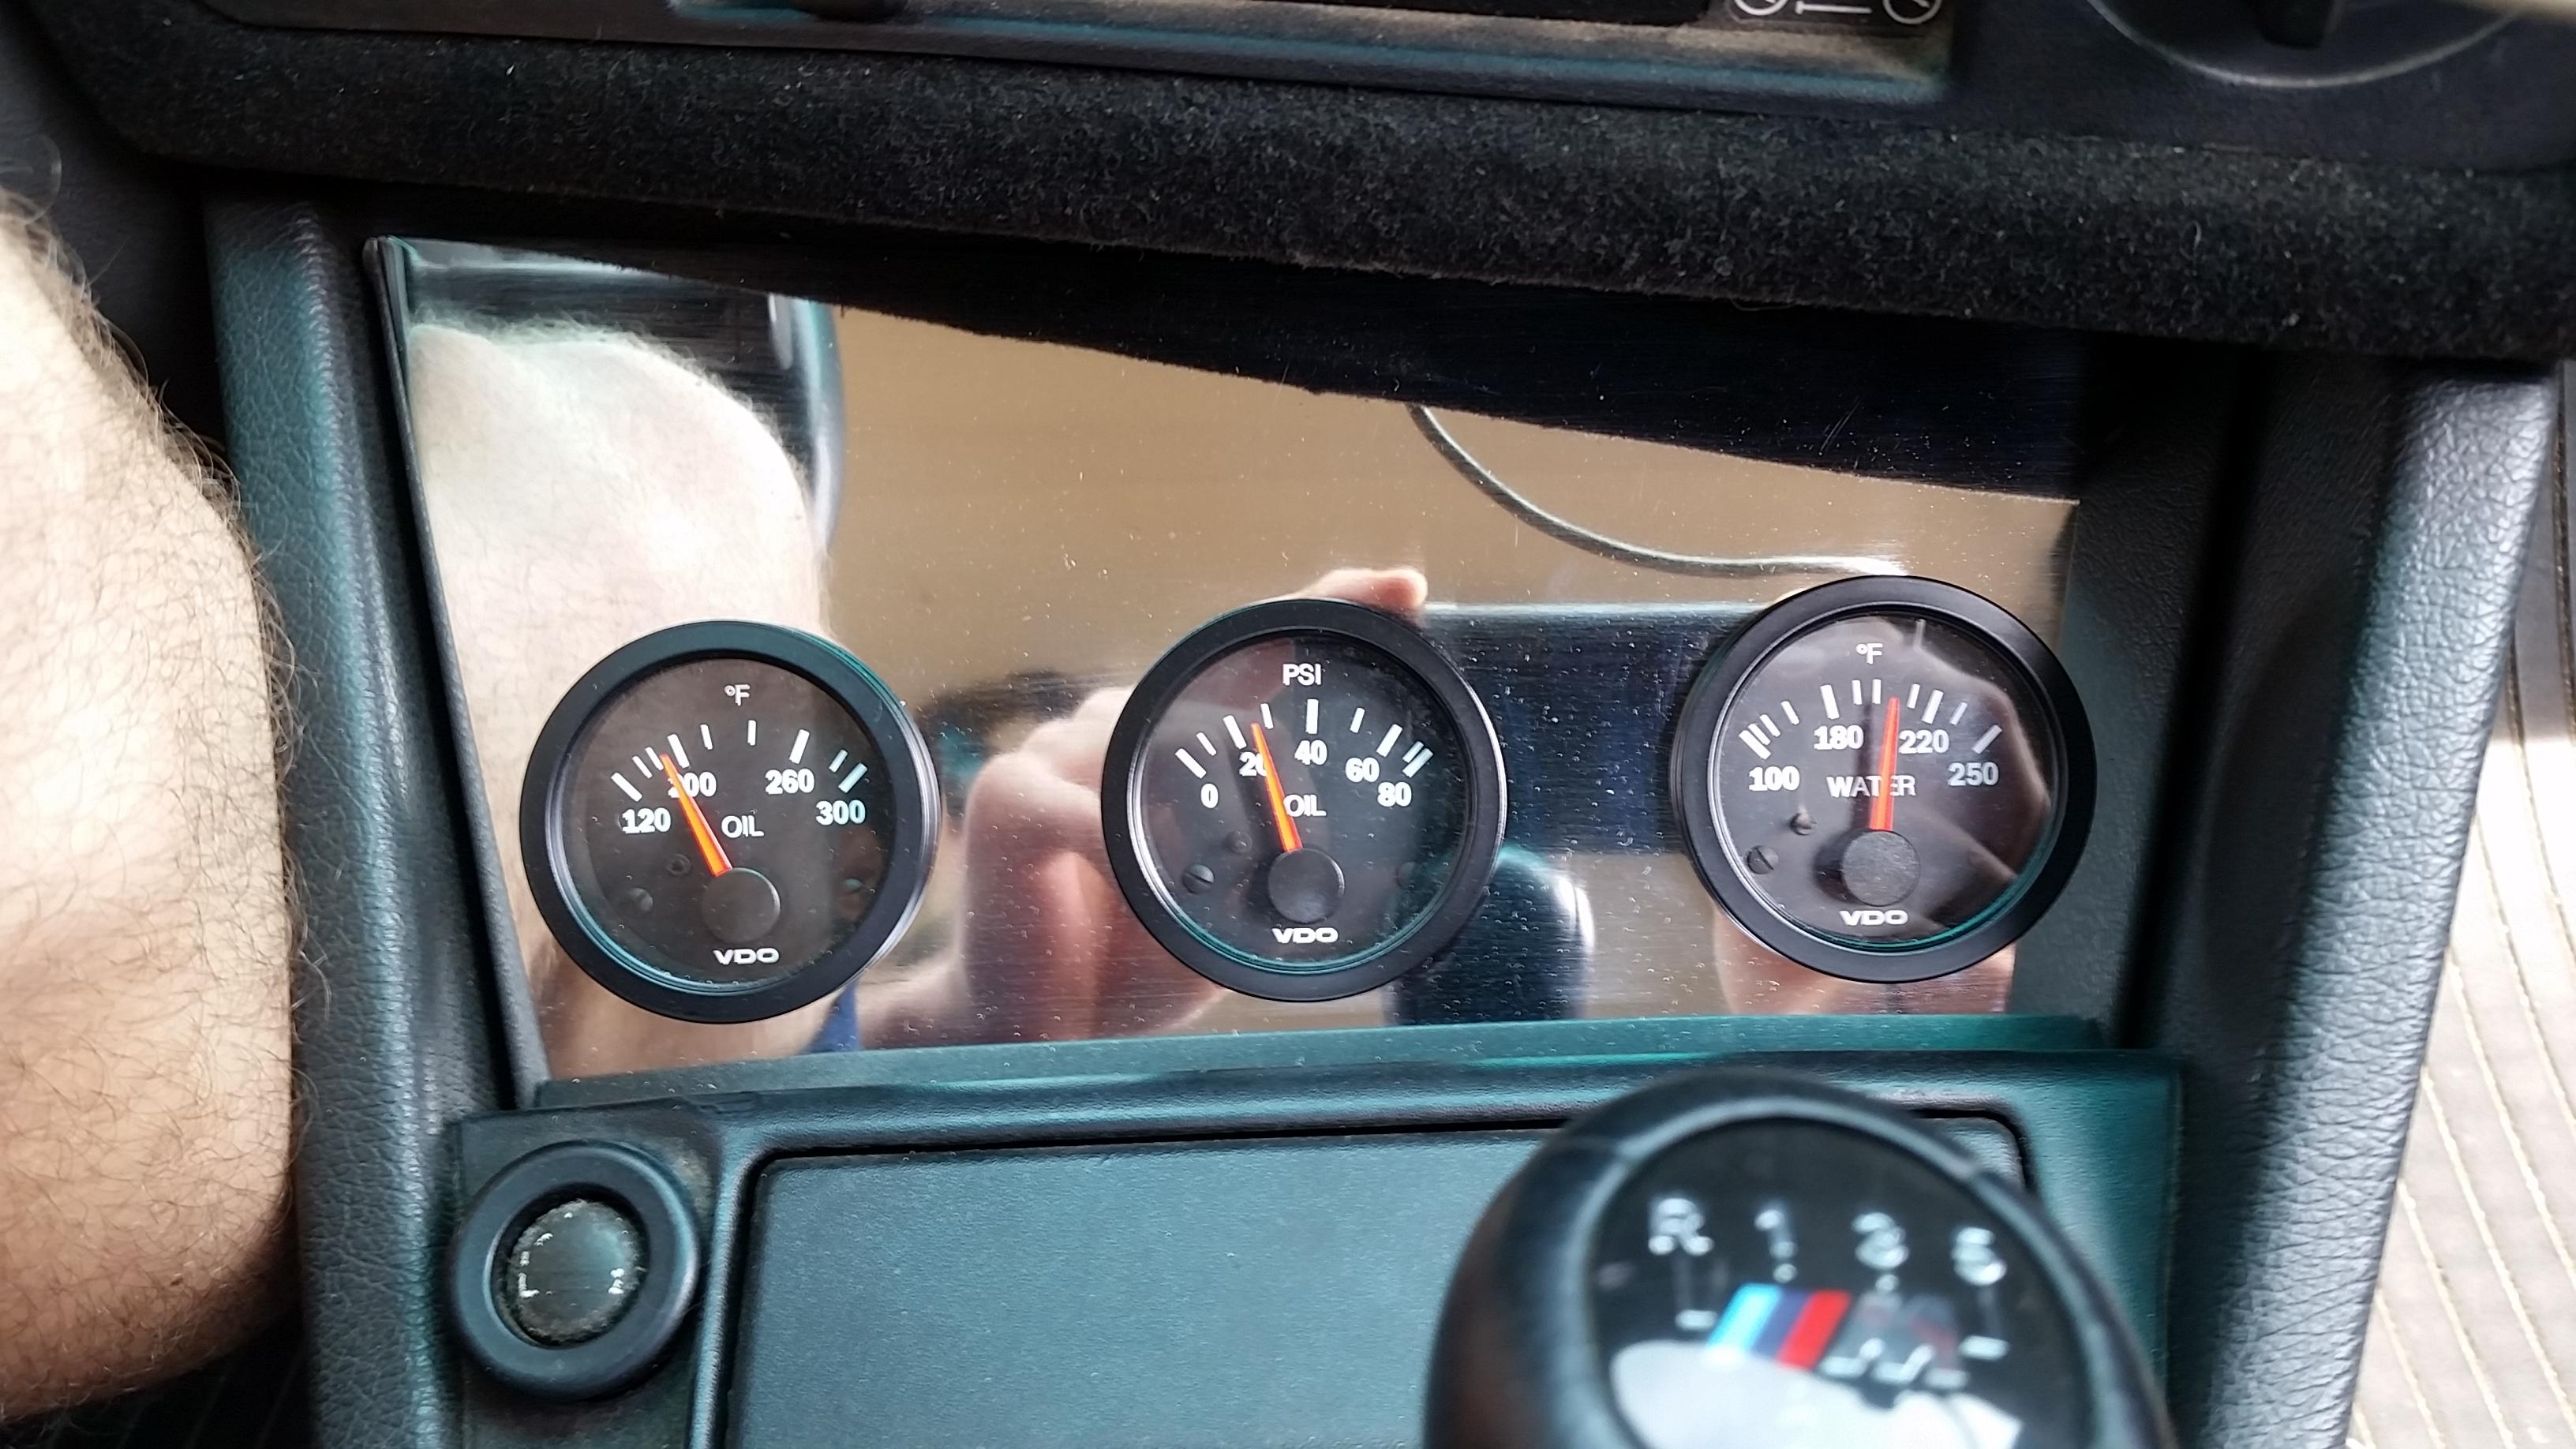
I was able to sneak a pic of the gauges during the trip up there. It seems the engine's happy temp is right around 200 degrees. (This was cruising right around 65 and it was just about 80 degrees out, it stayed right there for water temp when I started going a bit harder on it as well).
As far as I've read online 197 degrees is oem operating temp for the s52 so I assume I am okay. I am running a 88 degree Celsius thermostat though so I am curious if it should be lower then what it's at now.

Now, as for most engine swaps there are always some little things to tweak or fix. For me, I had a few slightly small issues that revealed themselves on the road trip to my trailer and back.
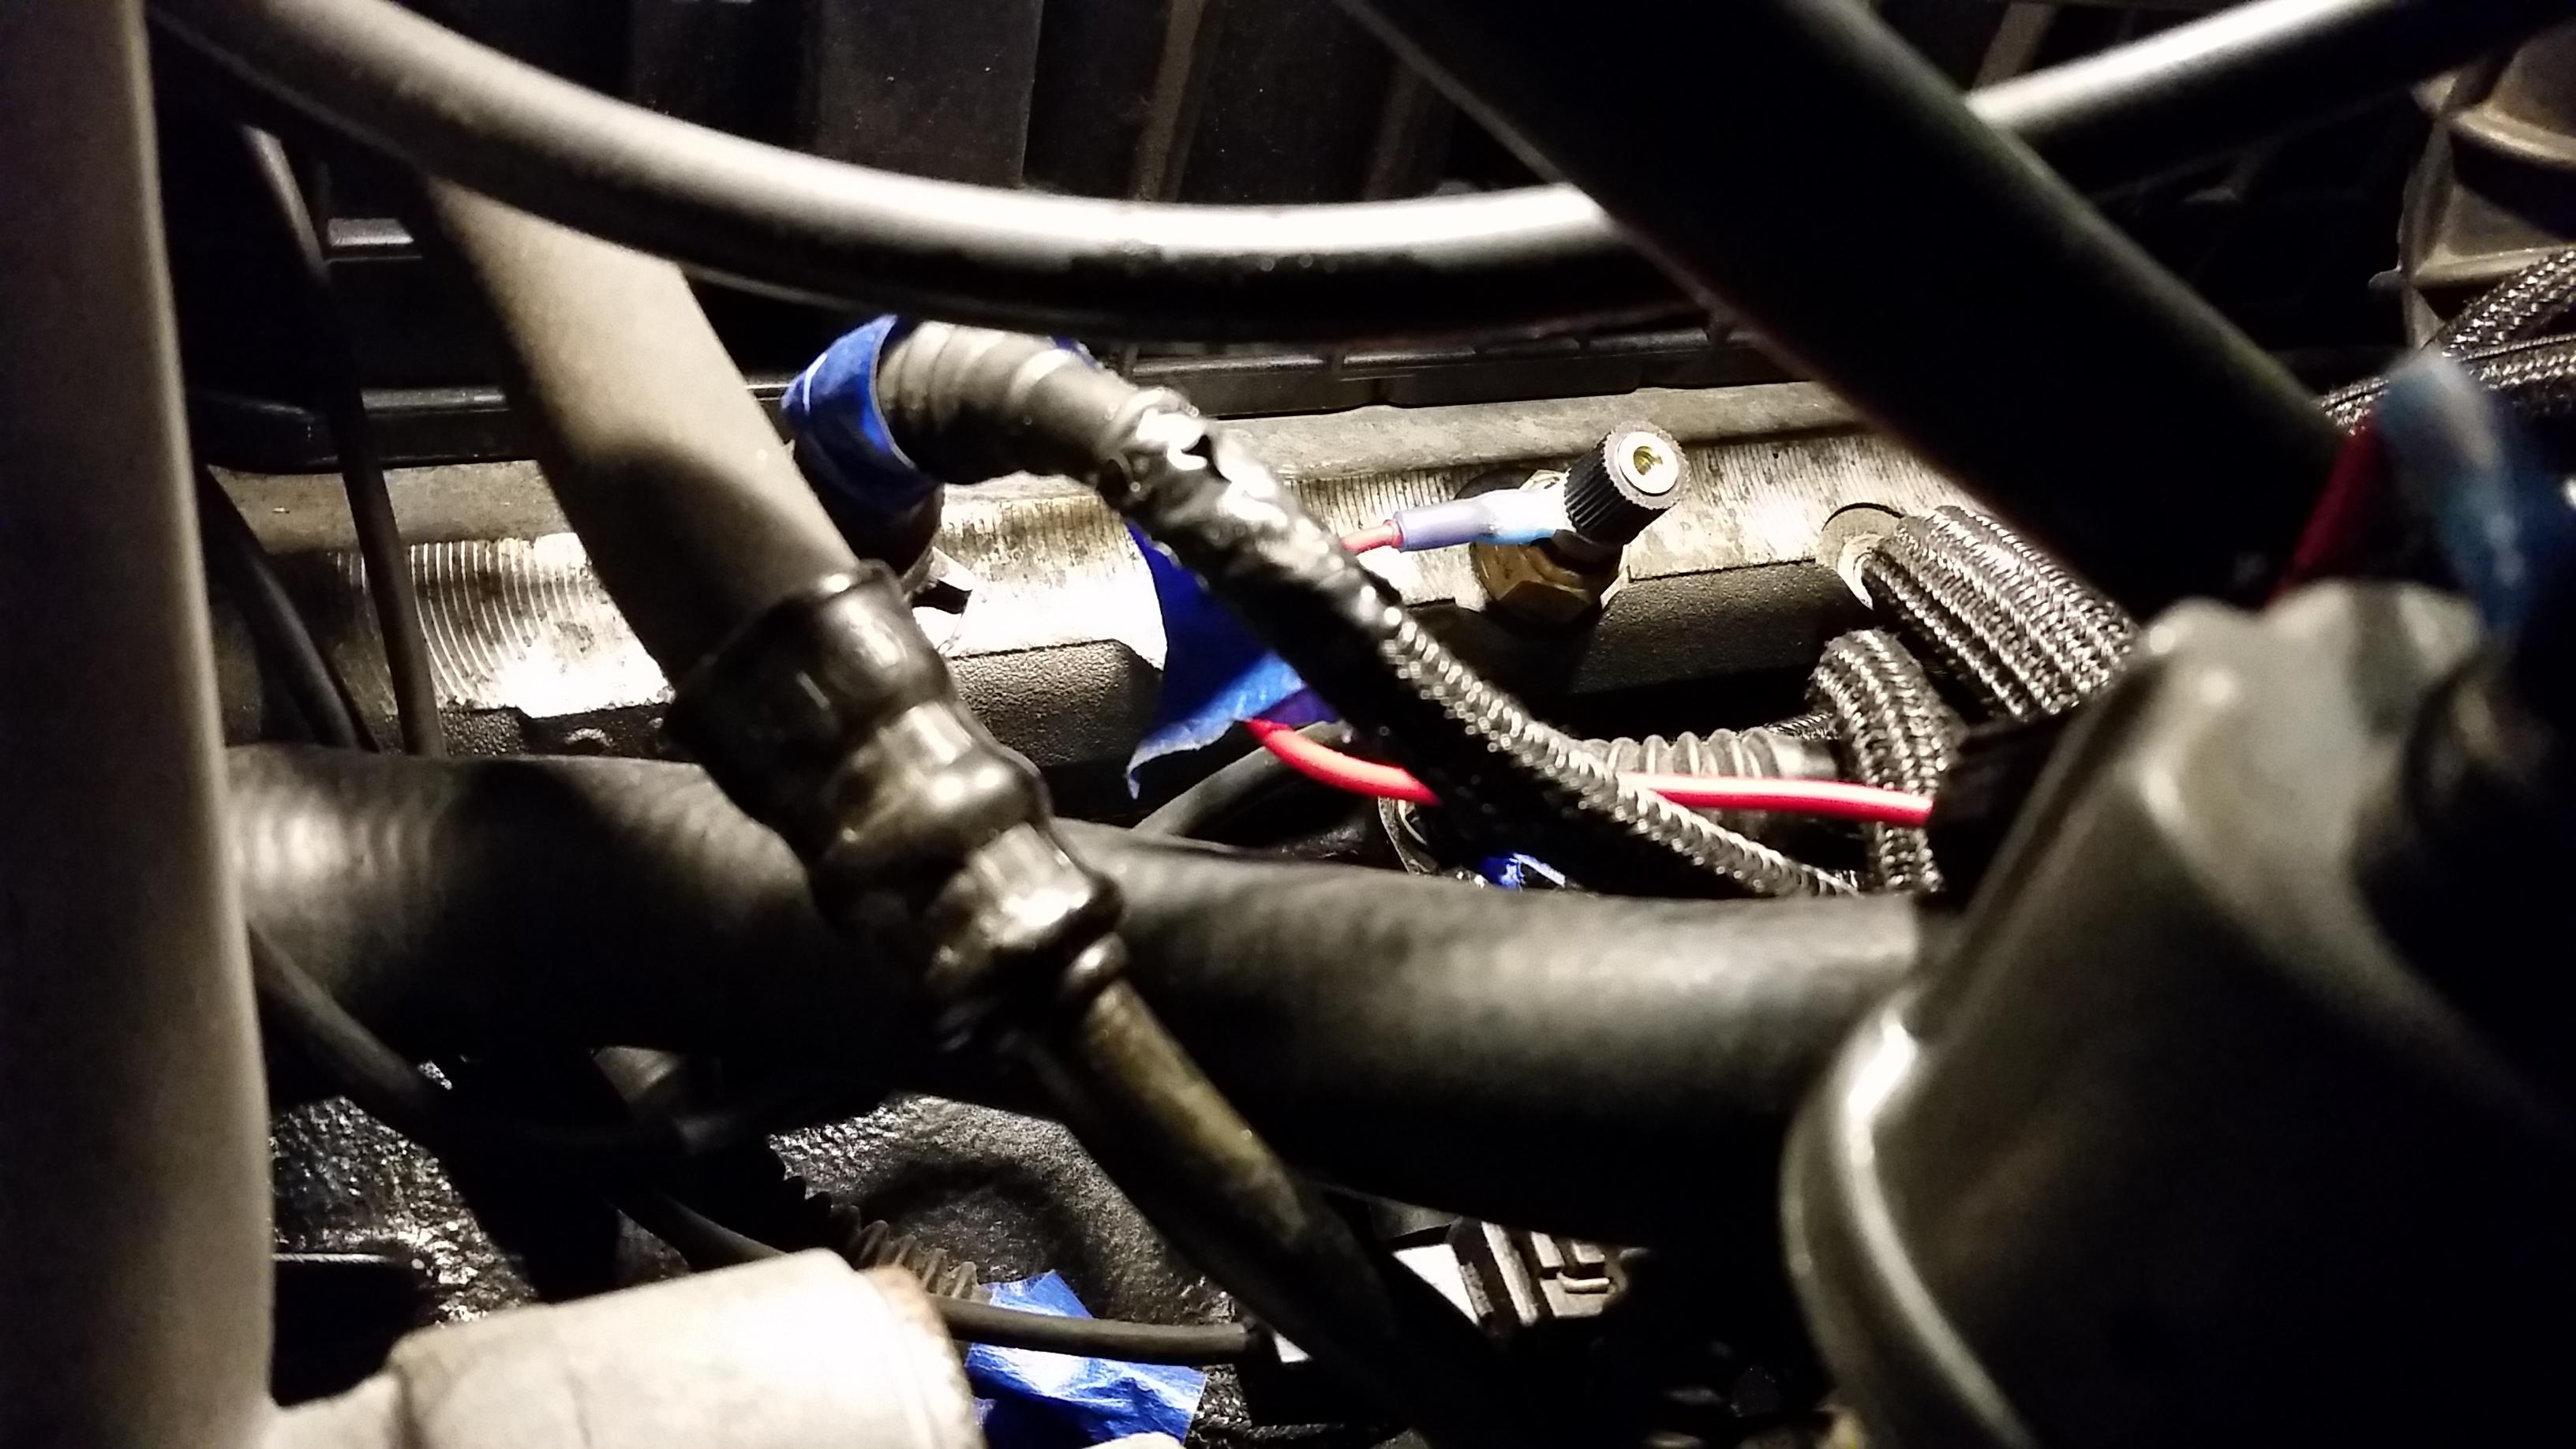
First off, the fan. It hasn't been running.
I know for a fact it's the switch. When I remove the two wires and jump them together the fan kicks on full power, no problem. I purchased the switch off a carpartsdiscount cite which was actually the only place I could find a 82 - 88 degree 2 prong coolant switch. The part number is 61-31-1-364-272-82. My only guess is that the switch is defective and I will have to find a replacement but where? Nobody seems to carry them anymore. Help on what others have done for this would be awesome!
I'm thinking I will probably wire up a toggle switch temporarily to those two wires for me to control tell I can find something else.
Next thing was the transmission. It seems that I have a pretty decent leak coming from the main output shaft seal. I am guessing when I had pulled the flange off originally to remove the dampener I had disturbed the seal. I know as for a preventative maintenance item I should have replaced all the seals on the trans but I had not and now I get to deal with it after the fact, yay. Monday I called the dealership and had them order me the output shaft seal which will be arriving tomorrow. Luckily I had ordered an extra quart of redline mt-90 gear oil way back when I originally put fresh fluid in the trans so I went ahead and checked the current level through the fill plug, level was a bit low as expected.
Lastly, The engine. I should mention that the flywheel gives off quite a bit of chatter at idle and between gears. Of course I new this was going to happen when I ordered it but wasn't quite sure what to expect. At first I sort of was getting annoyed by it but after the trip I had completely forgotten about it and it no longer bothers me. Sense I don't plan to daily this all that much I feel its worth it for the gains being made. Definitely would consider switching back to the stock flywheel though if it were a DD.
Took a little time to get use to the stage 2 clutch as it is quite a bit heavier then I'm used to but after driving it a bit I was already use to it's weight. That UUC shifter though... Sssssssoooooooo gggoooooooodddddd!!! I love every bit of it and feels awesome! I recommend it to anyone who is considering going with a short shifter, well worth the money spent!
Alright so the engine has an odd little quirk I have been noticing every once in a while during idle. The idle would stay steady and then begin to jump around for a few seconds returning back to a steady idle (800-1000 rpms). Not sure if maybe one of the few sensors I had used from the junk yard is on it's way out, maybe the MAF? Like I said its only once in a while and for a few short seconds so I'm fairly certain it wouldn't be any mechanical. I will see if I can get a video of it to post up. Also, every time I came to a stop bringing the trans to neutral and disengaging the clutch the engine would hop in rpms and back down to idle. Separate issues for sure but slightly odd. Any help on why either of these are happening would be greatly appreciated.
There are still a few little things I have to take care of in terms of aesthetics. Big goal right now is to take care of everything major.
Short little clip one of my friends took of me opening it up down a frontage road... Enjoy


the one and only e30 s52 engine swap
in Members BMWs
Posted
Ya, I am pretty spoiled. I continue to remind my grandfather every chance I get how grateful I am to be able to use some of his shop space for my projects, I literally wouldn't be able to do this without it.