Tkuhn
-
Posts
302 -
Joined
-
Last visited
-
Days Won
13
Content Type
Profiles
Forums
Events
Gallery
Store
Posts posted by Tkuhn
-
-
UPDATE.
yes @Jdesign I ended up putting in some LEDs for the brake and running lights. I'll be getting some stealth blinker bulbs as well. I dont have photos of the new LEDs yet, also need to get on the closing band wagon so they dont flicker and throw a code.
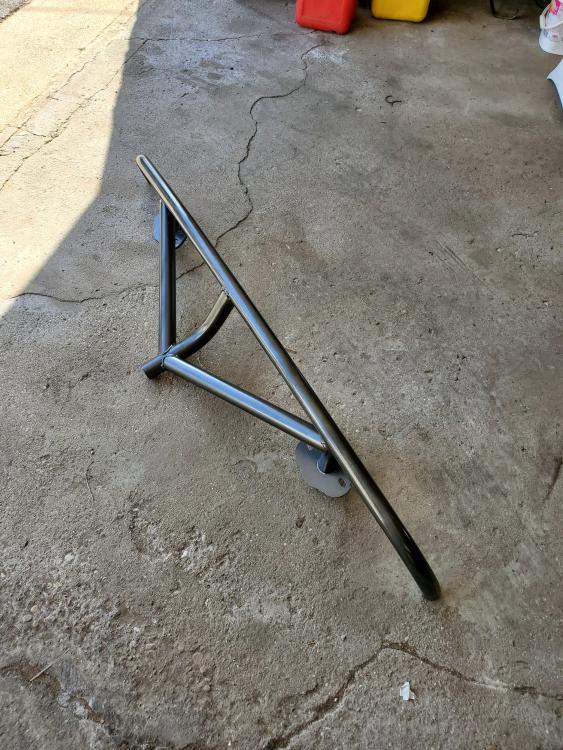
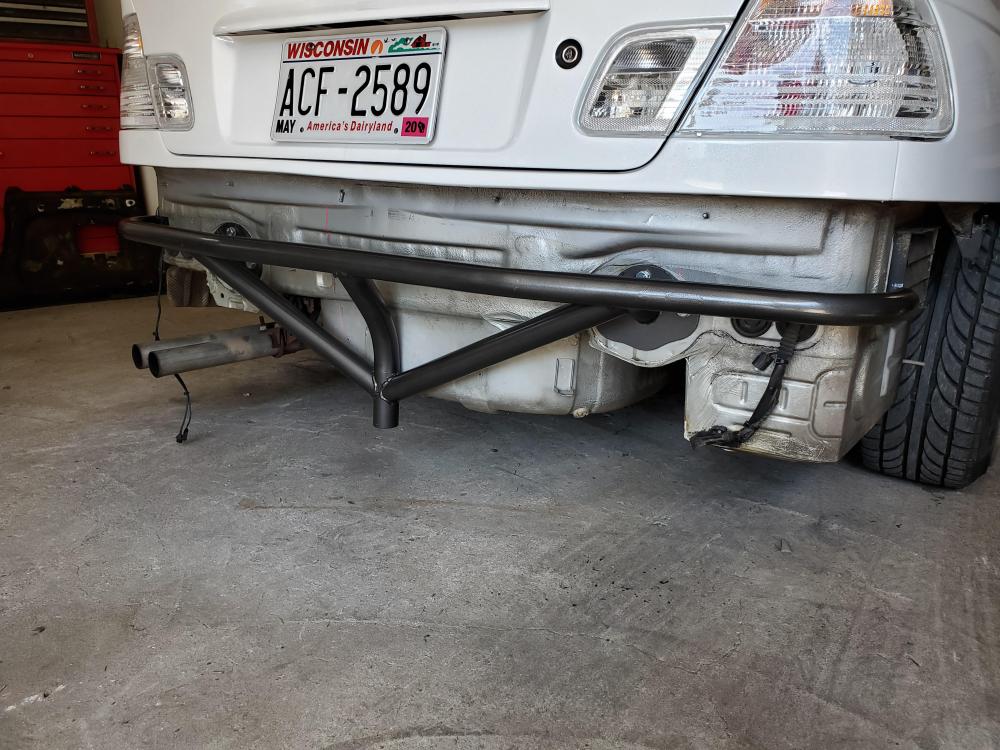
Secondly I went up to Sam's shop with the car and modified my street faction bash bar with a Jack point 😁

Turned out pretty well.
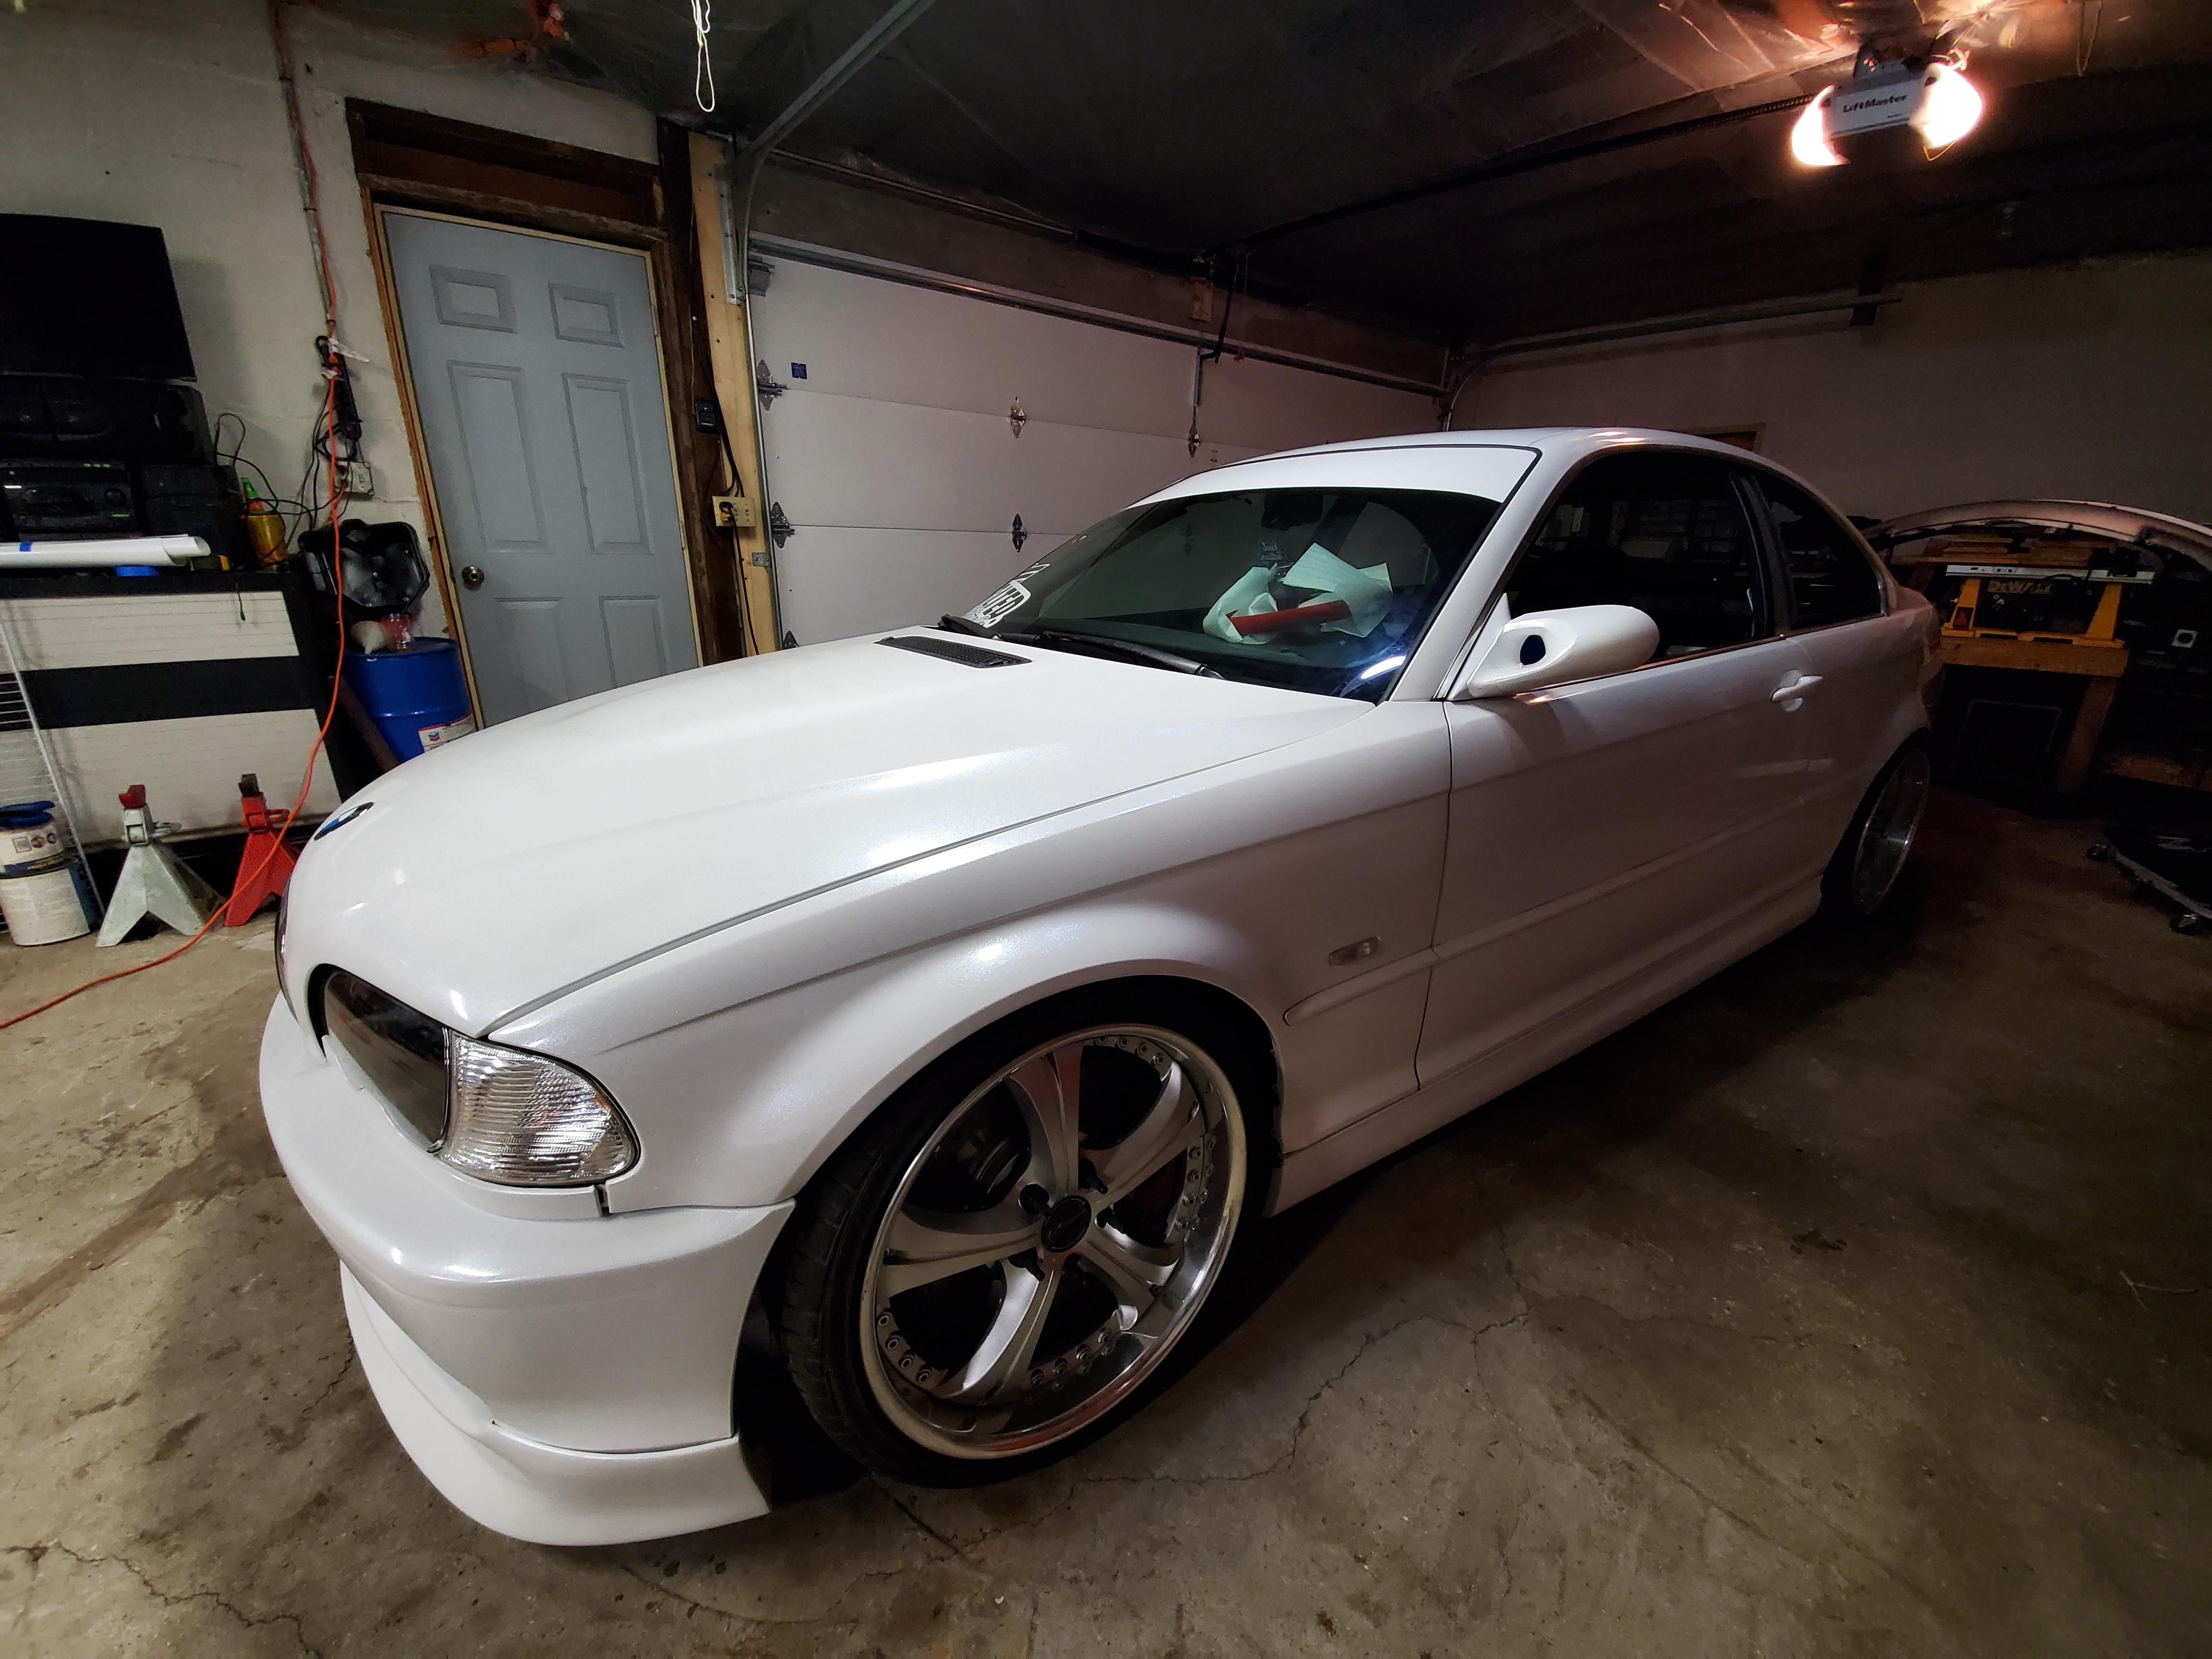
then on Sunday I slapped some paint on it.
- patsbimmer1 and Jdesign
-
 2
2
-
-
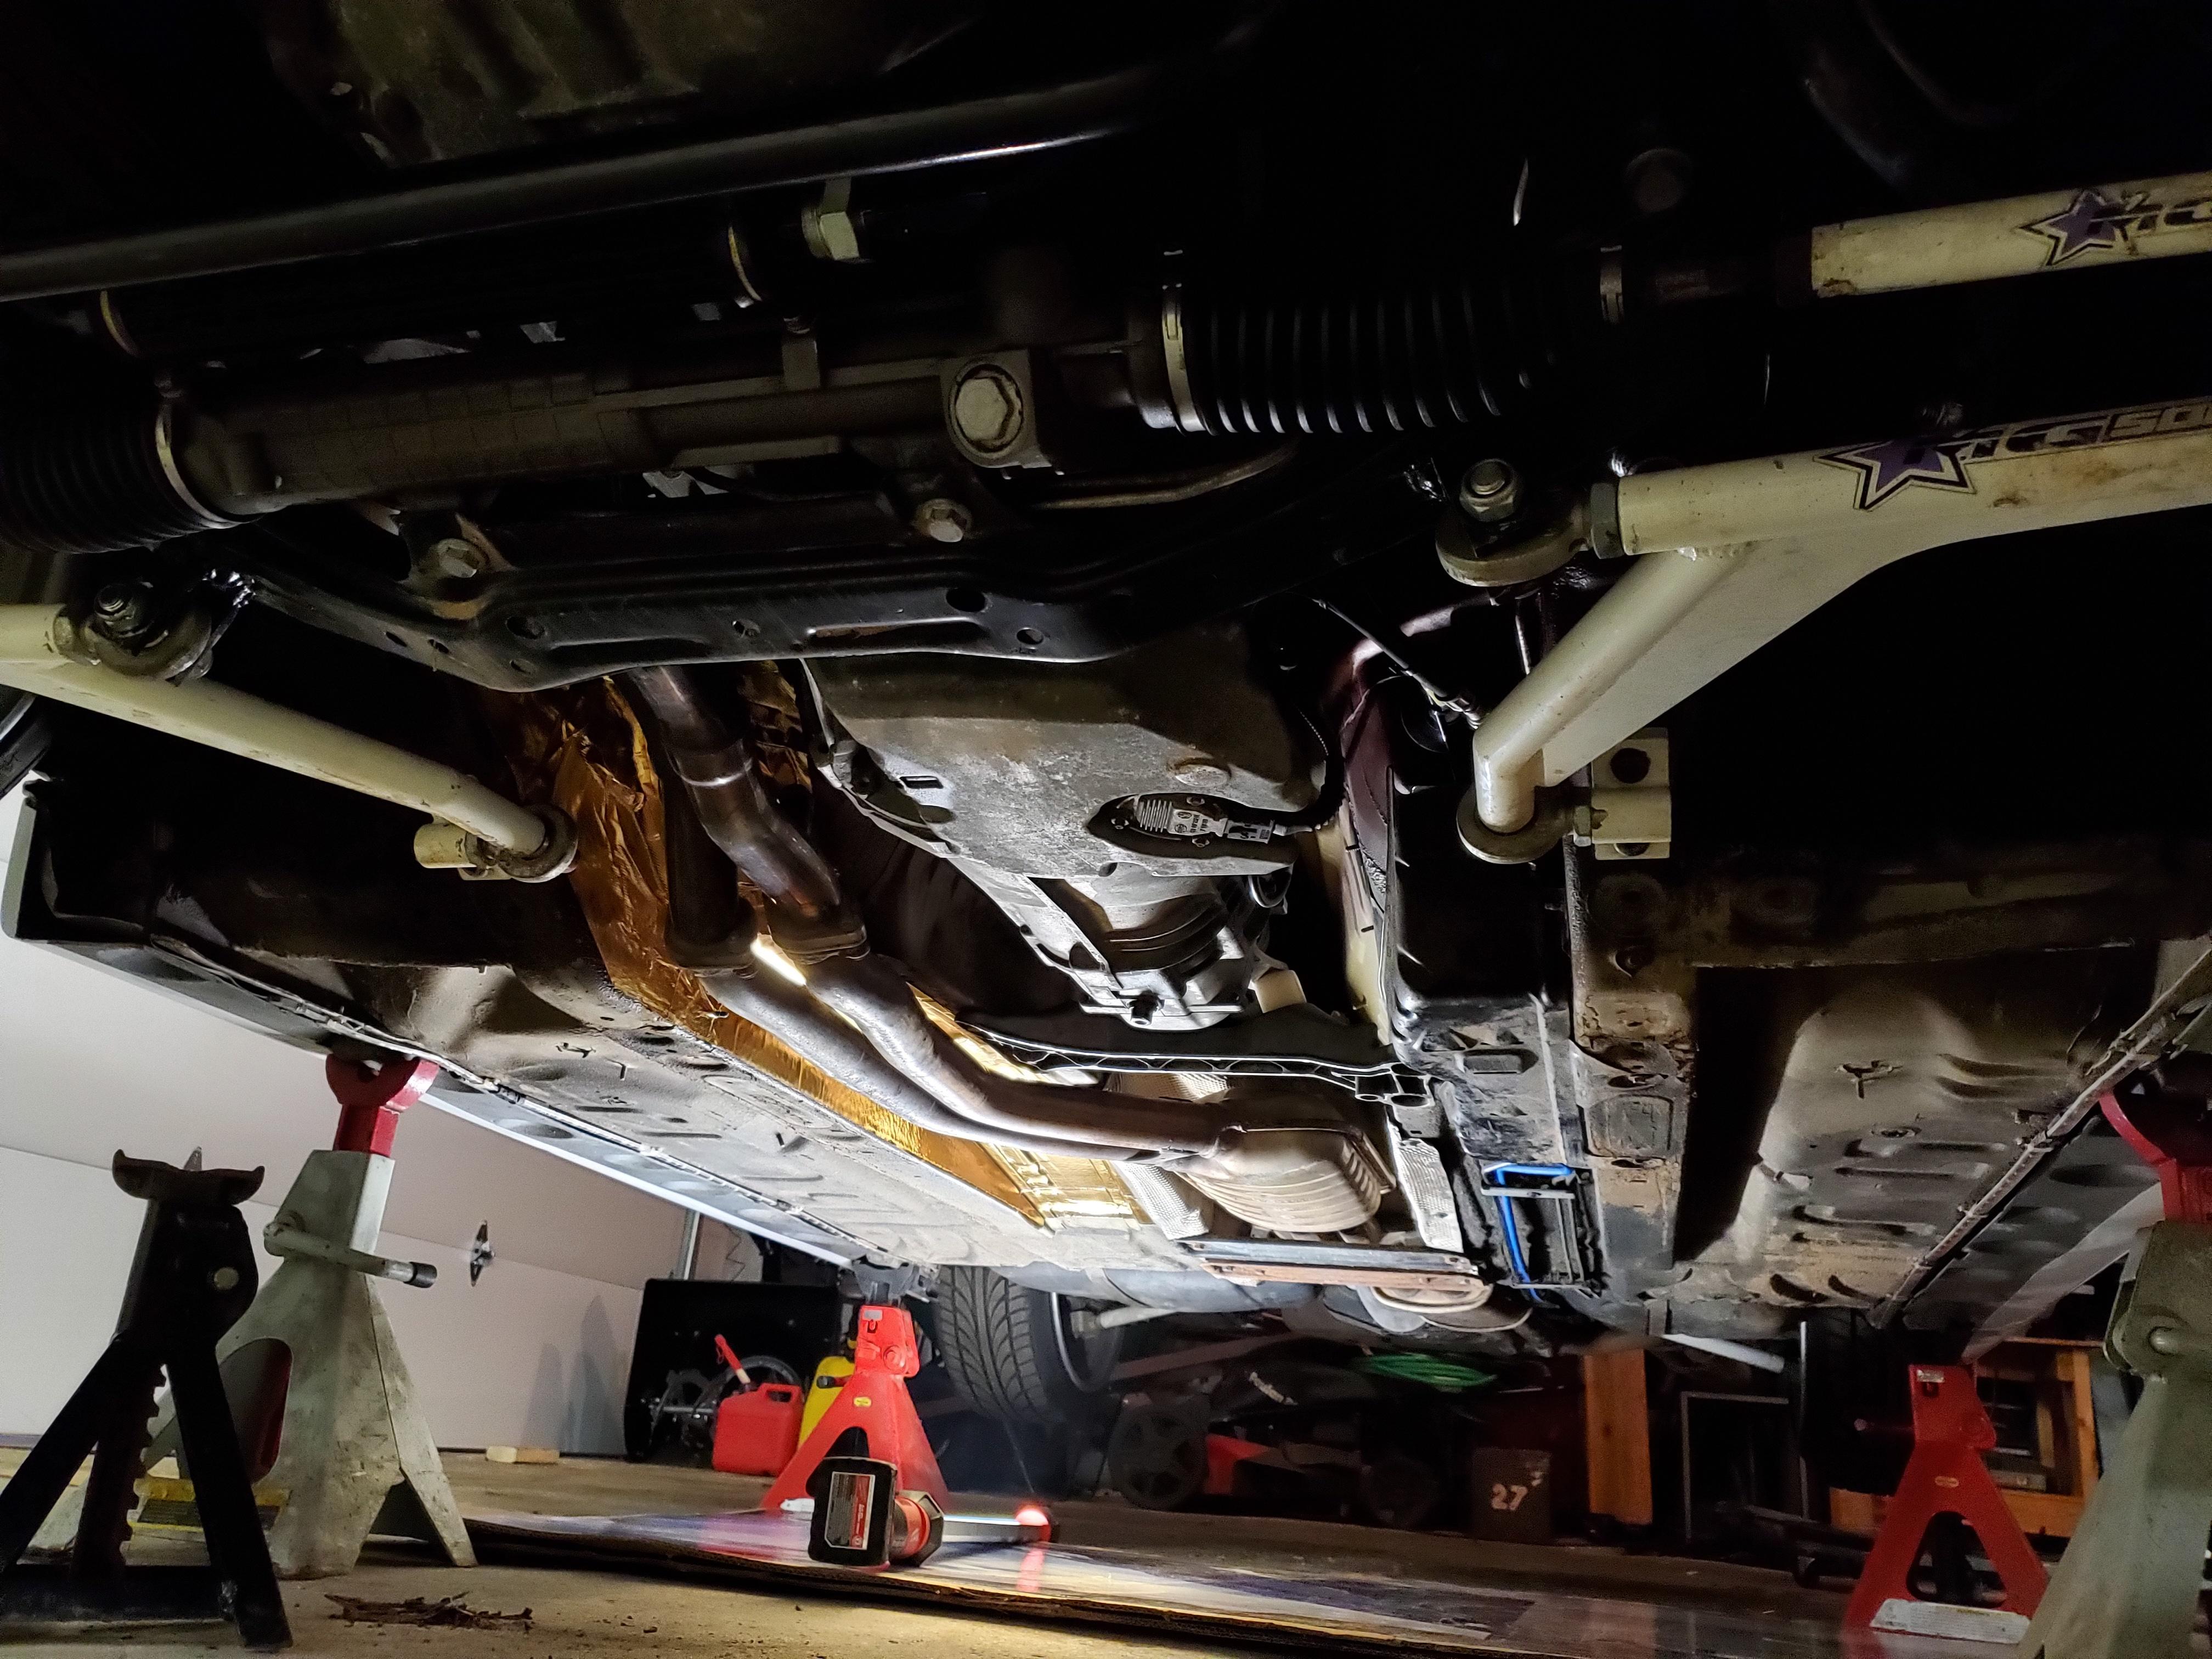
Been slacking on updates since it's only been buttoning up some small things. Got my new bulb tray and threw it in the car.

I currently have red incandescent bulbs in the running and brake positions and amber in the turn signal. Might convert to LEDs sooner than later so theres better light output and so it actually shows up red lol. It's kinda pink when the brakes are on.
-
-
Happy to have stumbled upon this 😍 love how much different Ms look from non Ms
-
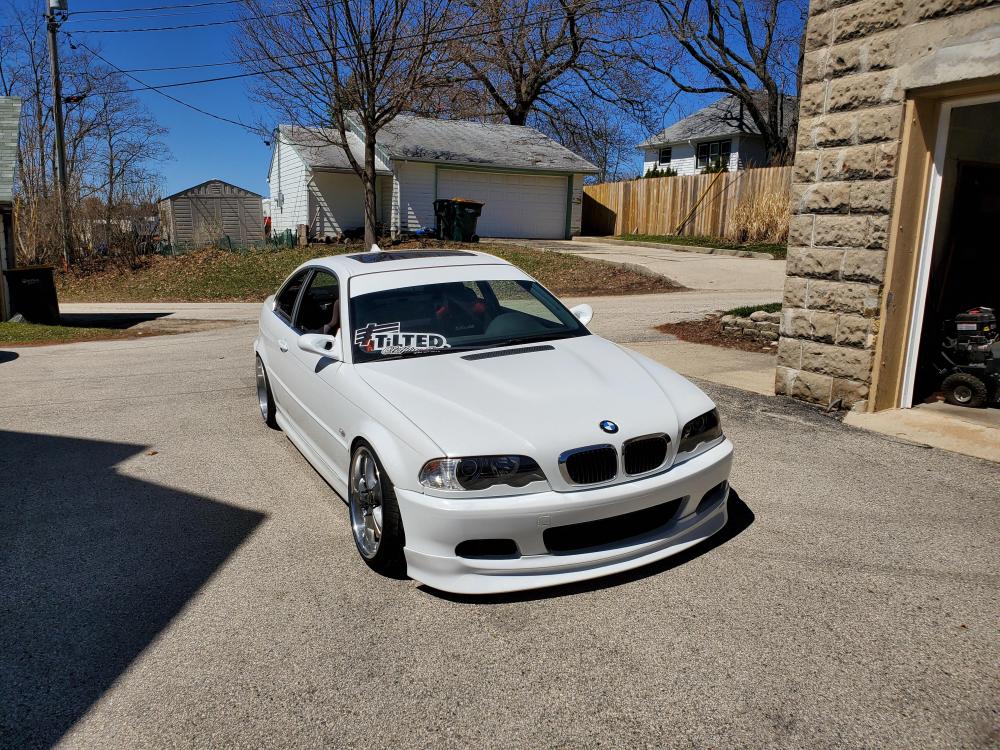
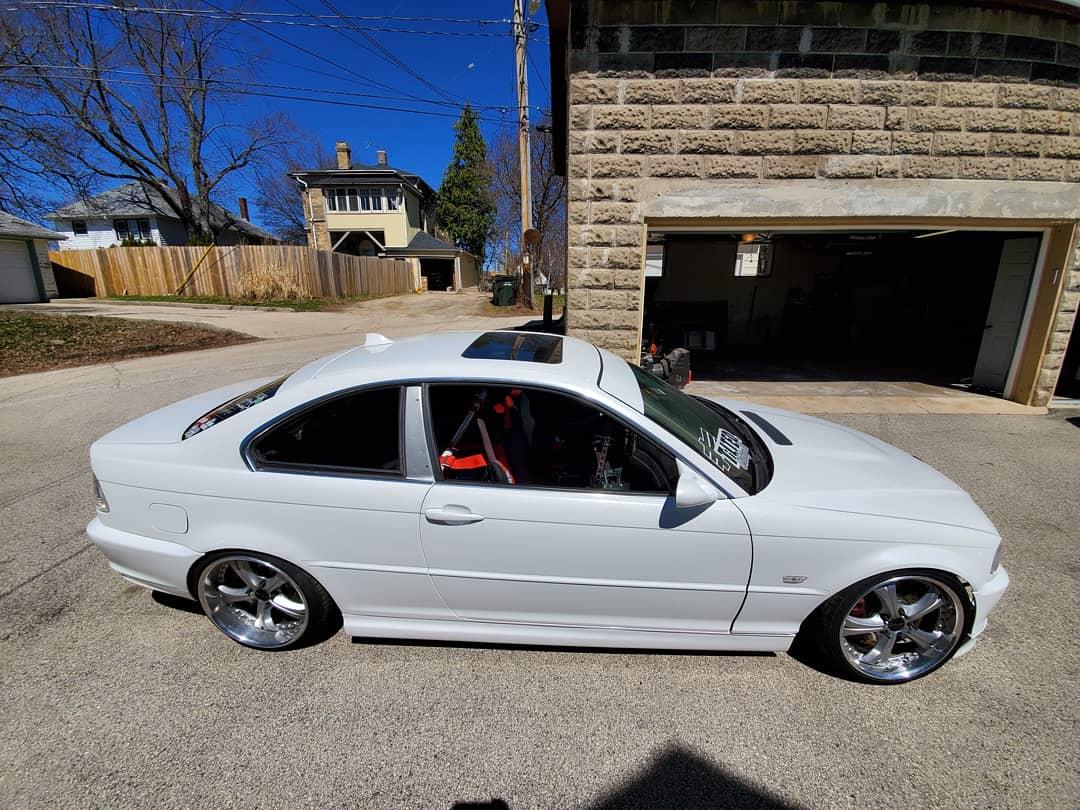
Small update after the productive weekend.
Took the car for a drive down the street and everything seems good and normal like before. Speedo works correctly and that in itself makes me excited to no longer need to use a GPS Haha.
Threw the quarter windows in after I took the pics on Saturday and on Sunday i put the grill in the front bumper.
The car needs a solid wash, lots of dust from sitting in the garage.
-
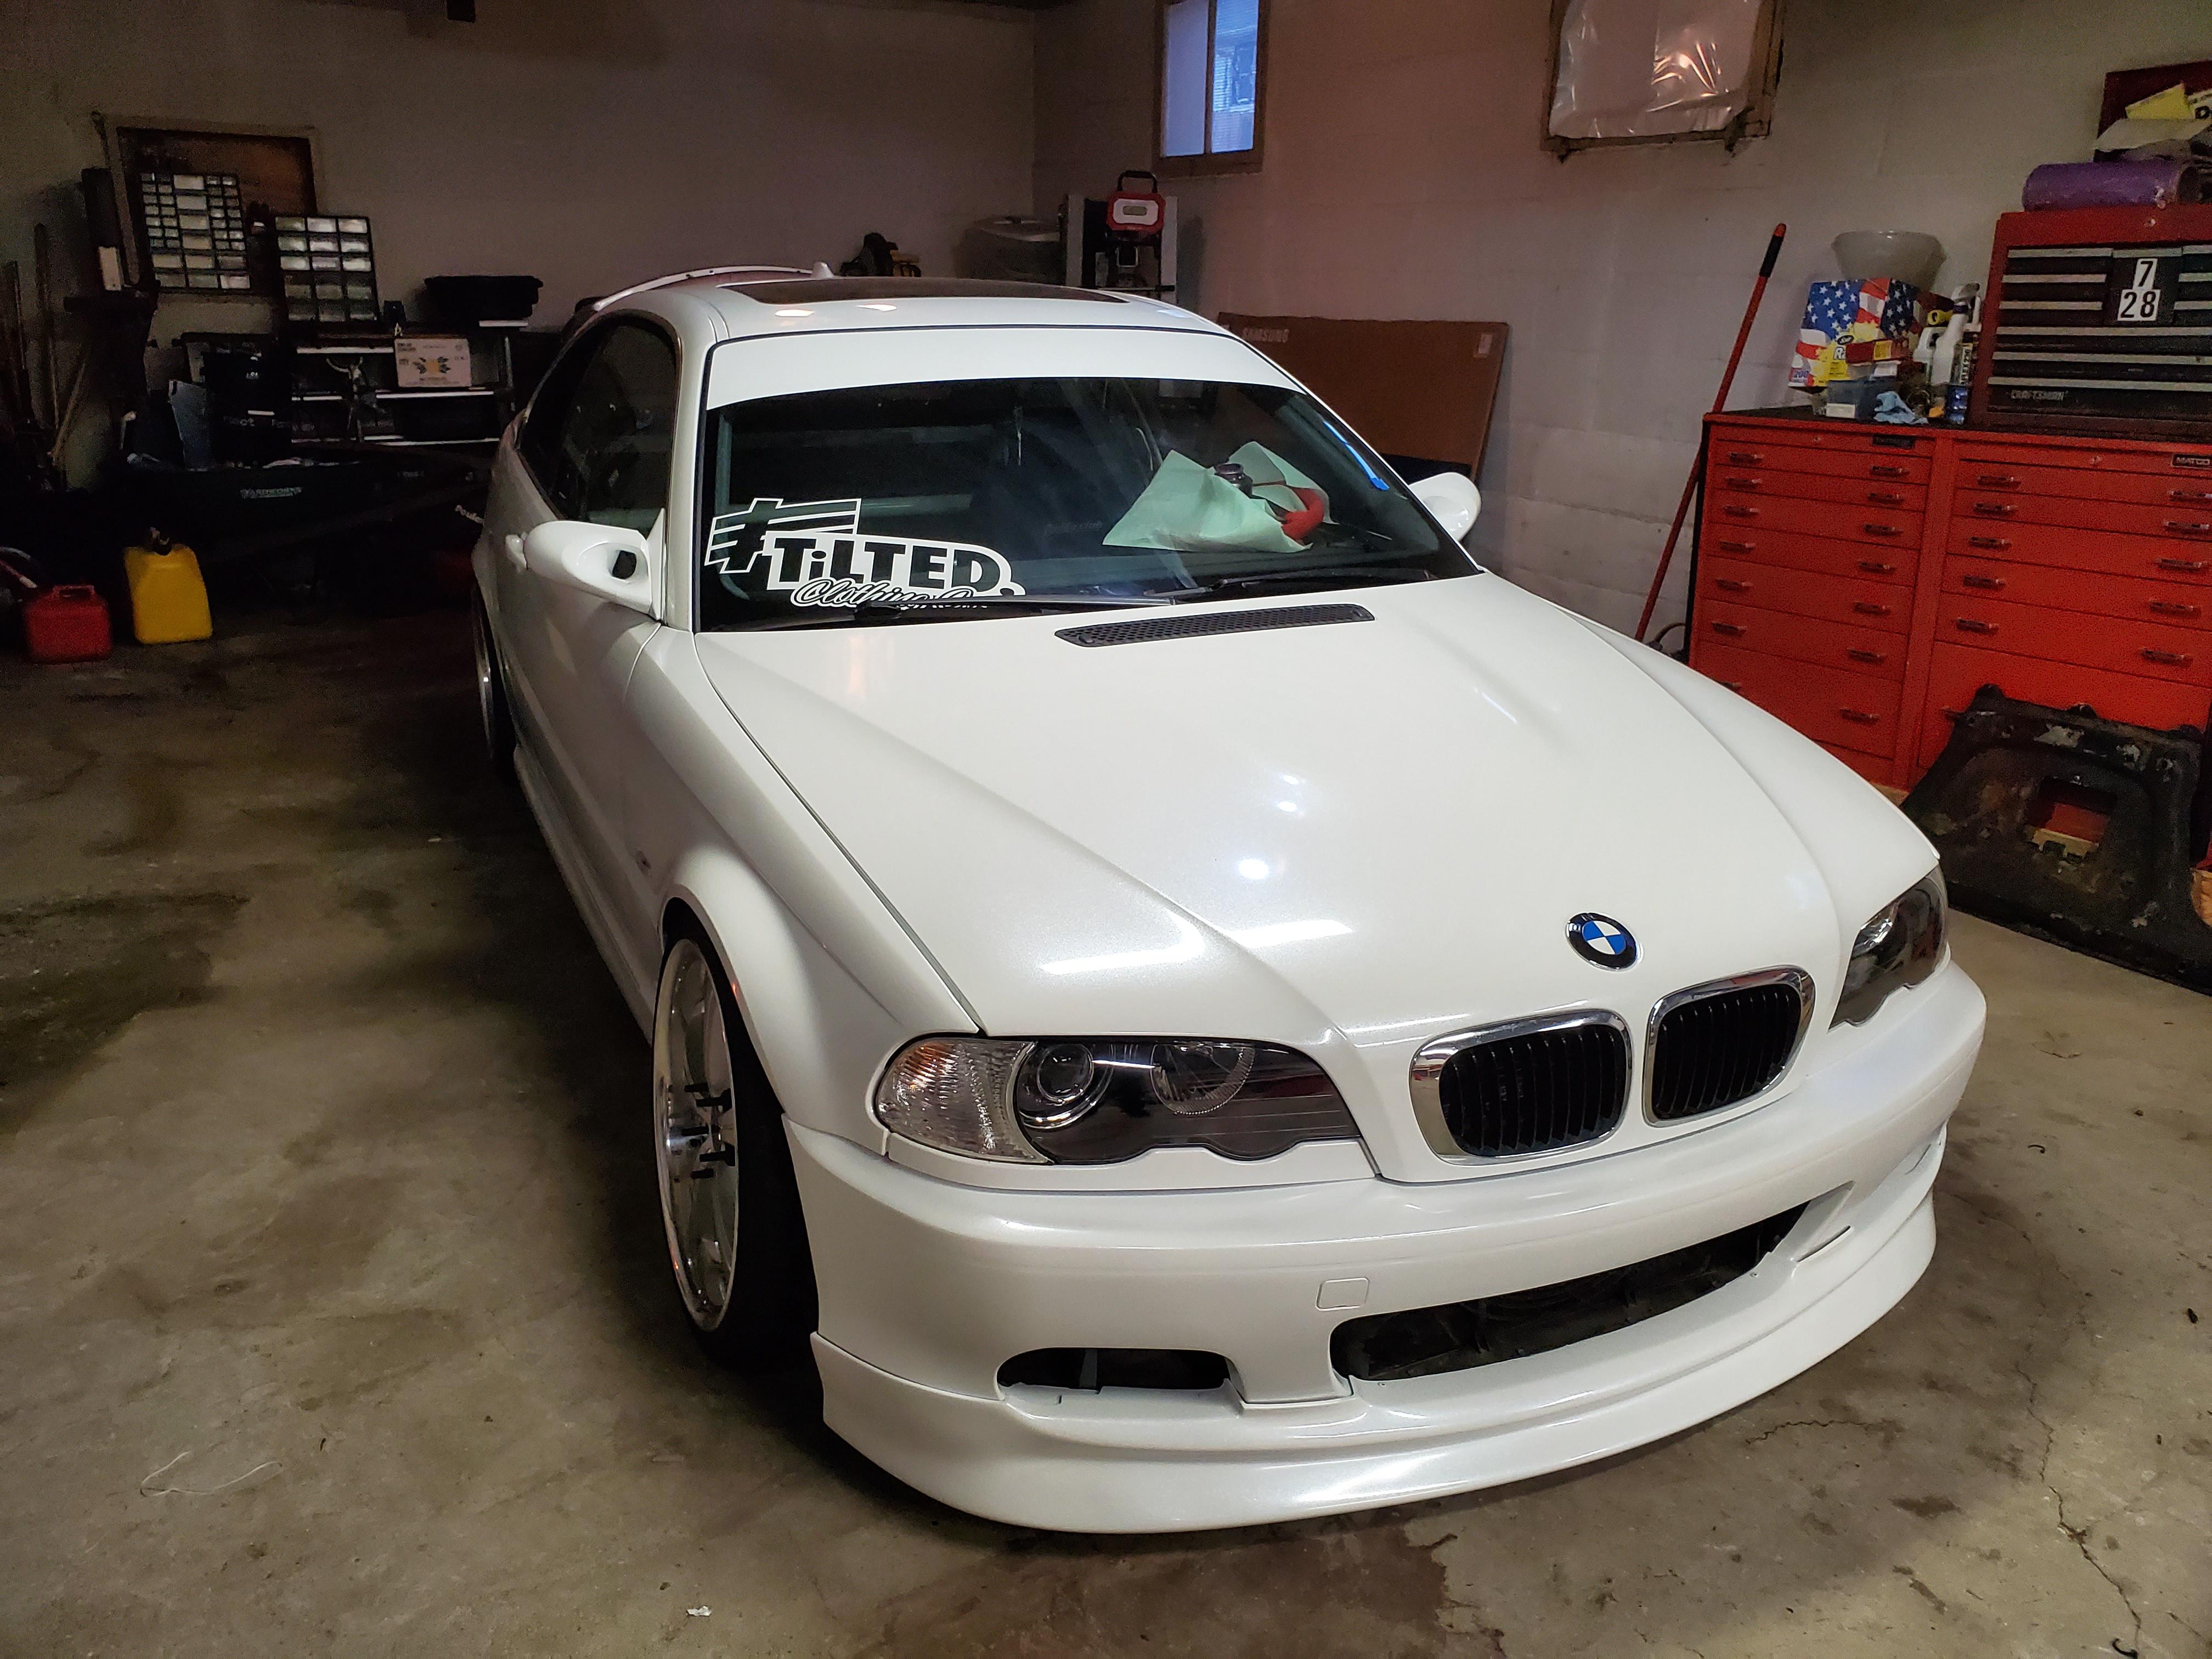
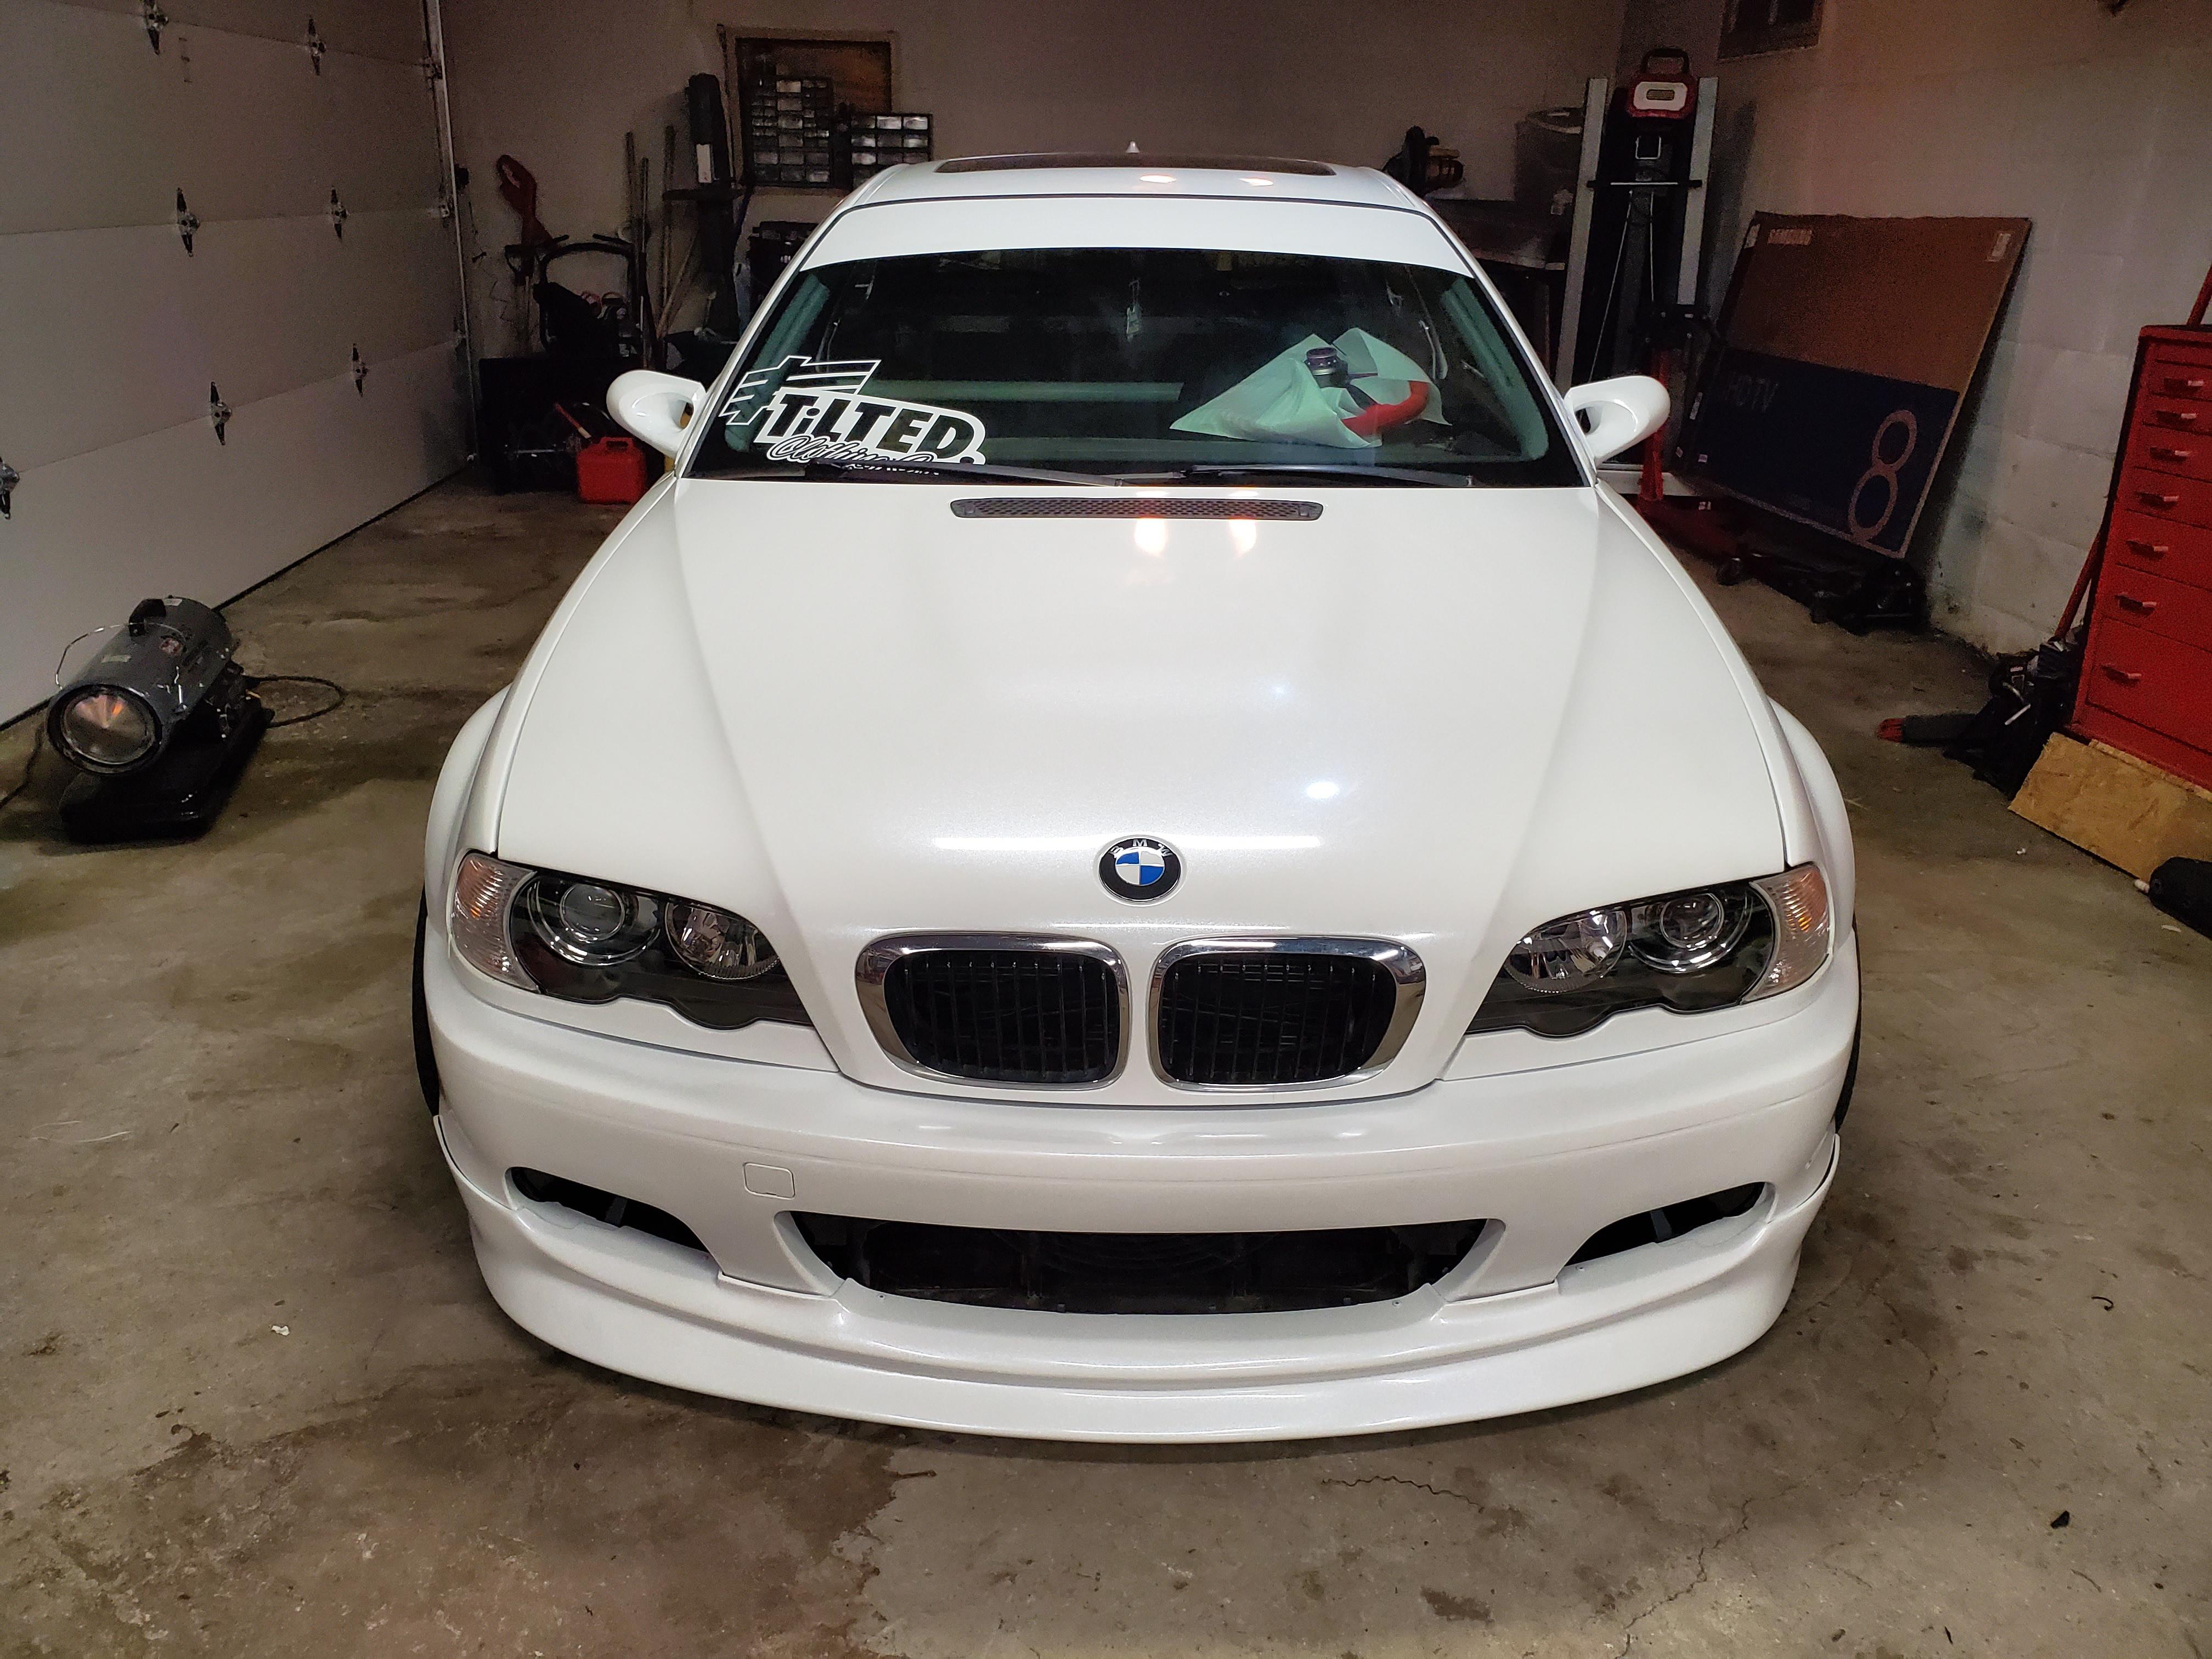
Update:
Got all fluids in and started up with no problems.
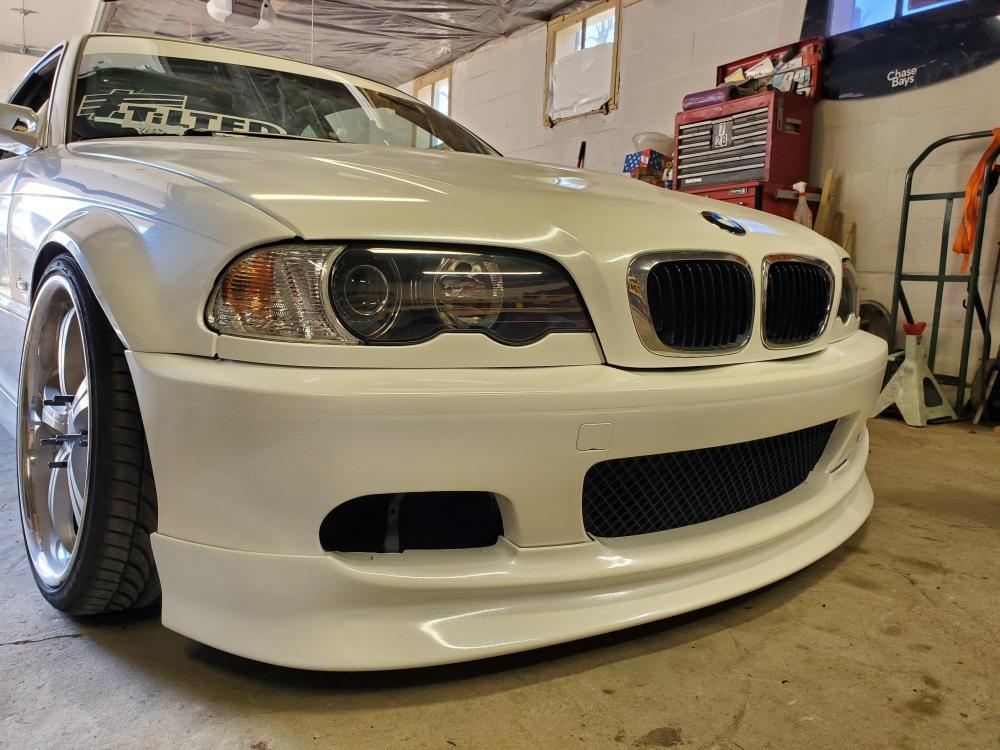
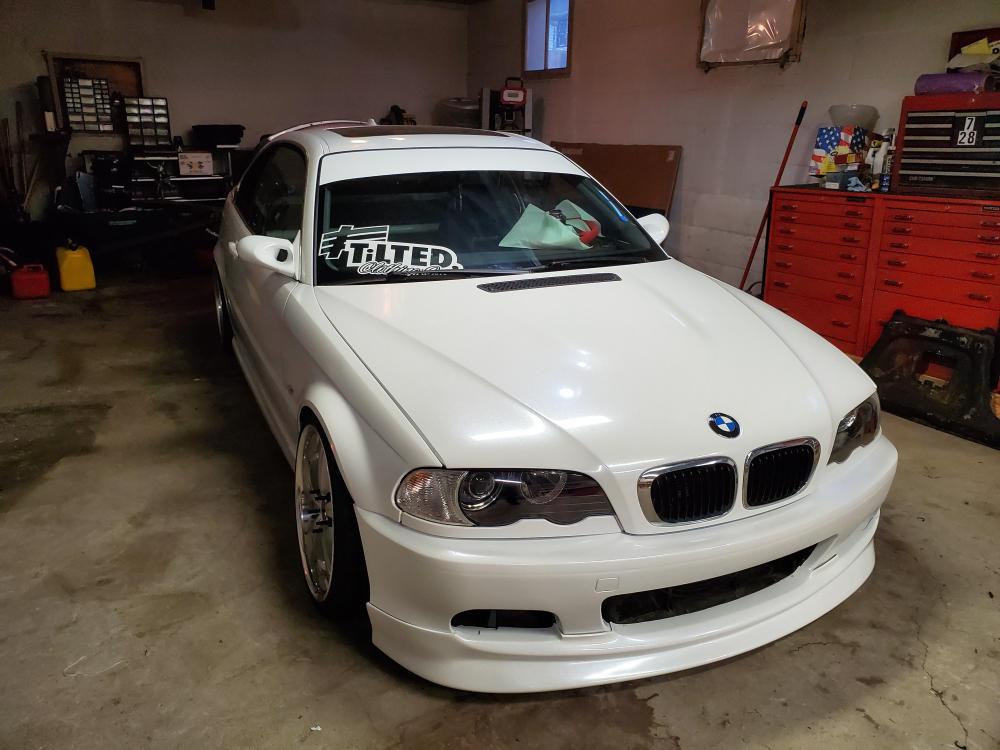
So since it was nice today in had to pull it out in the sun! It's almost hard to look at with the sun and no sunglasses Haha

And here's a pic with the rear bumper on. I have a buddy that has offered up his mtech2 bumper for a really good price. Just not sure if I should go that route or get a lip for this bumper.

Was checking lights and such and found that my left running light in the rear is partially lit on the brakes even when the brakes aren't pressed. Through process of elimination using a socket from my sedan I found that it's the socket holder itself. Luckily a new OEM one was only 30 bucks plus some shipping. So that's on its way.
- patsbimmer1 and suspenceful
-
2
-
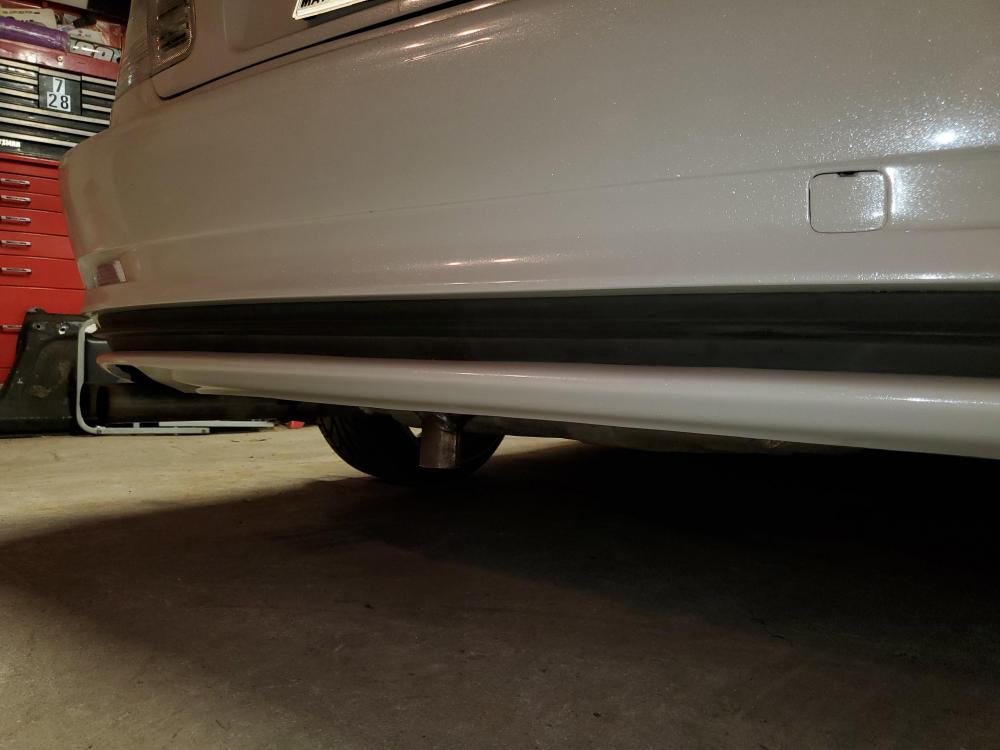
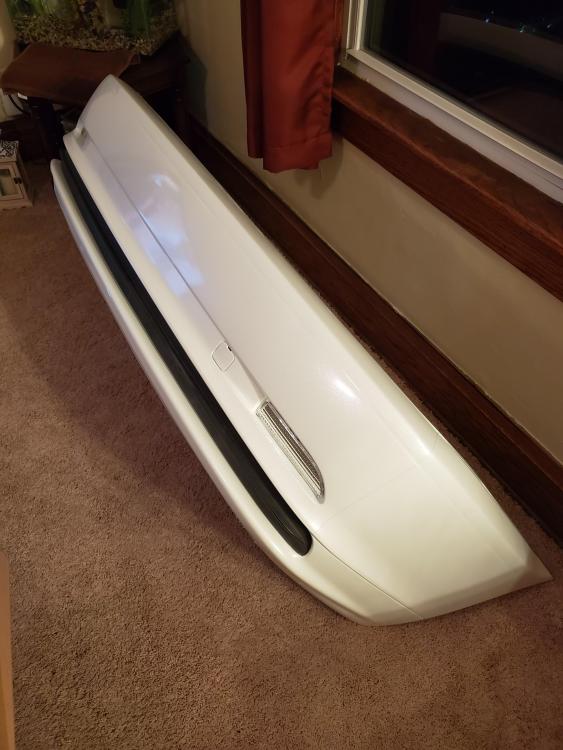
Wrapped the rear bumper tonight. Turned out better than the first time I tried. If you guys see the car in person you'll know what I mean.
Also as you can see I opted for the clear reflectors.
Also my DME showed up today as well, from getting a few modifications to the tune. So the goal for the weekend is to finish getting fluids in the car and have it up and running. 😁
-
5 hours ago, Jdesign said:
Im not saying I figured it out, but I think I figured it out..
I cropped the vehicle info to keep it a secret.

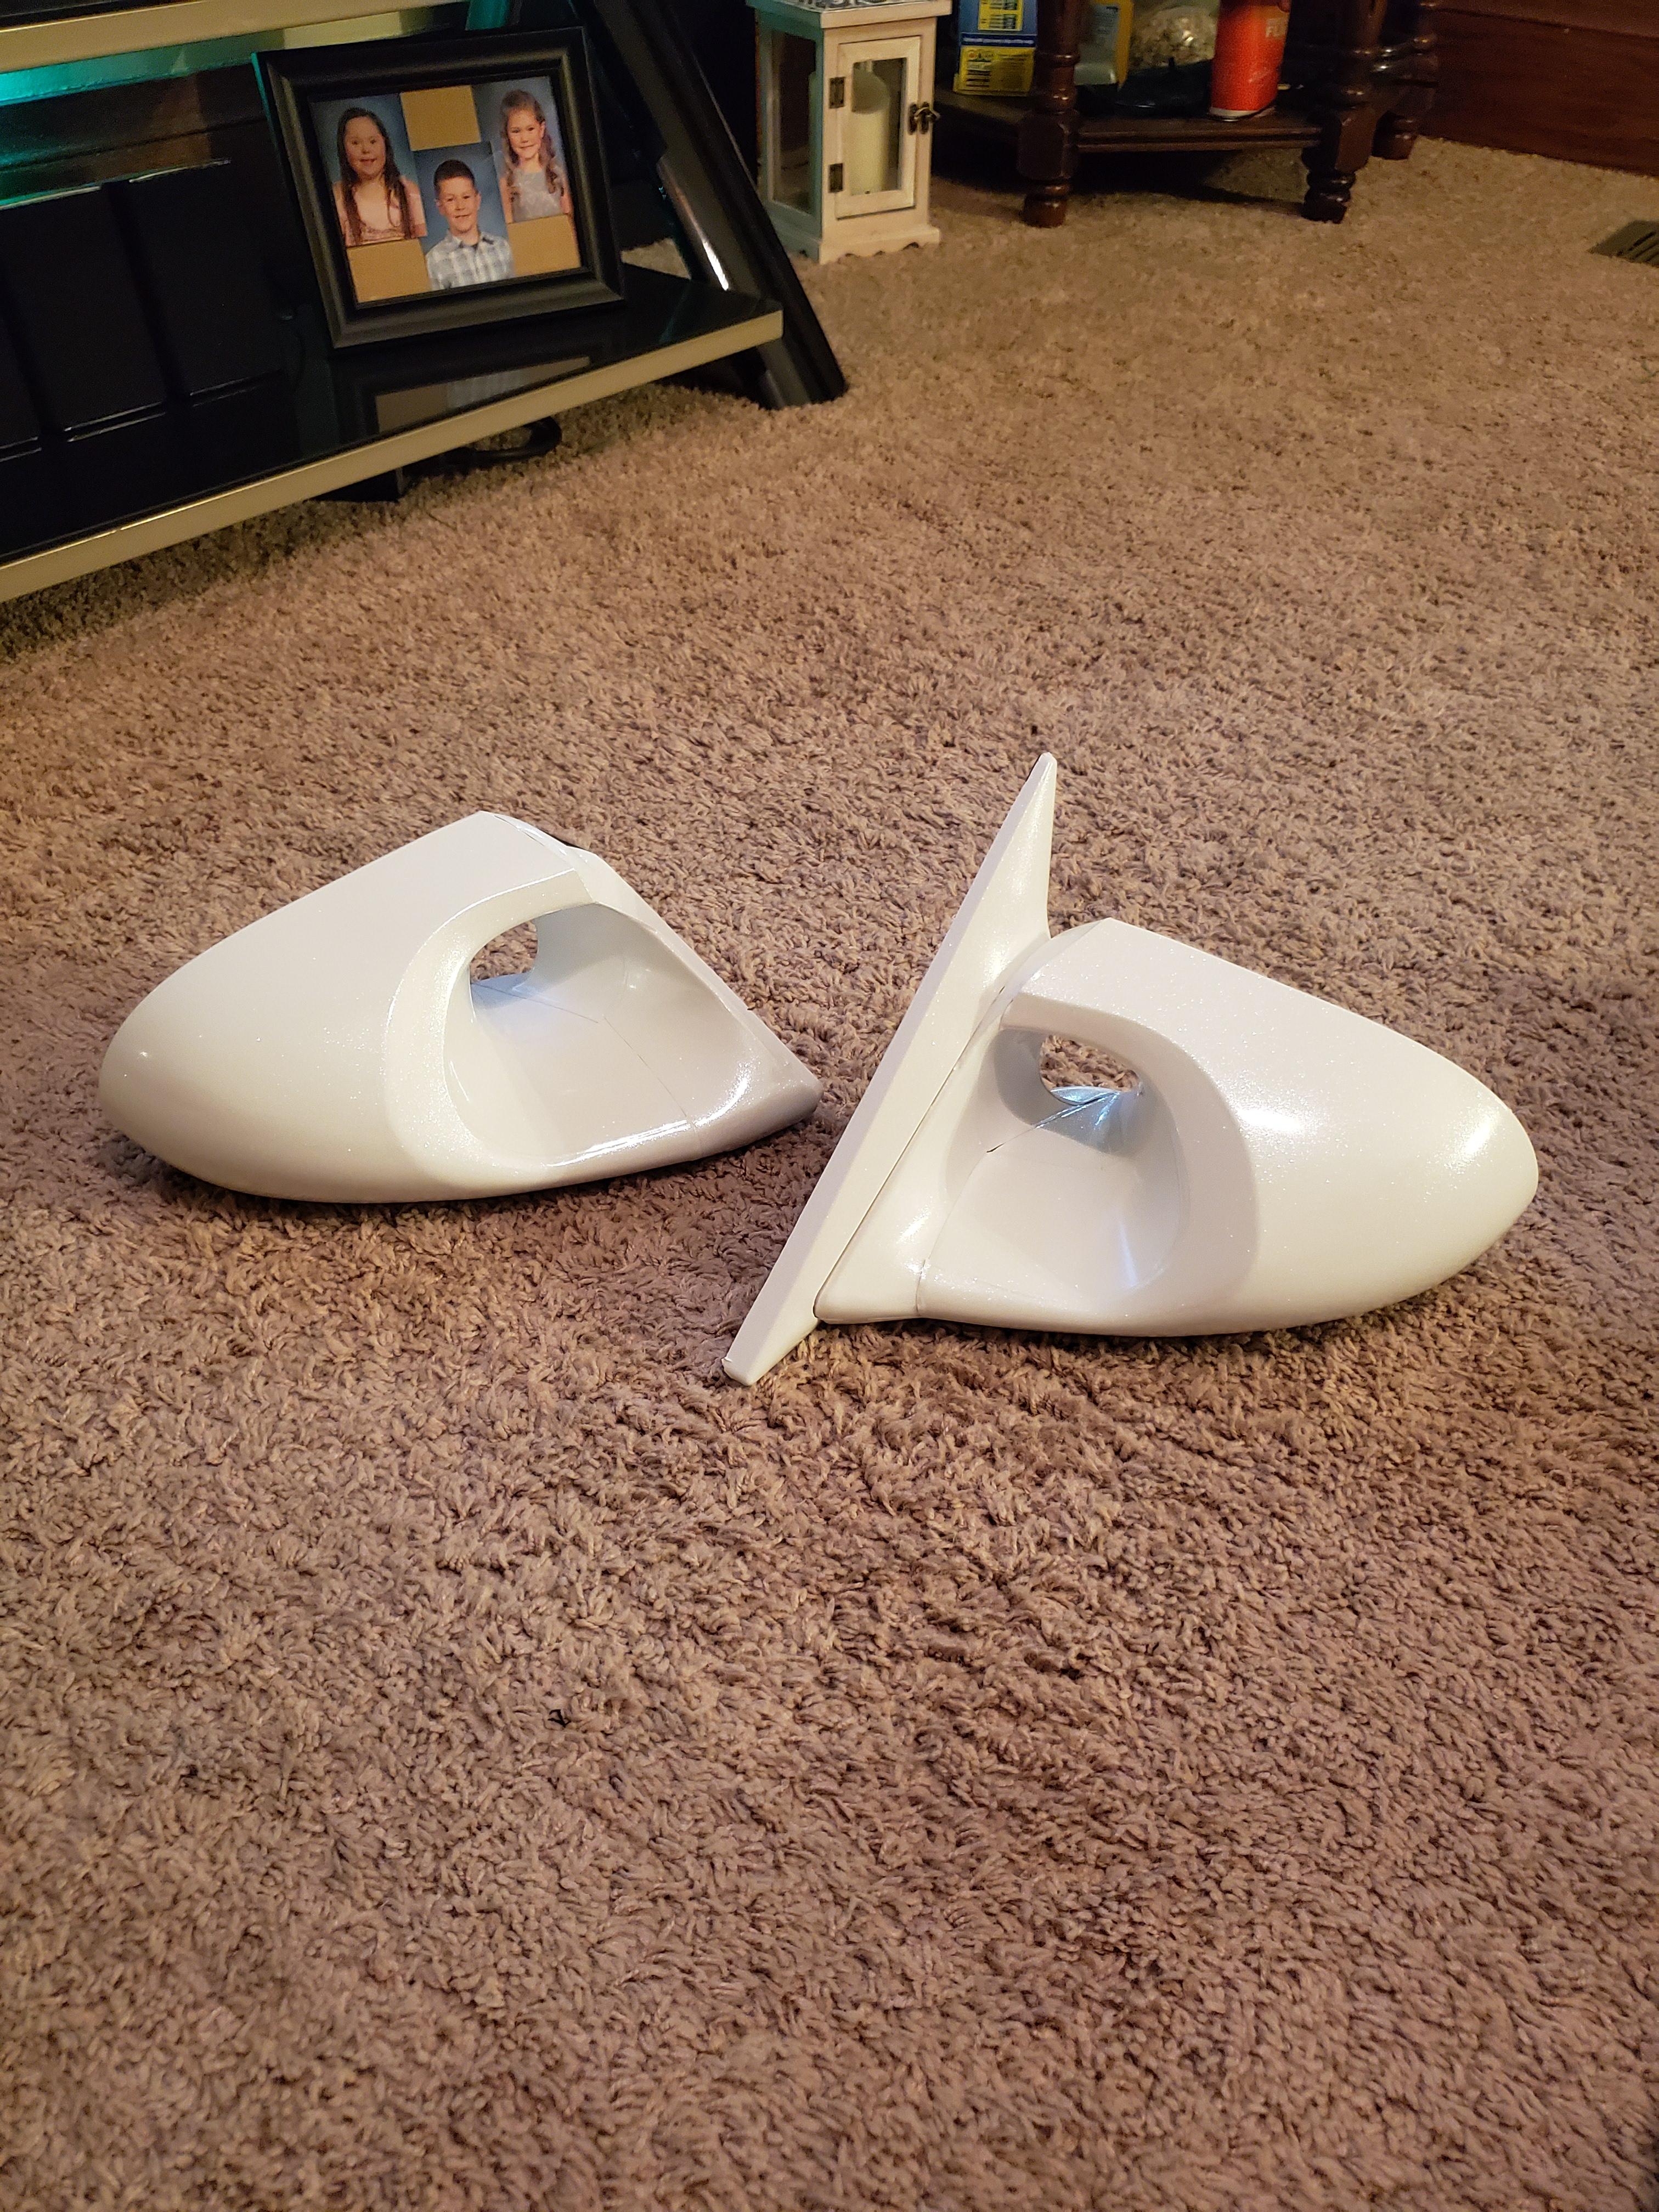
These are close but not what I have, I have a actual brand of mirror lol
-
1 hour ago, Jdesign said:
So you are leaving me(us) in the dark.
Kindaaaa Haha my dude did ask me not to tell what the combo was to make them hahah
-
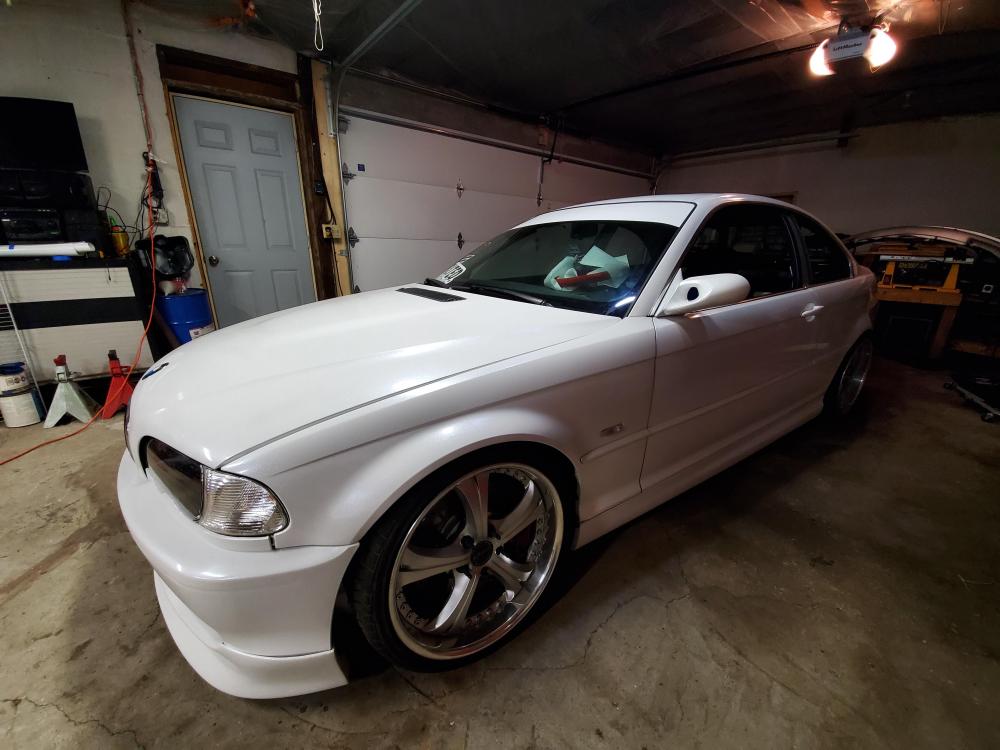
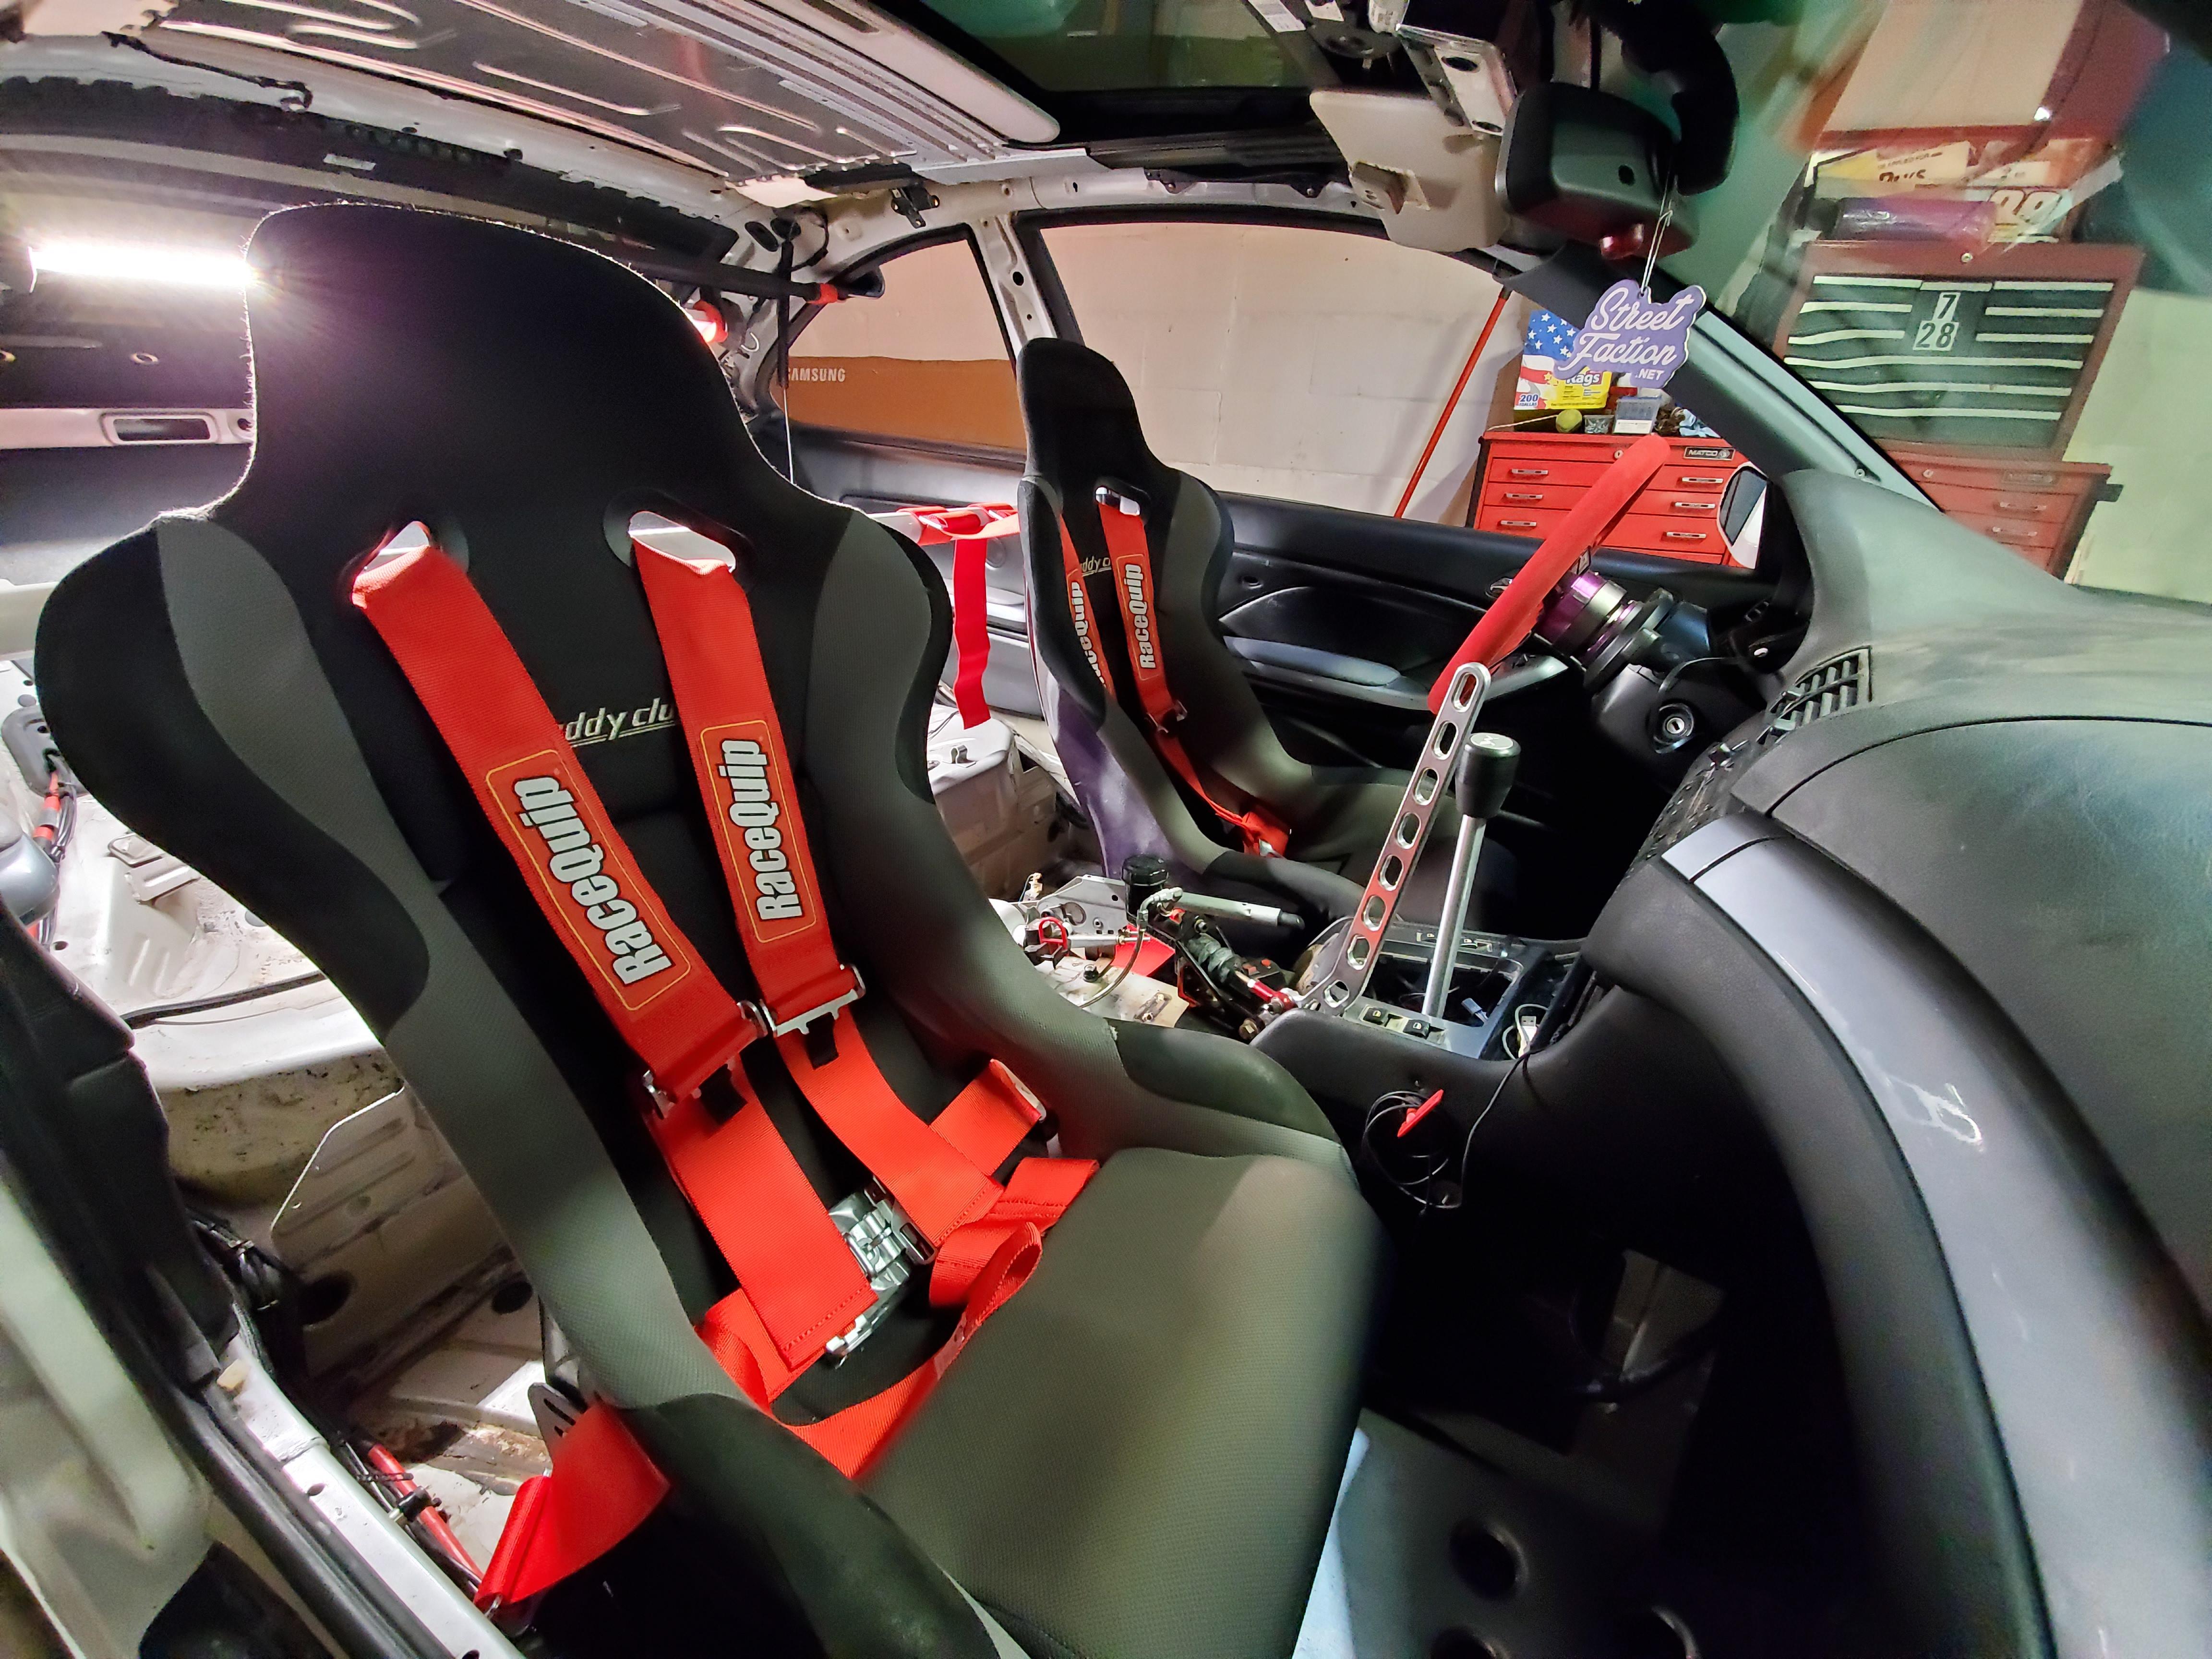
Finally put in the driver side kickpanel/dead pedal that I've had sitting around since last summer. It required a little modification because of the floor plate.
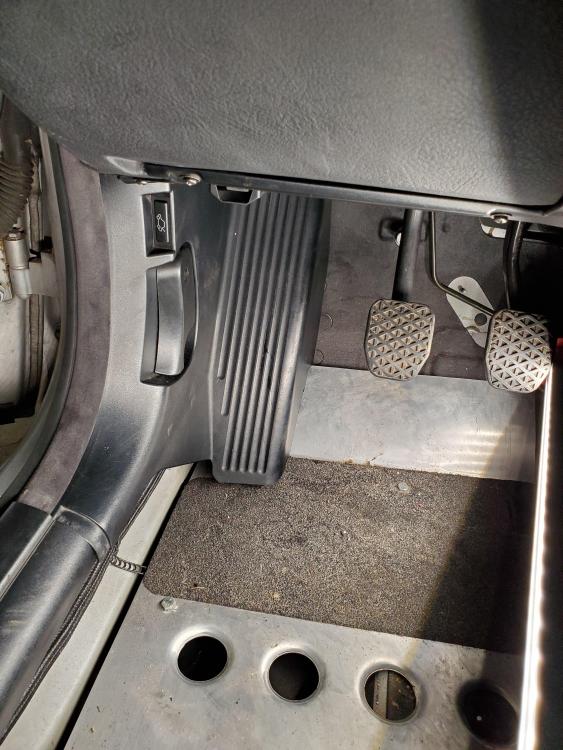
Also got some new harnesses, the blue ones are fine but looked wack with the red steering wheel and white car lol.

super hyped on the interior again with the rear decklid and block off being complete along with getting those rear panels in earlier this winter.
-
Small update.
@Sam_Holzmann 3d printed me a dome light holder since it bothers the fuck out of me that I have no lights in the car when I open the door at night besides the ones on the floor. This is version 1 and needs some modifications to fit well but it works for now! I also put some leds it it because why not.
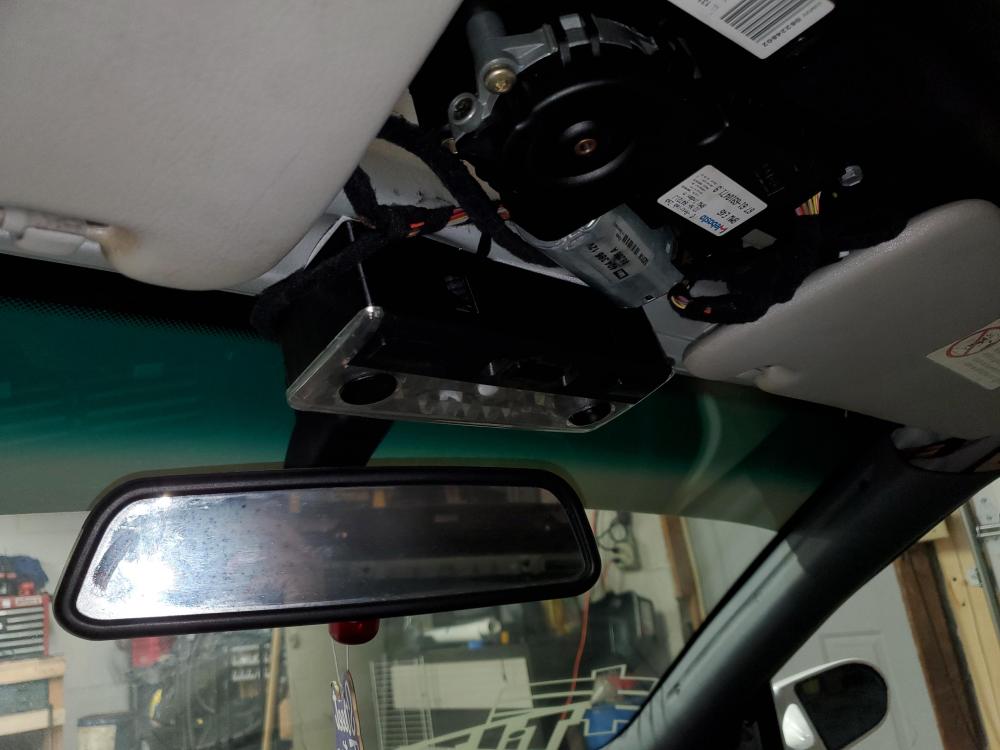
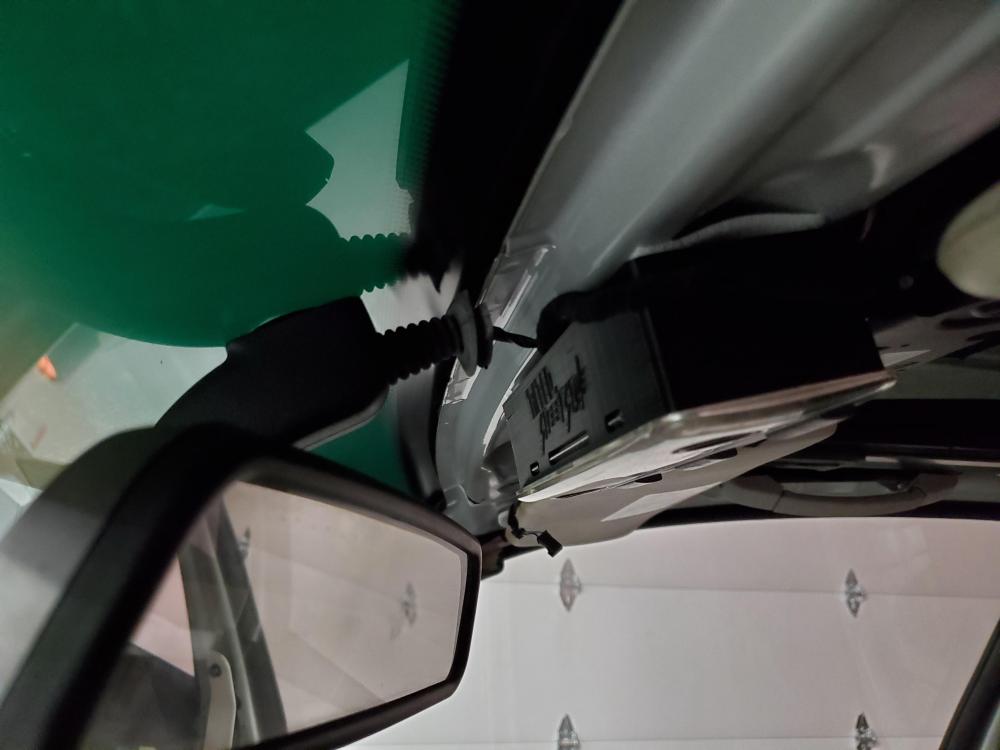
I also added a top windshield strip with the same wrap that the car is wrapped in. I dig it, although I did go below the "A" line because I think it would have looked stupid with how small it would have been at the "A" line.


-
4 hours ago, Jdesign said:
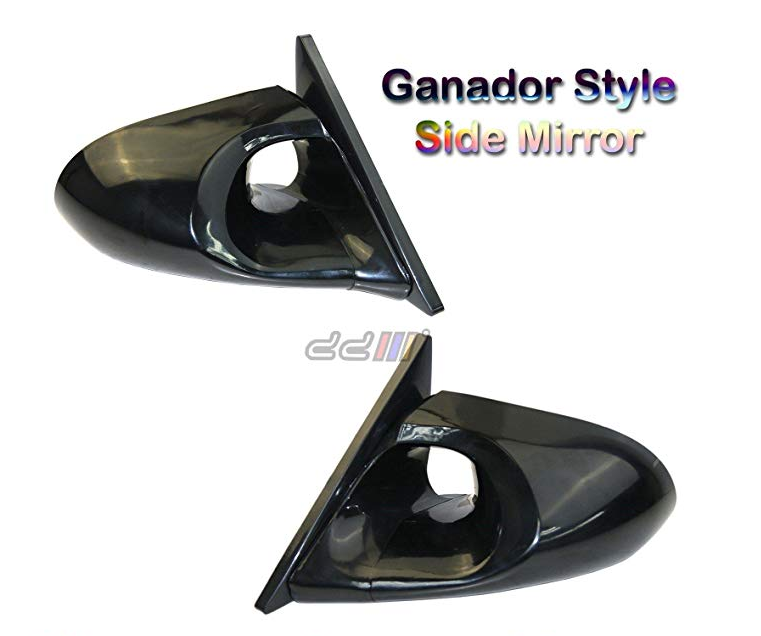
ganador mirrors!
Nope hahah
-
small update:
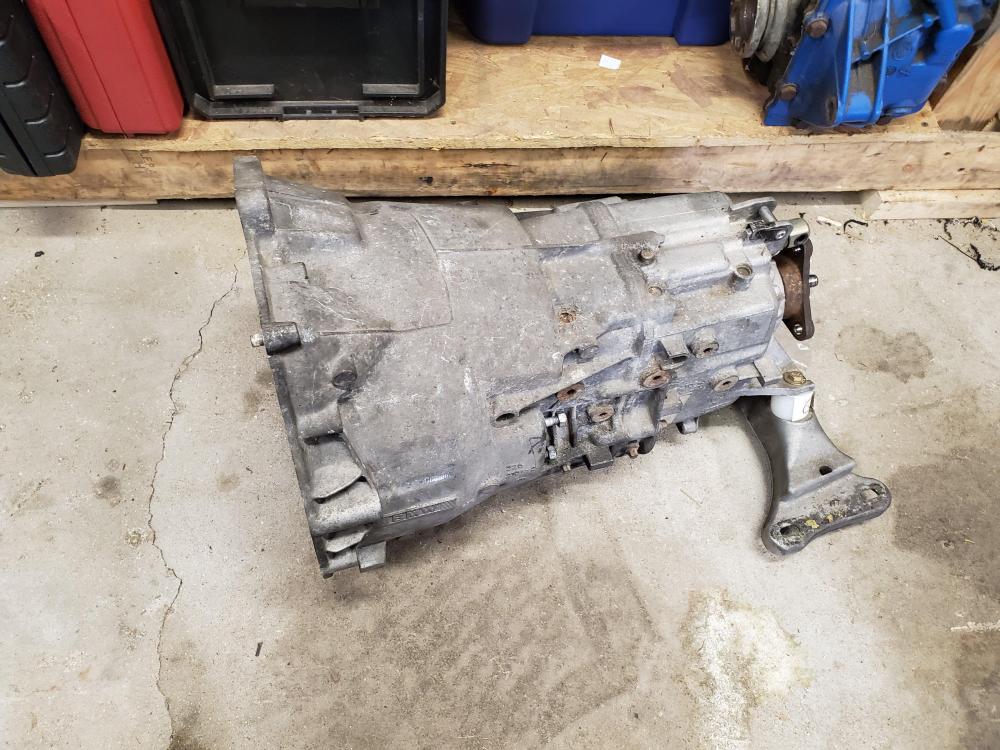
Installed the shift pin and detent pin repair kit last night. Then got the trans into the car along with everything I had to take off to pull it. The clutch works correctly now lol. So the car is back on the ground.
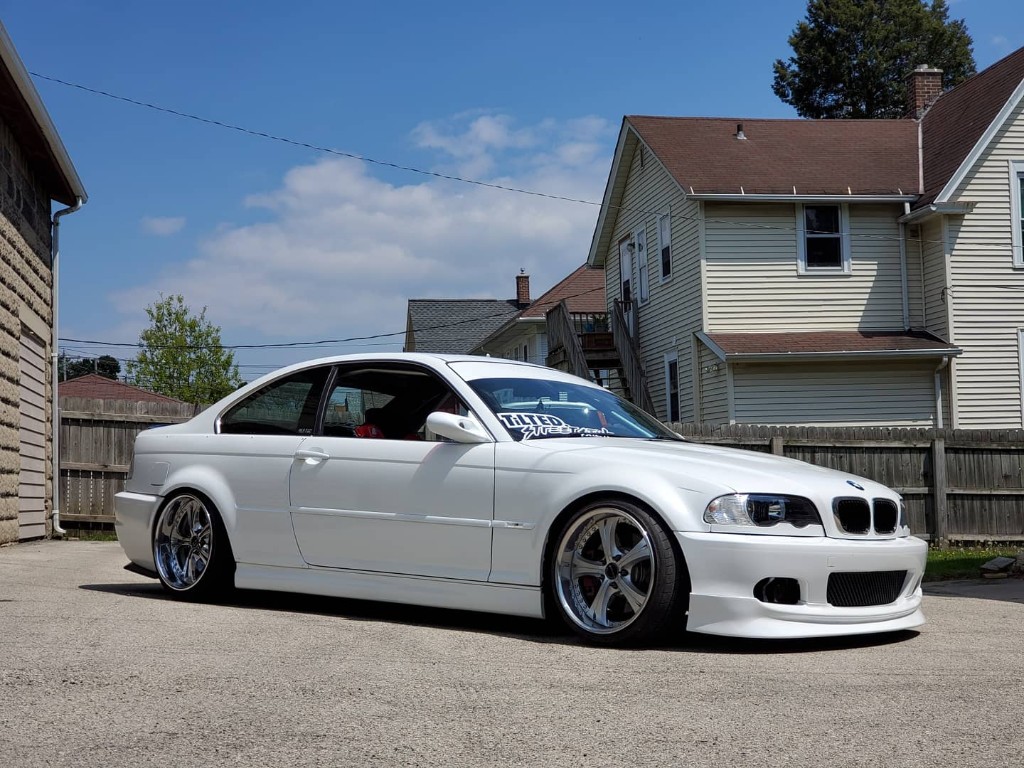
Also I finished the Frankenstein mirrors that a friend from Instagram told me I could make. It's a combination of some aftermarket e46 base plates and a Nissan style mirror. He didn't want me to completely share his secret though haha.
Although these are proably a level 15 on a scale to ten for wrapping I still attempted it. Not 100% happy with it but I'd say I did okay.

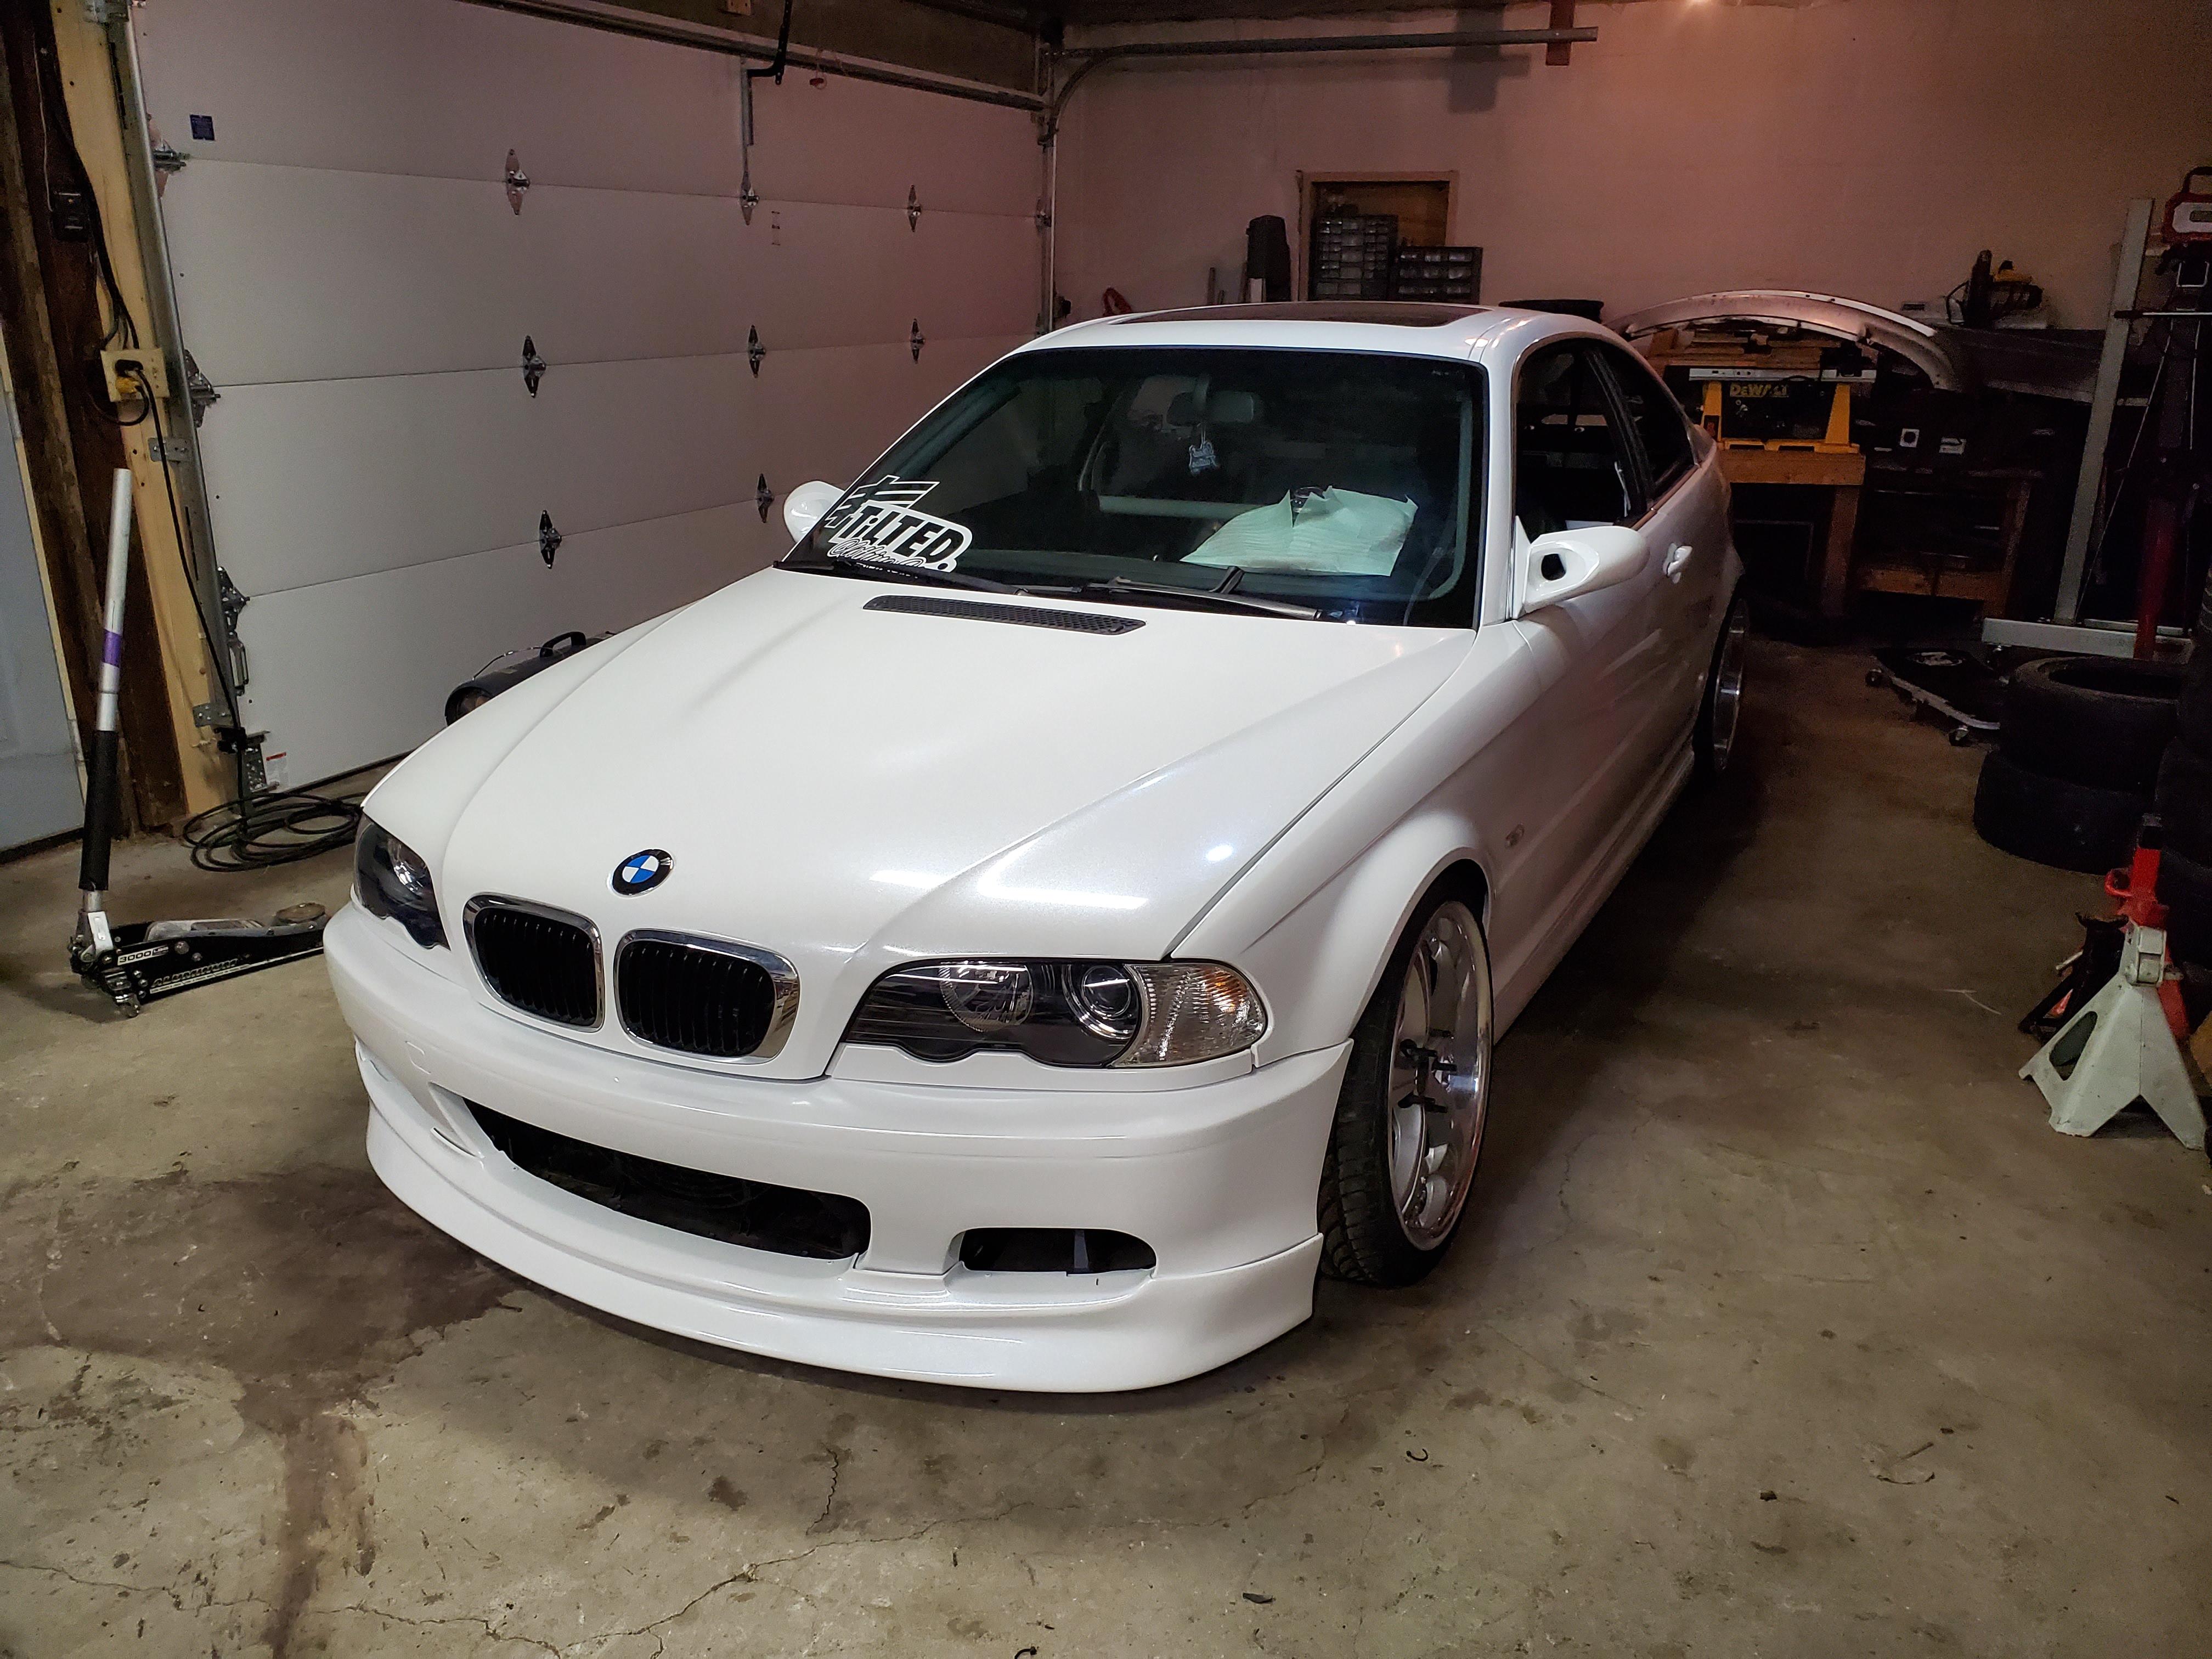
And here's a pic installed on the car.

I really dig them, looks way better than the e36 M mirrors and more out of the box than e46 M mirrors.
-
1 hour ago, wasnt m3 said:
I think it'd look nice and clean if you wrapped the reflectors to match the car, just my 2 cents.
That did cross my mind as well.
-
@patsbimmer1 @Jdesign true Haha I'll have to order them either way cause I smashed the fuck out of them getting the old ones out
And Jason that's not the worst idea Haha. We will see how ambitious I get.
-
2 hours ago, patsbimmer1 said:
This thing looks so bad ass. I fucking love it!
Thank you! I cant wait to get past this clutch ordeal and get it back on the ground. Detent fix kit shows up today hopefully. I ordered a blind hole plug puller kit which showed up yesterday. So replace the detent stuff then the trans and everything can go back on. Then I need to finish wrapping the rest bumper and the wrap is complete until I can order a rear lip which I really want and I think will complete the look for now Haha.
Also not sure if I should do clear reflectors on the bumper or red still. Red would hopefully get me out of some tickets for the clear tails lol but I think clear would look so much better haha.
-
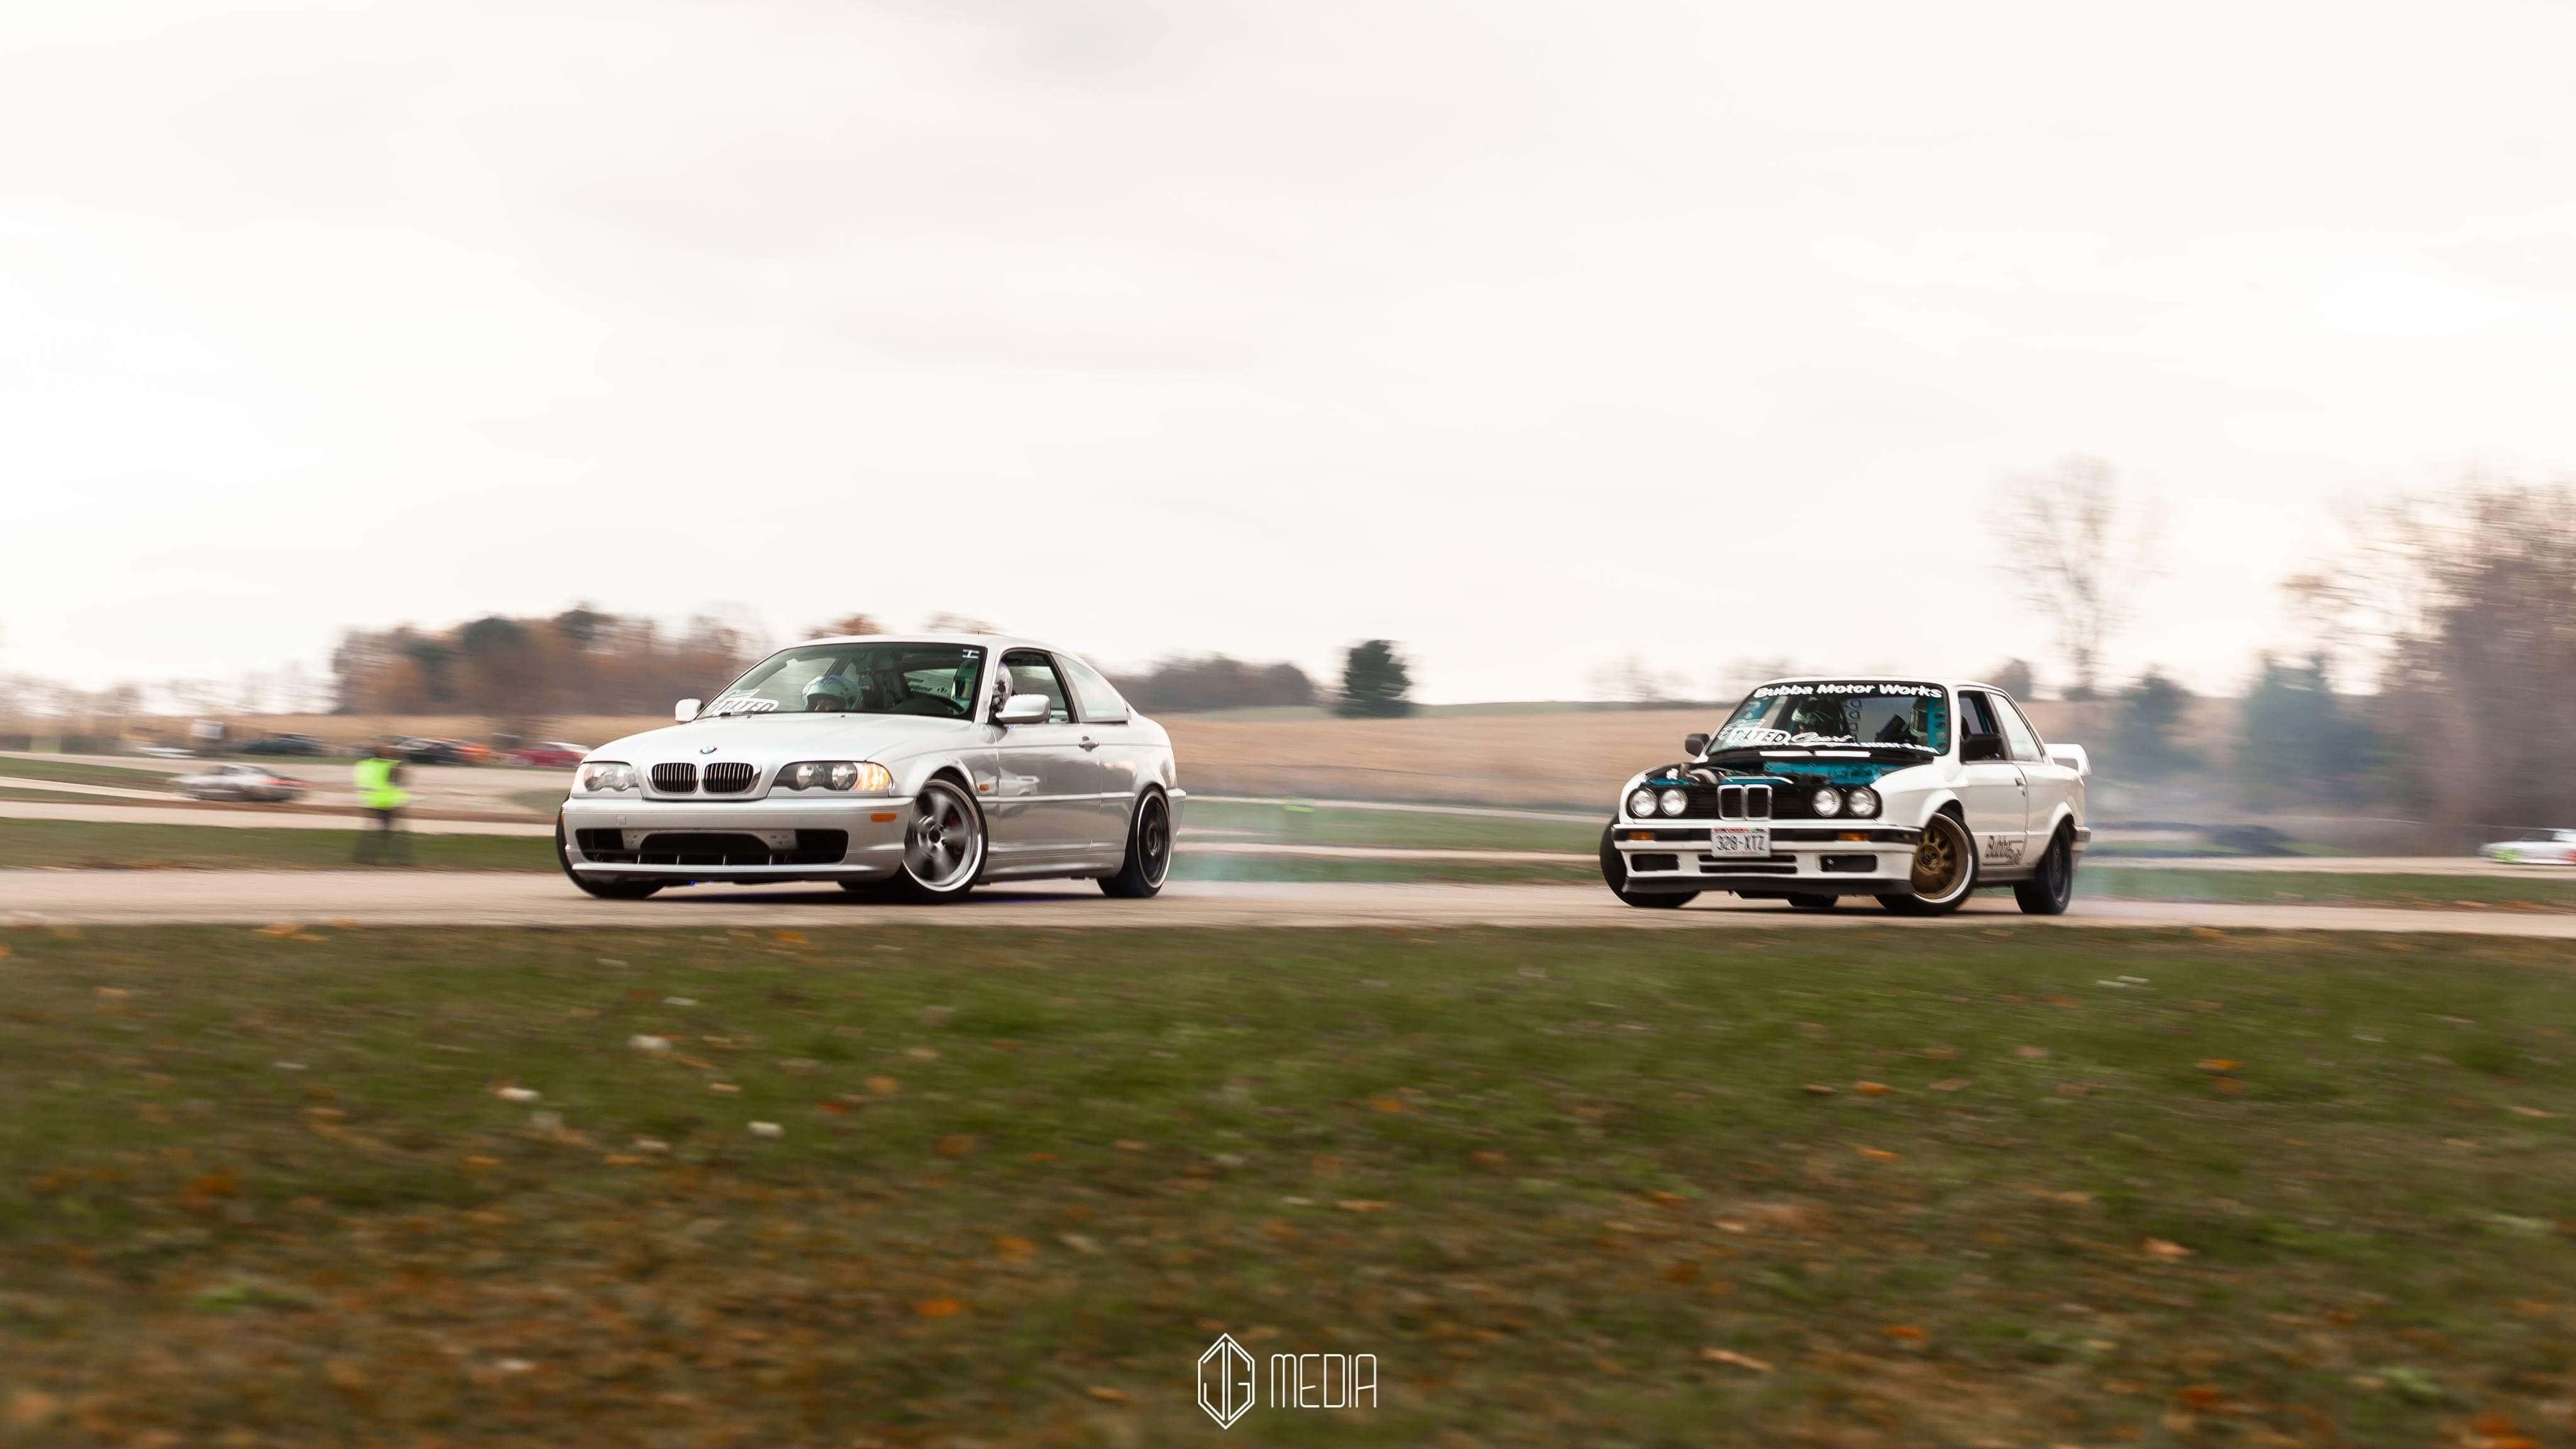
Bring your own brain buckets though if you come for a drift day. Hahaha
-
6 hours ago, Jdesign said:
I have but have not drifted on the track, I only raced there once a long time ago. @Earl and @Sam_Holzmann and @SamHolzmann and @Tkuhn all have been on track sliding.
We go often! Any of you are 100% encouraged to come out and check it out! It's kinda hard to get a pass as they sell out super fast but come to any of the Drift Days hosted by ClubFR and get some ride alongs! Final bout is also a huge event and worth coming for. It's only $10 for a pit pass at the drift day events!
-
10 hours ago, Jdesign said:
Make it yourself, its super easy.
I dont want just a panel that rivets in though. I want it to fit flush with where the sunroof was.
-
1 hour ago, straight6pwr said:
why do you want to have a stripped interior but then start covering random things back up?
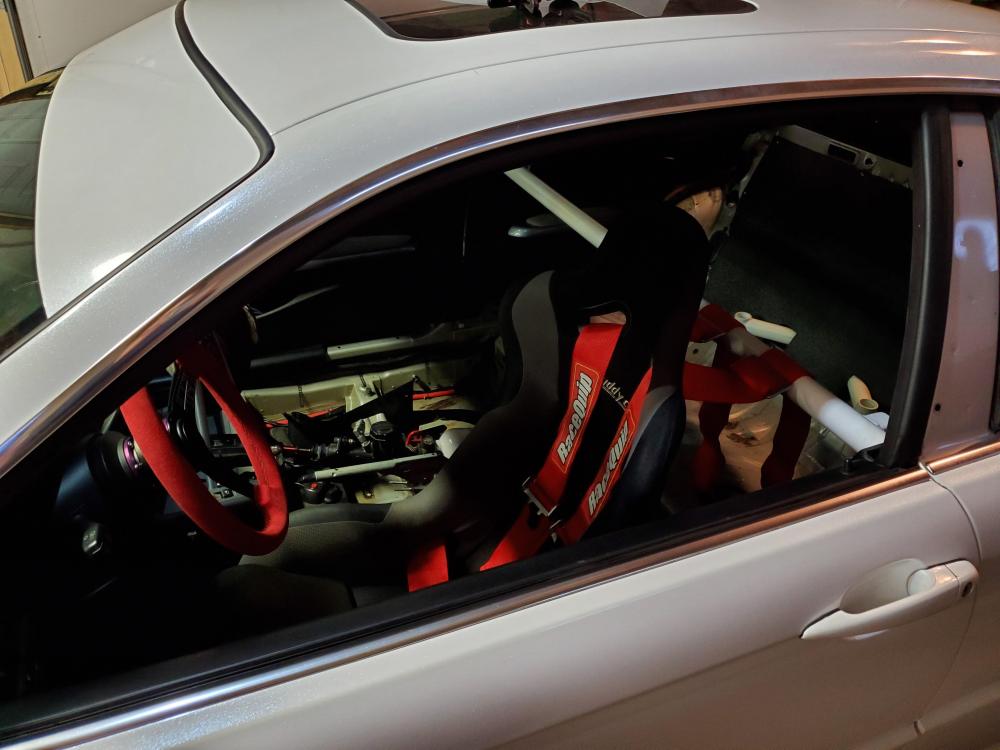
It's not really stripped. Cant run back seats because of the subframe bracing but I wouldnt want to run rear seats anyways because they are heavy. I have no carpet but that's because the carpet was junk when I got the chassis(thus the floor plates), wouldnt mind putting carpet back in just the front. I wanted to cover the rear decklid last season just never got around to it and I reinstalled door cards because it looks nicer lol.
It's a difficult balance between keeping it comfortable since it is a street car but also trying to save weight where possible since I am stock engine mostly.
I'd like to remove the sunroof and install a delete panel to get all that weight off the highest point of the car, just cant get myself to spend 250+ yet hahah
-
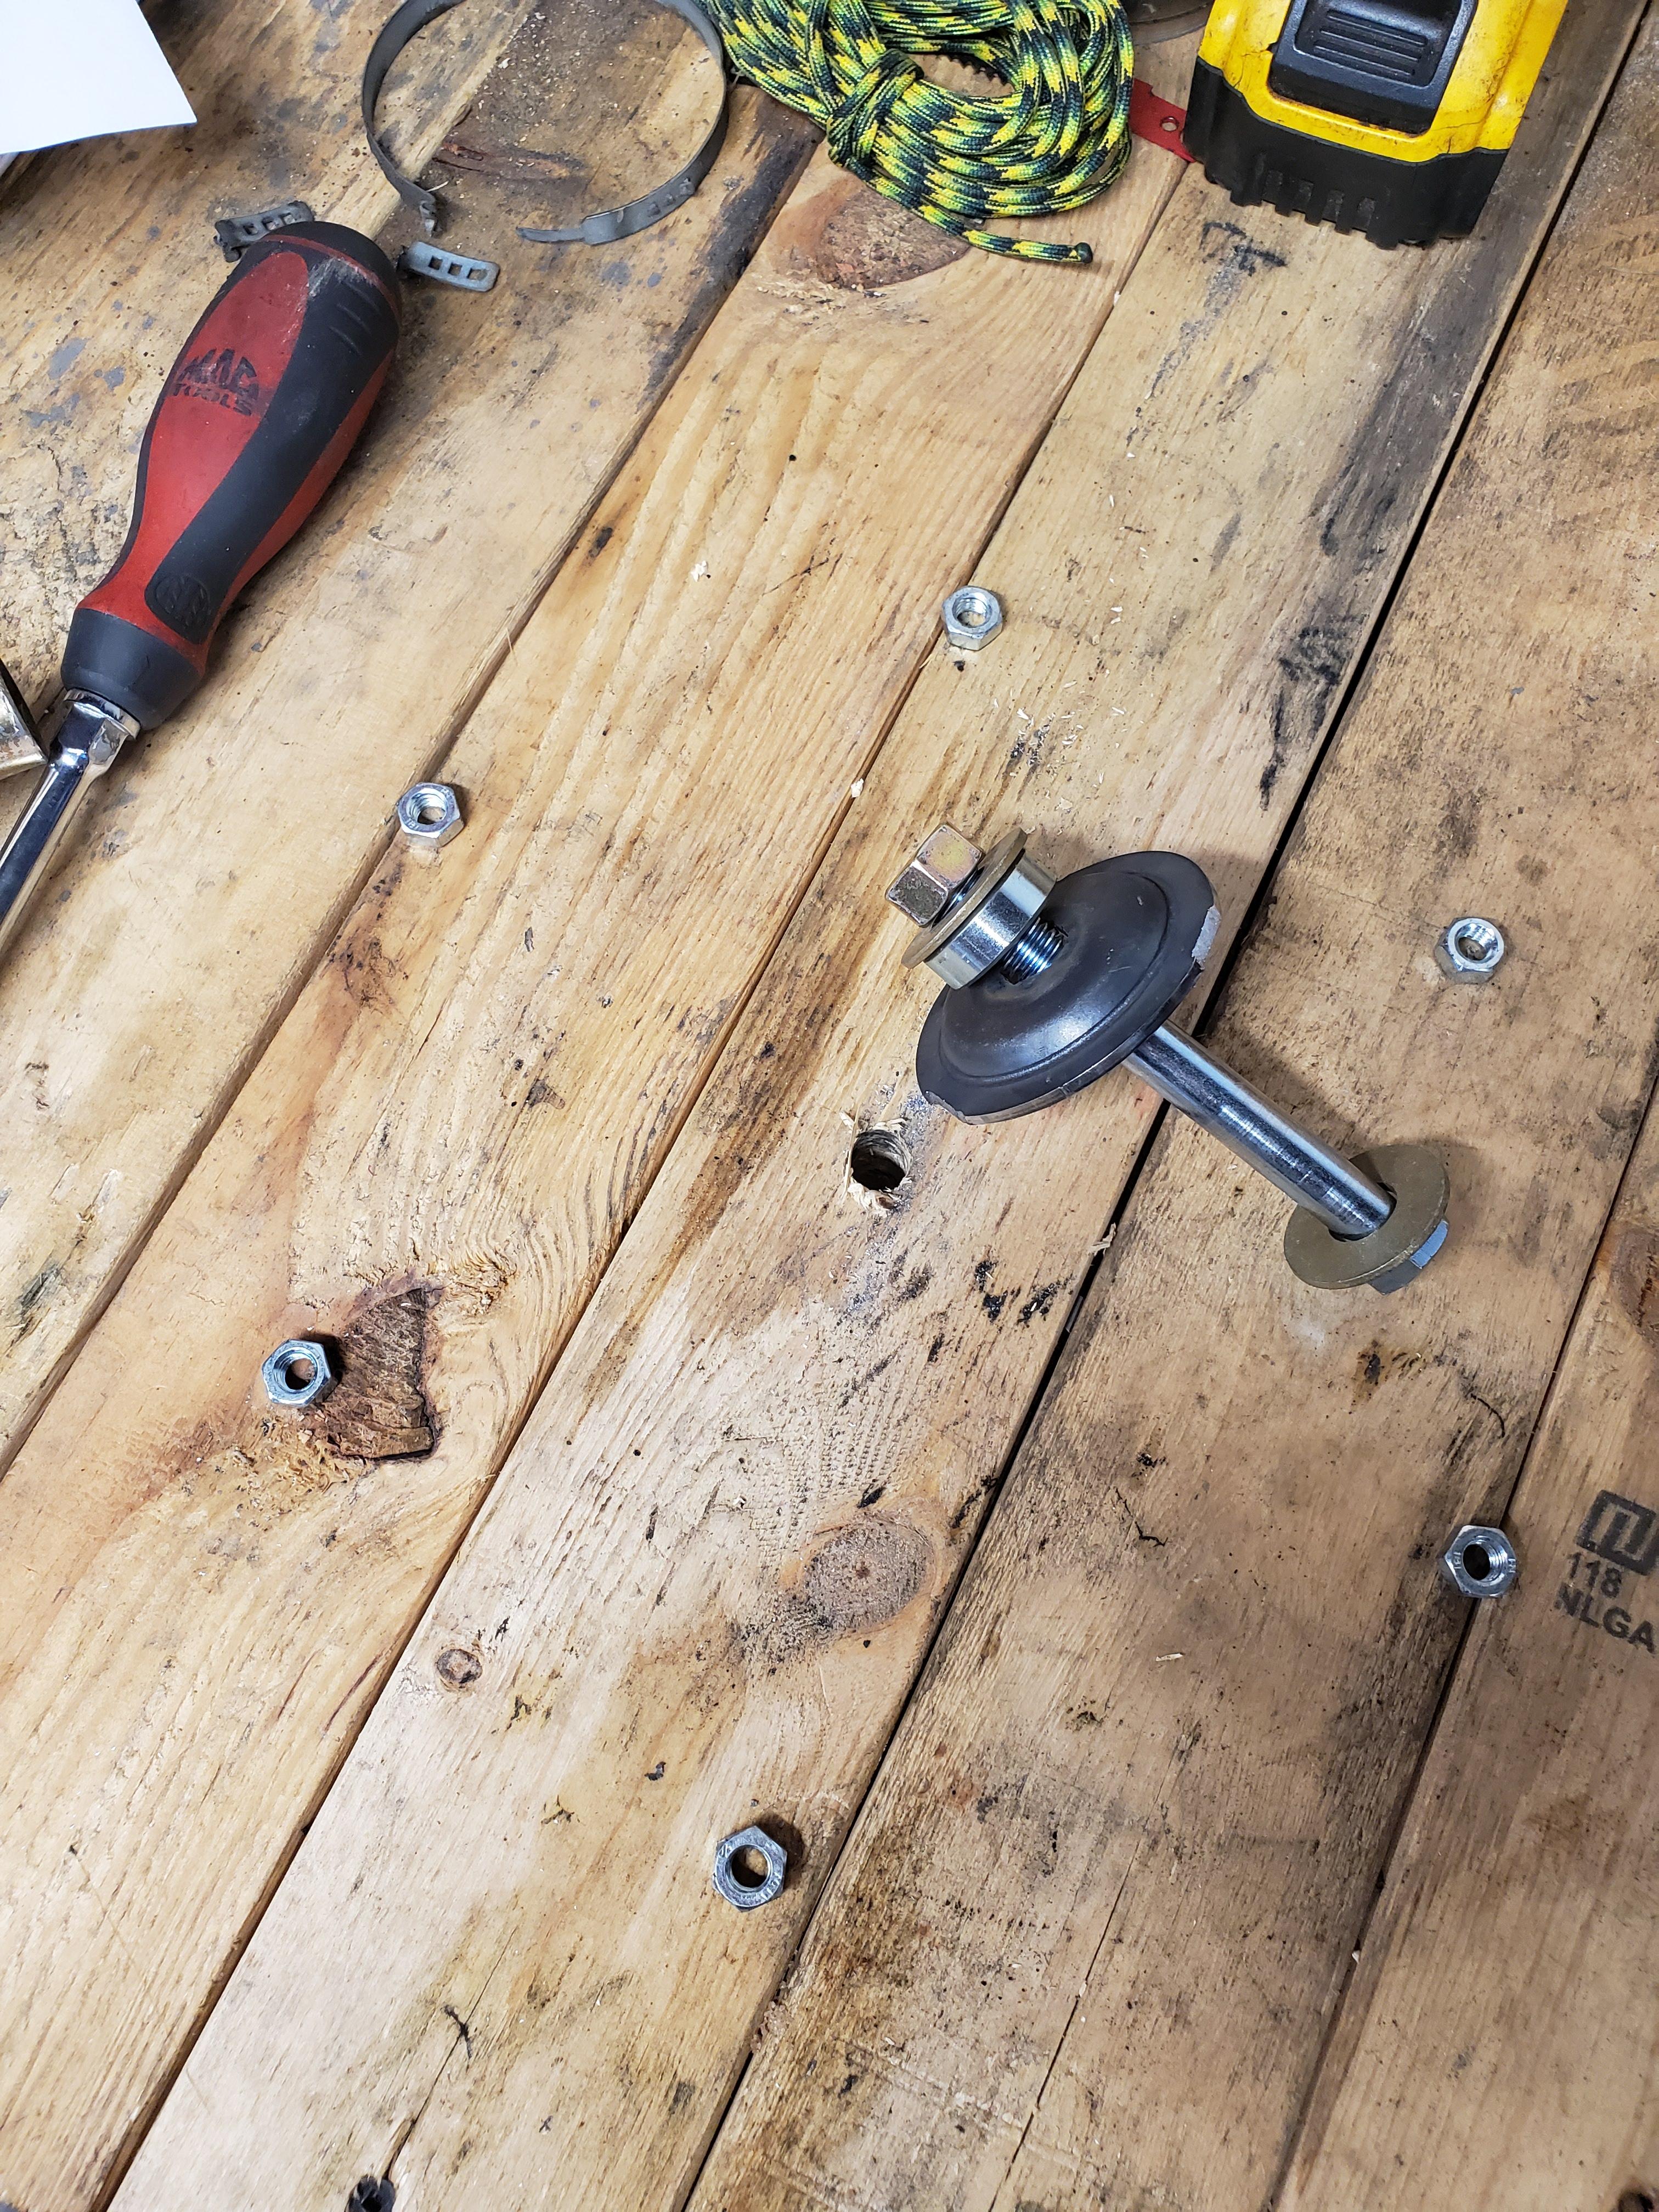
Aight boyzzz. I devised a way to reset the pressure plate back to the install position thanks to a YouTube search. Some say to use a 3 jaw puller but the way I did it worked like a charm!
First step was to make a hole on my work bench and then support the pressure plate mounting spots. I used some m8 nuts. Next was to devise something the size of the throw out bearing with a hole in it to allow a large bolt to be put through the bench and the pusher (which I used one of the old shipping locks from the pressure plates with the tabs cut off).
Here's a pic of the hackery I set up.

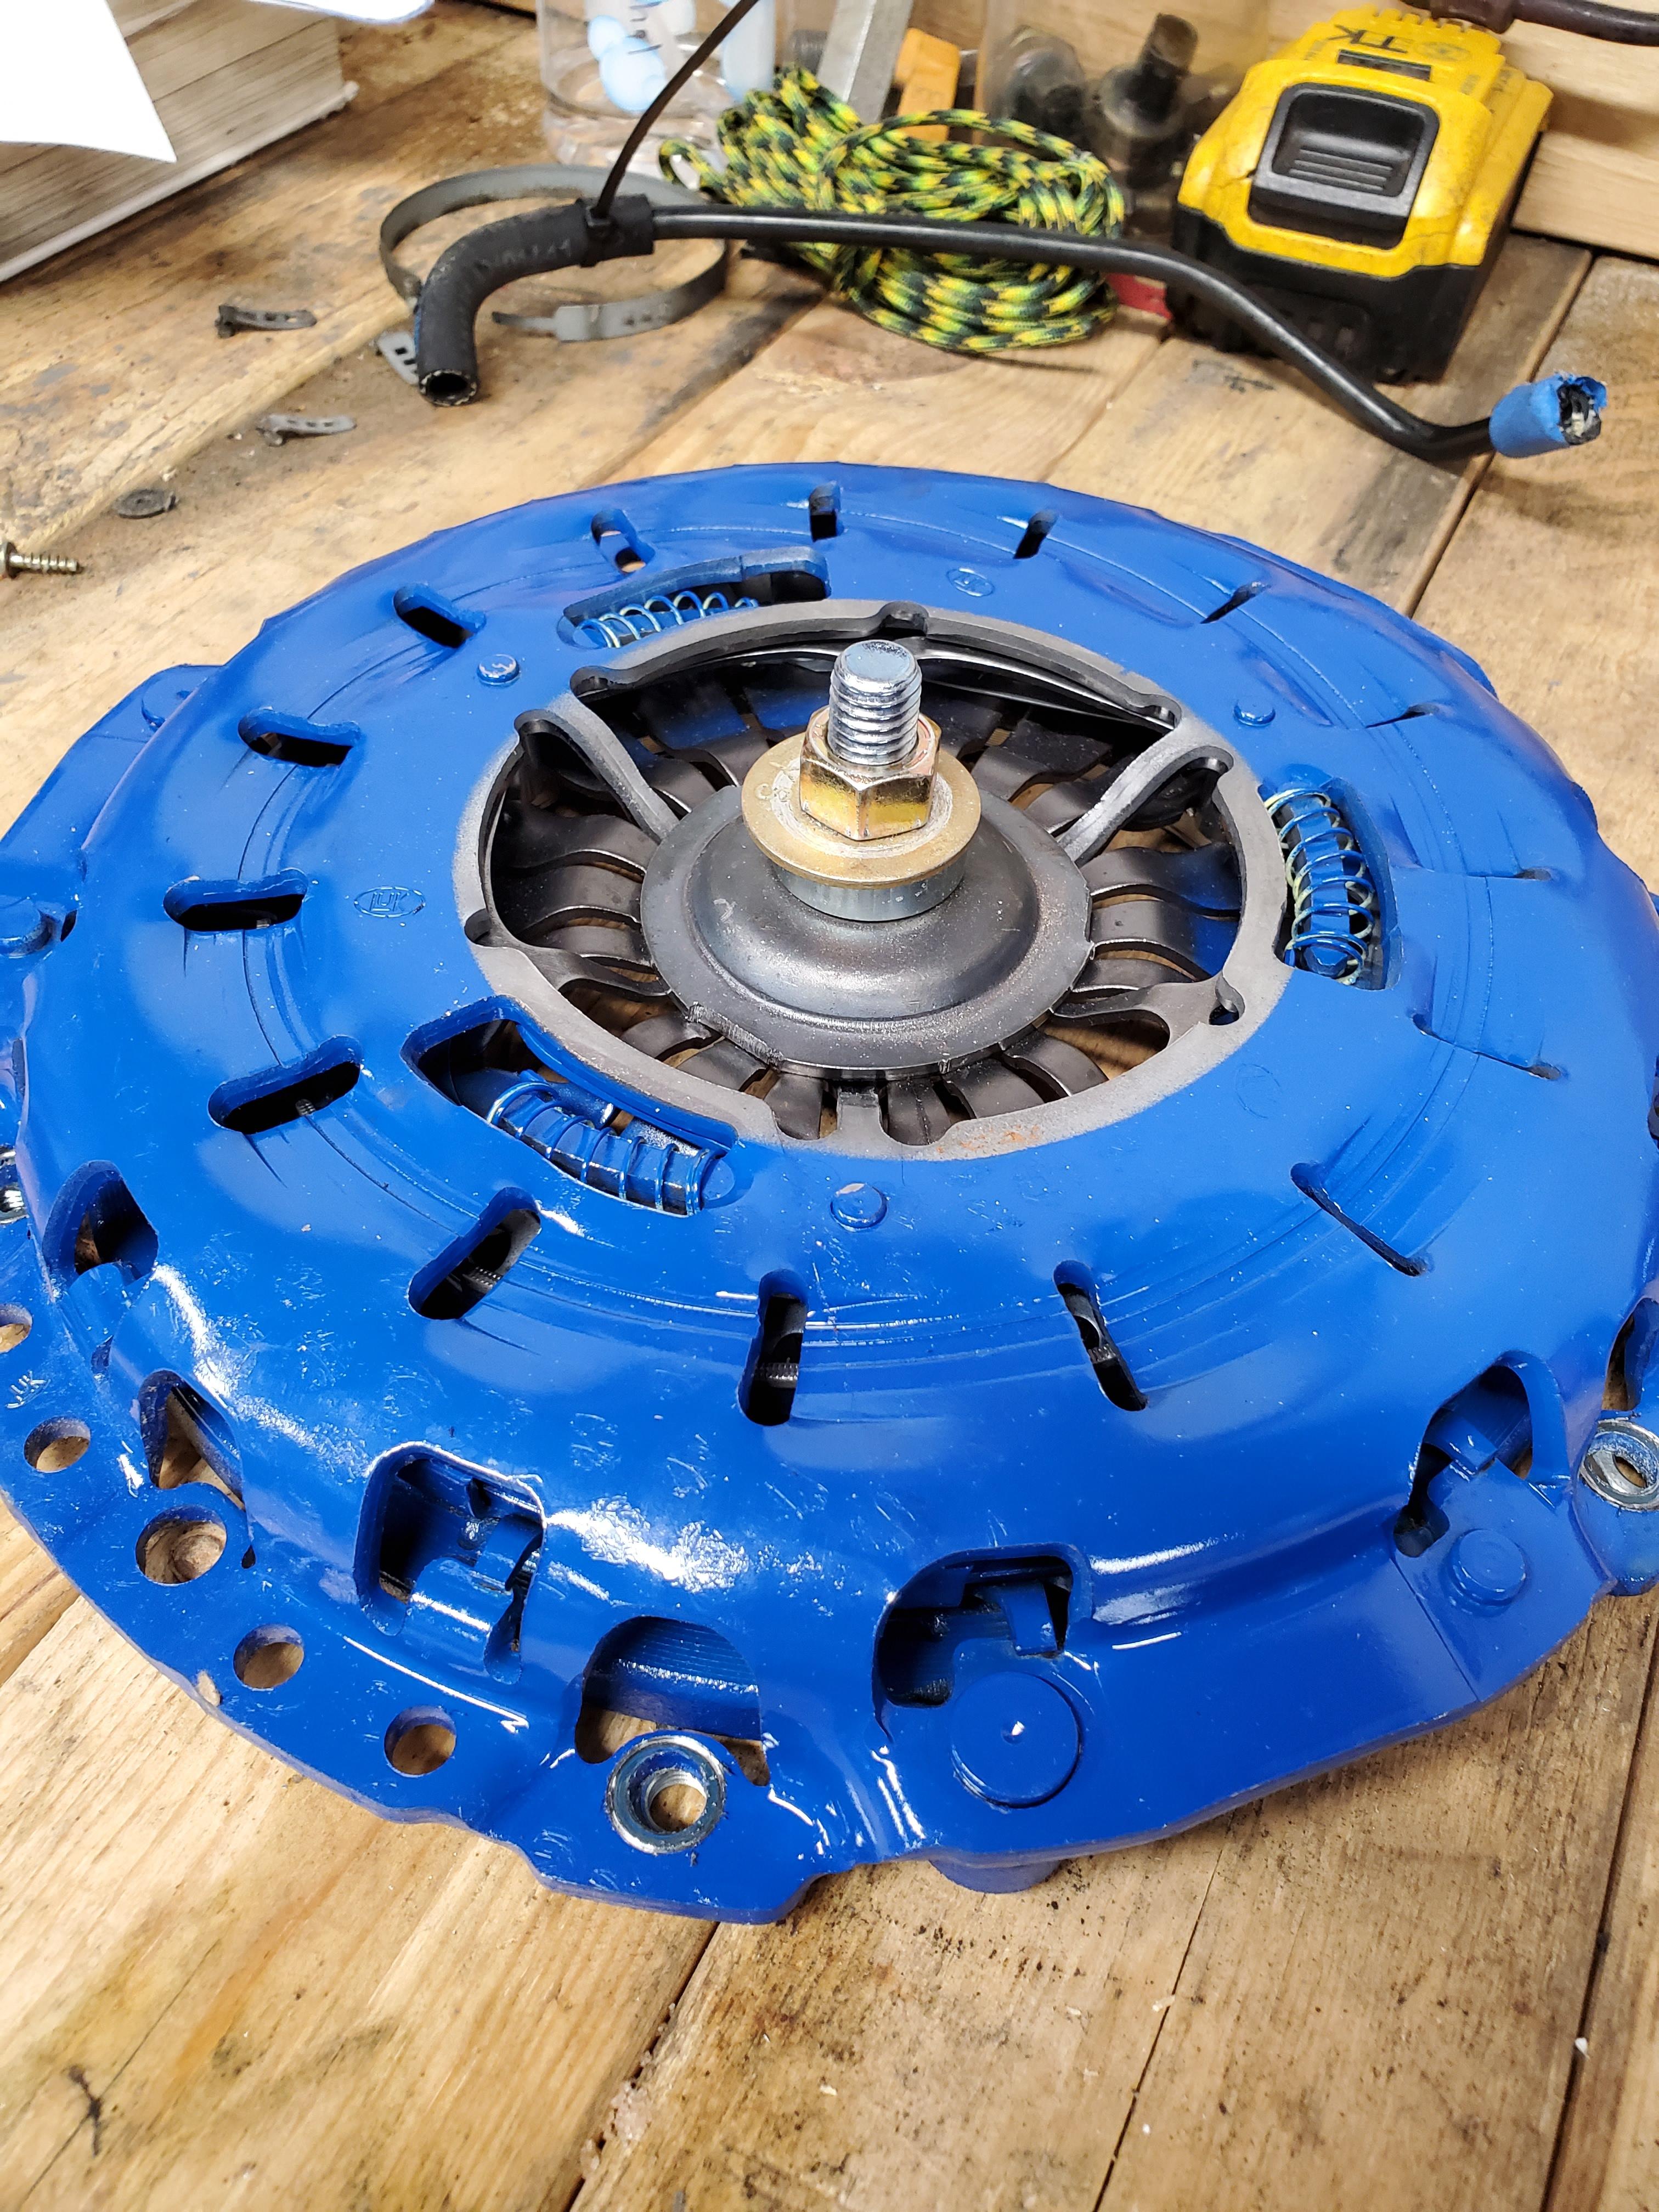
Then I set the pressure plate on the nuts, sent the bolt through the bench and set it up to pull the fingers on the pressure plate down. This is a pic of the fingers pulled down.

Once it's to a certain point you can move the self adjuster with a screwdriver. I moved it all the way back into the install position.
Then while holding the adjuster in the service position I backed off the pinch bolt set up and BAM! Shes back in the install position.
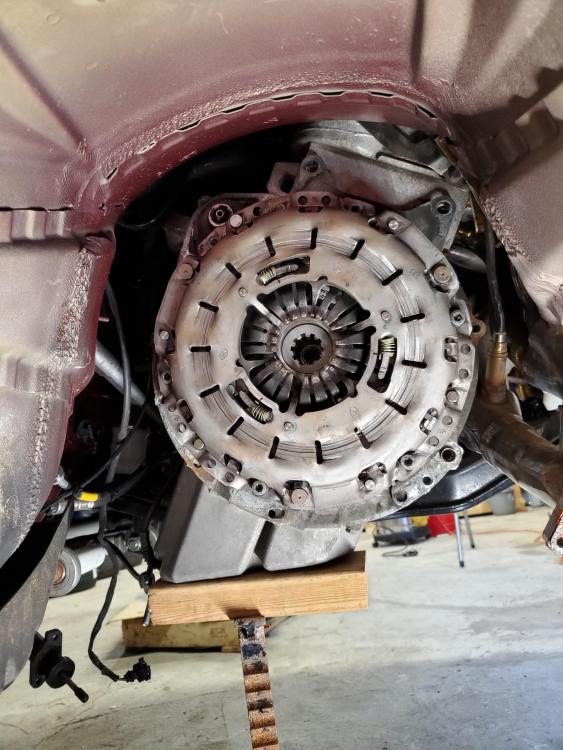
So I did this to both pressure plates and ultimately I opted to put the old pressure plate back into the car with the new carbon kevlar disc.
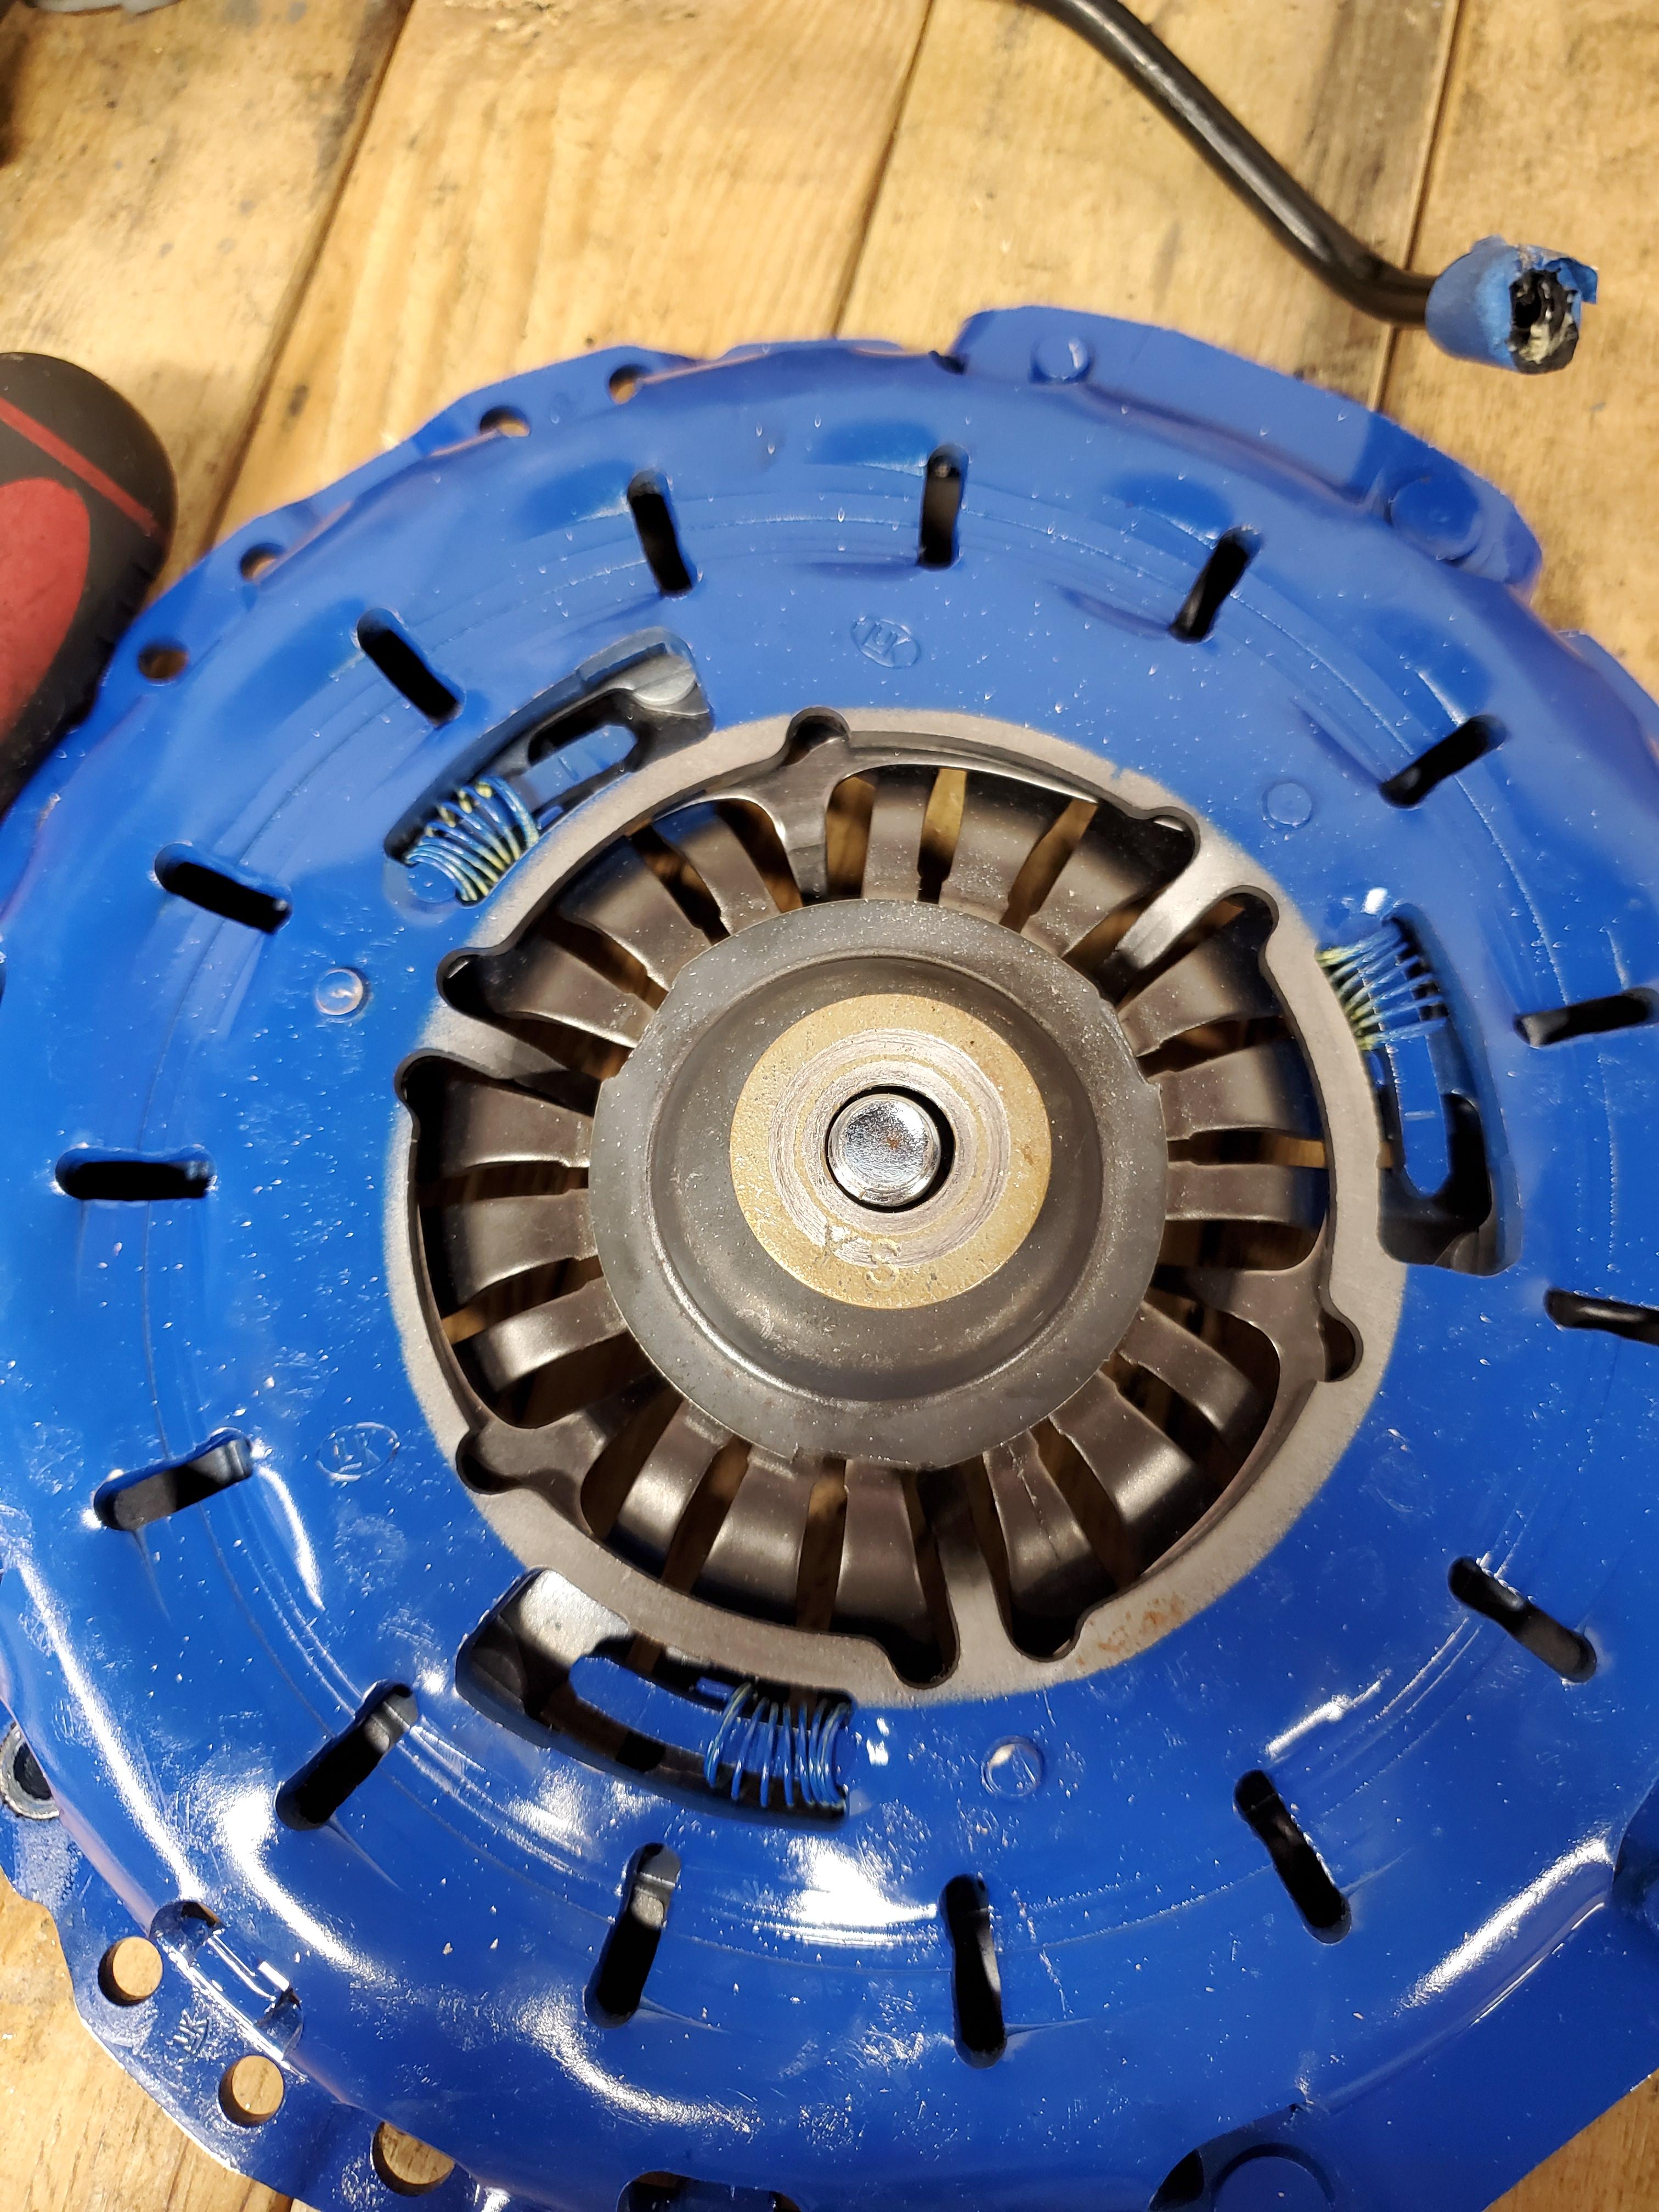
Here it is all installed back in the car, as you can see the springs are pulled all the way back which is how they should be.
Soooo I could have put the trans back in but I decided to not be a lazy sack of shit and I ordered the detent pin rebuild kit for my trans. (I totally forgot that they should be replaced when we had it out the first time.) Hopefully that shows up by the weekend so this large step backward can be done by Sunday night lol.
-
13 minutes ago, Jdesign said:
MAN this looks sooooo good. Bummer about the pressure plate. Seems like it wont be that big of a set back though, just annoying.
100% annoying. Lol also seems that you can reset the pressure plates. Sooo I suppose I should try that.
-
UPDATE.
Some bad news today.
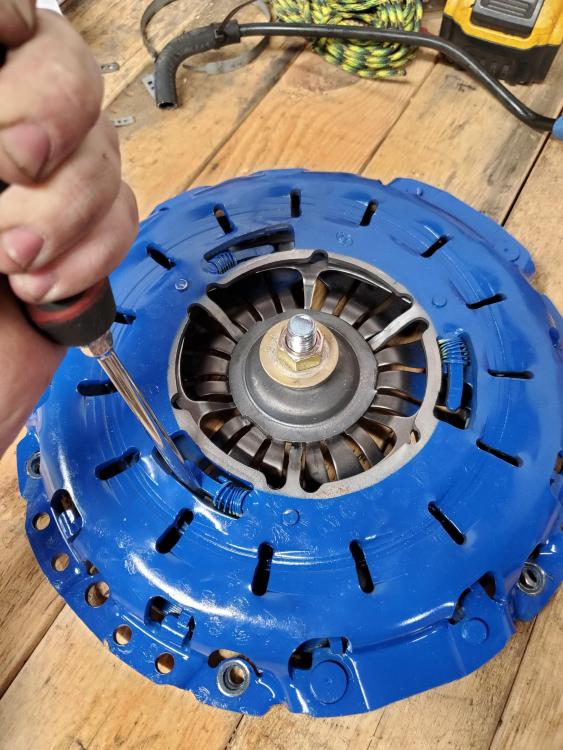
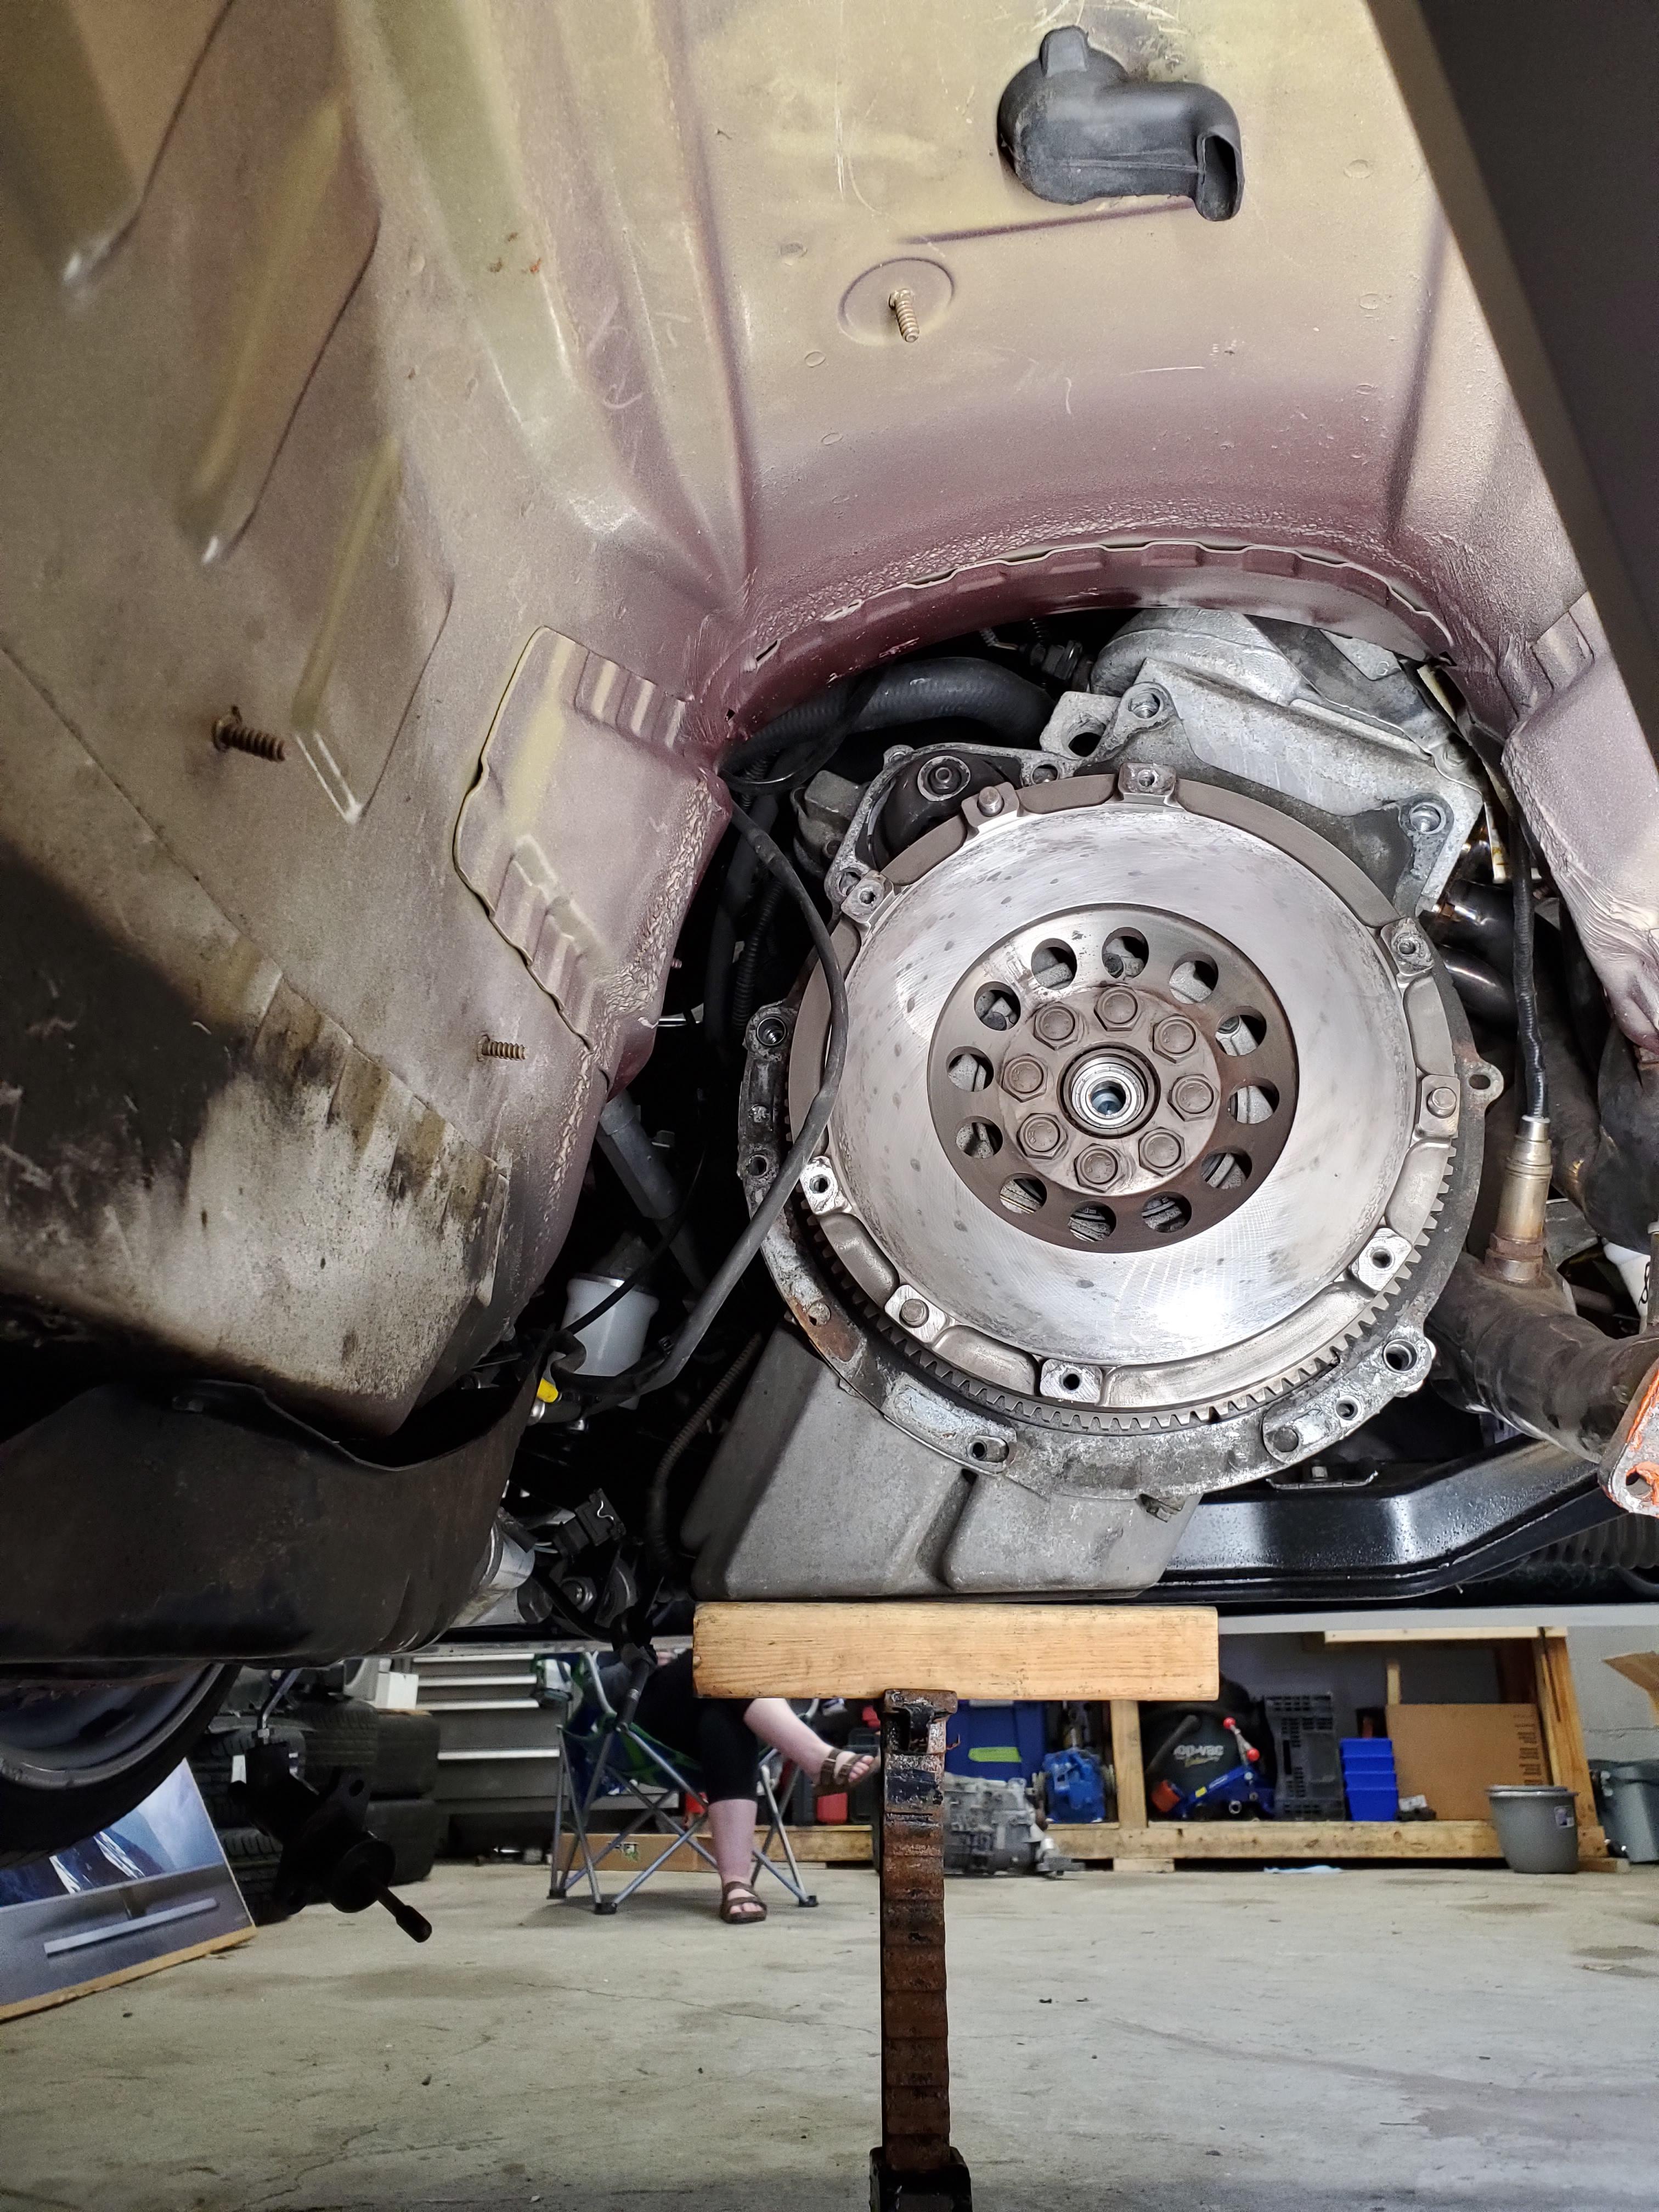
Last night we found out there was a problem with my clutch. After trying a few things including removing and installing the slave, rebleeding it and making sure the clutch fork hadn't fallen off or anything we found the problem. (Clutch pedal was hard as a rock immediately).
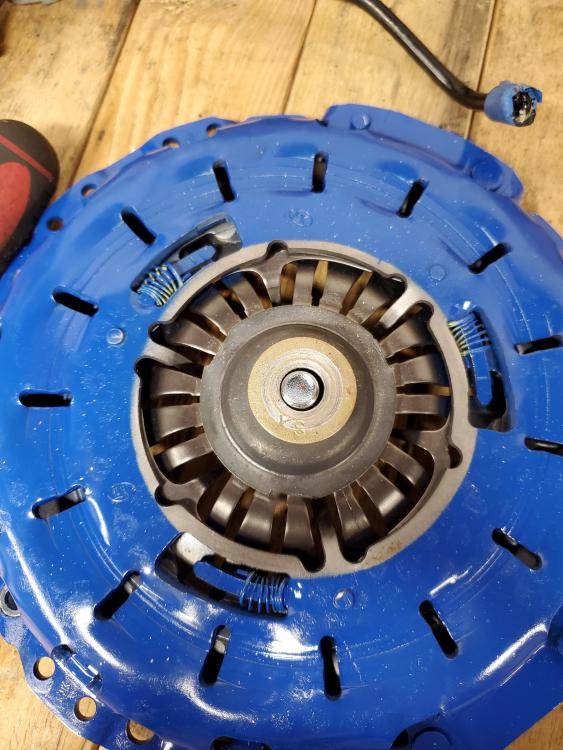
My new pressure plate was the same as the old one which is a LUK self adjusting one. And after reading these can be flawed from the factory, the plate is fully adjusted which is bad. (The springs are fully extended)
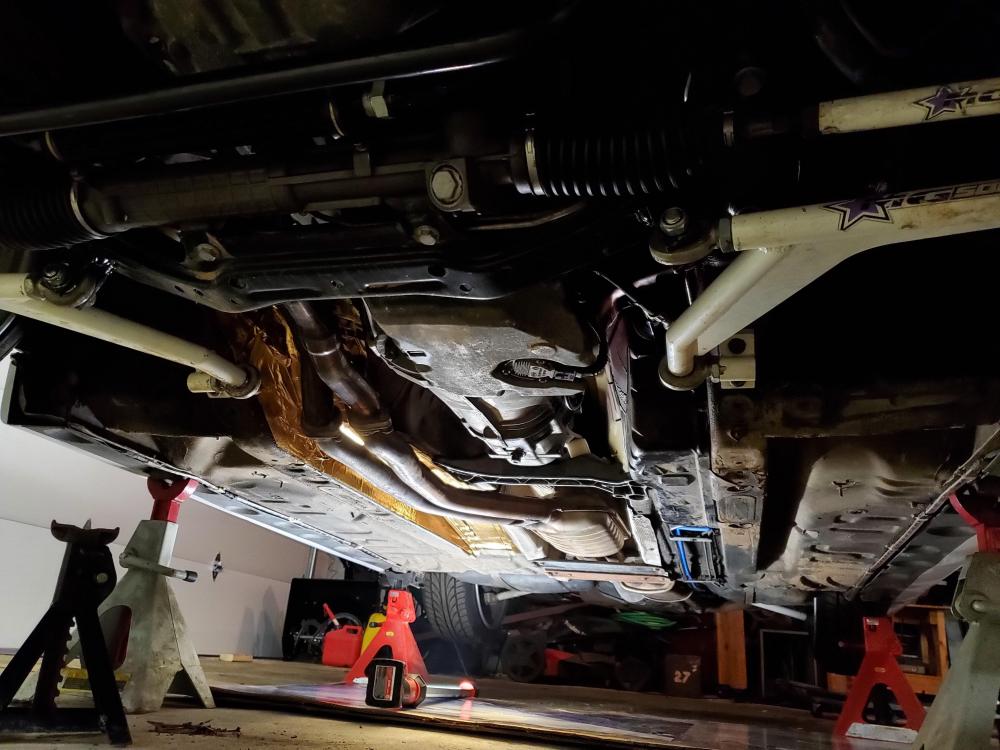
Sooo I was forced to pull the trans, again.

Here you can see the difference. New one is on the right and the old one is on the left. Notice the difference in the self adjusting springs.
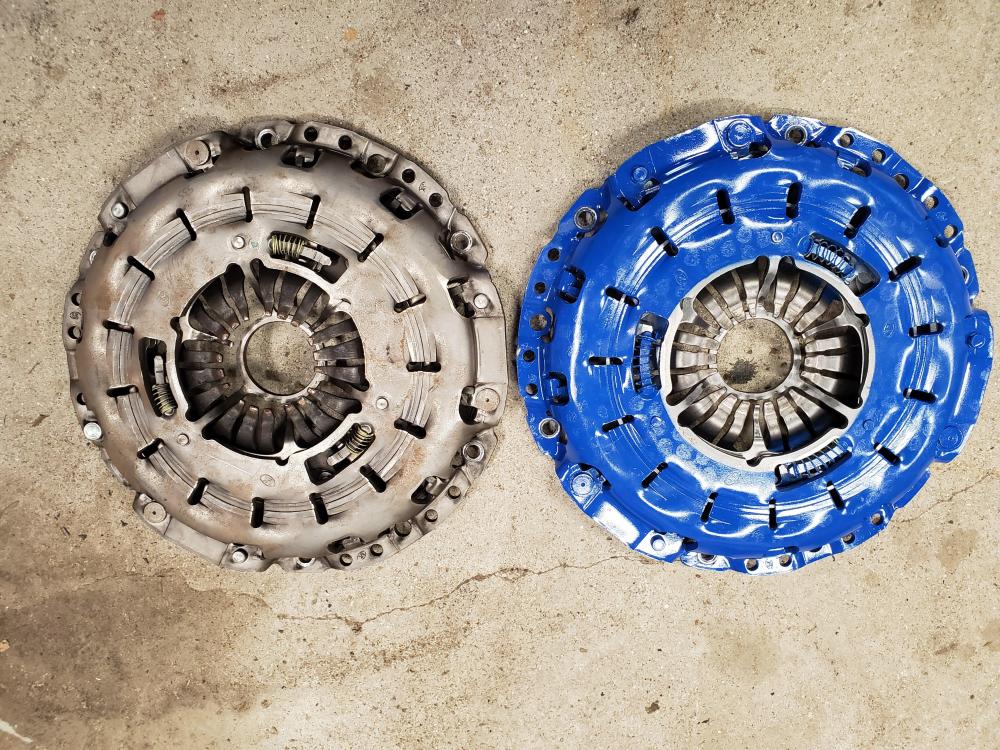
Luckily things went pretty smooth and I had everything out in just under 2 hours.
I will be contacting the company I ordered through but I have little faith that they will resolve anything due to their lack of replying to emails after my order. I may end up ordering a sprung disc with non adjusting pressure plate like I should have in the first place.
I didnt let this get me down completely so I continued on to other things.
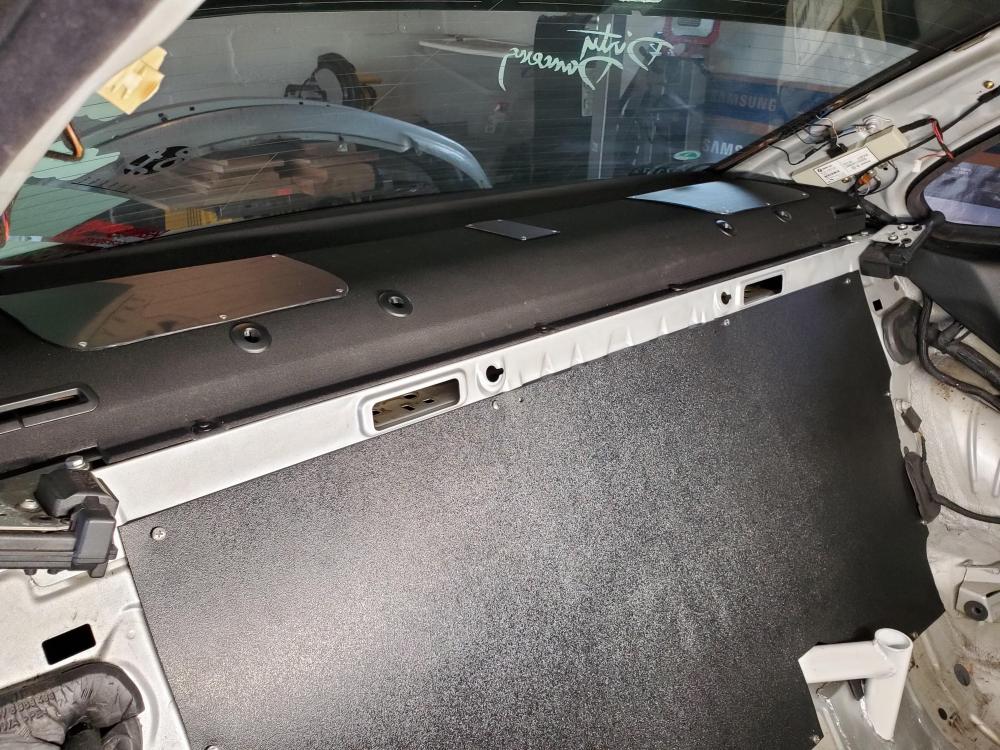
I wanted to have the rear decklid covered last year but never got around to it, I ended up interior painting the old faded and nasty grey decklid cover.
Then made covers for the speaker area and other hole in the top out of some plastic.
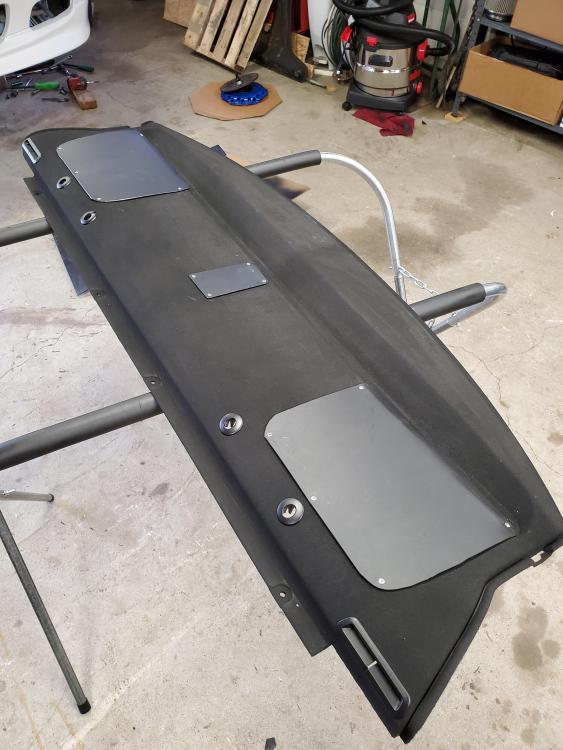
Turned out pretty well.
That's it for now until I figure out what my plan is with the transmission/clutch situation.


A purists nightmare - E46 drift build
in Members BMWs
Posted
Had a low beam go out on me yesterday right when I got in my driveway. Pulled it apart and found that where the igniter plugs into the bulb melted itself. Pretty sure the clips were wore out and it caused the poor connection.
Luckily I had one spare one left. So I pulled out the headlight, disassembled it and swapped out the igniter with harness.
ALSO luckily I had a spare xenon bulb.
Was a pretty easy job since everything was clean.
That's about it for the excitement lately. Put a few hundred miles on the car over the past 2 weekends as well and everything seems to be good.