
AsparagusMike
-
Posts
258 -
Joined
-
Last visited
-
Days Won
26
Content Type
Profiles
Forums
Events
Gallery
Store
Posts posted by AsparagusMike
-
-
Update:
Gonna go back a bit before the engine not cranking phase so I can be thorough on whats been a happenin.
So my adapter for my coolant temp sender unit showed up from auto meter. Right away I tried screwing in the vdo sensor and the inside hole between the threads was way to small of a diameter for the sending unit to slide through. As I wanted to get the thing put on that day I went ahead and decided to drill the hole out big enough (I believe it was a 21/64ths) to get the sending unit threaded in and get both installed on the head.
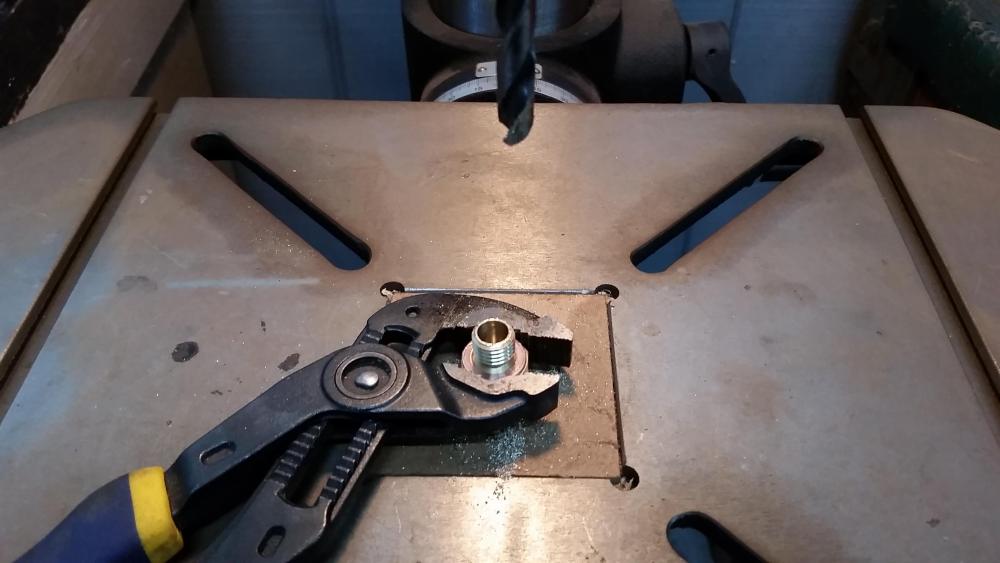

Sense I tend to not think things through before doing I forgot about the fact that drilling out the inside hole larger was only gonna make the walls around it thinner and weaker. As I began to thread in the adapter I didn't even get it flush with the head on the block before the threads snapped off from the larger portion.
After taking a short walk down the driveway to cool off and think everything over I proceeded to remove the portion still threaded in the head out which wasn't all that terrible.
I didn't have another adapter or a way to get the vdo sending unit installed I decided to just throw the brown top m20 back in and run with the stock gauge for now.

Once I do end up doing the head gasket I will order a vdo sending unit with the correct thread pitch so I won't need to deal with finding an adapter that will work.
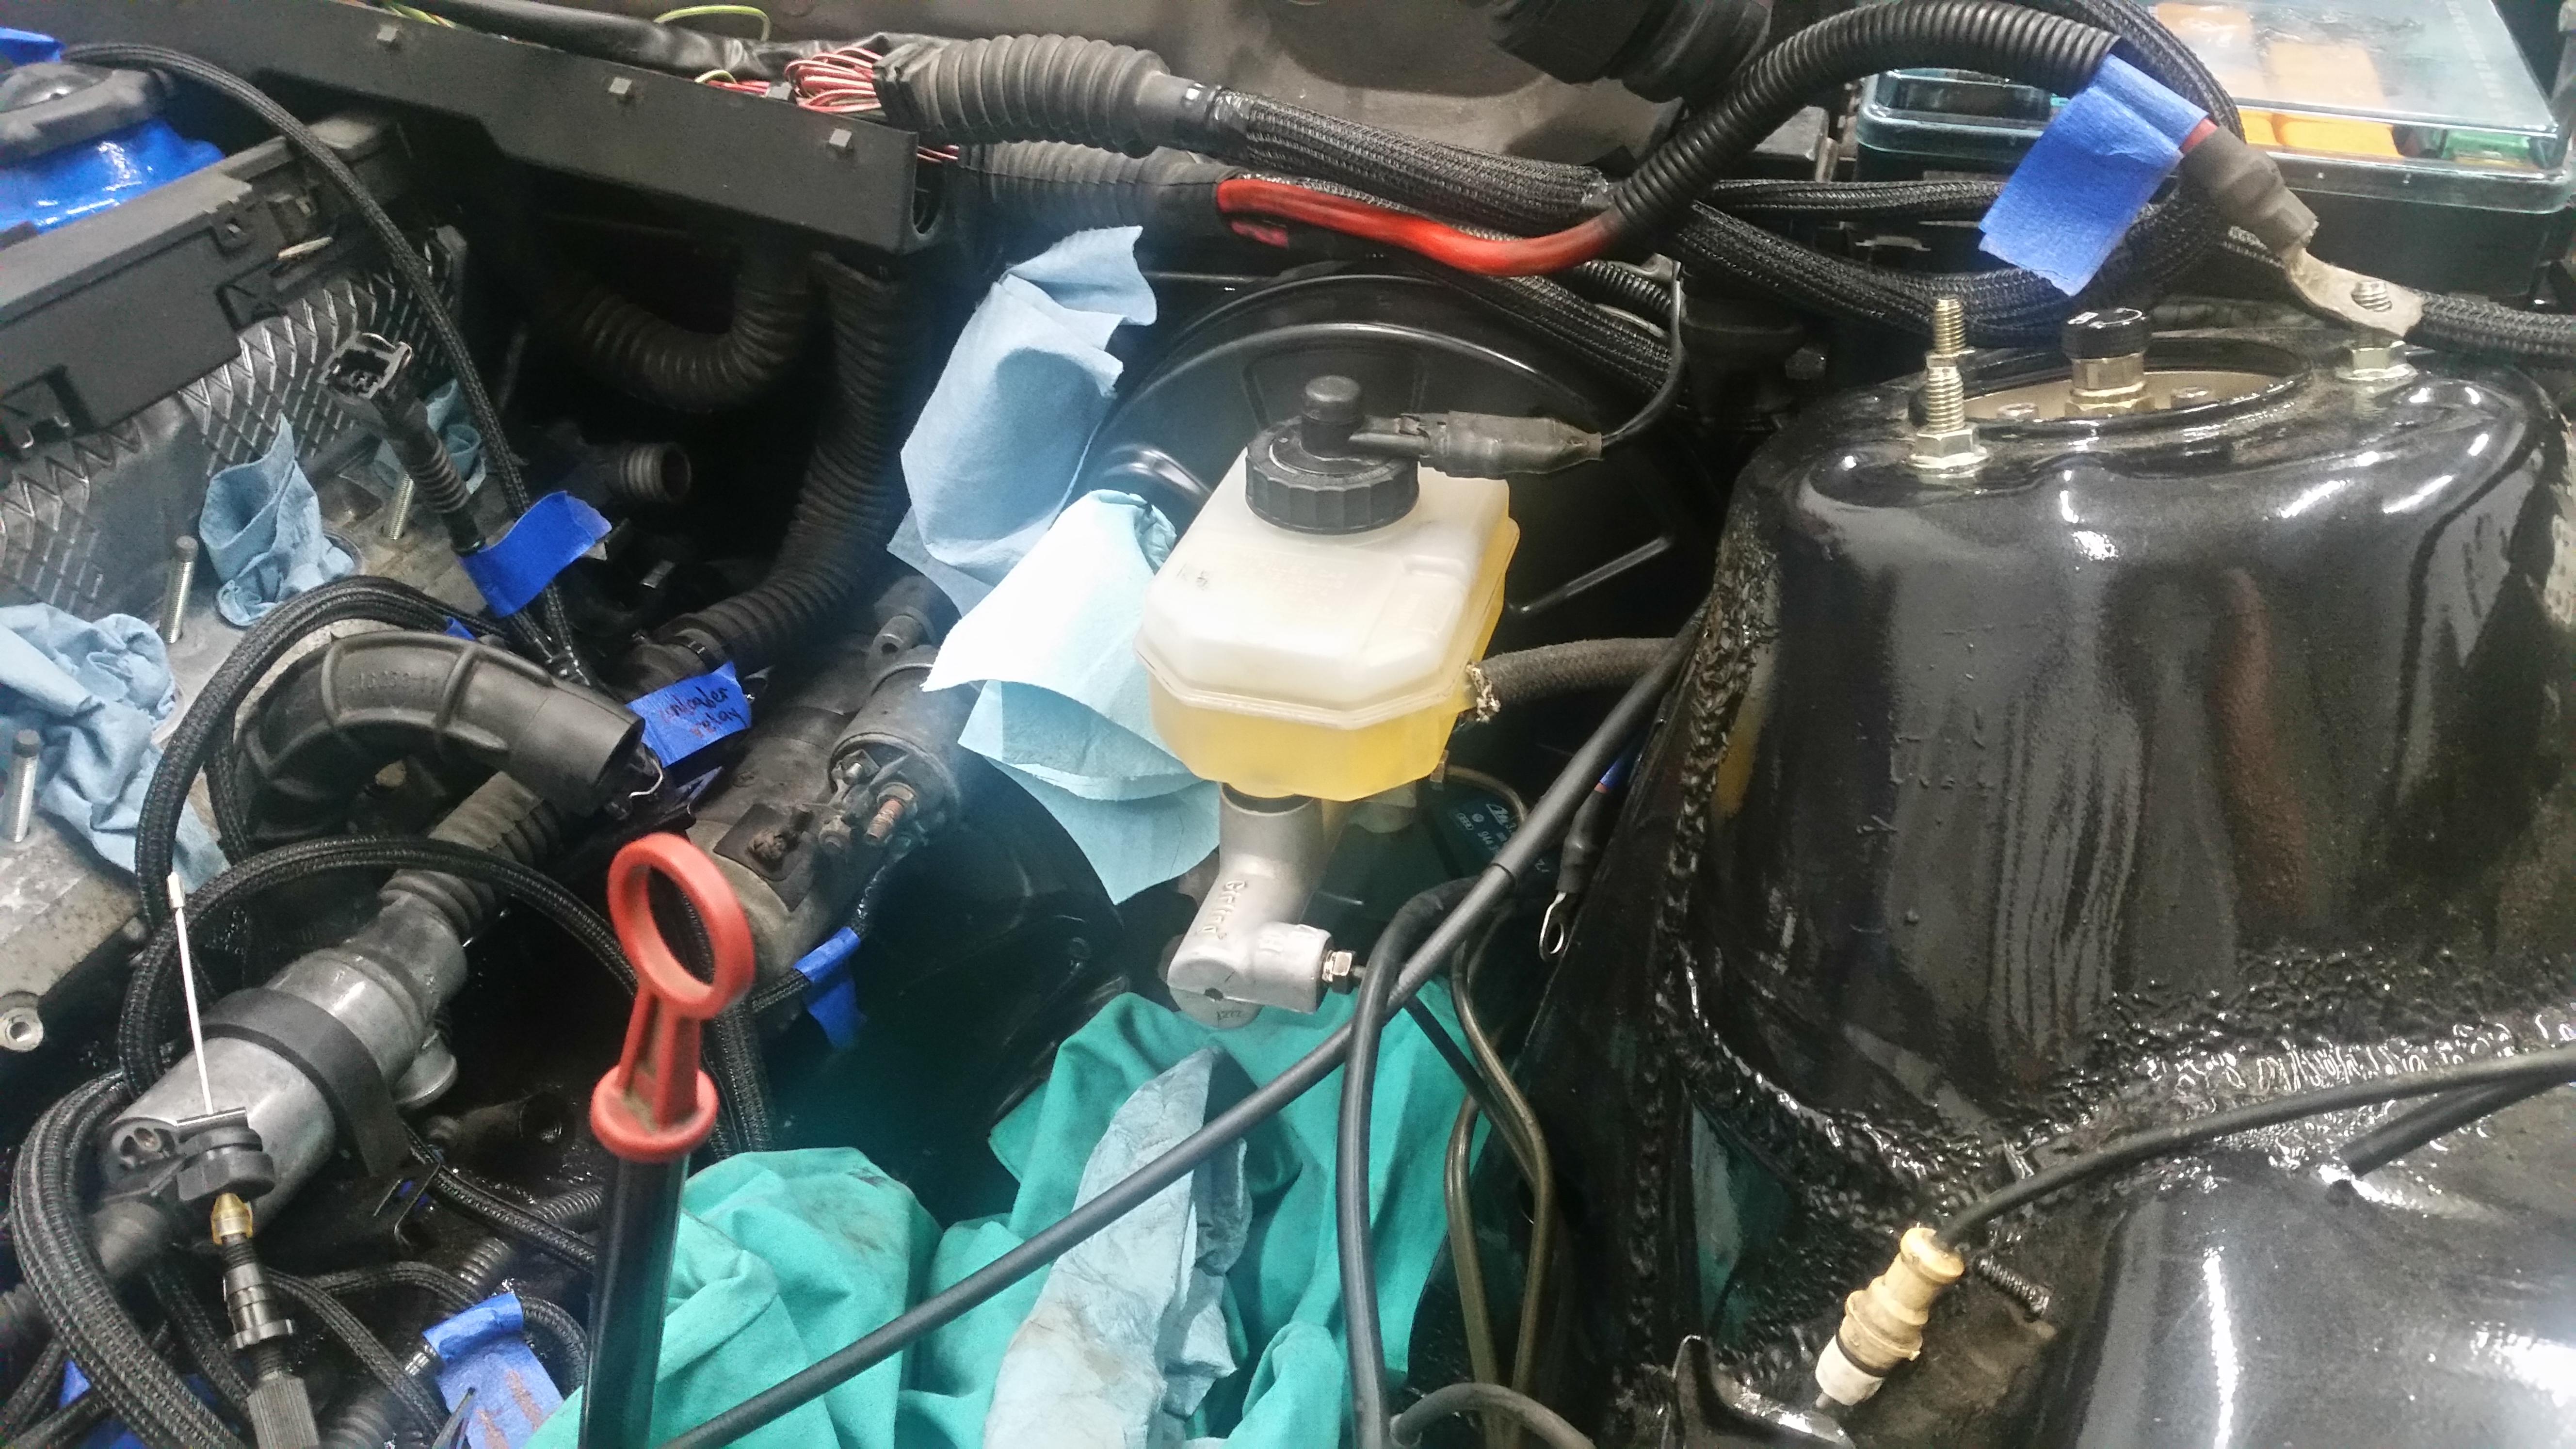
Also installed both my oil pressure, oil temp, and factory oil pressure gauges onto the BW distribution block and tightened that into place. Luckily I had no issues there. Routed some wiring for the sending units.

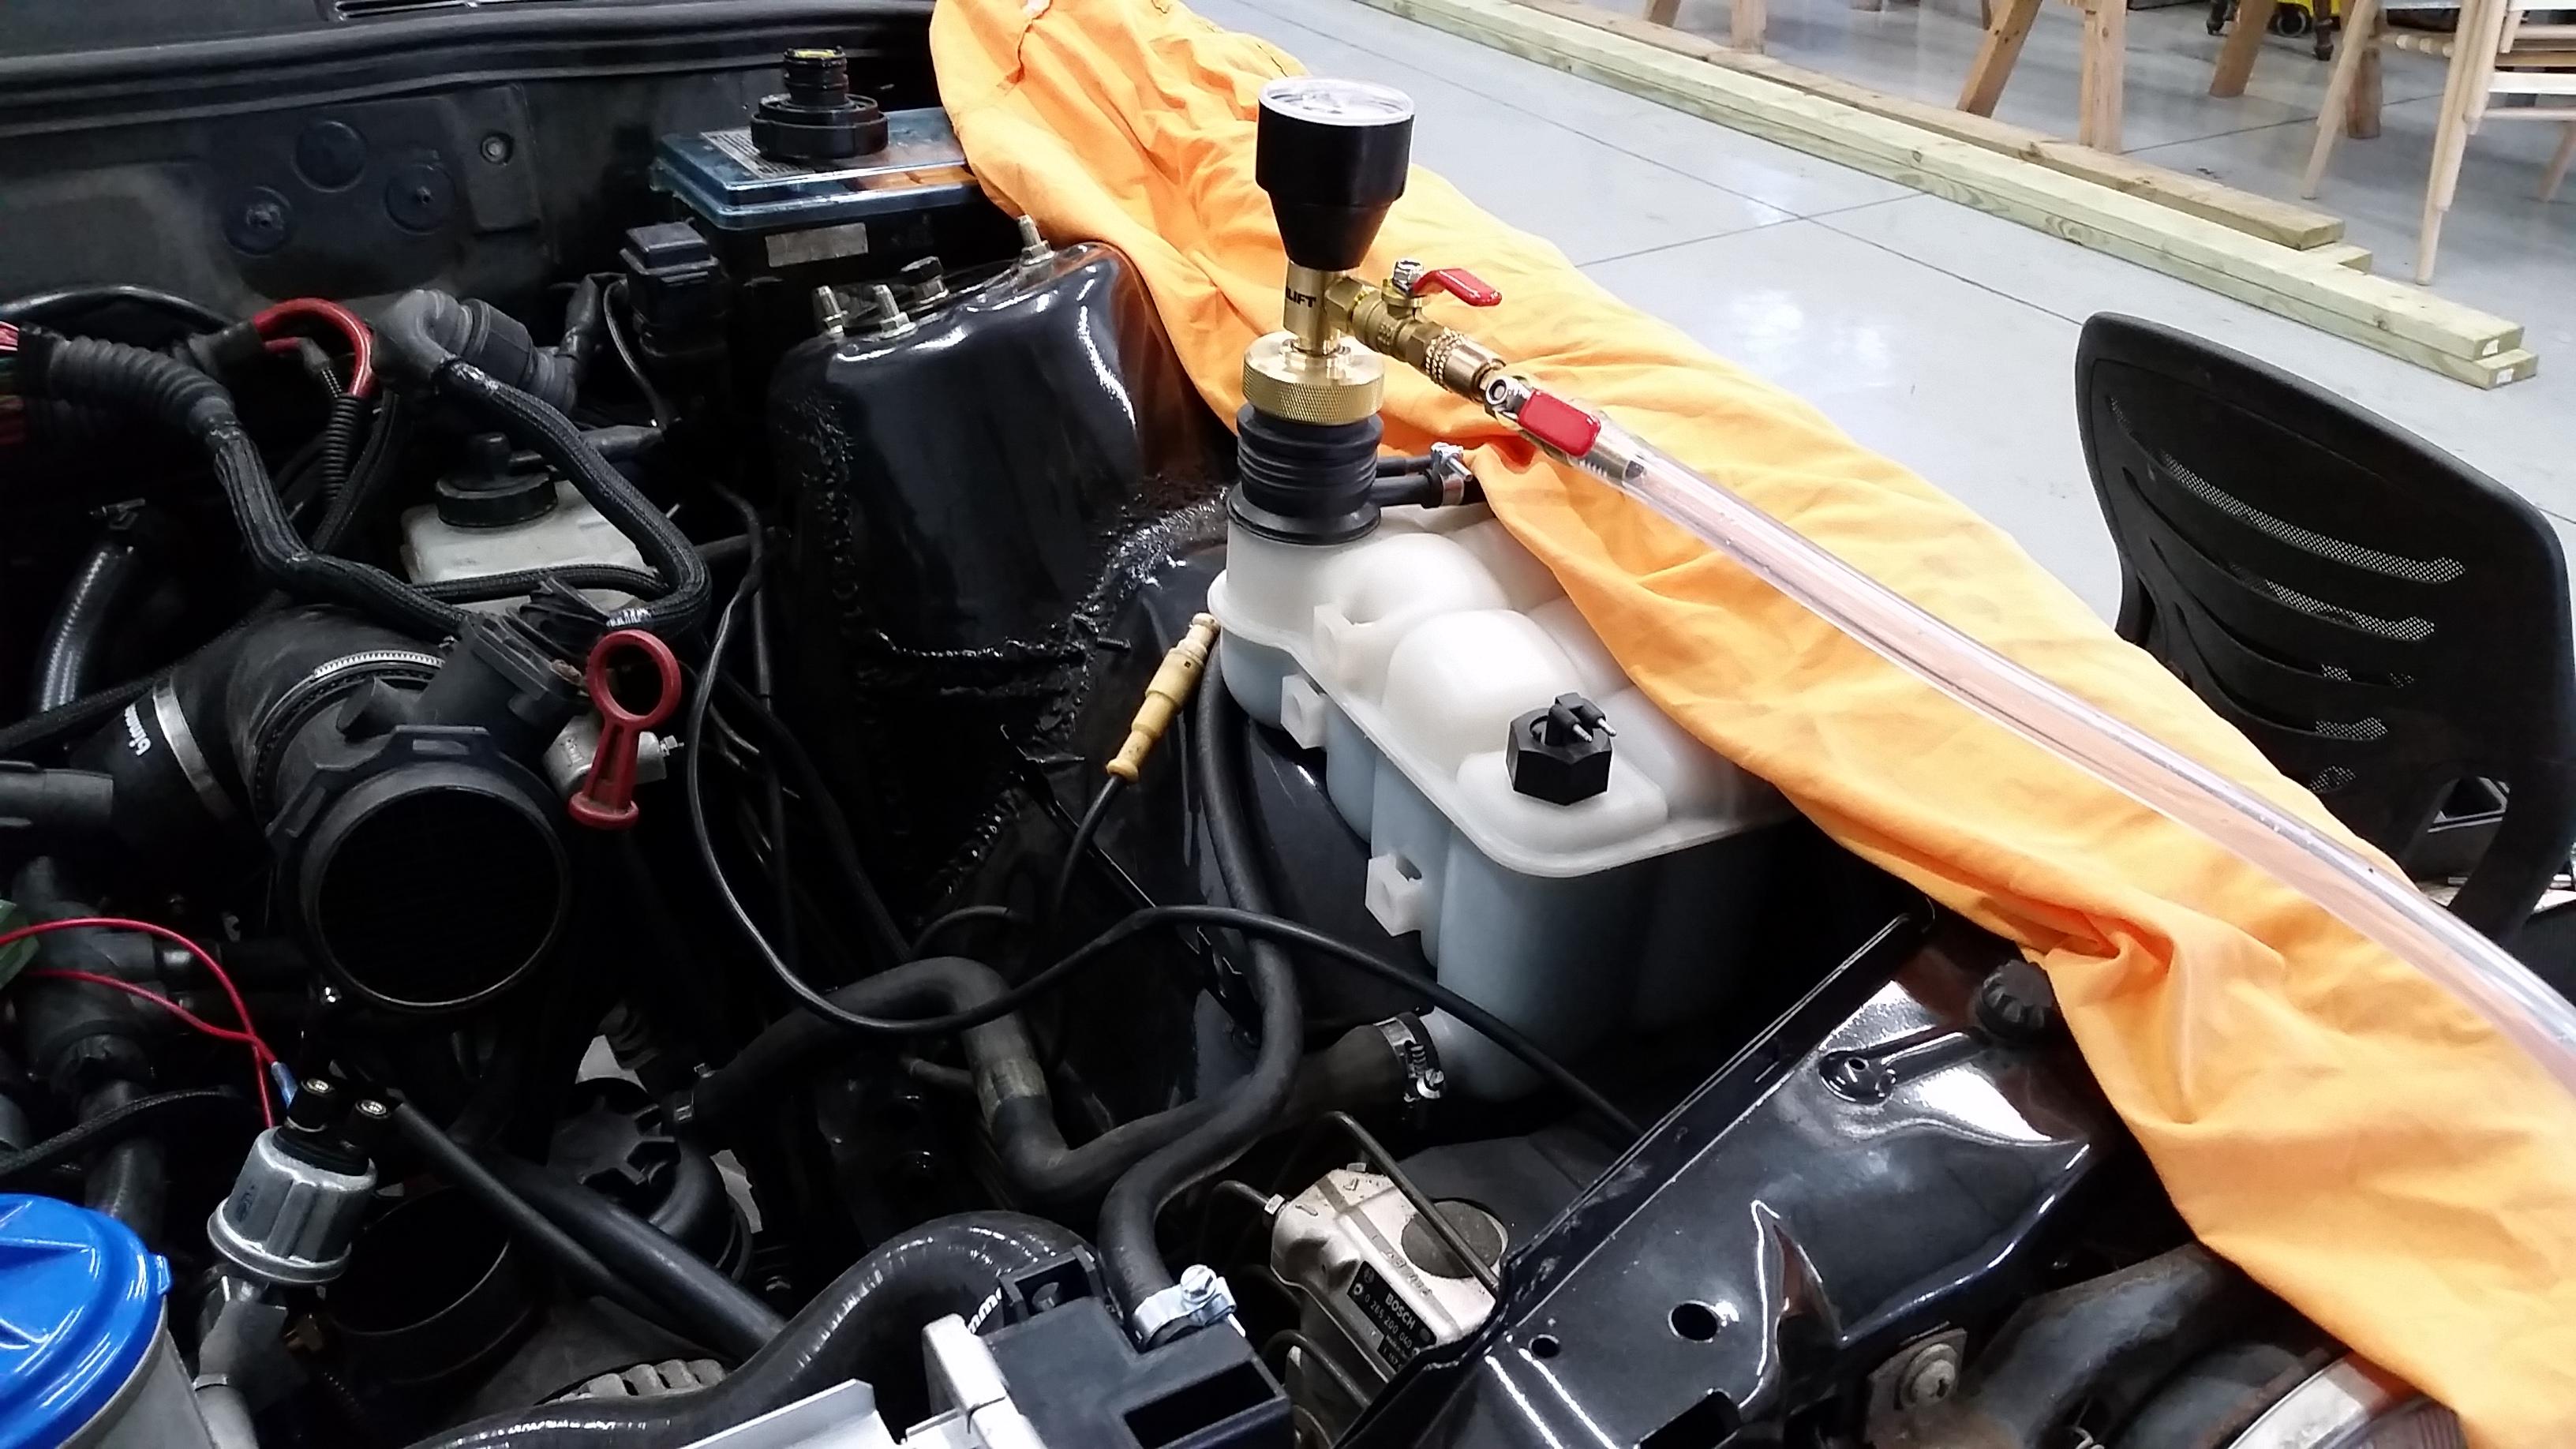
Once installed I went ahead and pulled a vacuum on the cooling system to check for any leaks. I did have a fairly quick loss of vacuum and started checking around to find that the other coolant sensor for ecm was only hand tight. Tightened down and tried again... good to go!

Filled the system up with bmw coolant I think it sucked in something around 2ish gallons all in all.
Got the intake system reinstalled, filled my power steering system with some fresh castrol atf and ran the car for a few minutes to reach around operating temp. Everything seems to be functioning great! Still slowly leaking from the head gasket above the timing cover though. 😡
Next thing on the list... exhaust.
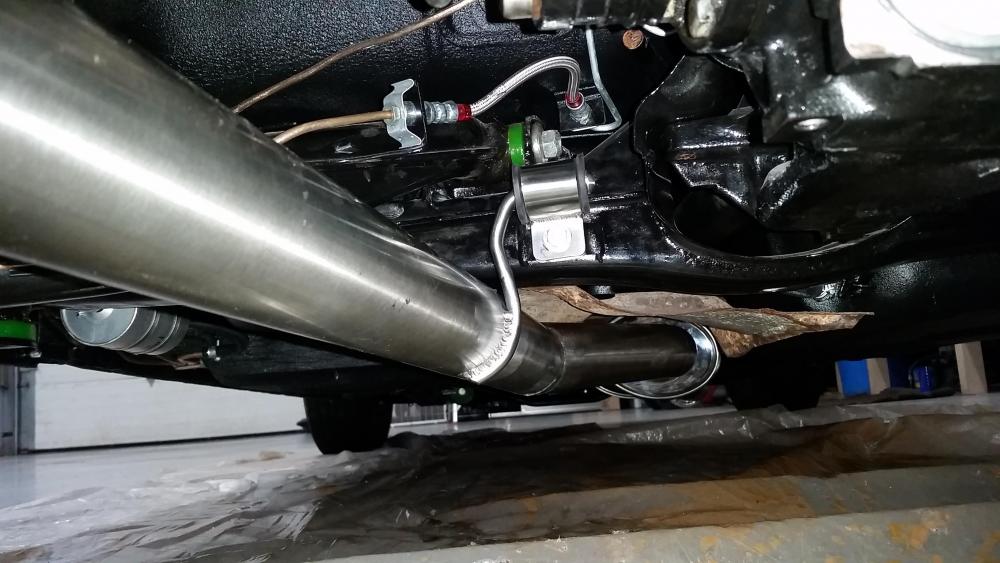
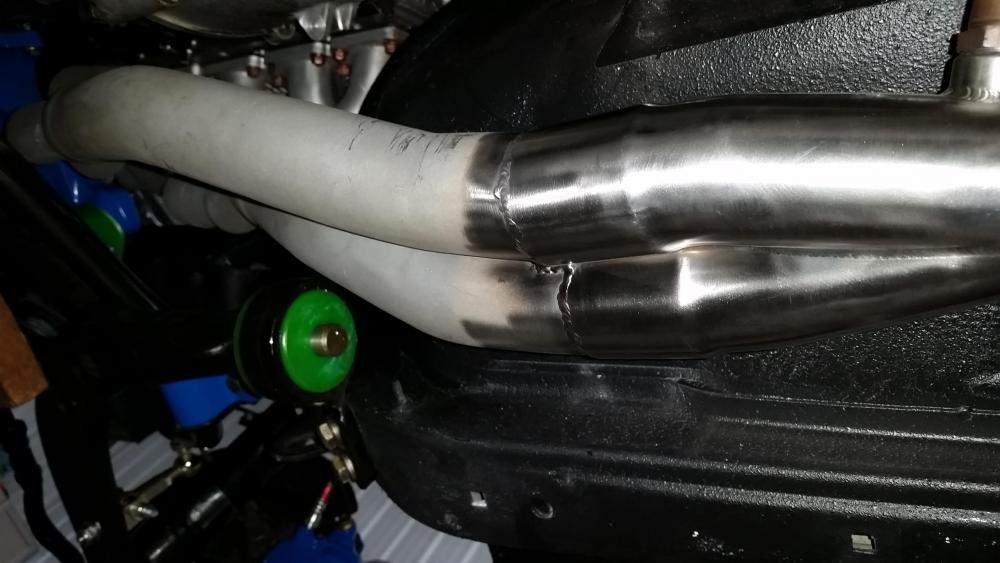
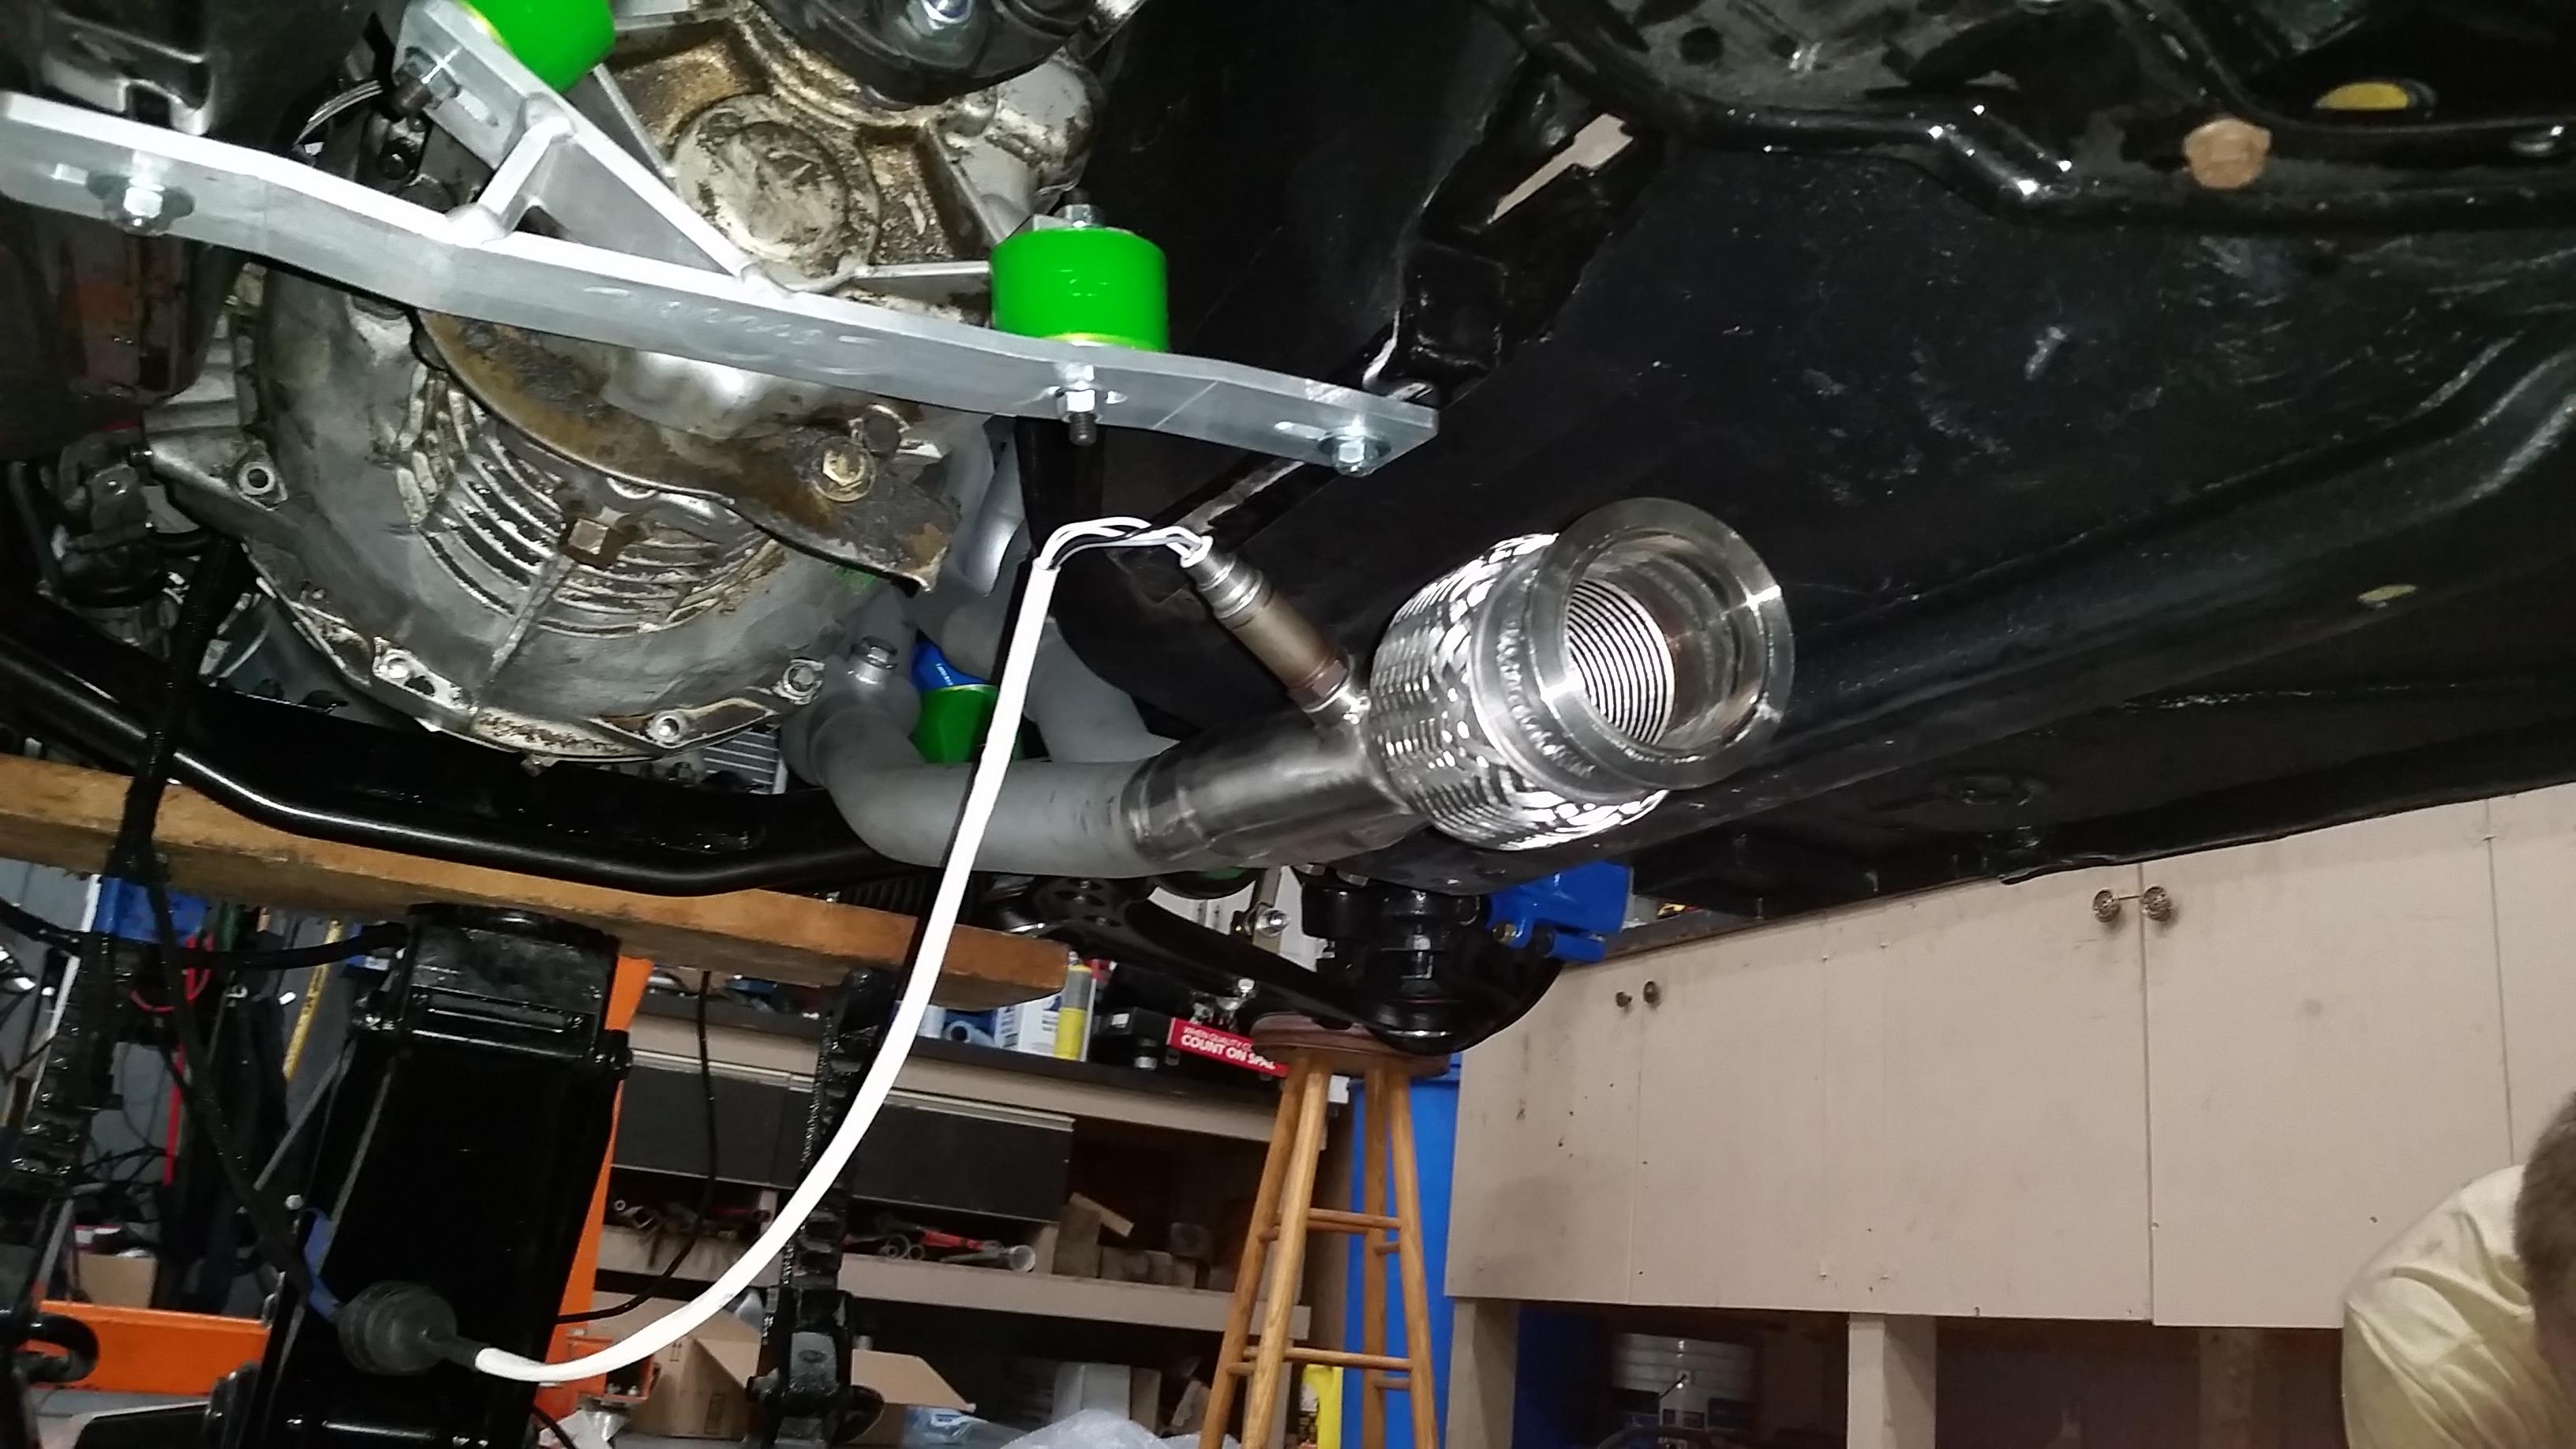
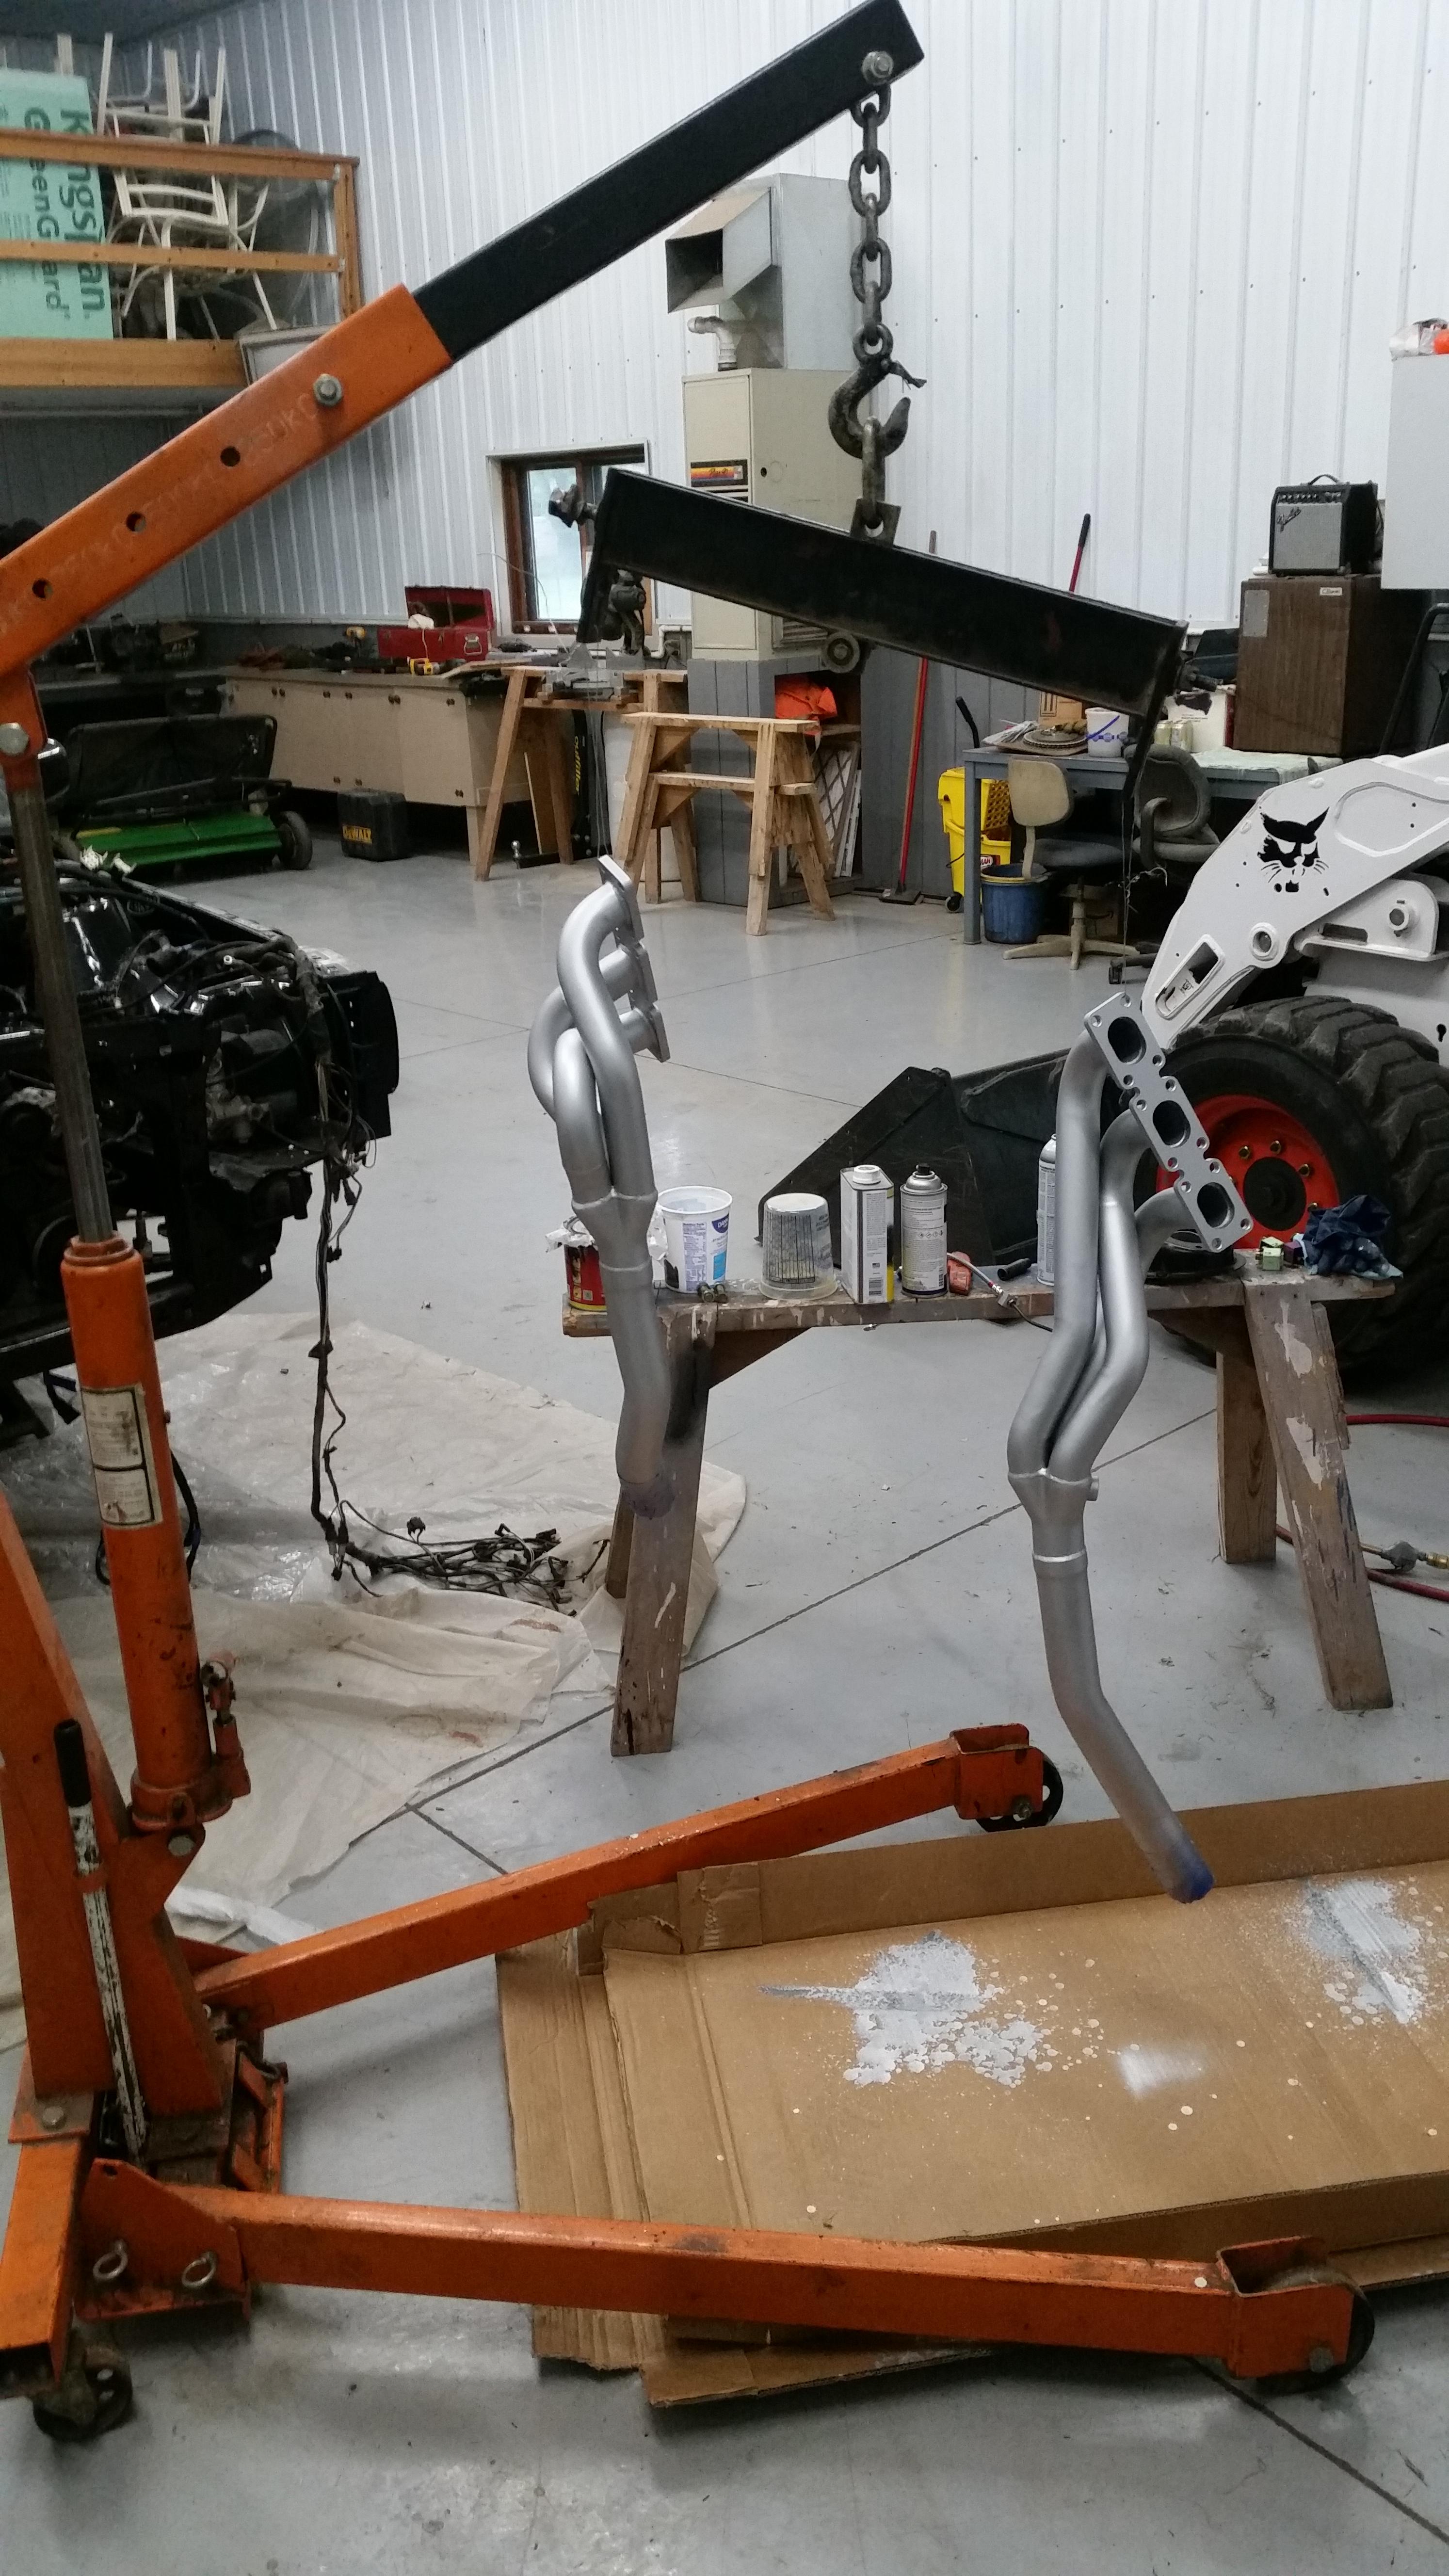
My buddy Forrest came back over last week and started cranking out the rest of the piping. So far its looking great!
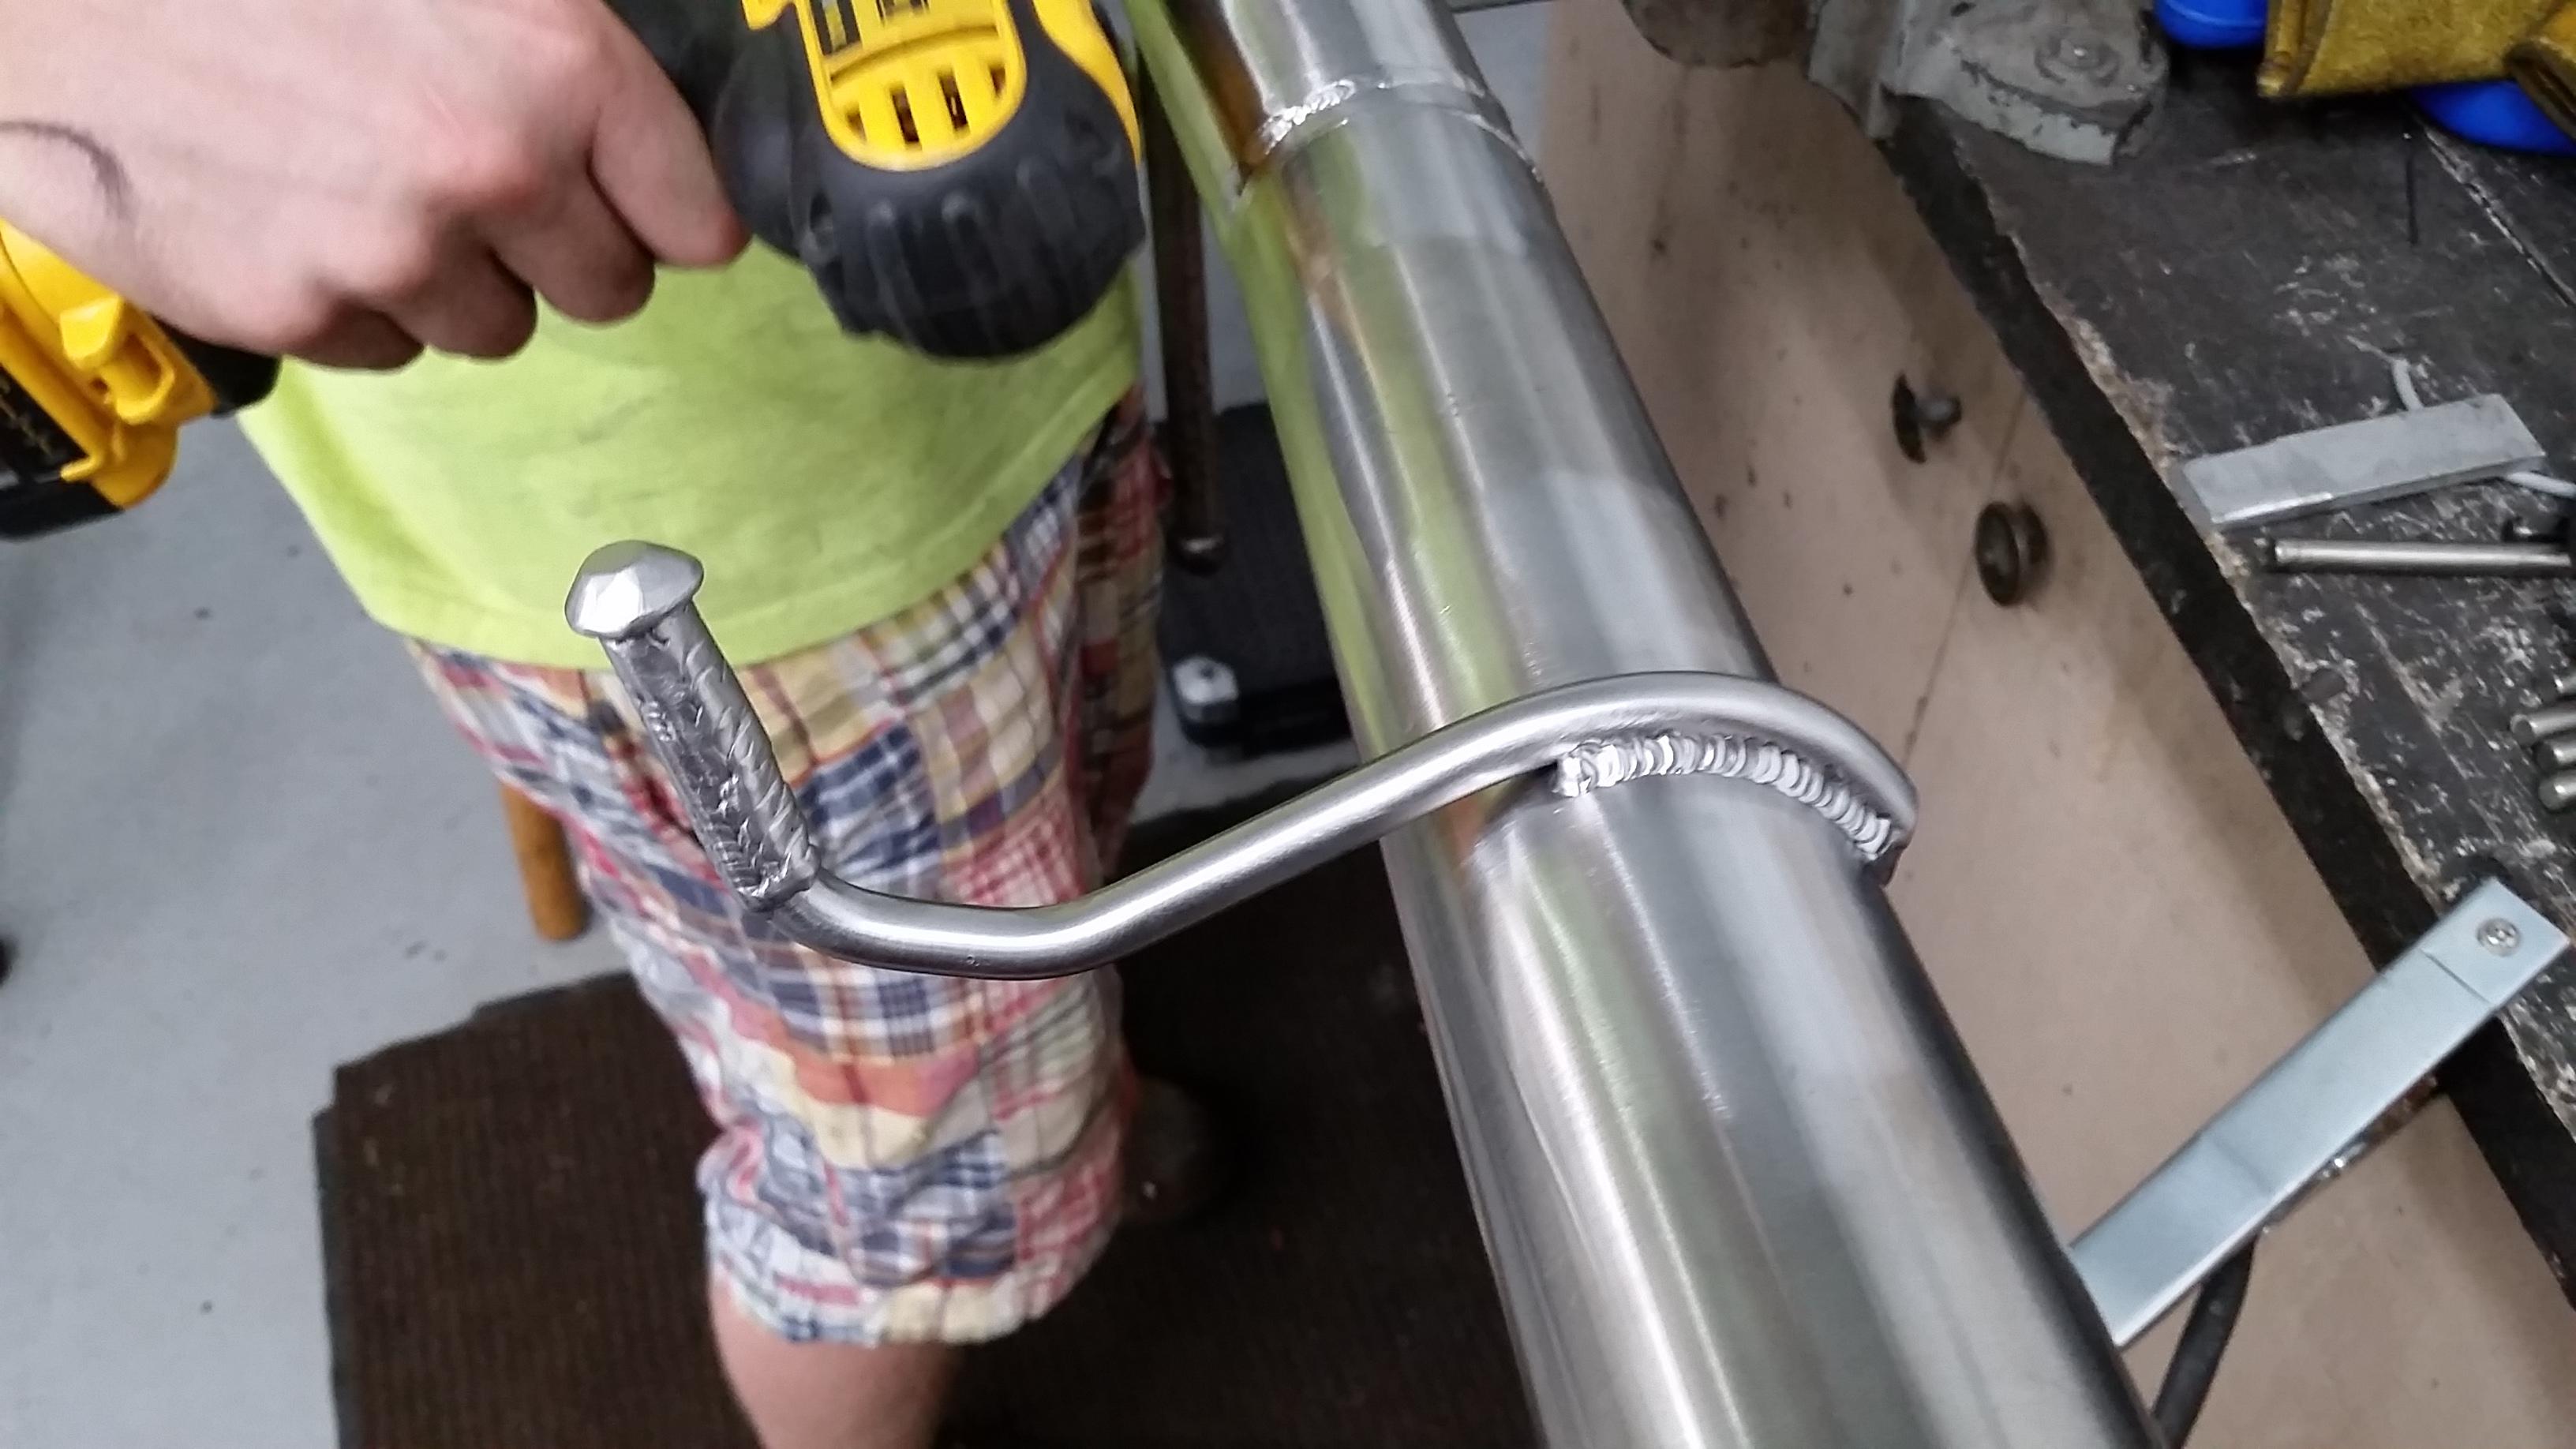
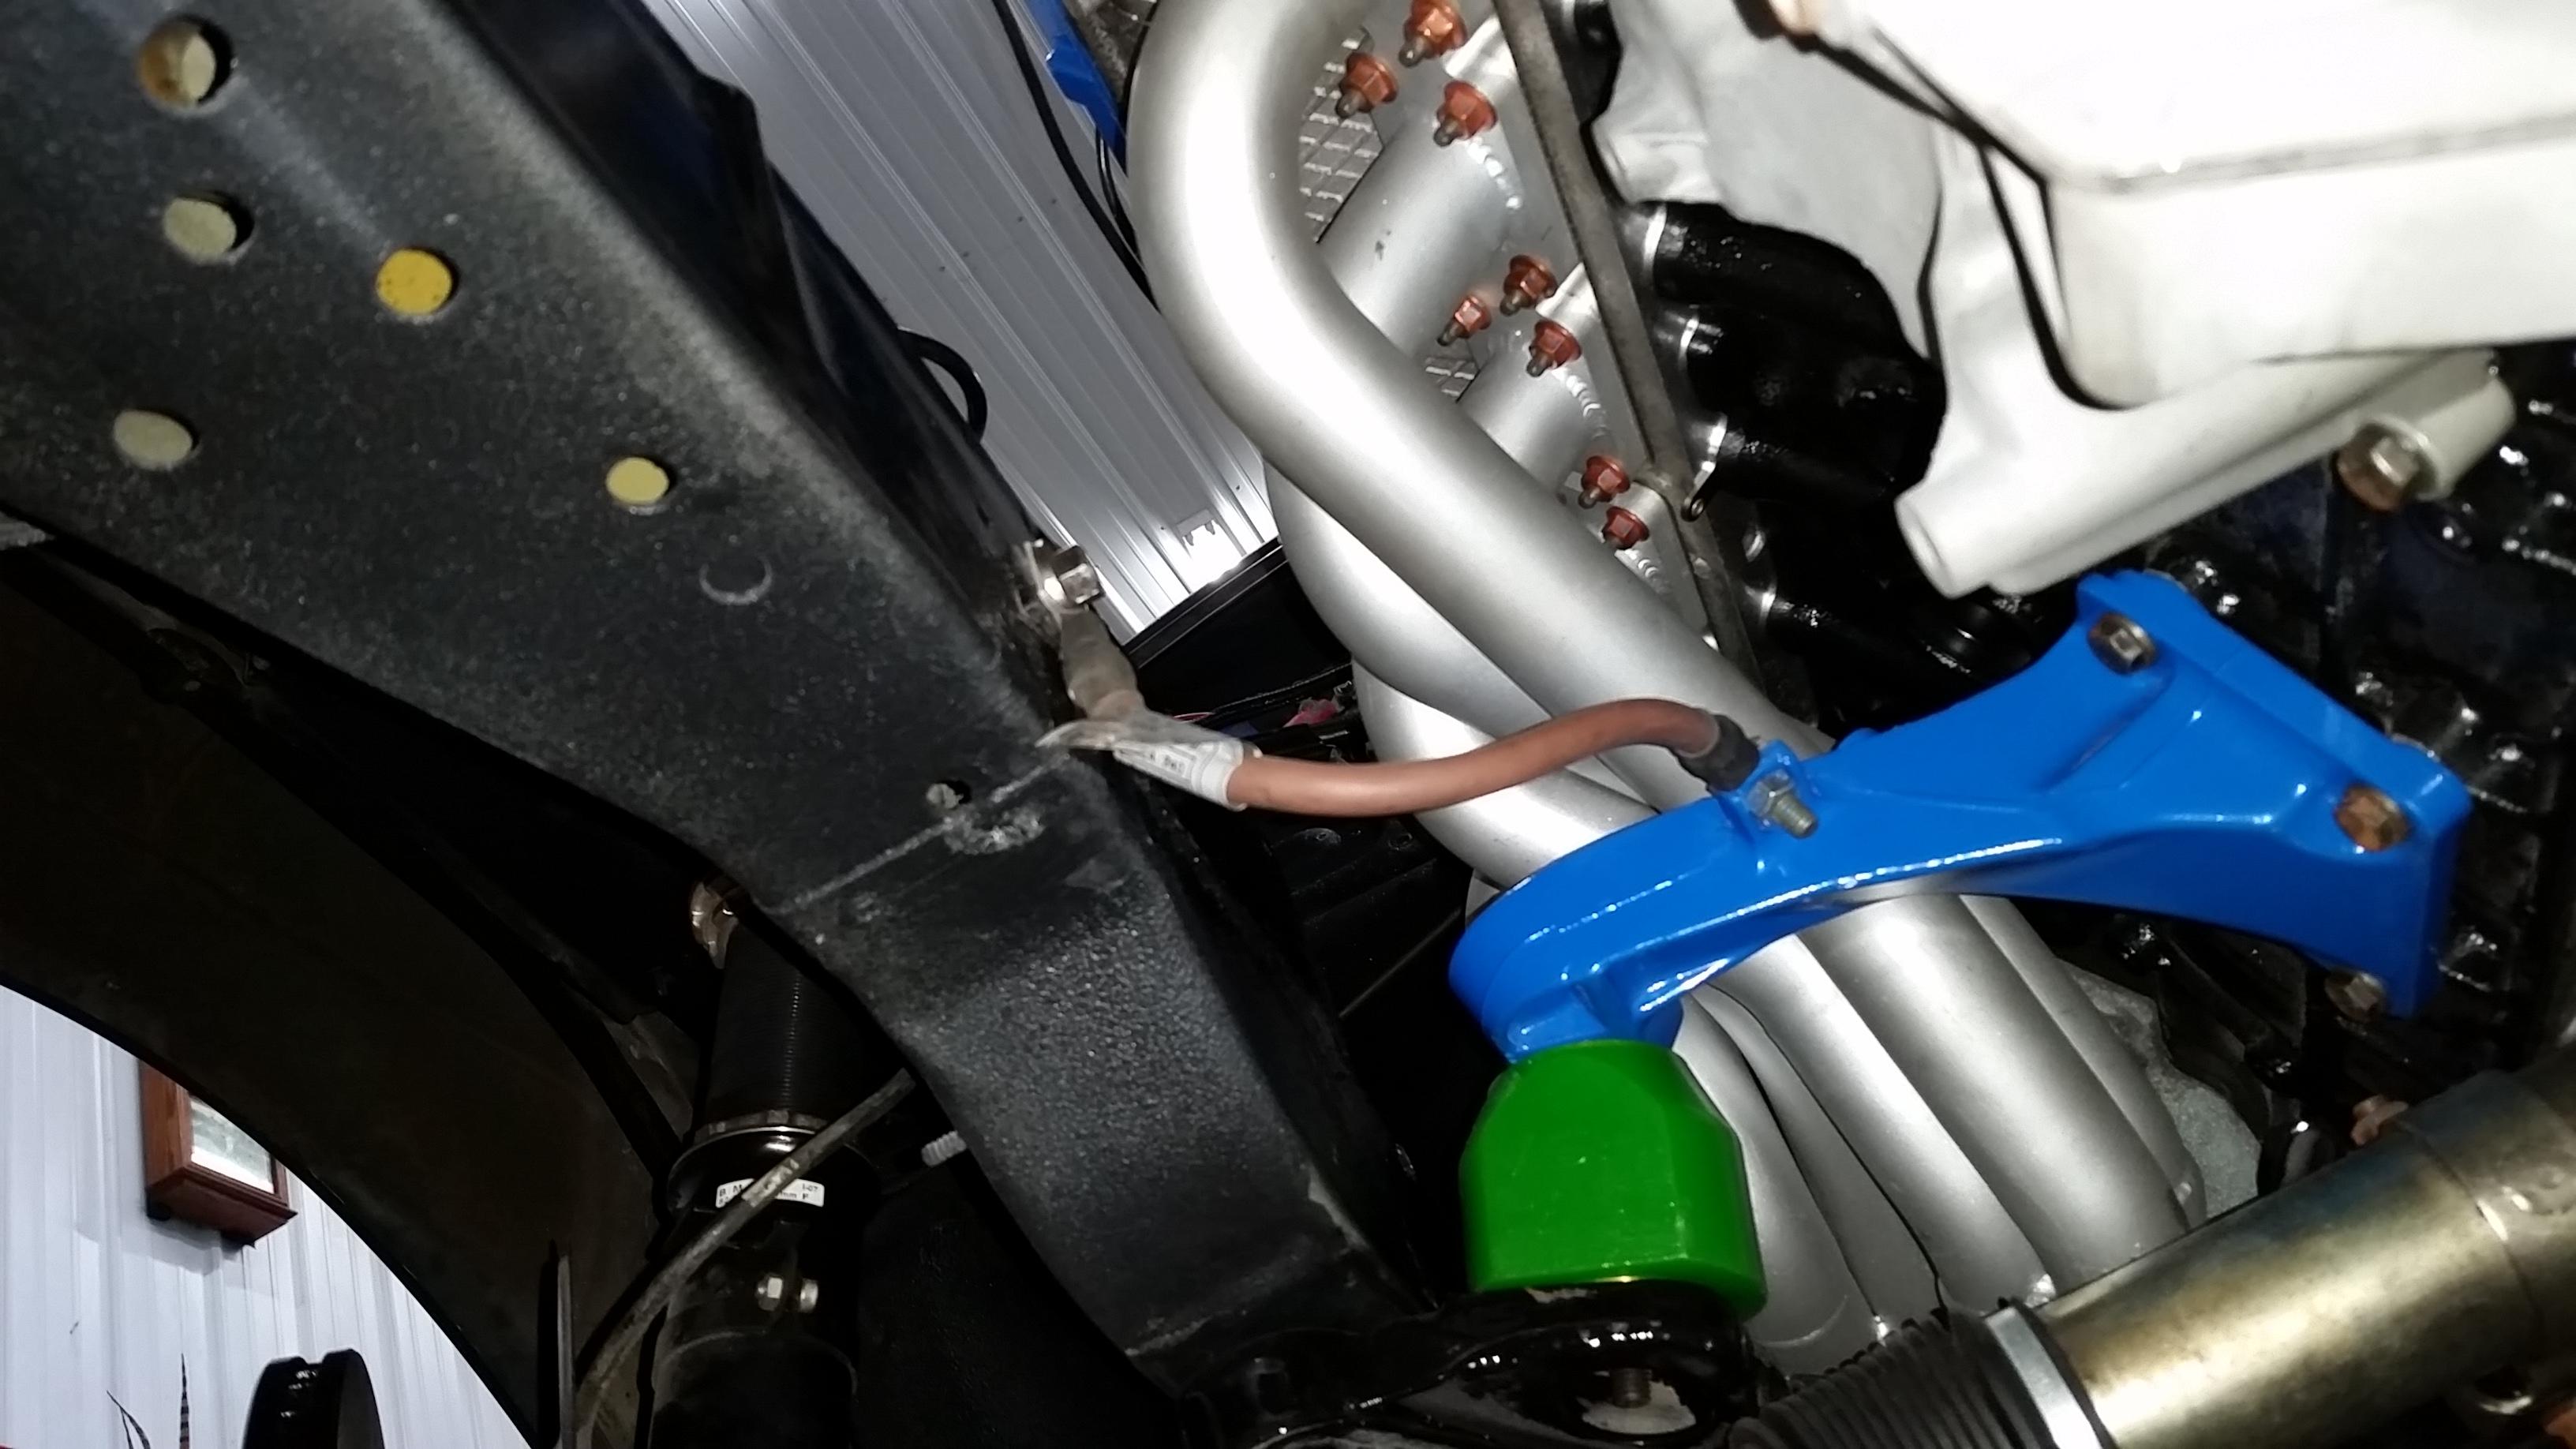
After getting it welded past the rear sub frame I started figuring out how we were gonna hang the thing. Went to other side of the shop and dug through my tub of old parts to scavenge up my old rear sub frame bushings. Luckily we had a bit of scrap 16 gauge stainless sitting around and we went ahead and cut a long rectangular piece out in which we took the press and bump formed a piece to fit around the bushing. We left a flat section to drill a hole through for the M8 bolt that threads into the rear sub frame.
After that piece was made we took some measurements, took a piece of 3/8 stainless bar stock and shaped into something that we could use. Once shaped and fitted up, he tacked it on and welded it up.

Sense the diameter of the inside hole on the bushing was larger then the 3/8 bar stock we ended up just filling it all around with some weld beads so it fit more snug. Also threw on a little end knob to keep the hanger from slipping out.
Everything installed...
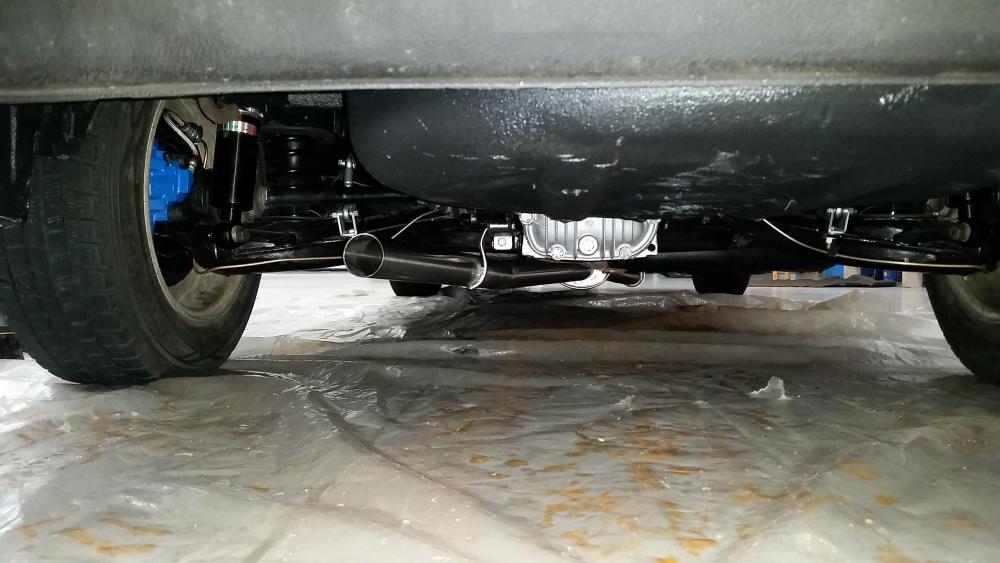
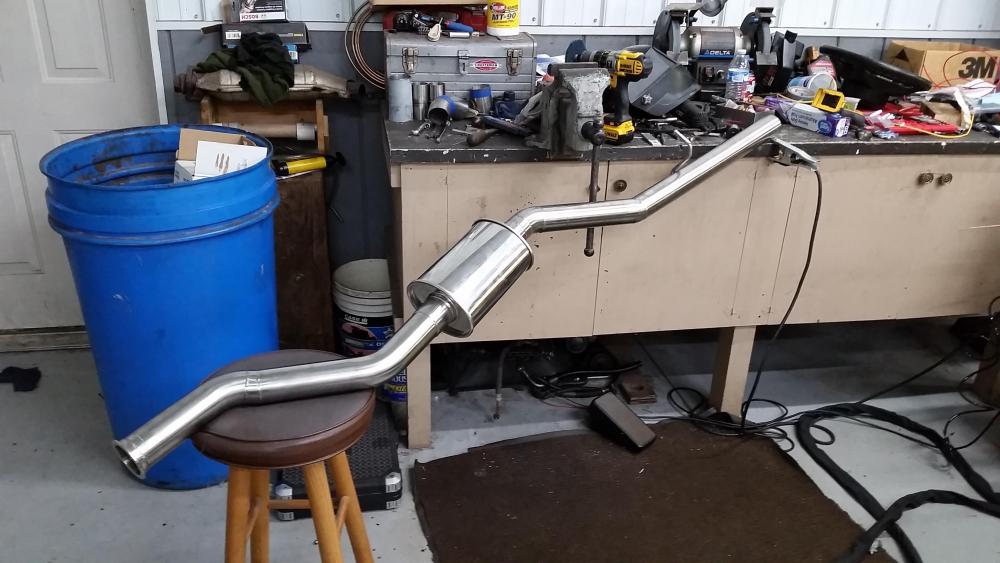
Originally was gonna run with a magnaflow muffler but found out that the inlet pipe was 2 1/4 inch and I didn't like the idea of having to reduce the pipe back down. Instead I went ahead and ordered a vibrant street power muffler which had an option for a 2.5 inch inlet. Hoping to see that tomorrow and we will be able to go ahead and get that installed and the exhaust will be complete.
Found me some seats!!! I originally said that I was having some sport seats shipped over from Florida but after doing some further searching through Craigslist I found a guy who was selling his e30 vert and had a spare set of leather sport seats from the car he was looking to get rid of sense he had got some cloth ones for it instead. Took a trip up there about a week ago and picked them up.

Ya they aren't mint and will definitely need a little work but all the brackets are in solid shape and my plan will be to reupholster them this coming winter. For now though, I will be throwing some nice matching seat covers from the old set back on and run them for the rest of the warm season.
Onto more things, fan relay is wired up.

When ahead and mounted it next to the power distribution block. Ran the wires along the tunnel behind the fender. Grinded away some paint on one of the holes beneath the passenger side headlight for a proper grounding point for the fan. Decided to run the relay independent from the car so, (for those of you who are familiar with the spal harness) instead of running the orange wire to ignition I ran it to ground. By doing this I keep the relay on a +12 volts constant and it can run freely whenever needed. I also had to go ahead an order the 2 prong switch as the 3 prong I had originally purchased was not gonna work well with my setup. Hoping to see that show up tomorrow sometime.
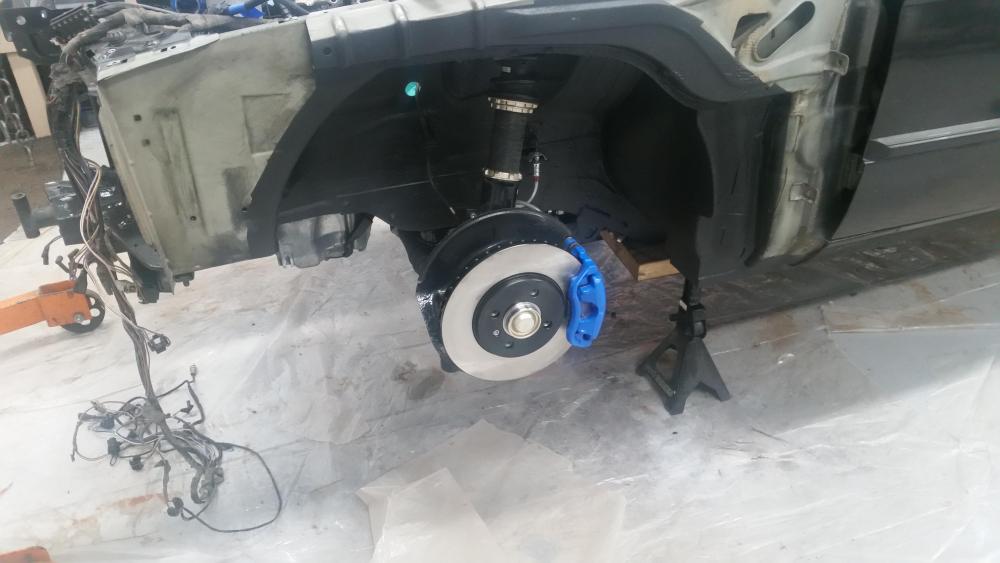
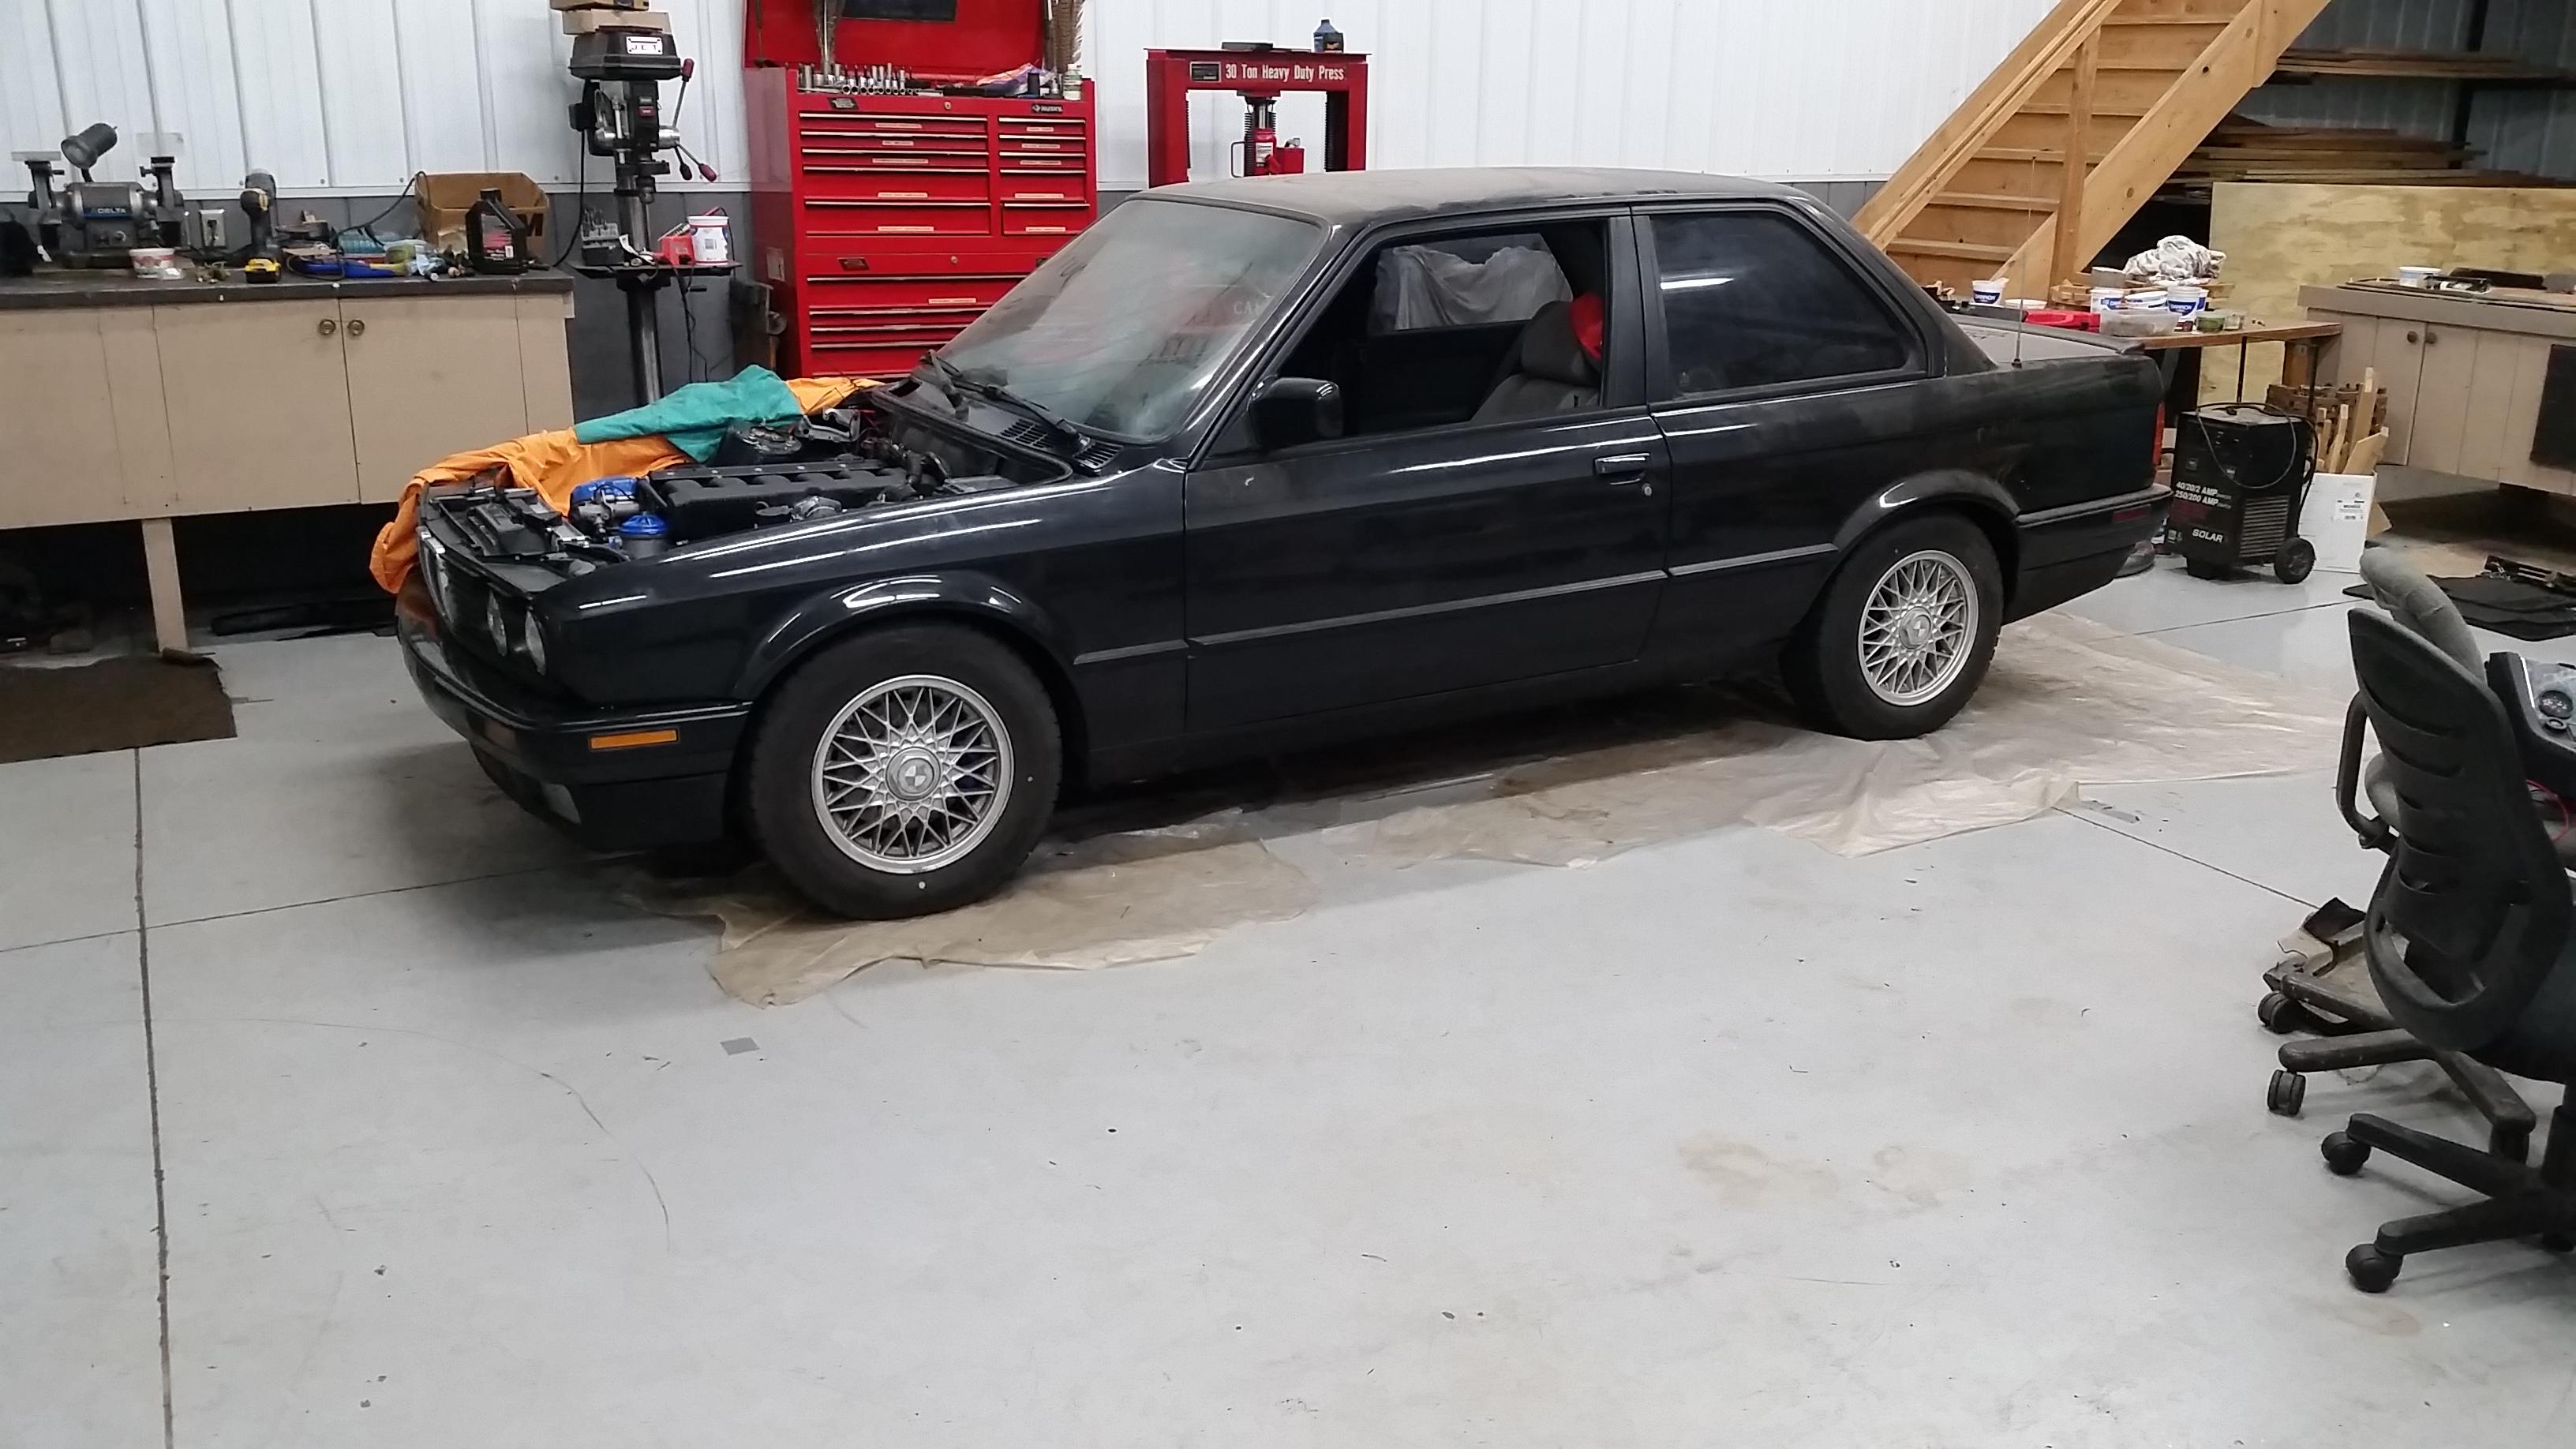
After reinstalling the front end and fenders I went ahead and threw the front wheels back on and layed the car on the ground.

Right away I was completely disoriented by how low the car was. I have been so use to the jack stand height of the car that I had completely forgotten what its ride height was on the ground. The rear end is gonna need some tweaking as it sits forward a bit. Yes I know, definitely gonna need some different wheels.
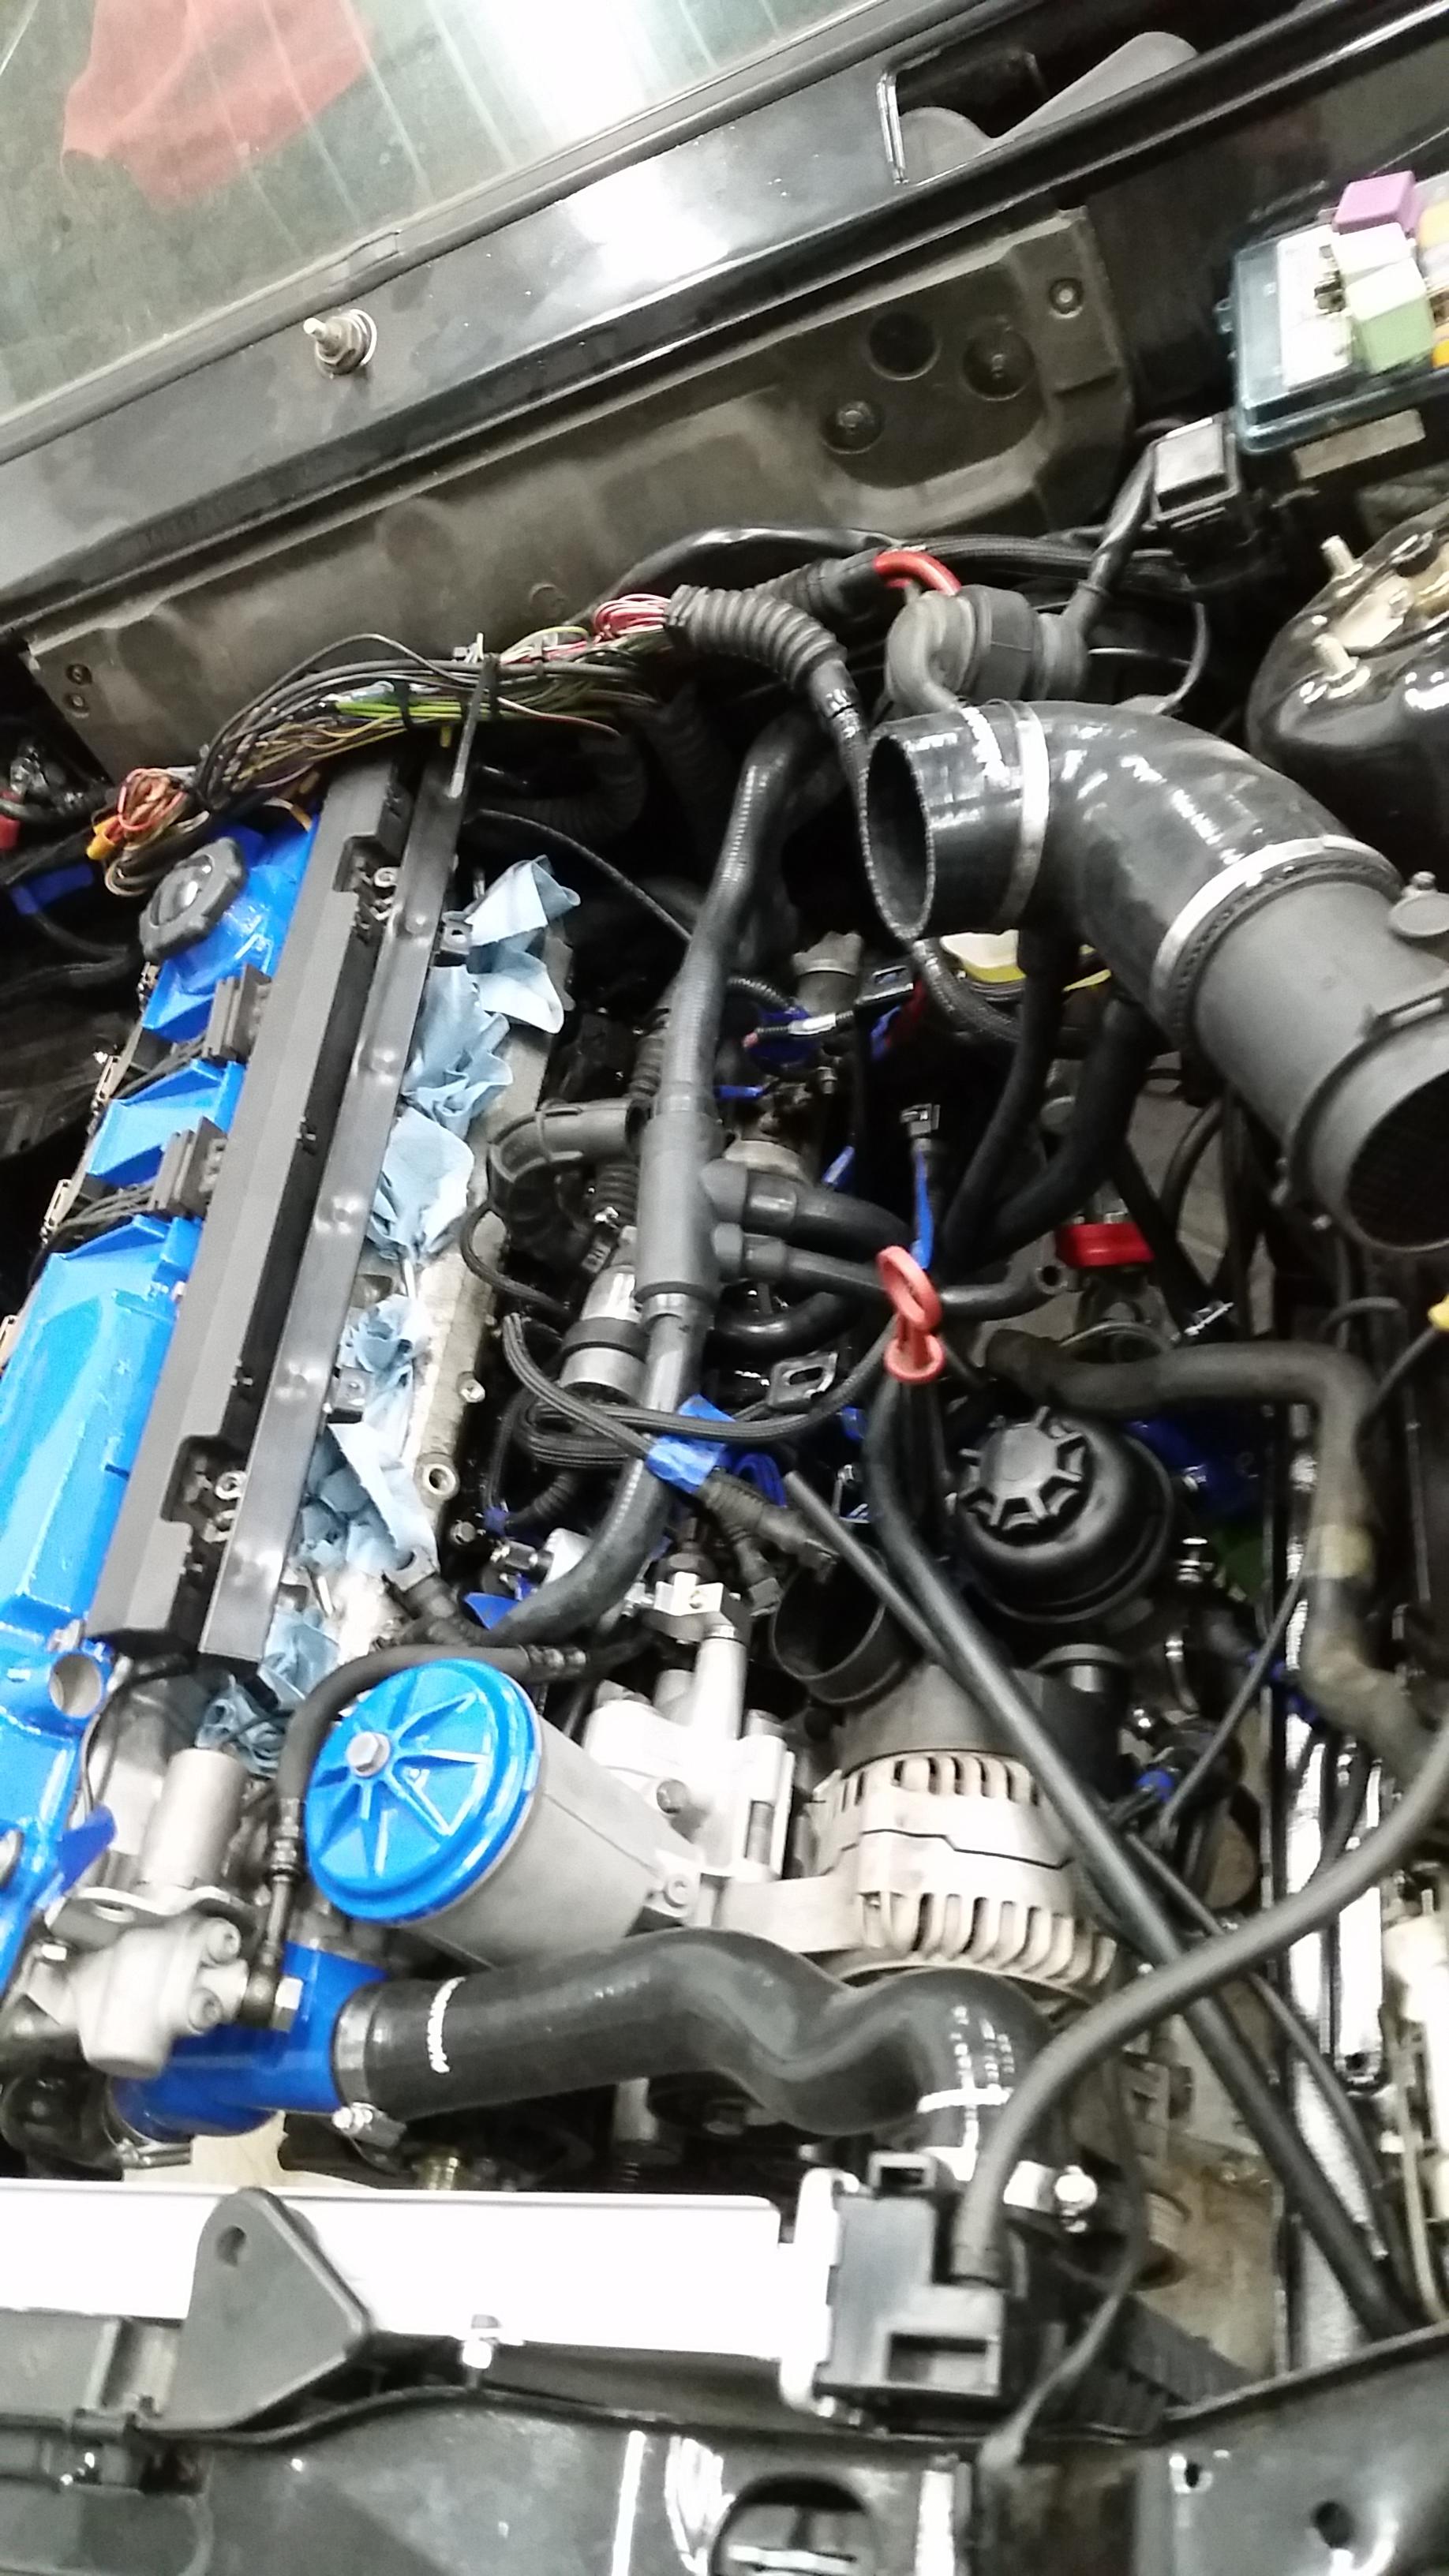
Received a cone air filter from AEM today. Went ahead and installed that but realized I was gonna have to do a little triming to the throttle body silicone elbow from BW in order for it to fit right.
Couldn't get it completely back together as I broke one of the band clamps that hold it to the throttle body. Will pick up another tomorrow to get it fully installed.

Ideally I'd like to make a custom air box system so I can somehow route in some colder air then the warm engine bay air this will be sucking in. Threw it on the list for a next winter project.
Got the hood bracket blasted up.

Planning to give that a coat of paint sometime this week, gonna keep the color the same as the engine bay so it doesn't stick out to much.
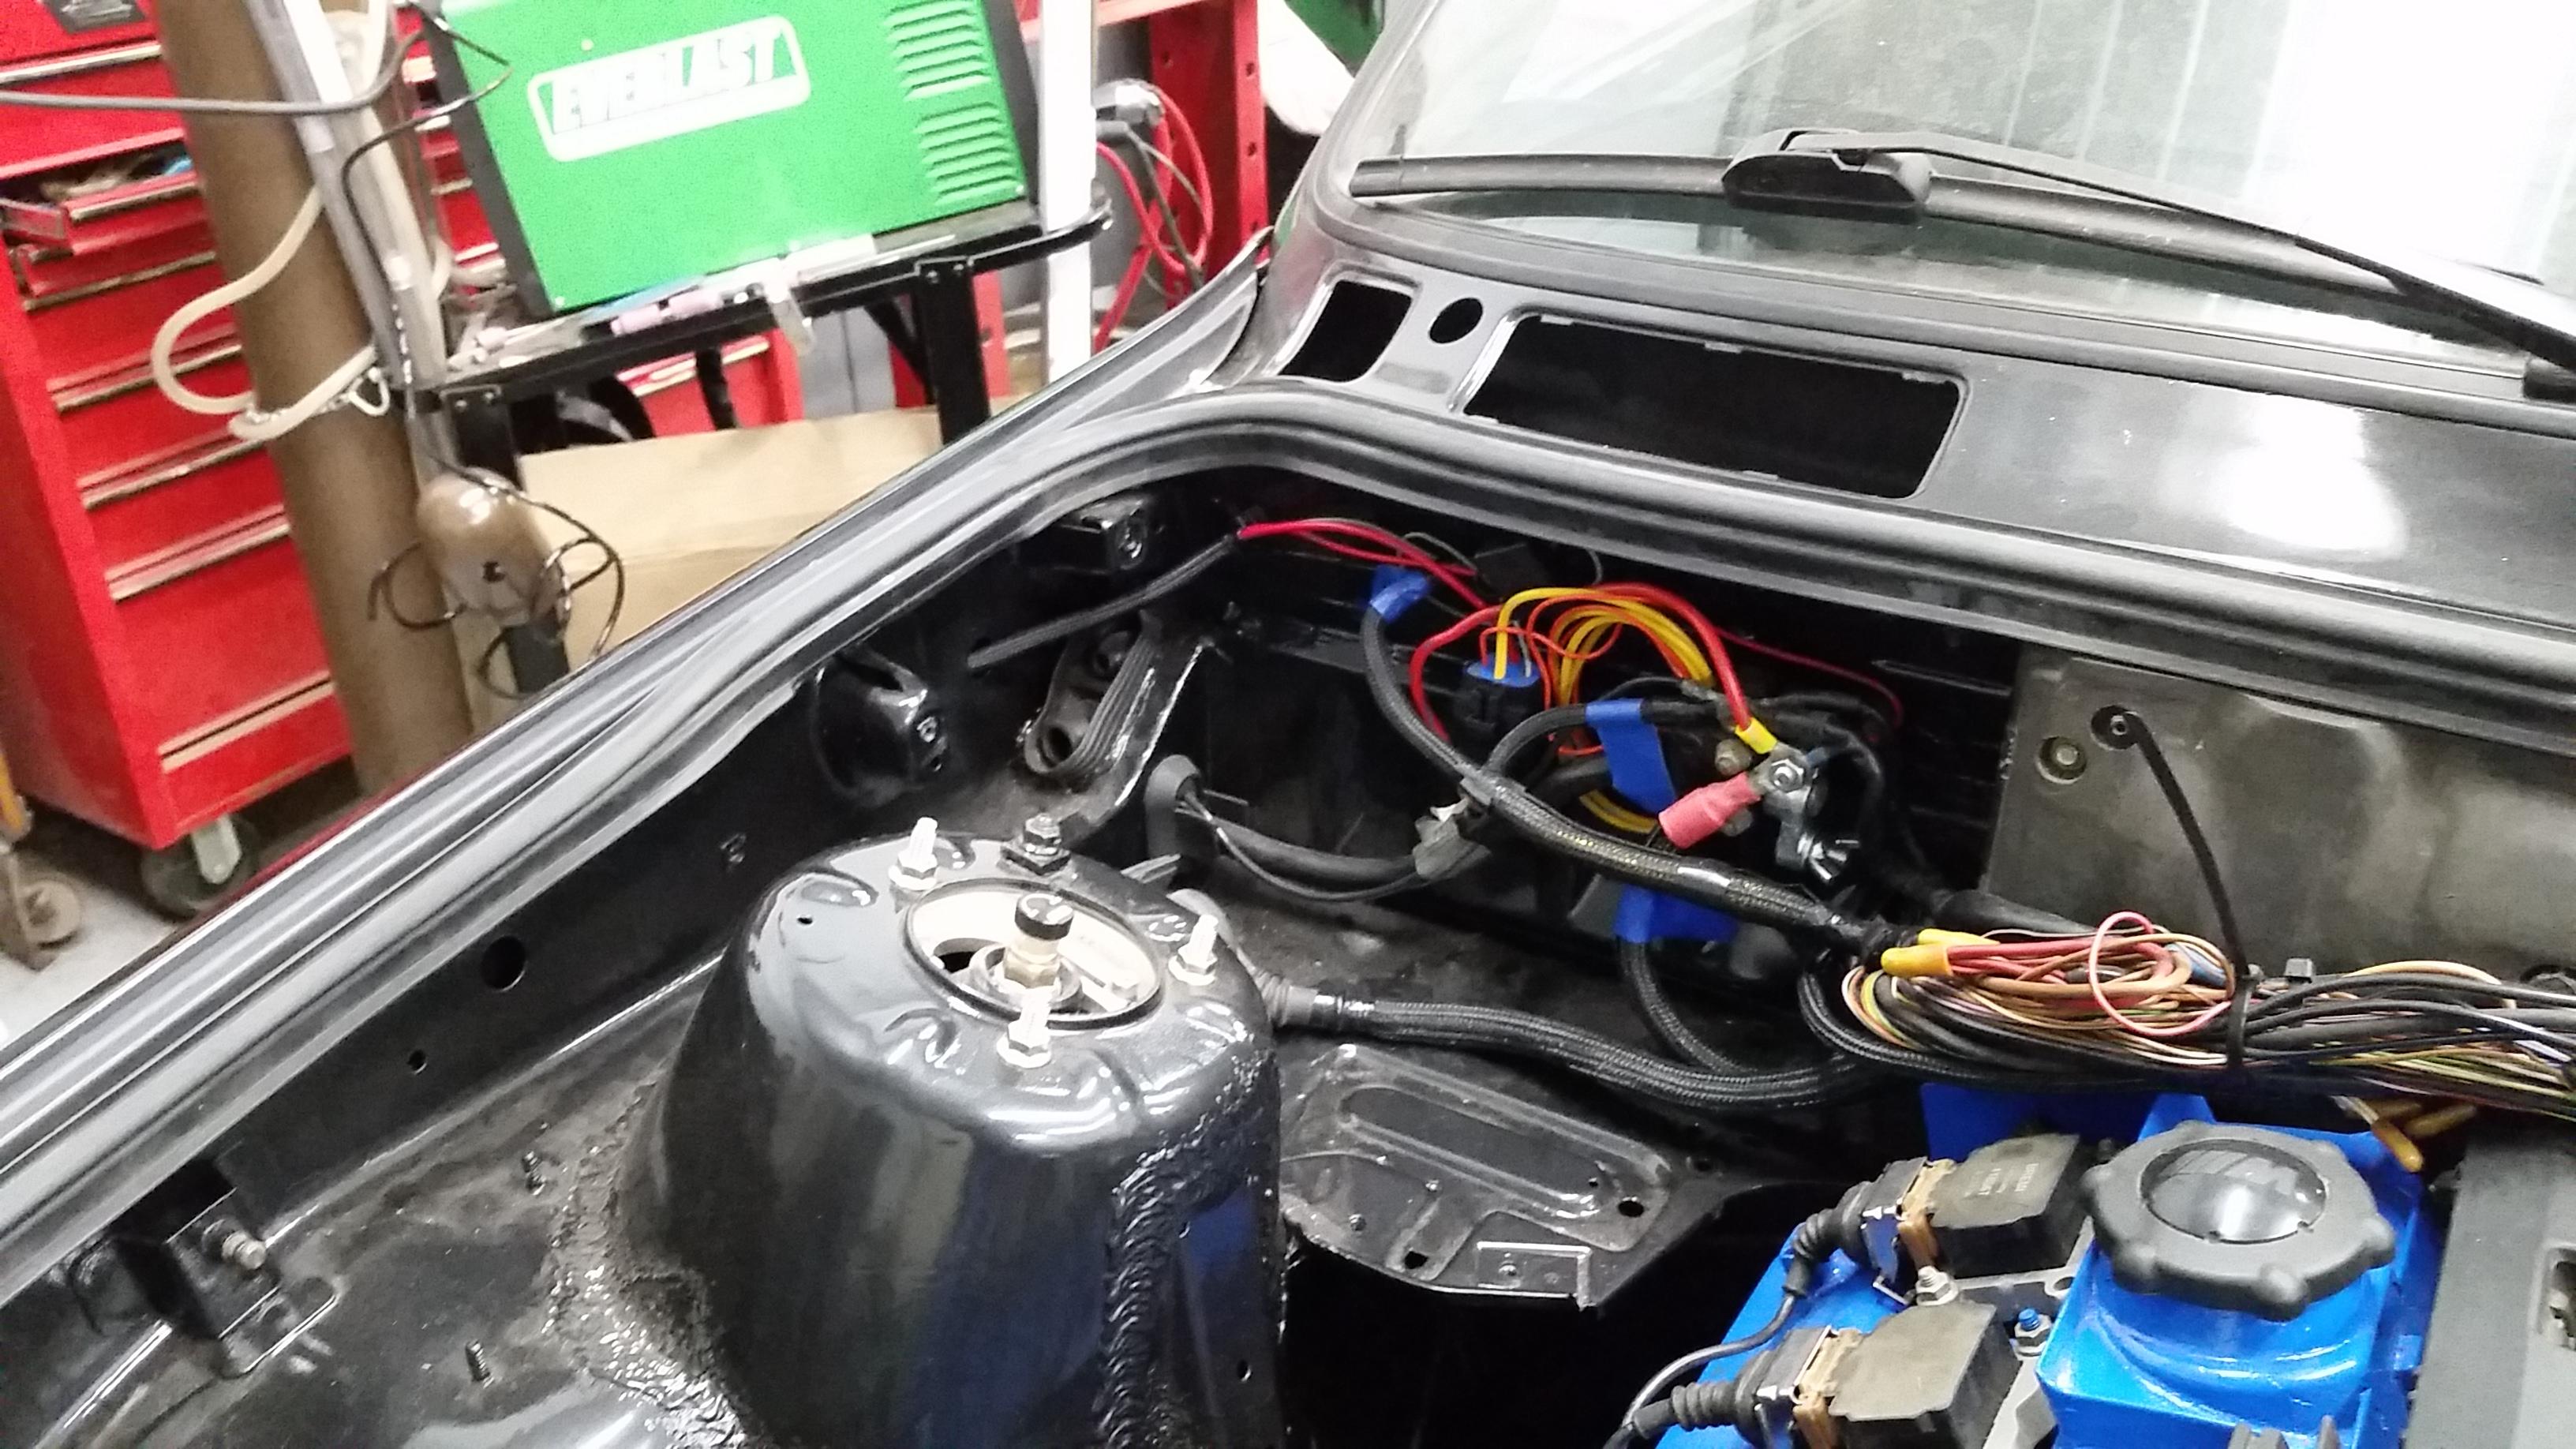
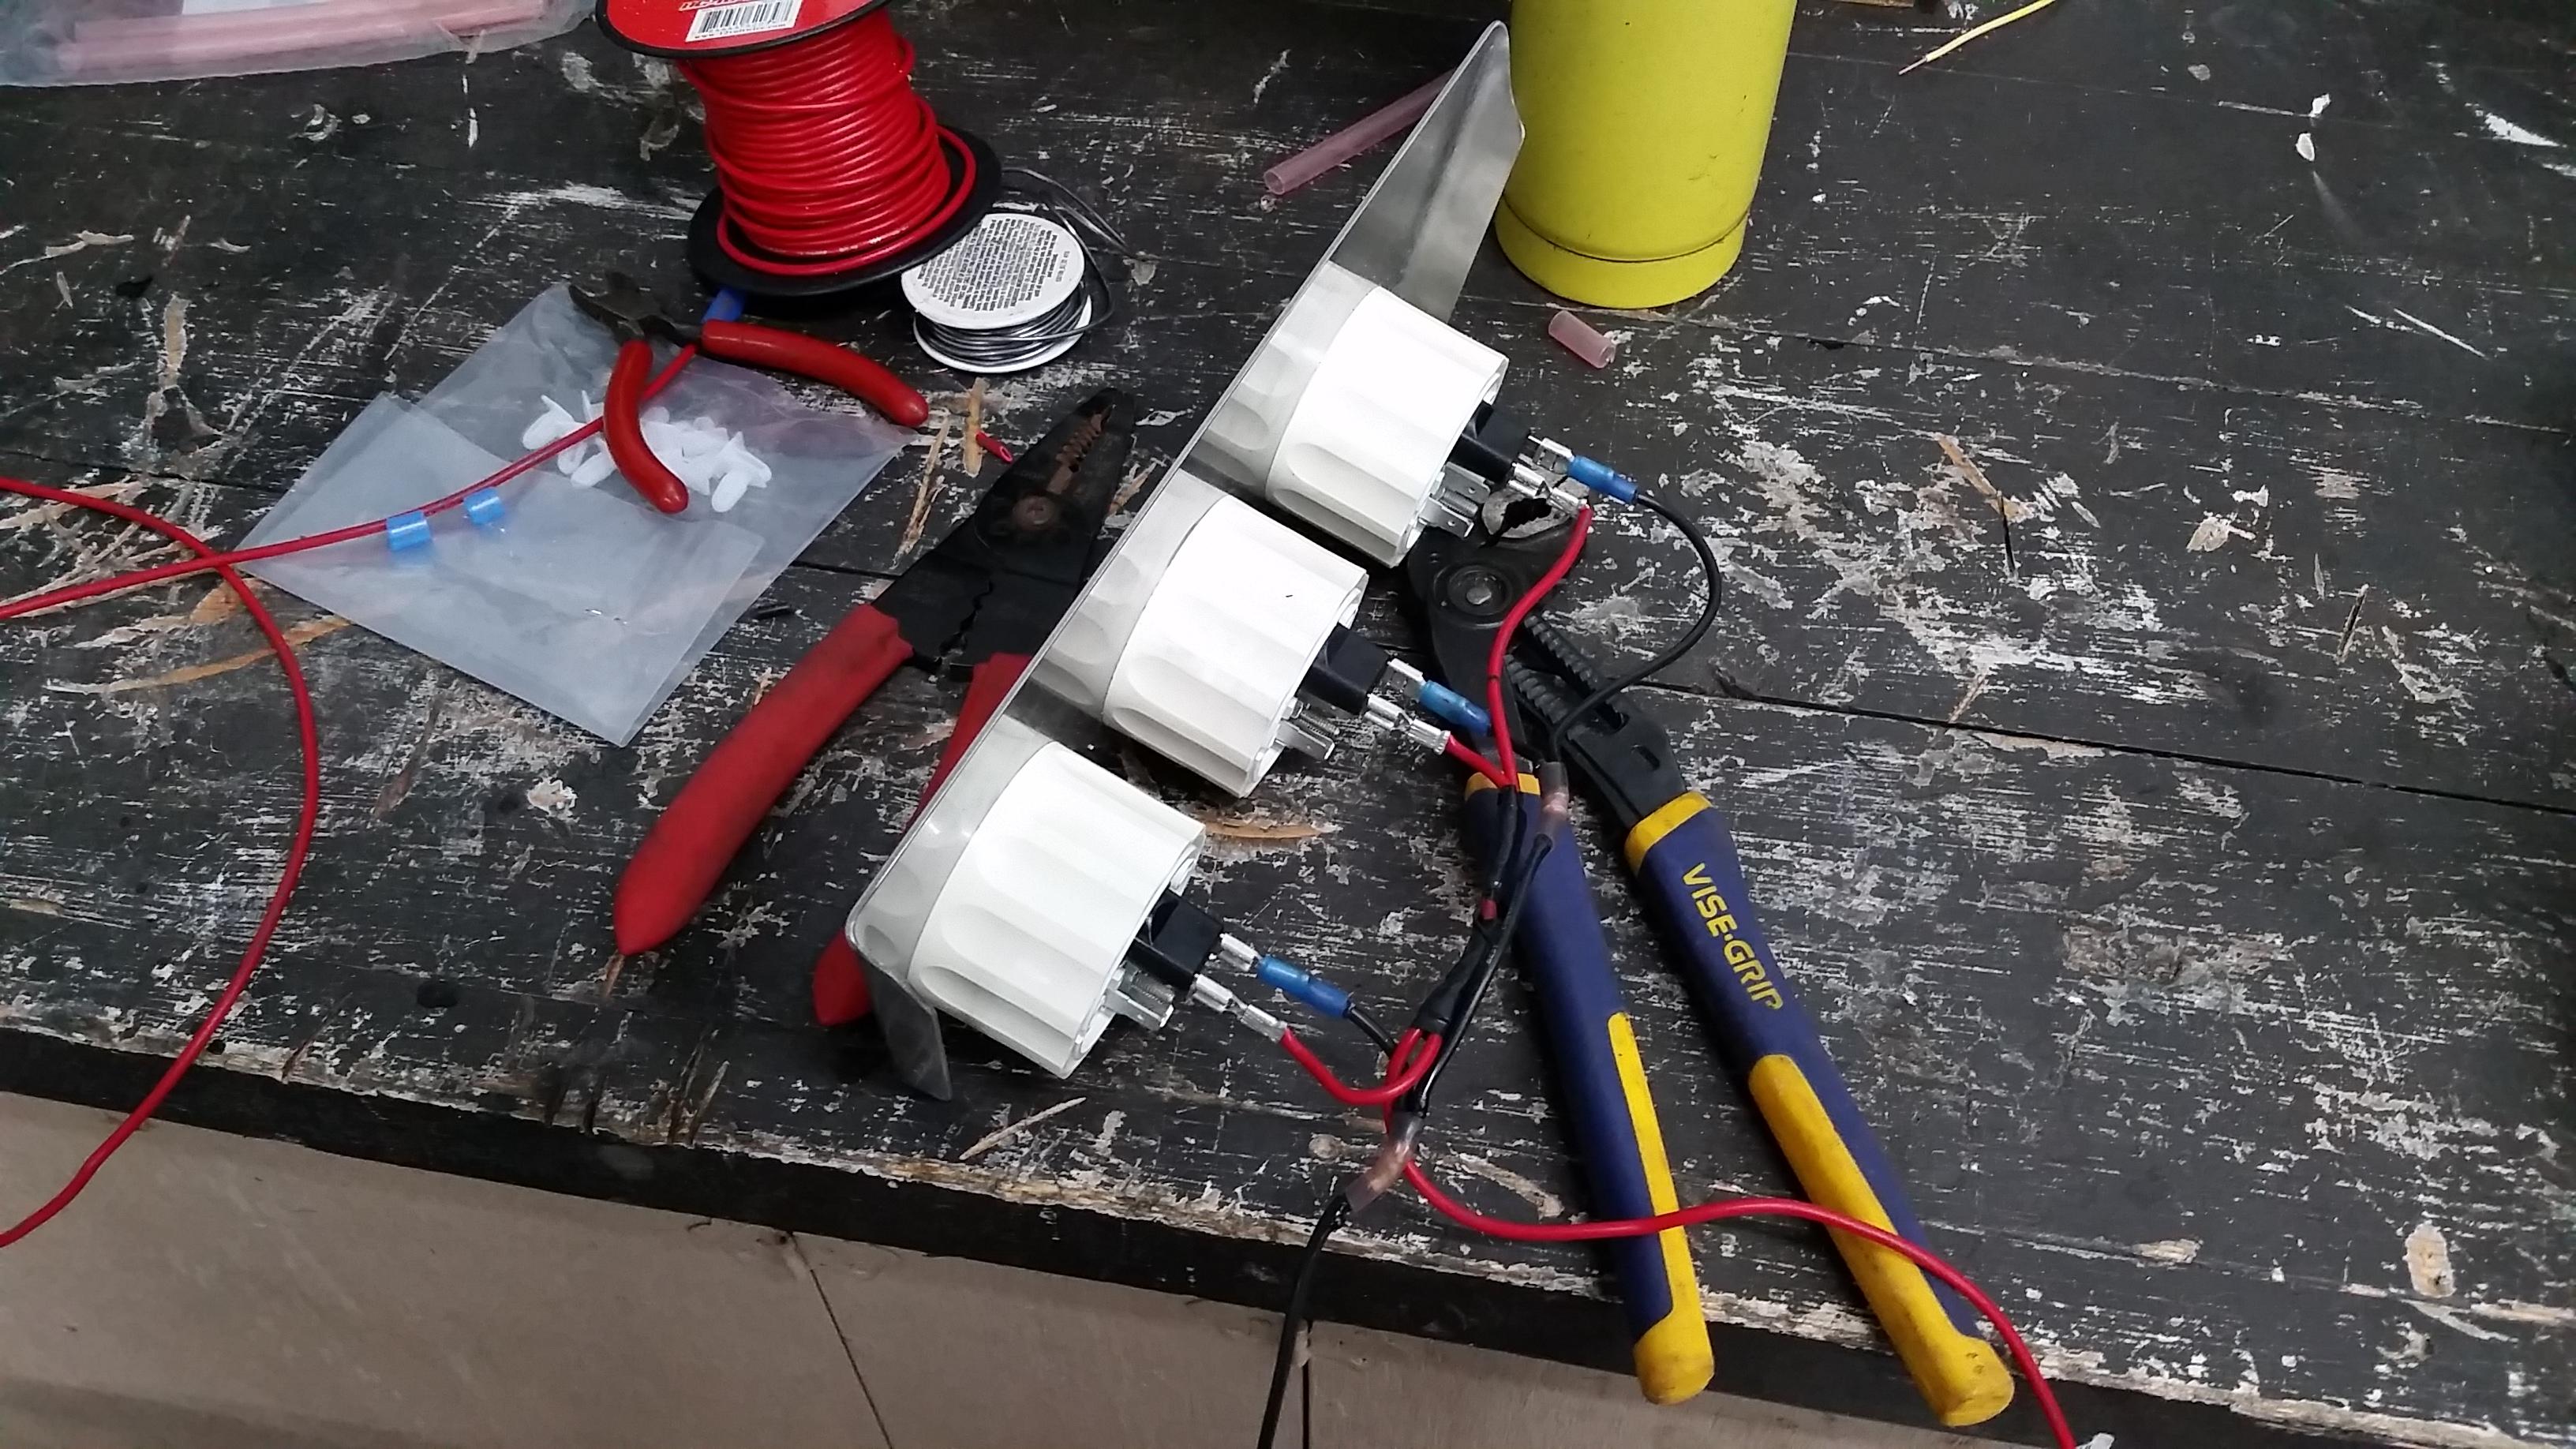
Started working on wiring up the gauges inside the cabin. So far I have the lights for all three done. Plan is to run that power source off the light control switch that runs the rest of the back lighting.
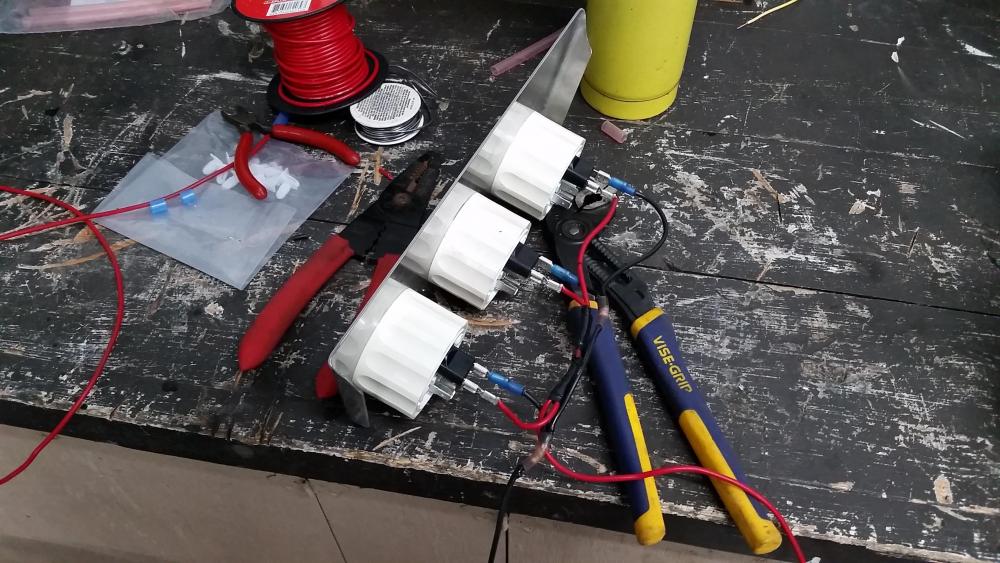
Ran out of the connectors needed for this so I had to take a pause tell tomorrow so I can pick some more up.
Quick question for these as well. Where is the ideal place to splice into for ignition power for the gauges themselves?
Still working on getting the car insured and registered (hobbyist plates) But I'm still hoping to take the car for a short spin down the road and back on Wednesday to make sure everything else is feeling good.
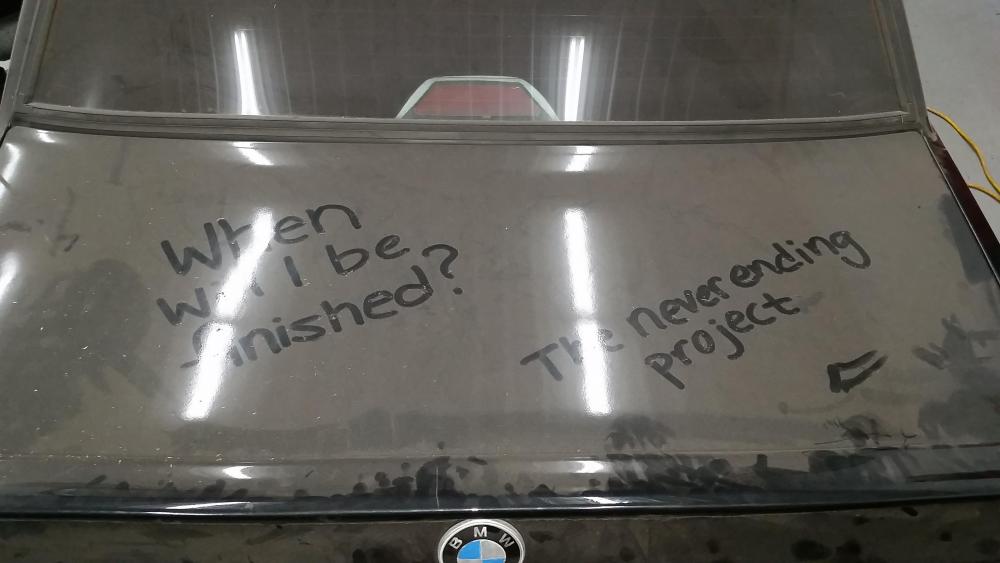
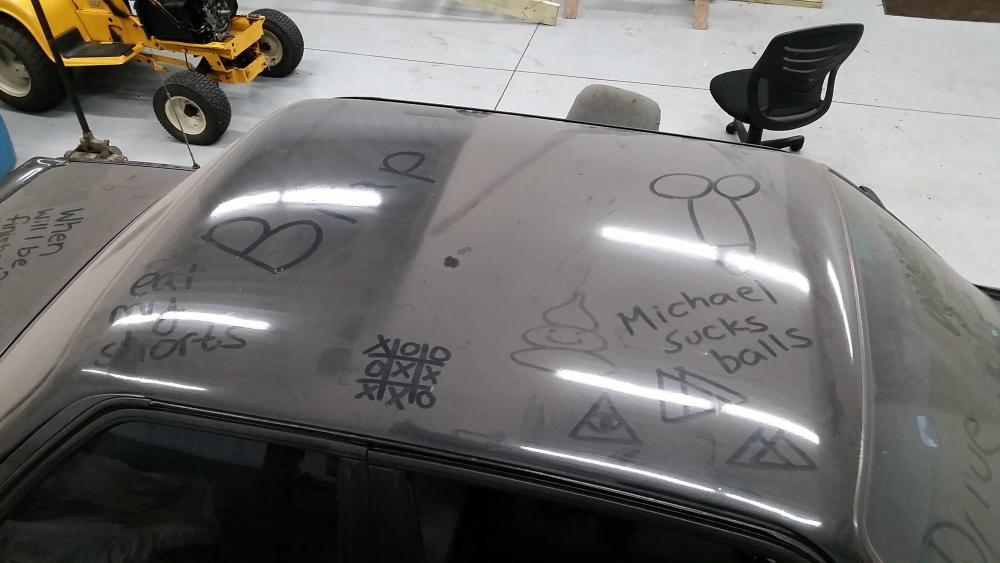
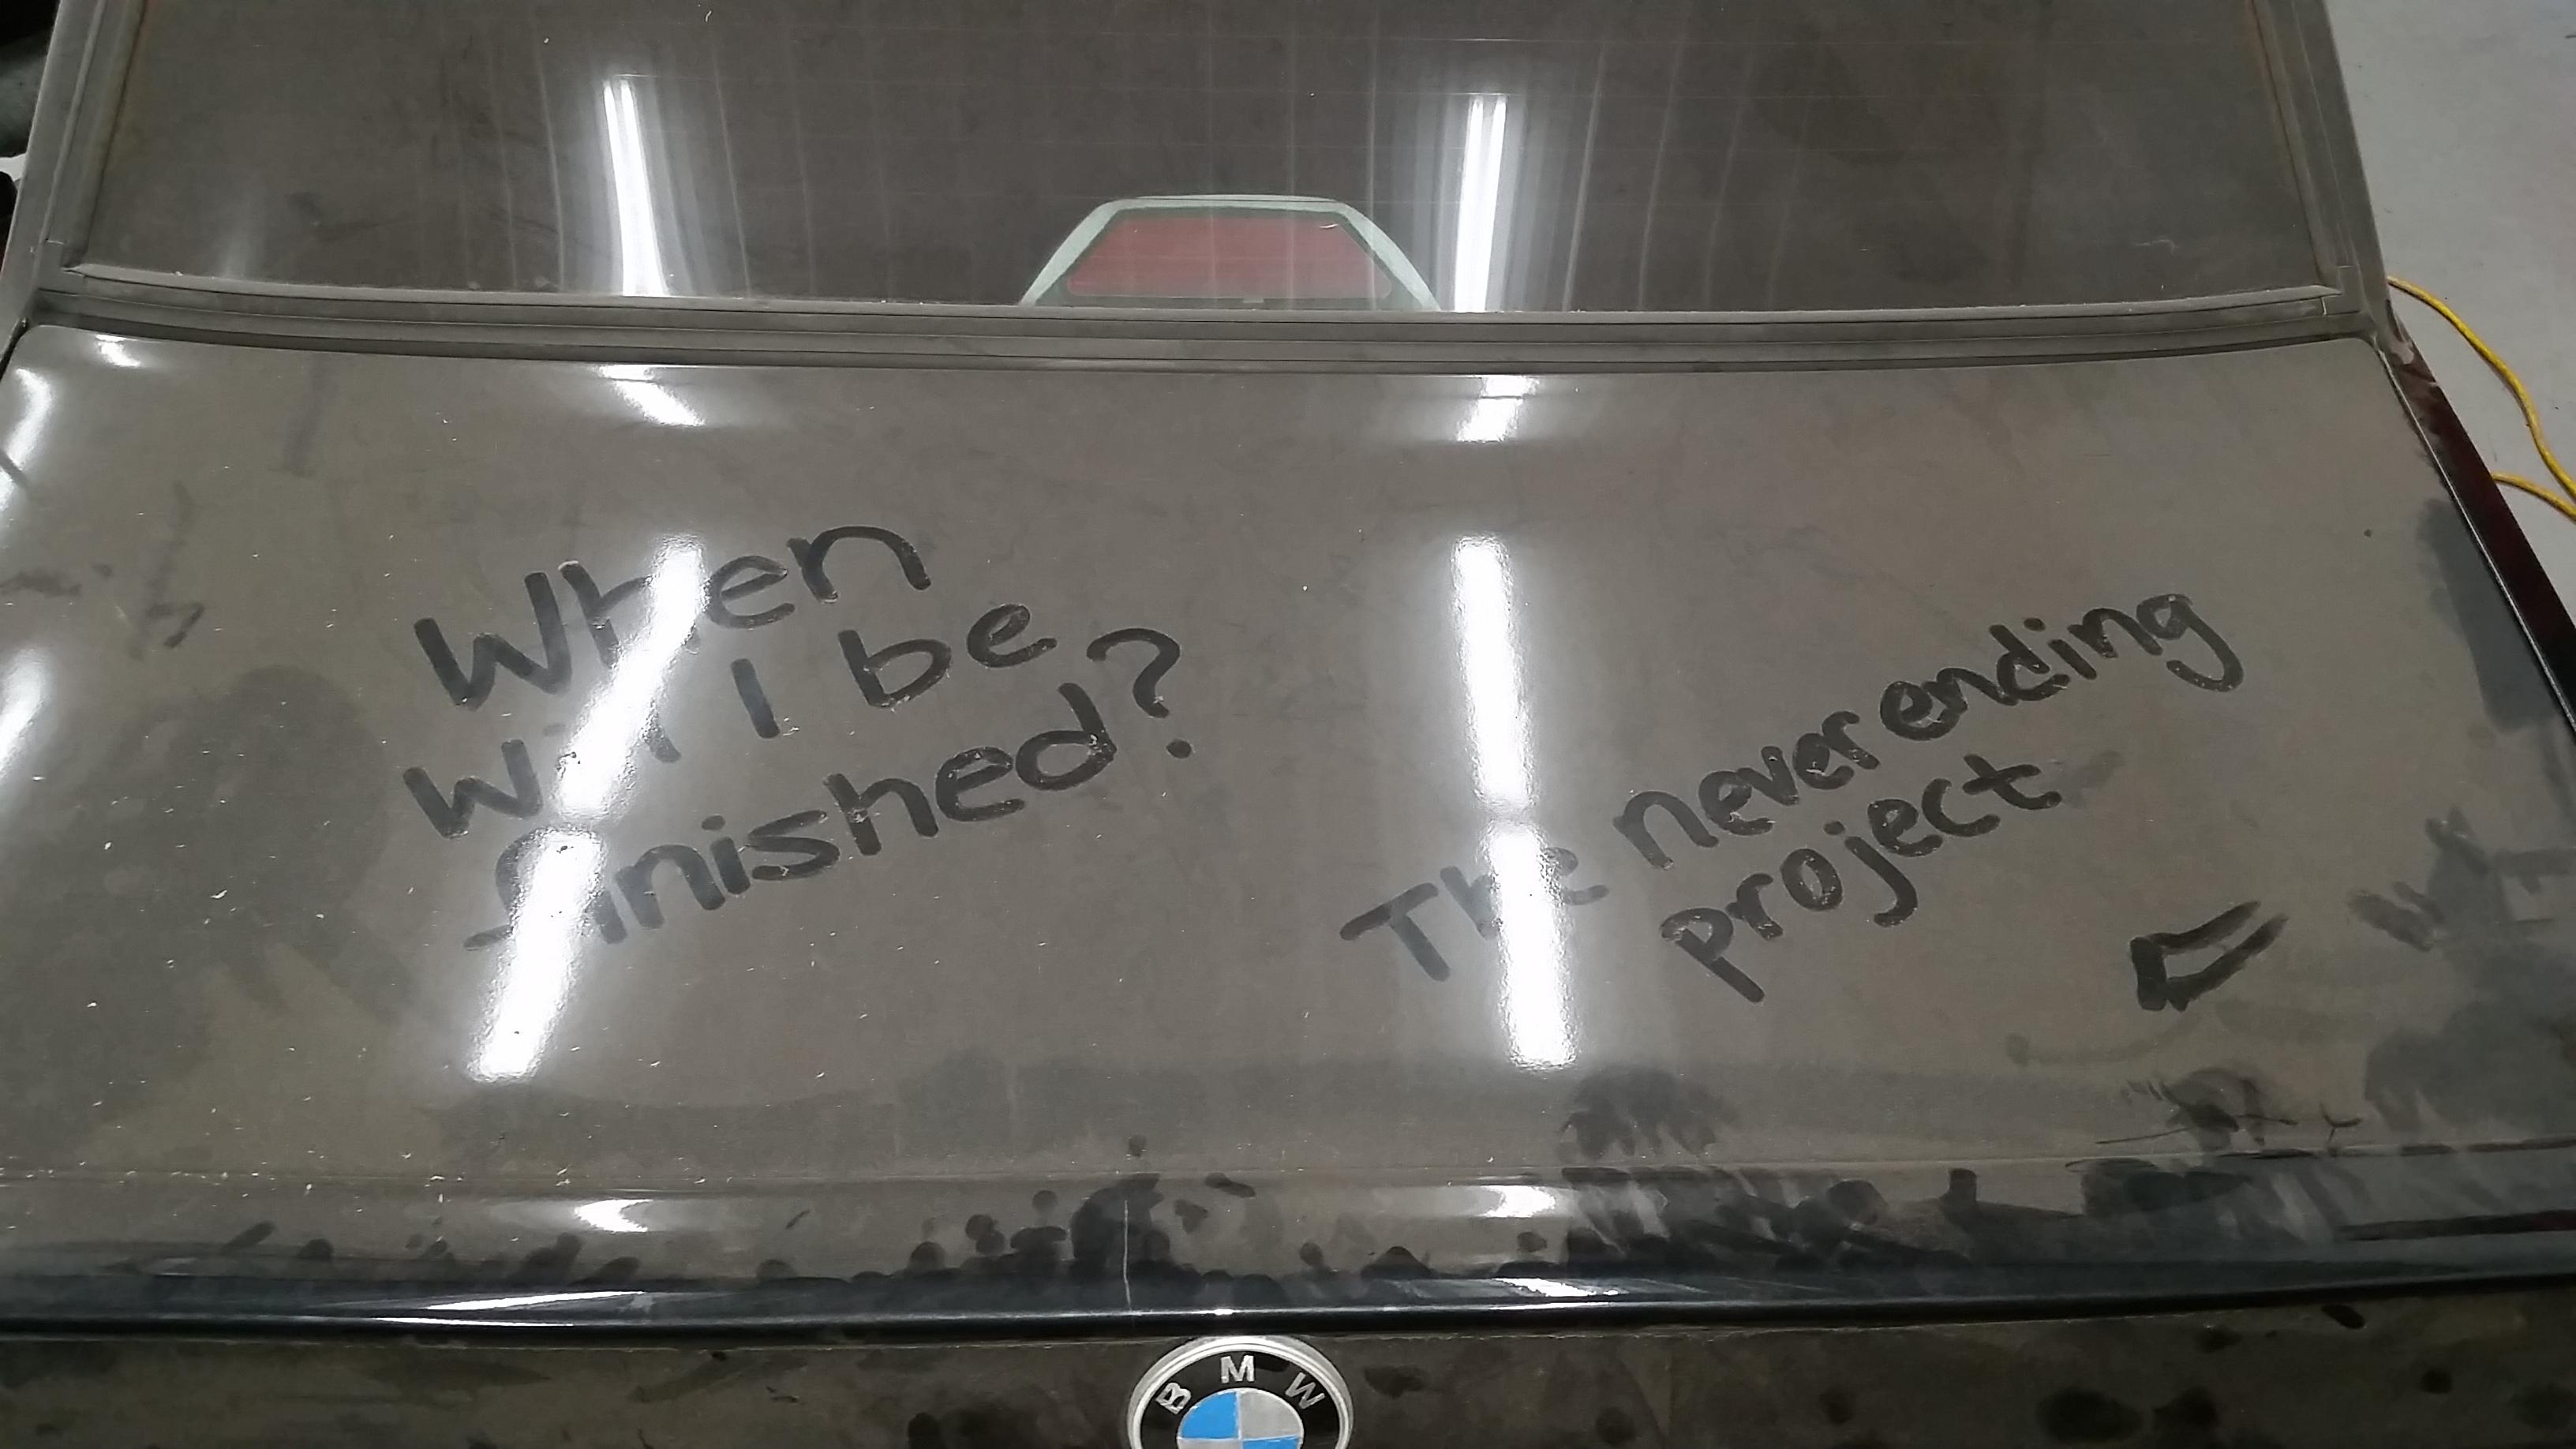
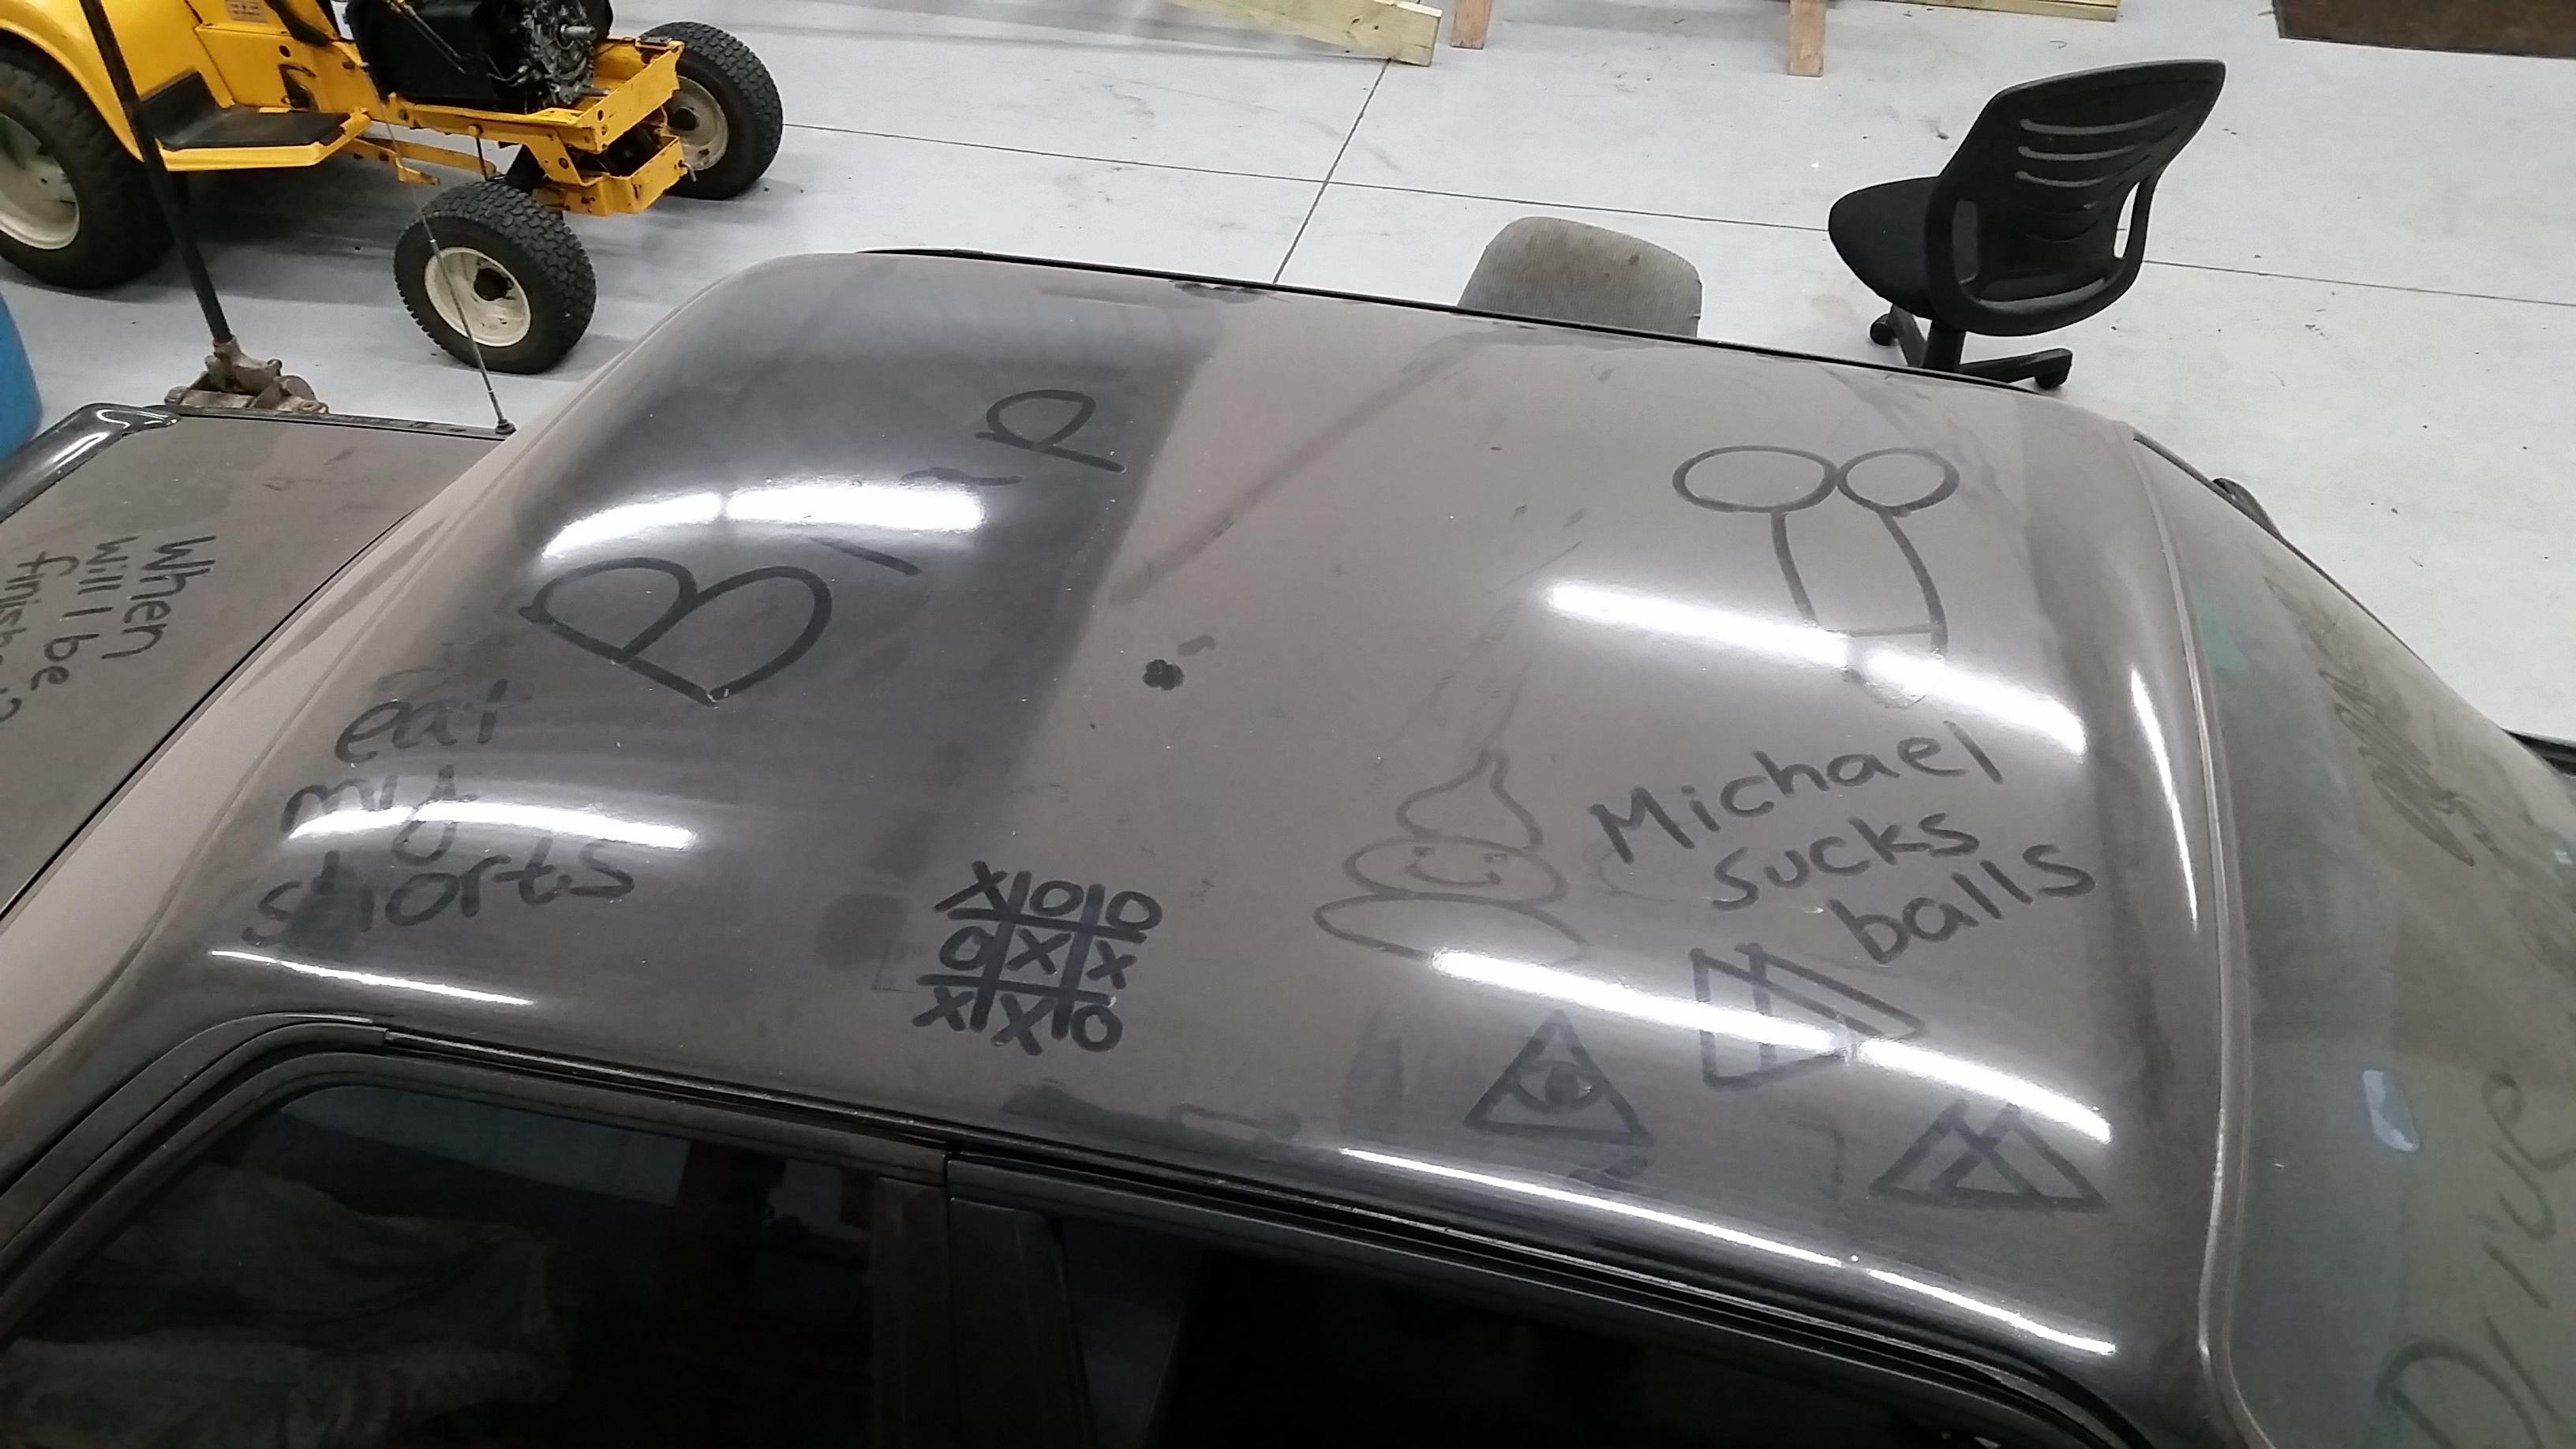
Also, the car badly needs a wash and I have been oh so fortunate of having some great friends who love to write me encouraging notes to keep me motivated.

Stay tuned!
-
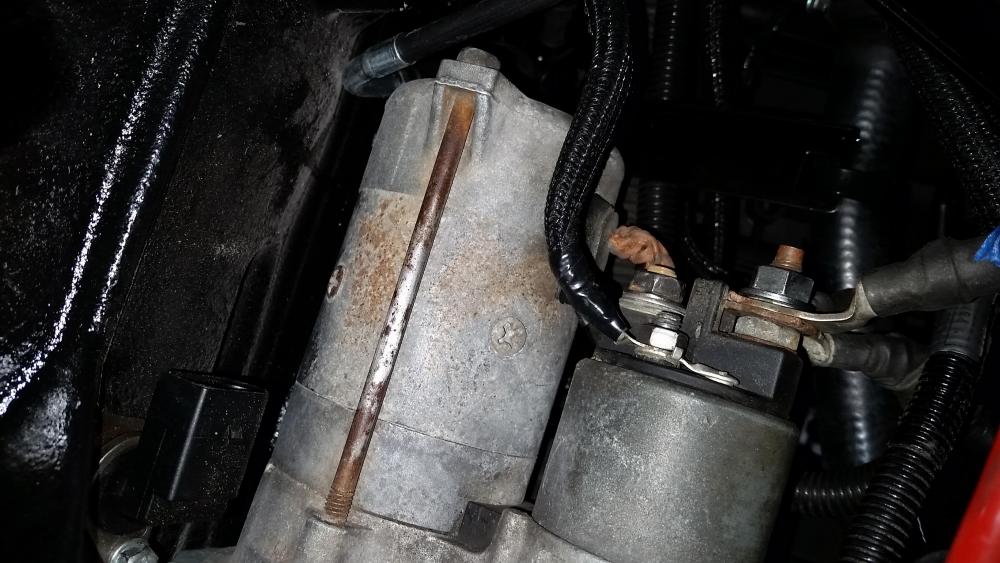
So once I got over to the shop later today I thought over what yall said and went back to start assessing the possibility of a bad ground issue as @jc43089 stated. I went over to the other garage and snagged the jumper cables from the shelf, hooked one clamp to the alternator mounting bracket and the other side to the front subframe mounting bolt. Hopped in the car... turned the key over to start and I was suddenly welcomed with the sweet sweet sound of the starter beginning to crank, hallelujah!!!
Jumped the fuel relay to get some fuel up to the fuel rail, hopped back in the car and she came to life once again.
This is where it gets very odd though. After I ran the motor for a few seconds I shut it off, pulled the jumper cables off and the car started right back up again. Wait, what? Did it just need some kind of encouragement? I shut the car off and started it 5 different times tonight with no issues. I suppose I will leave everything the way it is and further asses the problem if it decides to return.
Thank you to everyone for their helpful feedback!
-
Went through and inspected and cleaned every ground location, turned the key over... nofin.
pulled and tested each of the relays, they are all good.
couple pics of the grounds and wires I checked. I also checked the ground right next to the abs unit and the ground underneath the dash next to the steering colum


Not really sure what to do now
-
4 hours ago, jc43089 said:
Here is a link to the ETM. I assume most of the stuff is E30 wiring for the starter anyway. Here is a screenshot, there is no starter relay, if the black/yellow wire at the starter is getting 12V when the key is turned to the start position then there is a bad ground somewhere.

Thank you for this ^
I'll go ahead and check every ground on the car after work to confirm good clean connections.
2 hours ago, snap said:1) was the car an automatic
2) you started it with the key and same wiring configuration before, correct?
the couple times i couldnt get my car to crank I realized I had the C101 adapter disconnected... oops
1) The car was originally a manual.
2) I never changed any of the wiring up from the last time it ran. Although, nothing was hooked up through the dash for wiring when I started it the first time. Don't know why that would affect it from cranking over though.
C101 connector is hooked up and good to go lol.
-
Alright, I got me a problem.
Got everything thrown back together on the motor. Went to crank it over, nothin.
No crank just a couple clicks from the abs unit and a humming noise from the IAC valve.
So far I have been able to eliminate the starter and battery from the list of suspects.
Reason for this is because I pulled all the wires off the starter solenoid, pulled the battery from the car and hooked up jumper cables straight to the starter and grounded to the housing. Used the old screwdriver trick and was able to get the starter to spin the engine no problem.
After confirming this I threw everything back together.
Went ahead and pulled the engine ground off and cleaned both sides to confirm a good clean ground as well as all the wires hooked on to the battery cable mounting block in the engine bay and gave it another try, nothin.
Checked power coming to the starter from the main battery cable, got a good constant +12 volts.
Checked power coming to the small post from the ignition wire (black and yellow) while I had a friend turn the key over, +12 volts.
Flipped the relays around between the O2, fuel pump, and starter, nothin.
I'm stumped guys.
-
7 hours ago, jc43089 said:
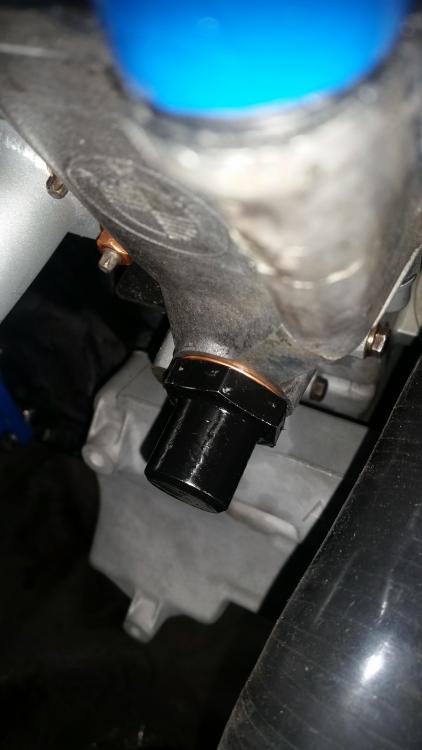
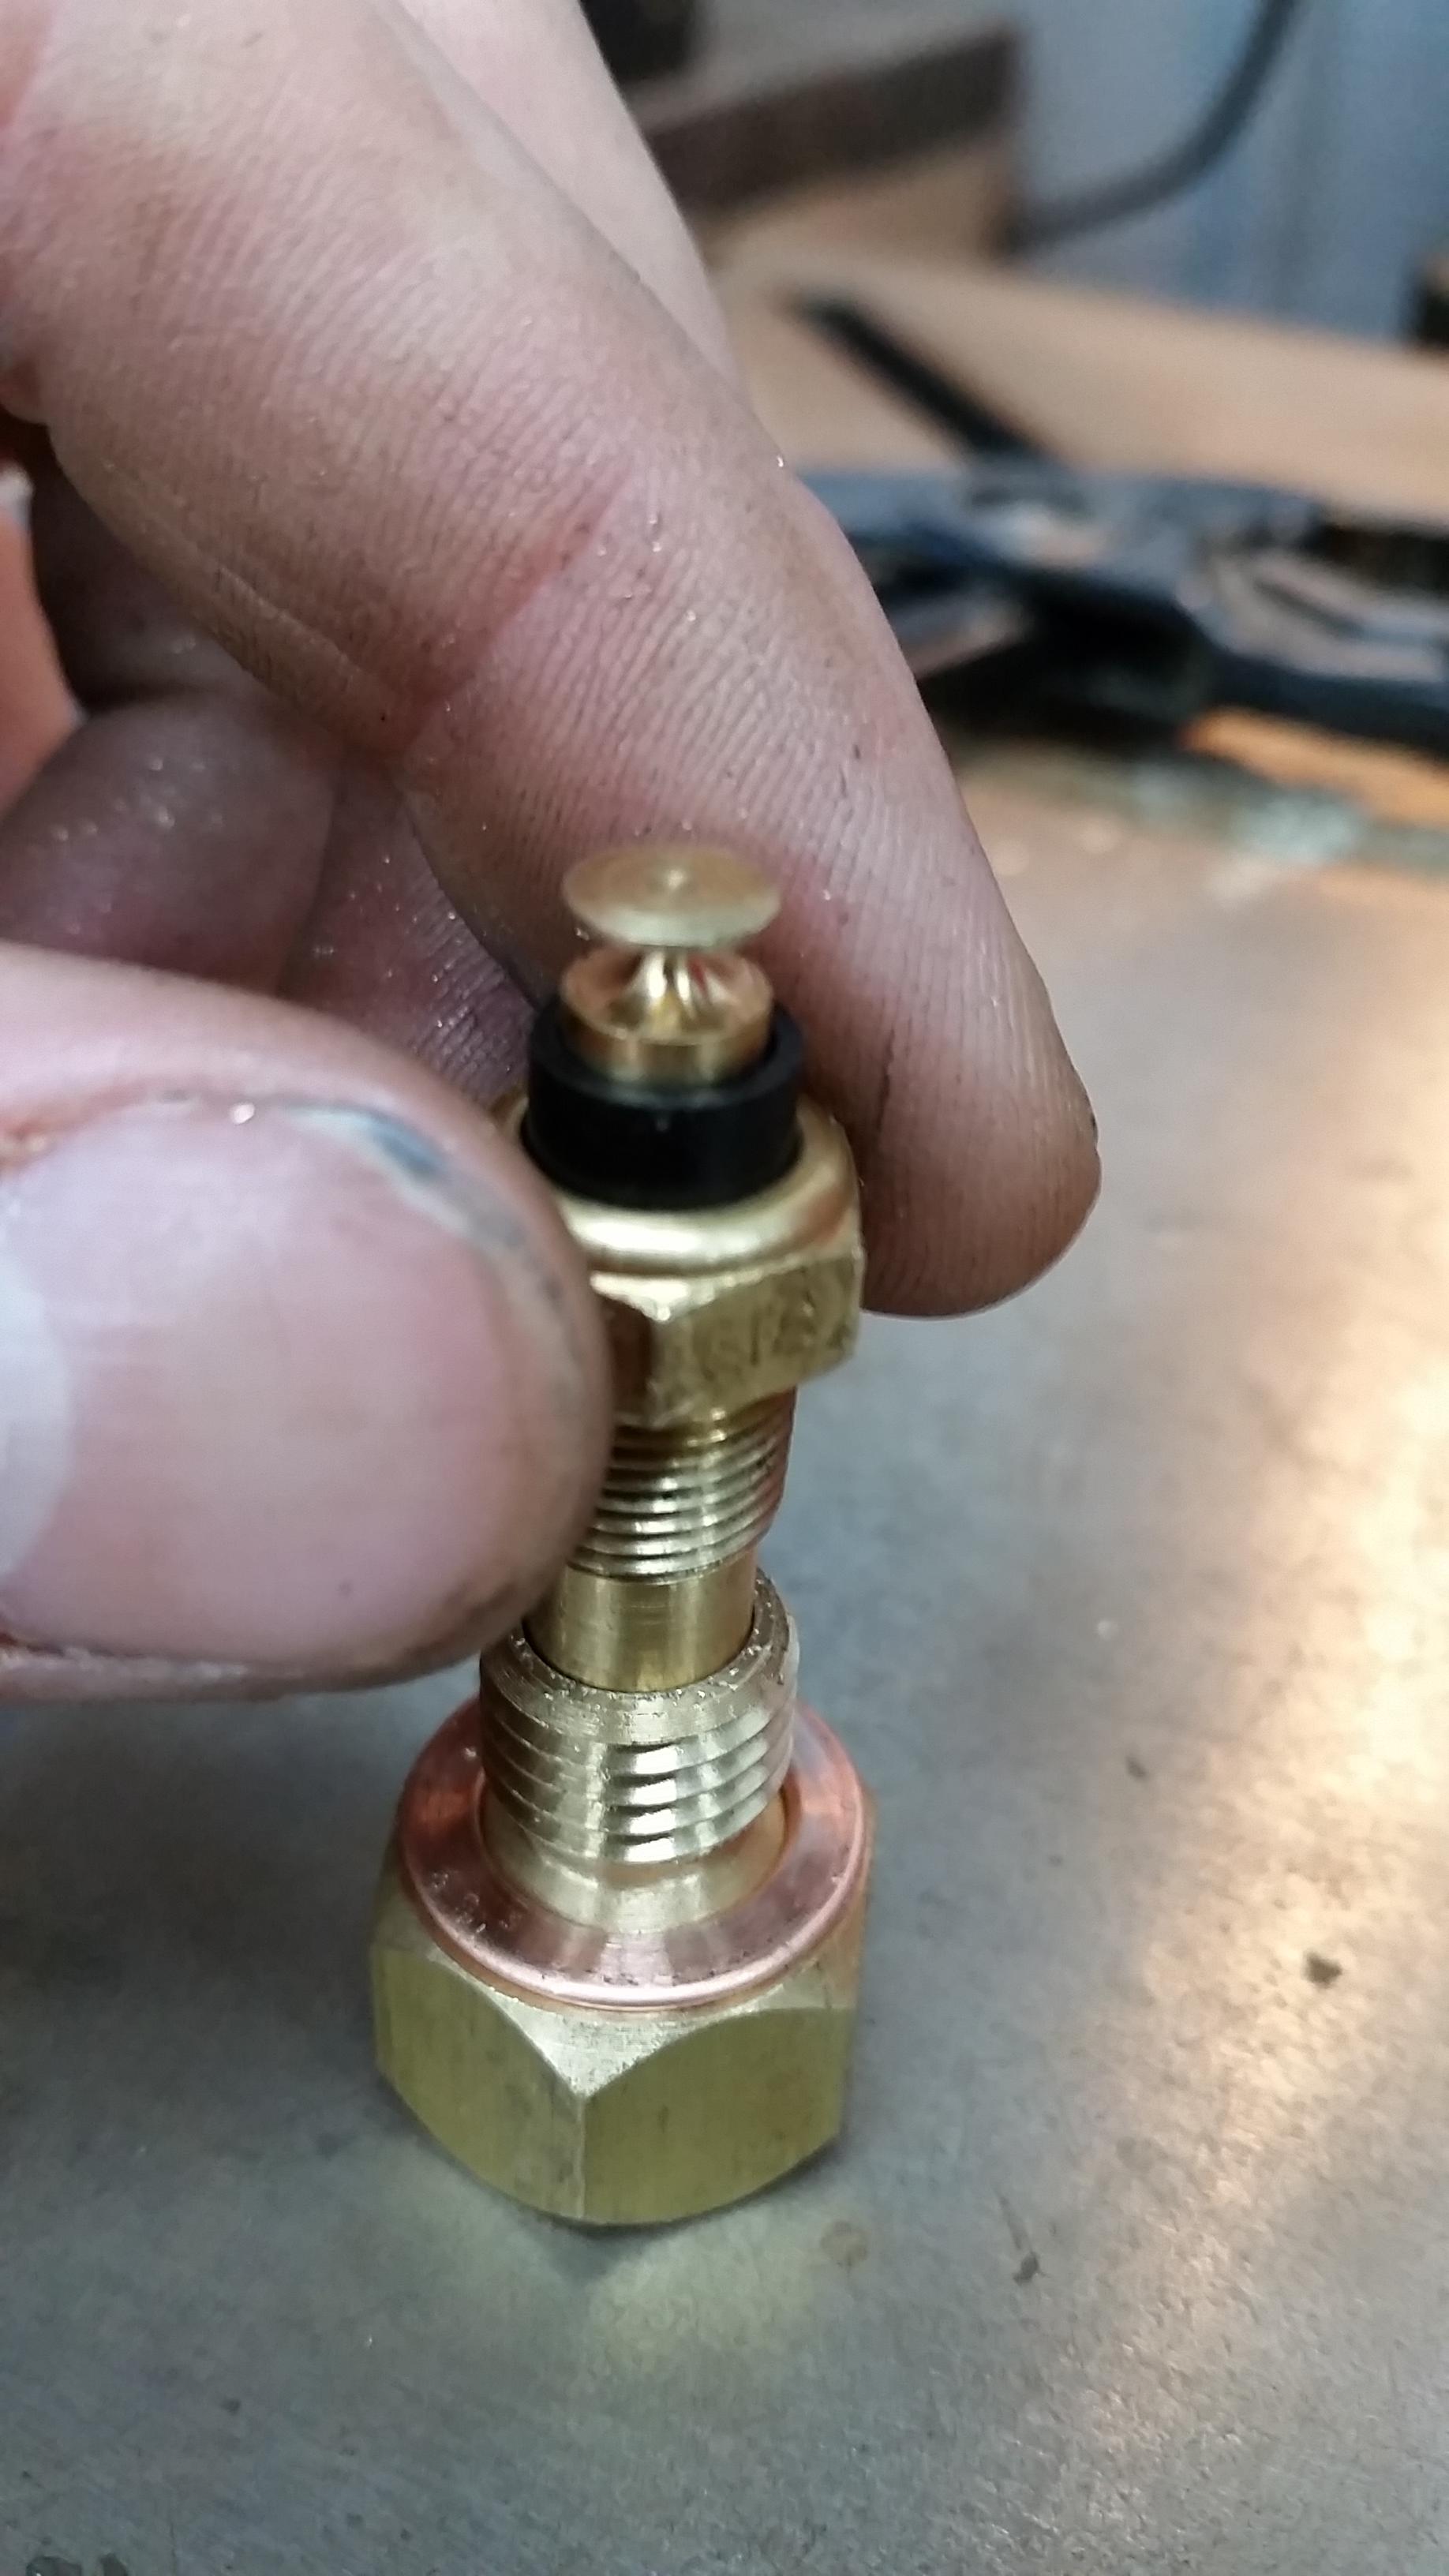
Are you installing it where the TB heater nipple came from? I thought that was M12x1.5 and the sensors whether you have 1 or 2 are M14x1.5.
All the threaded holes there are gonna be a M12 x 1.5.
-
22 minutes ago, KaiserRolls said:
What gauge and sensor did you end up buying?
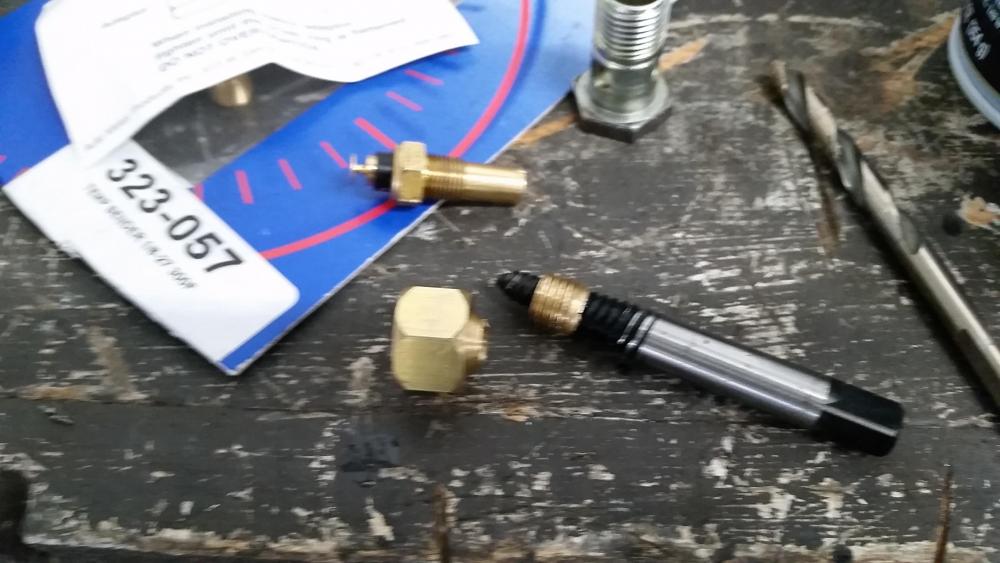
Gauge is a vdo 310105
Sending unit is a vdo 323900 (0-250 degree)
-
On 7/5/2018 at 10:27 AM, Earl said:
The Viilante Leggera is the 130r if you wanted to find them Mike
Thank you for this! But, I think for now tell I can do some more research and make up my mind I'll be running with the original steering wheel.
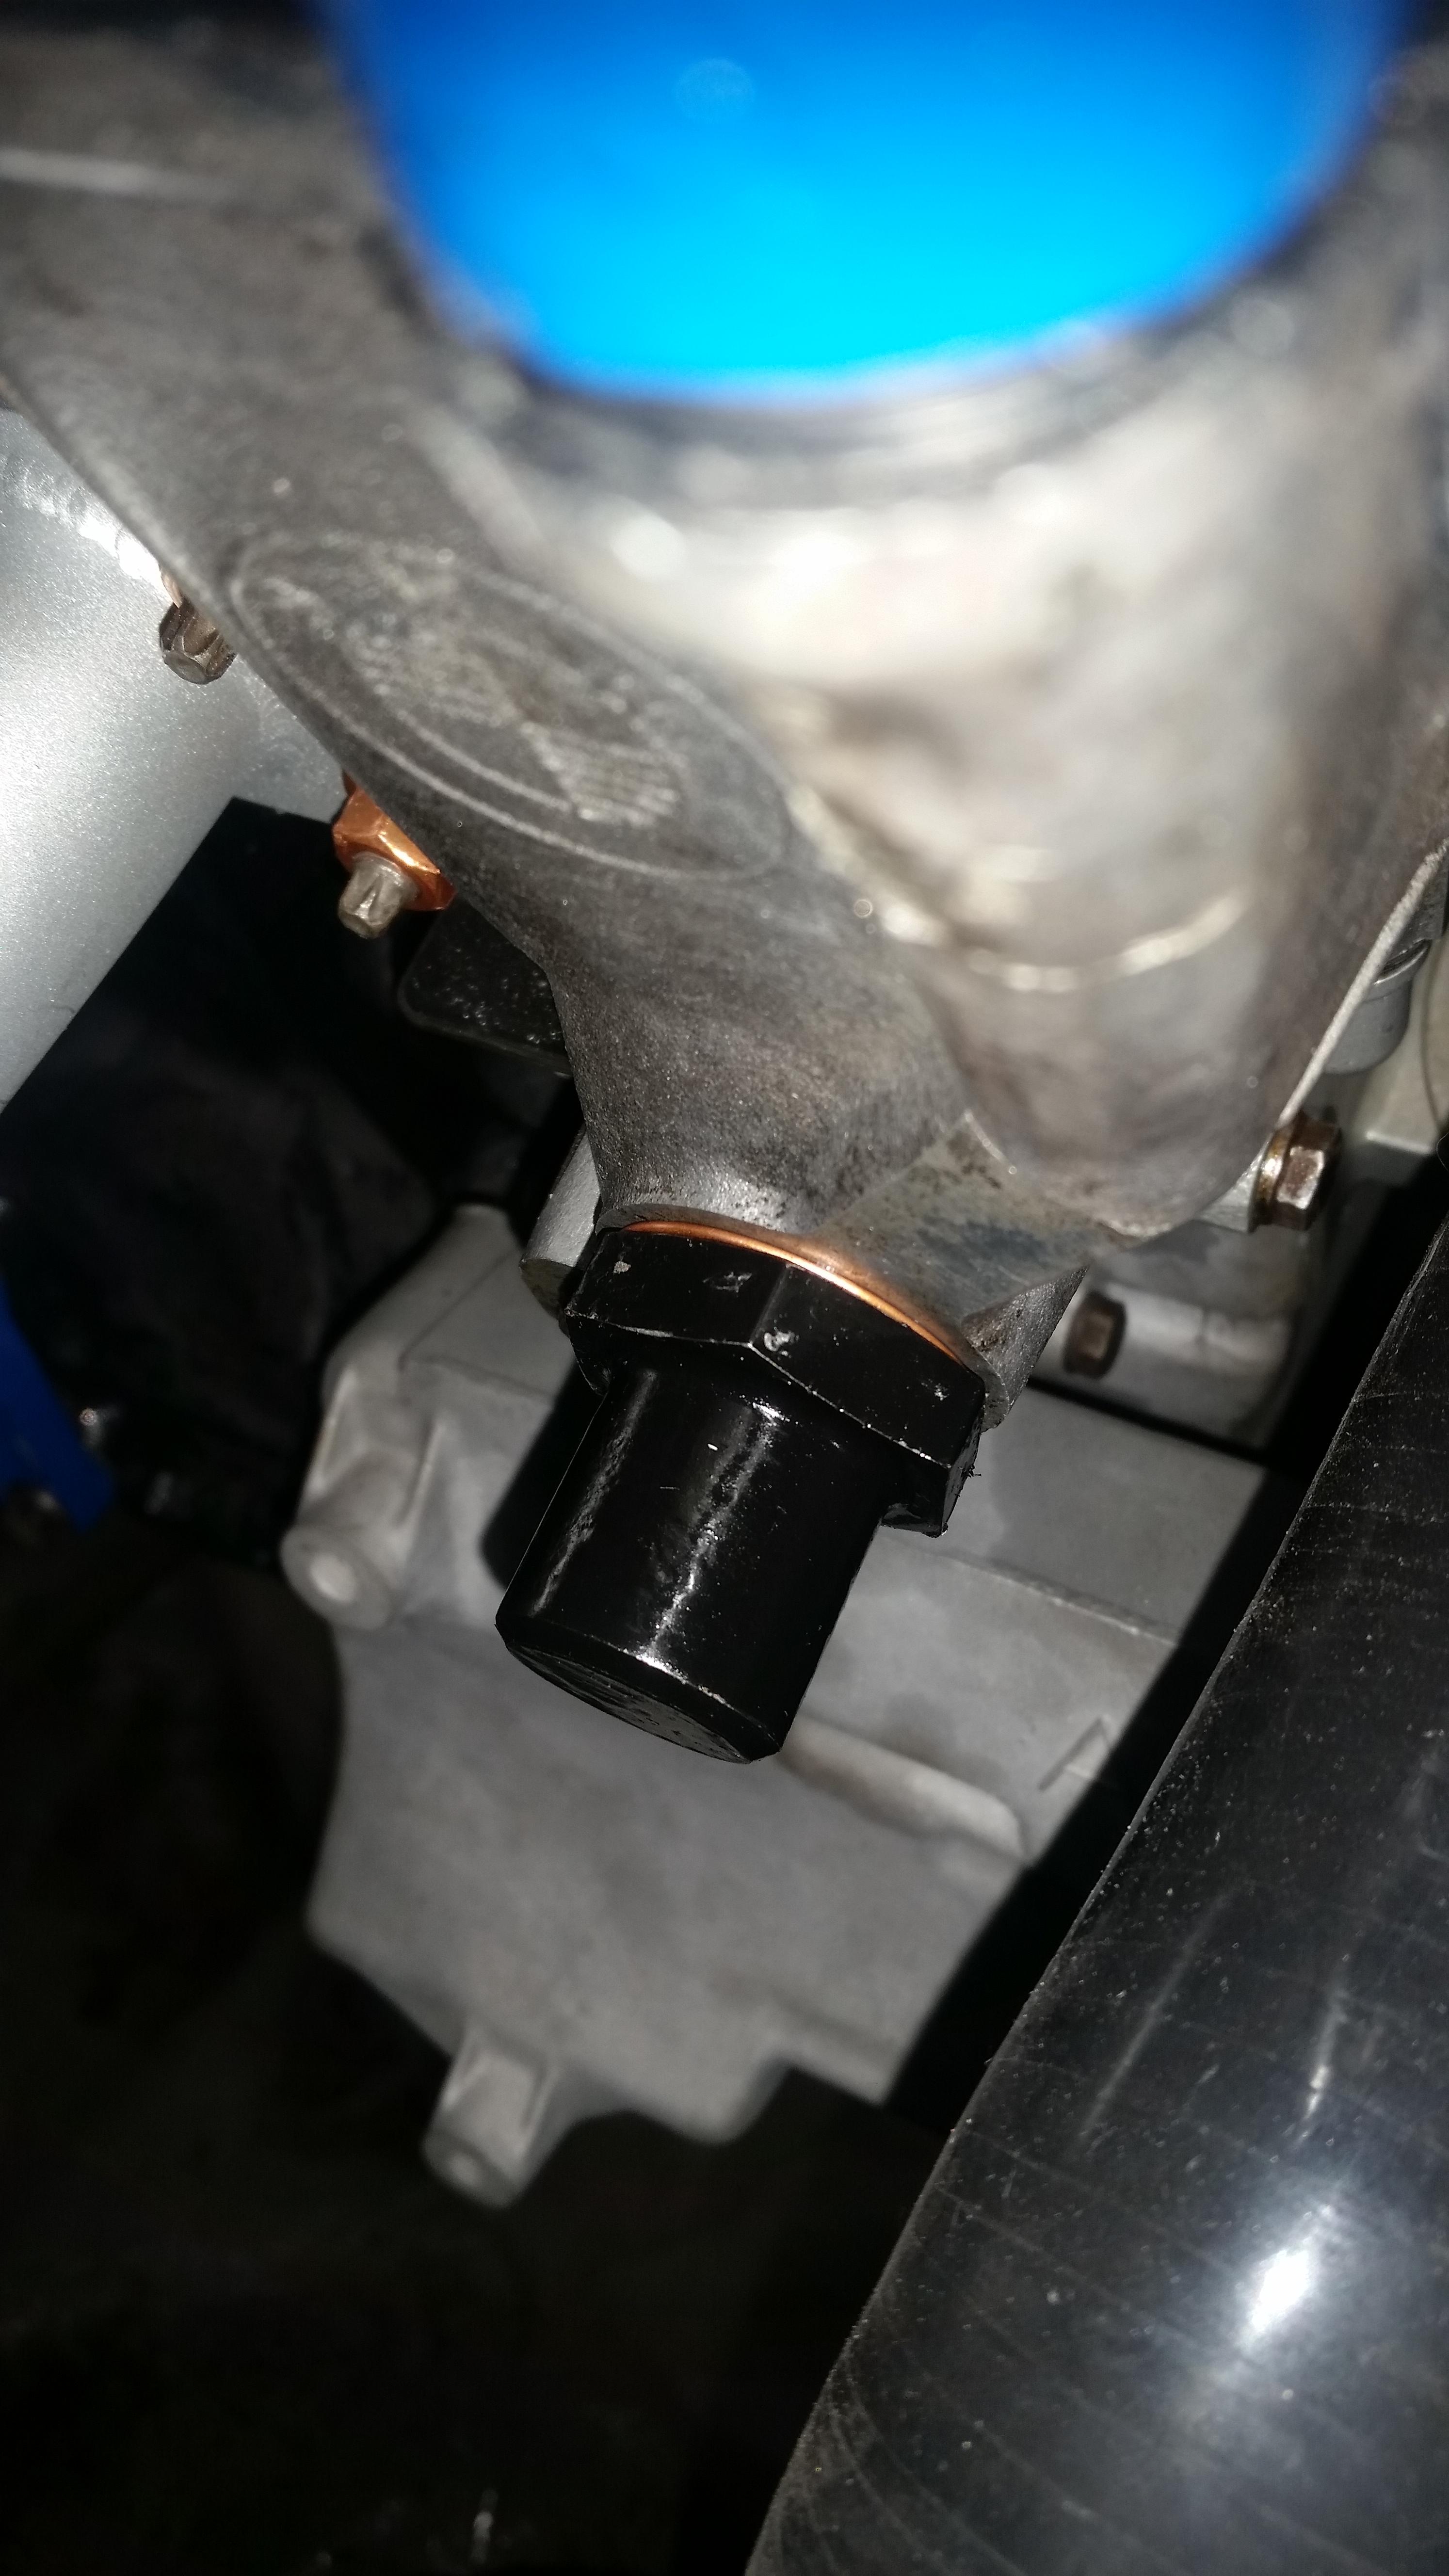
On 7/3/2018 at 8:49 AM, jc43089 said:The threads in the head for the temp sensor are not NPT. It is an M14x1.5 mm straight thread. I don't know what the VDO sensor is but it should not be just cranked in there. The head does not have tapered threads and should seal with a crush washer like the factory sensor, it will not seal otherwise.
I have an Autometer gauge and the sender is 1/8" NPT and I bought an adapter from 1/8 NPT to M14x1.5.
Just so there's no confusion, the threads are actually a M12 x 1.5. The adapters I received yesterday did not come with that size threads (should have double checked before ordering). However, I did get the right one ordered from Auto Meter that should be here tomorrow.
-
On 6/30/2018 at 1:24 PM, 6inarowmakesitgo! said:
Make sure you use plenty of zddp with every oil change
Is this only necessary tell I reach 5 or 6,000 miles when I switch over to synthetic?
-
On 7/3/2018 at 4:59 AM, snap said:
That spal fan will pull too much current on the inrush. I tried wiring it to both high and low speed circuits. It would always pop the fuse on one, and would pop it one in ten times on the other. Unfortunately the only way to wire it reliably is to use the Spal fan harness. i was able to do it cleanly along the passenger side fender.
Thank you for the info. I actually purchased the spal wiring harness when I bought the fan but then figured I wouldn't need it if I can use the factory wiring. I suppose it will come in handy after all.
On 7/2/2018 at 11:38 PM, straight6pwr said:IIRC, you can swap the seat belt receptacle to the other side to make that seat temporarily safe to use.
for the spider hose, i believe i trimmed the end that hooks to the heater core pipes to let it sit straighter. its not designed for the e30 chassis, obviously, so its not a perfect fit. however, I don't that that kink is going to cause you a problem, either.
here's your info for the aux fan wiring: https://www.r3vlimited.com/board/showthread.php?t=210783
Well it seems the seats may be here sooner then I thought...
")
I fiddled around with the spider coolant hose again last night and I got it to where the kink is very minimal and should work fine. I did trim it down a bit as well which definitely helped.
On 7/3/2018 at 4:59 AM, snap said:fyi, that exhaust is going to be loud
Good
On 7/3/2018 at 8:49 AM, jc43089 said:The threads in the head for the temp sensor are not NPT. It is an M14x1.5 mm straight thread. I don't know what the VDO sensor is but it should not be just cranked in there. The head does not have tapered threads and should seal with a crush washer like the factory sensor, it will not seal otherwise.
I have an Autometer gauge and the sender is 1/8" NPT and I bought an adapter from 1/8 NPT to M14x1.5.
I ordered an assortment of metric adapters that should be here tomorrow. Hopefully it does the trick. Thx!
On 7/3/2018 at 2:43 AM, Earl said:Nice progress. What steering wheel were you going with?
http://www.renownusa.com/product/renown-130r-motorsport-competition
-
More updates...
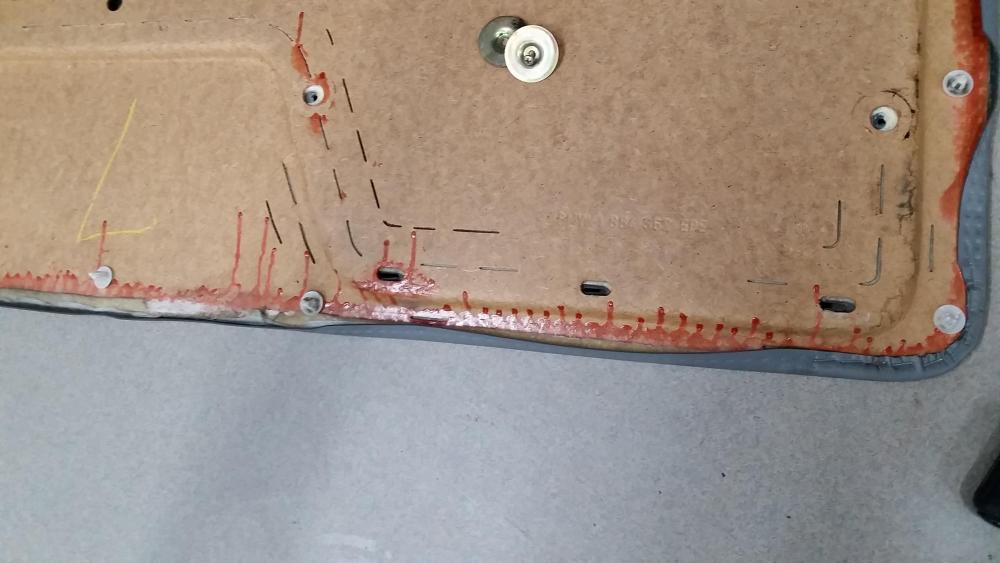
Interior is just about done. Unfortunately the vinyl on both the driver and passenger side door cards is peeling away. Working on fixing them at the moment as the vinyl at the bottom has unglued itself from the molding pretty much along the entire bottom.
Thinking of trying some epoxy or gorilla glue, we'll see what happens.
For the rest of the interior, I am pretty much finished up. Still working on finding a glove box. So far I'm loving the way the dash looks in the car. Was thinking I would eventually flock the rest of the pieces but now I'm not really sure it's necessary, let me know what you guys think. The steering wheel I was planning on ordering is currently sold out and won't be available again tell August so for now I will be rocking the stock steering wheel. I should also throw in that before, I was having trouble figuring out how to straighten up the shifter and carrier but after installing the shifter boot and knob It looks nice and straight and shifts into every gear very well!
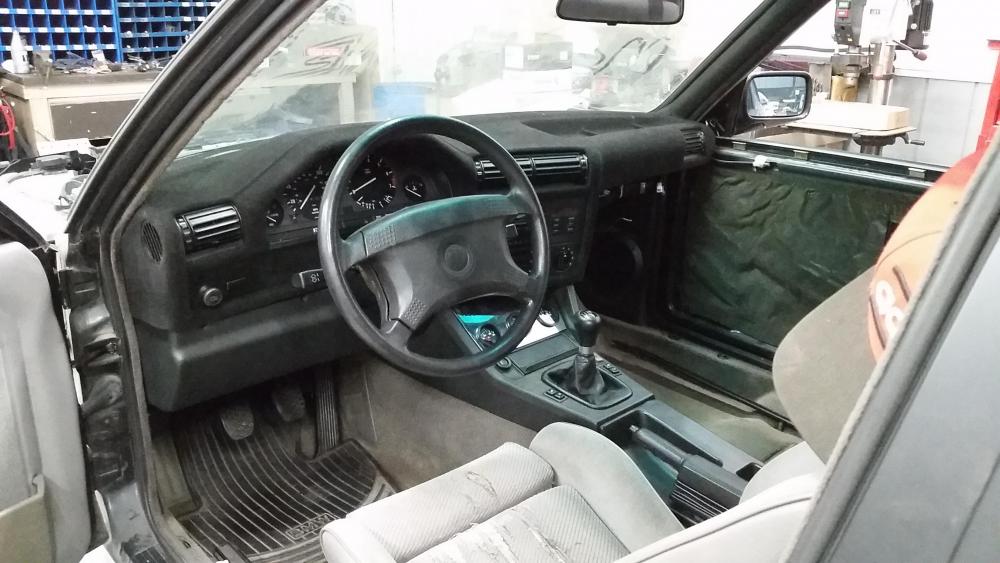
As for the seats, I did find another set of sport seats for the car. Unfortunately they are being shipped from Florida and will probably not be here for a couple weeks. So, for the time being I installed the passenger seat on the driver side. I do understand the seat belt buckle will now be on the wrong side so I am not driving the car far (down the road and back), just to get the engine up to temp and further assess my timing cover head gasket issues and hope that with some kind of miracle it seals up (I know I know, not a chance. Shutup and let me dream!)
On to other things...
Fan
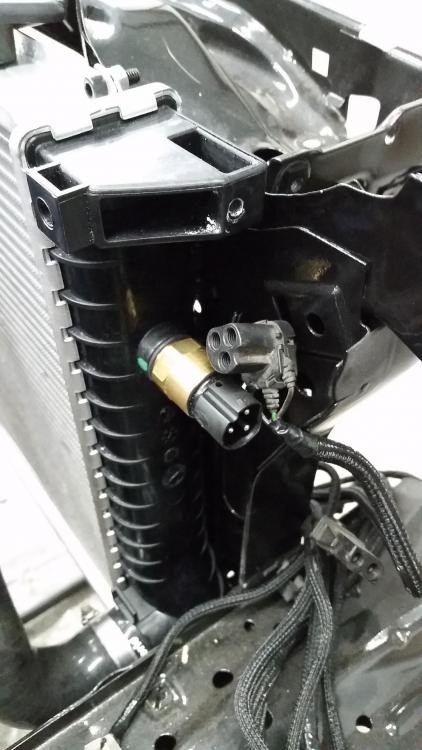
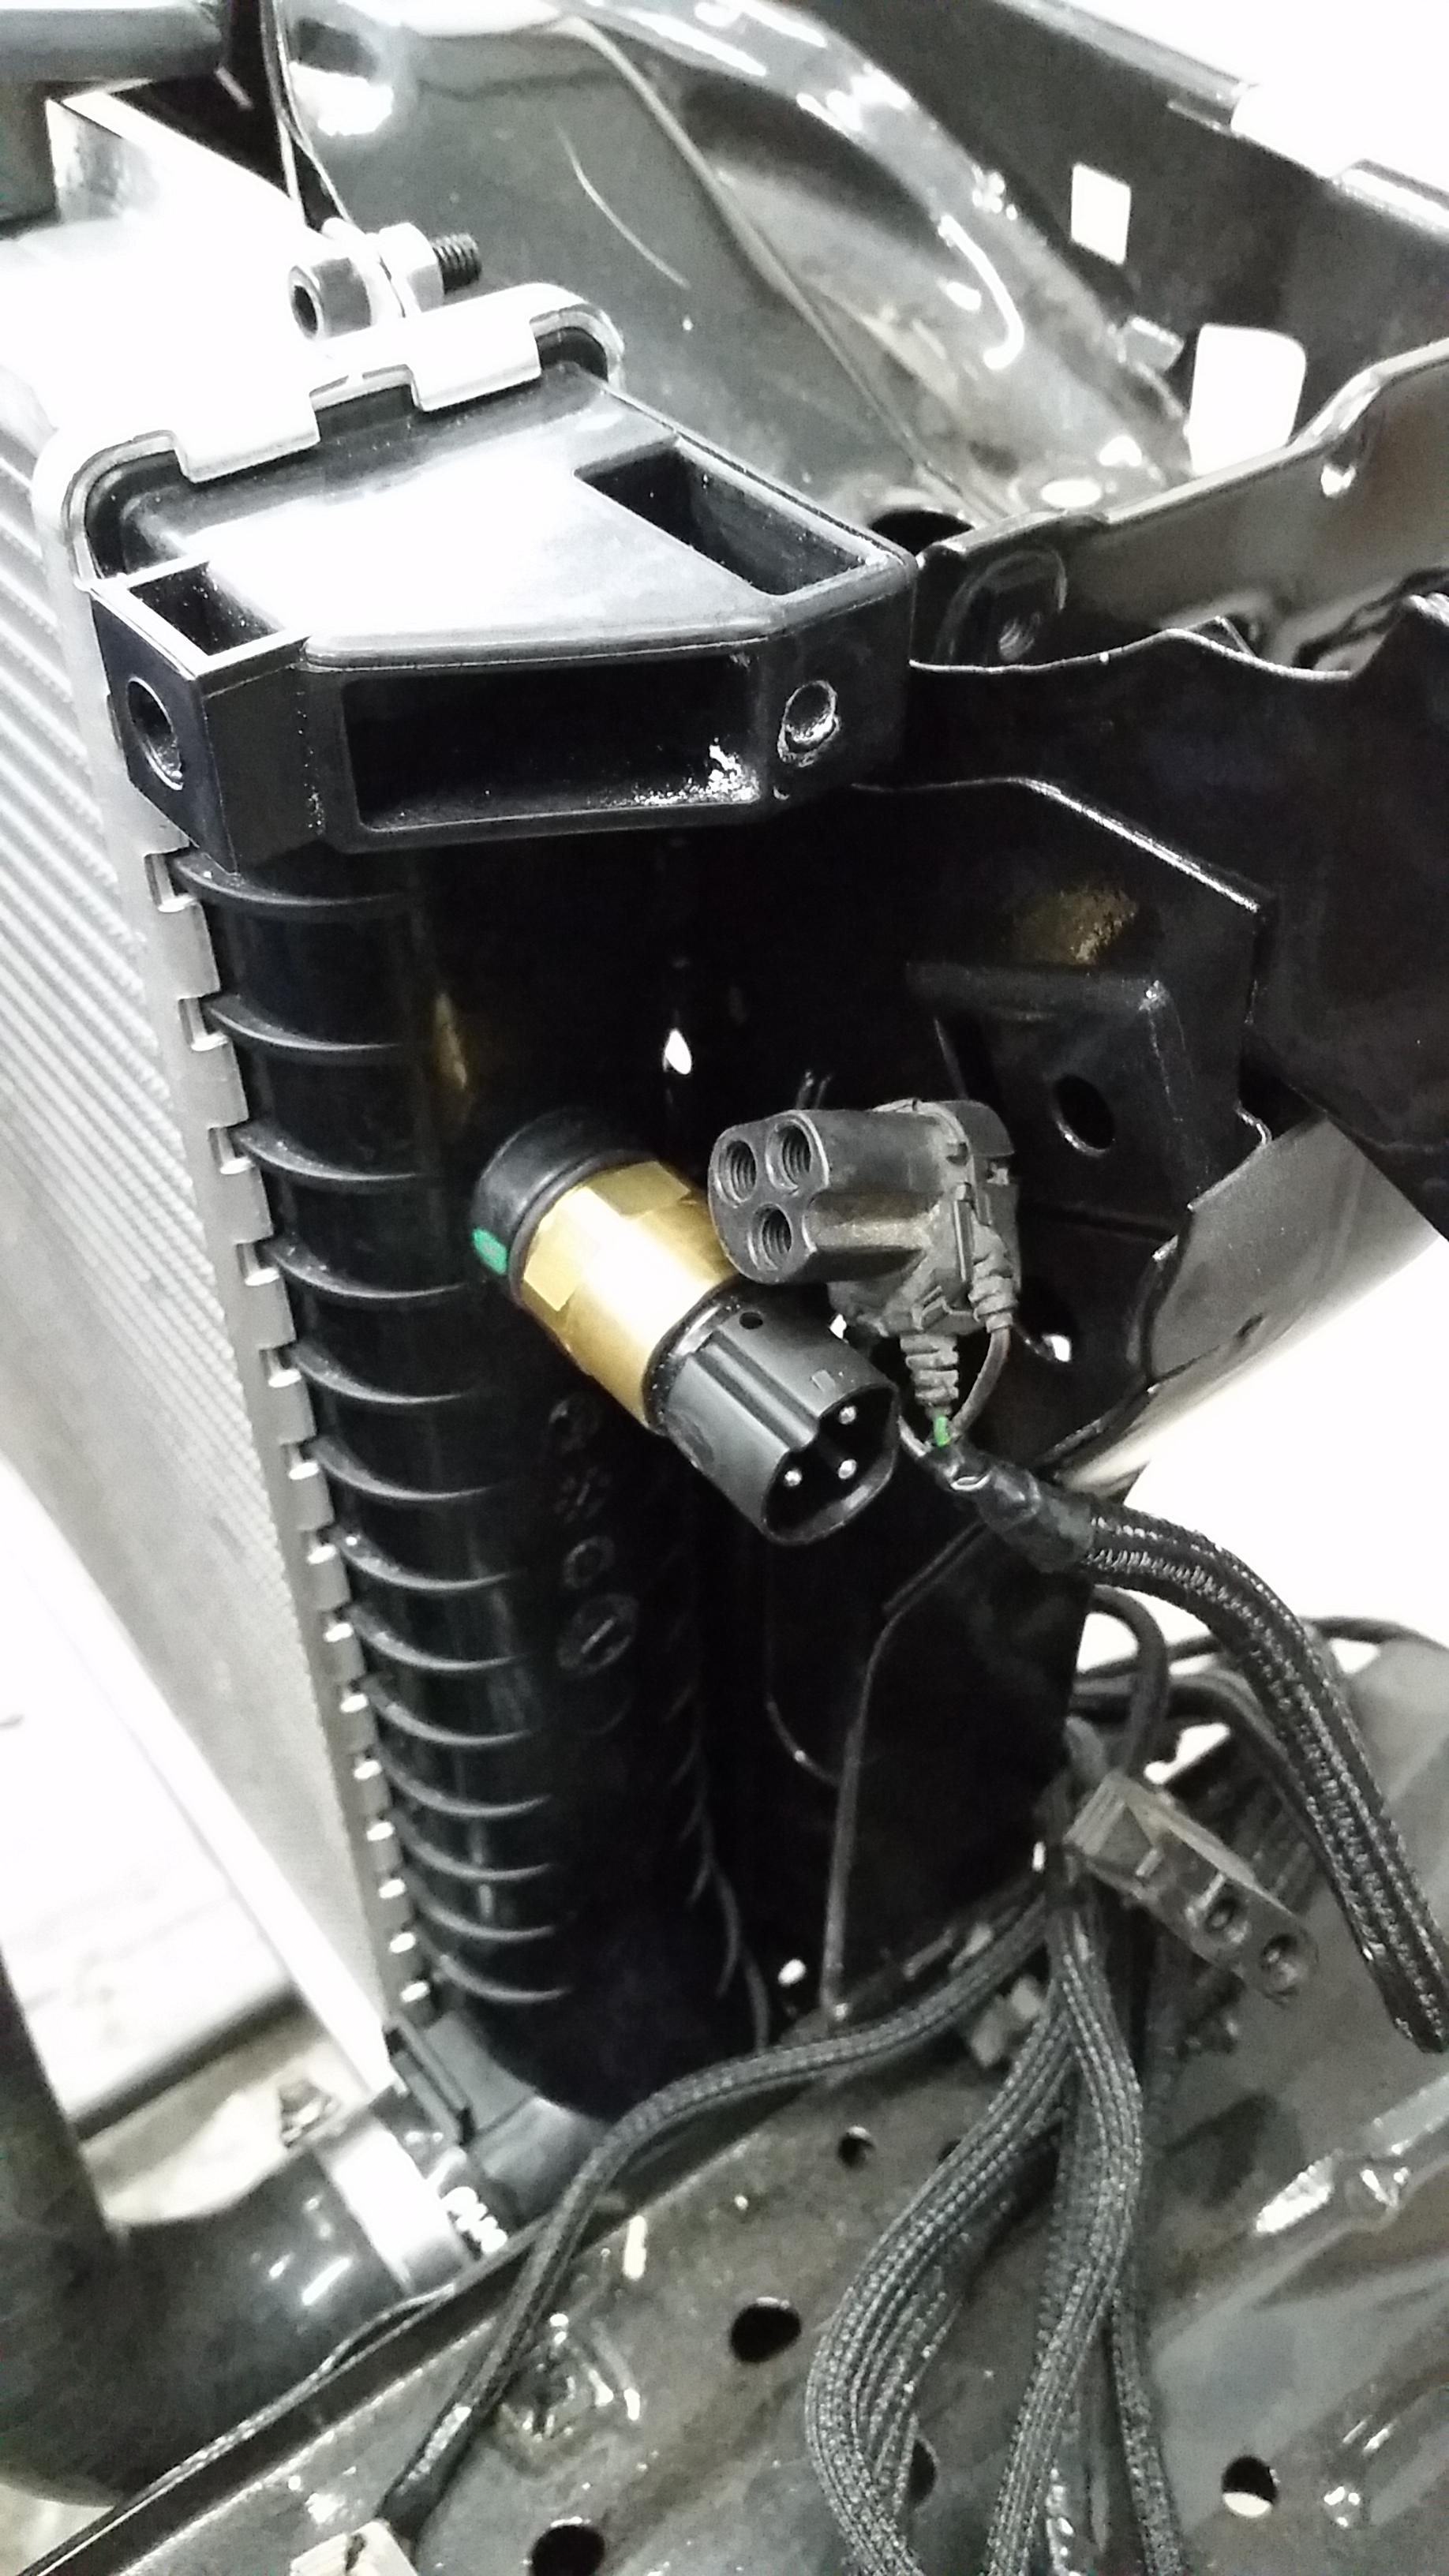
There is one quick question I have about the fan sensor setup. Sense this car had a auxiliary cooling fan for the AC I just wanted to run the wiring through the stock relay's. Now I understand how to wire this up for the most part, problem I have is that I mistakenly purchased the wrong radiator coolant temp sensor.
It is a 80 - 88 degree Celsius sensor I bought from bimmerworld. Is there a way I can make this one work or is the only way to perform this setup is with the 2 prong 82 degree sensor ( 61-31-1-364-272-82 )? I'm guessing it won't as the goal is to illuminate the low speed relay and run only the high speed when it hits the target temps and you do that by removing that third wire I think, idk maybe not, just thought I'd ask.
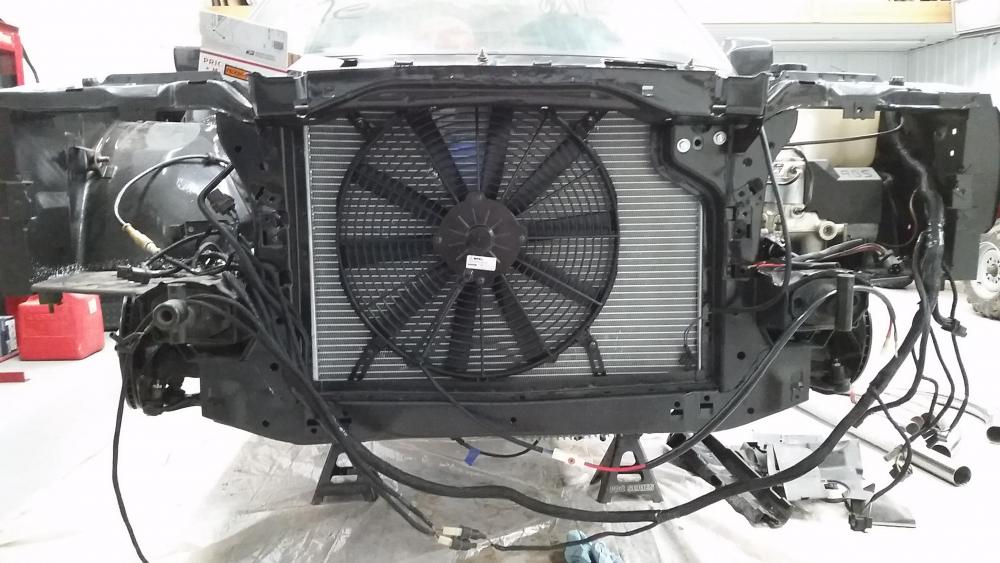
coolant expansion reservoir mounted
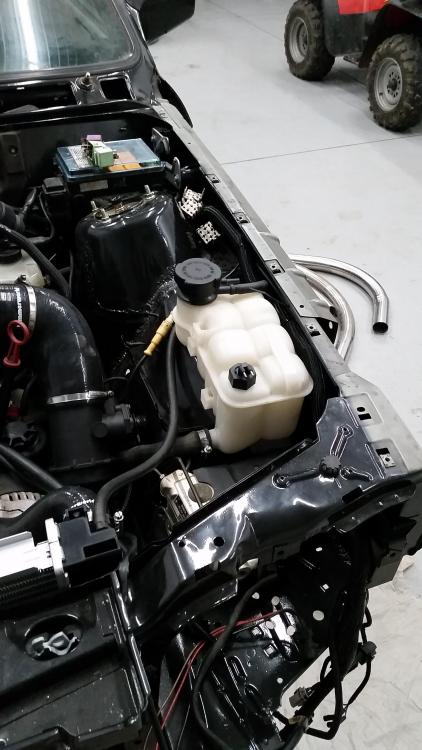
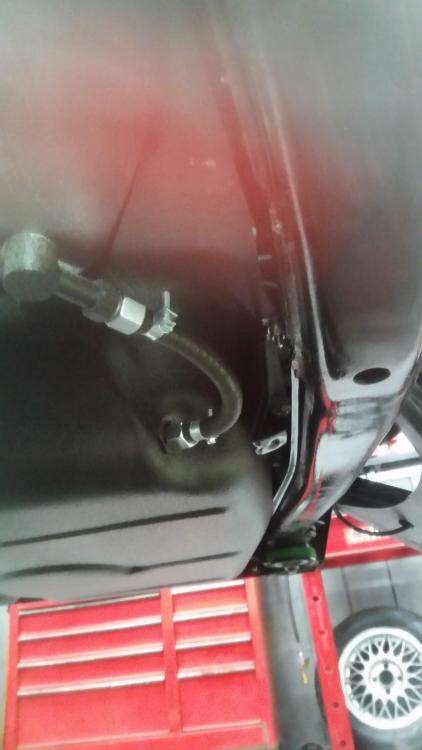
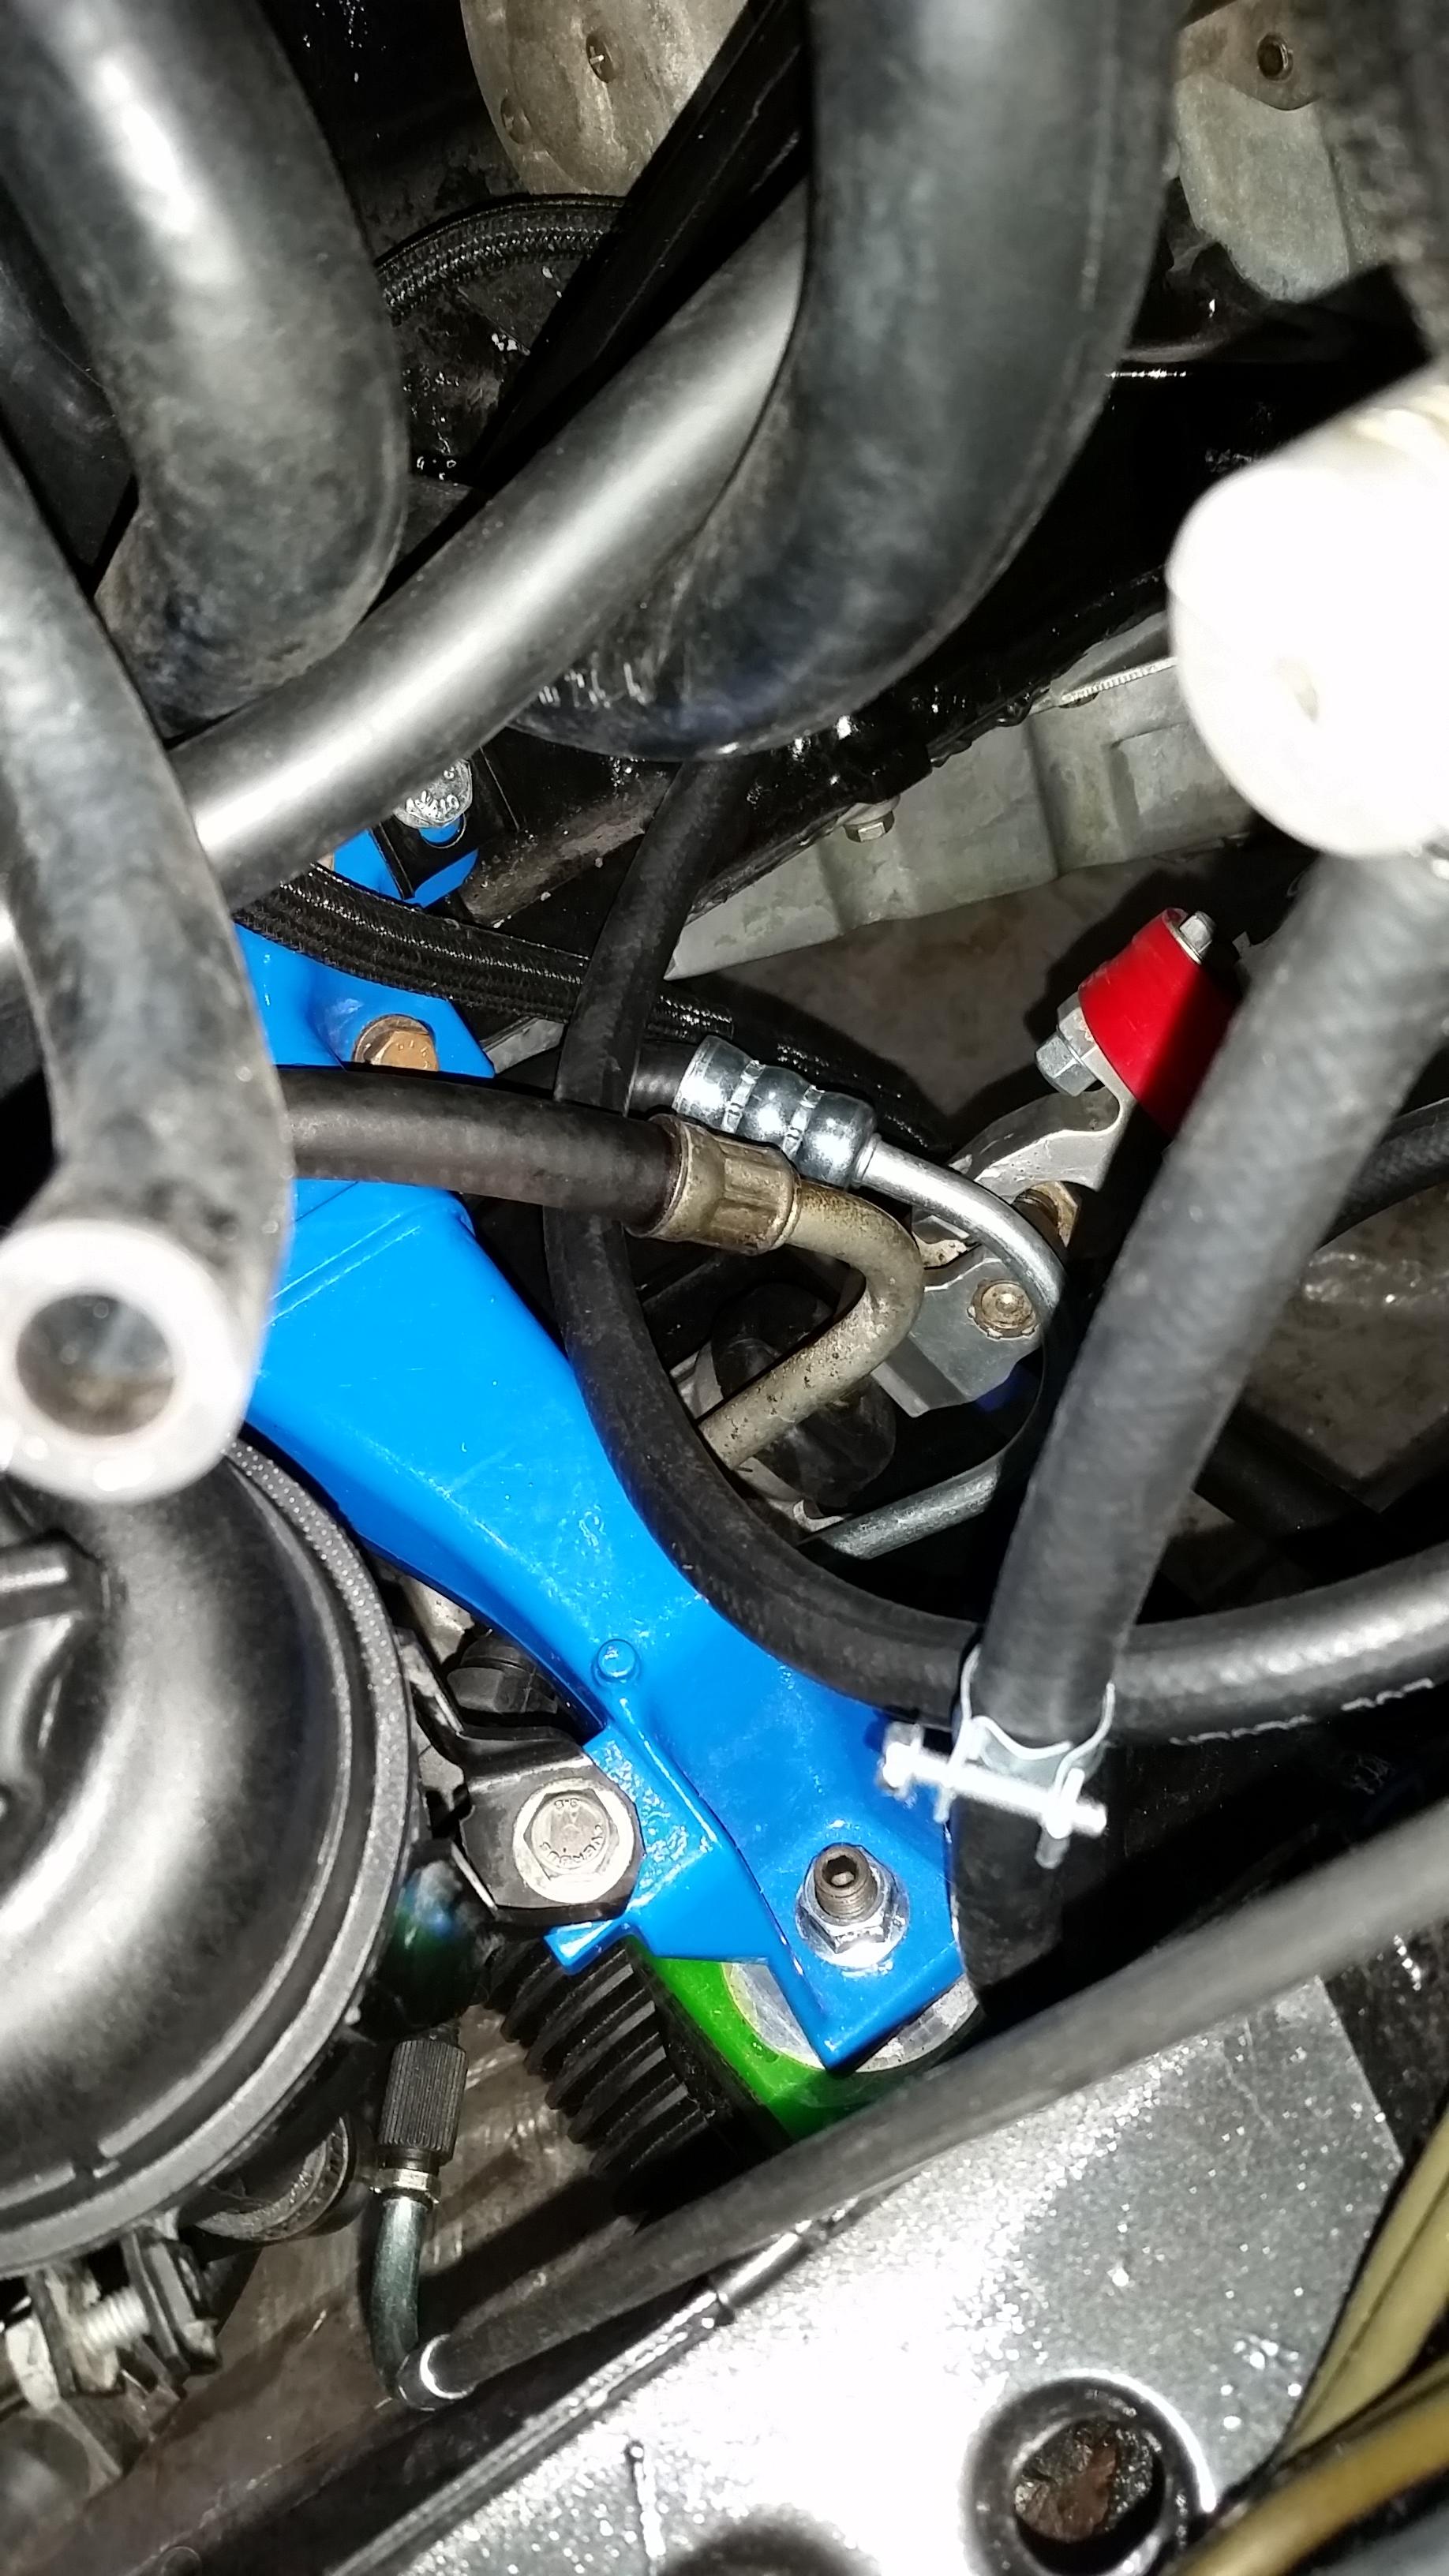
Power steering reservoir mounted and lines ran
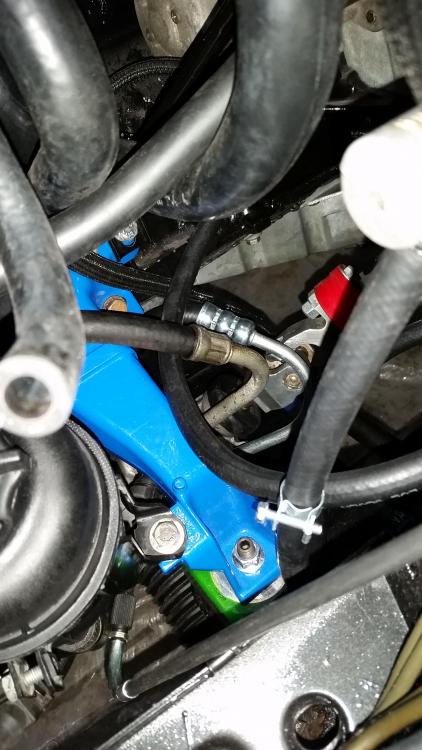
Quick question for the return line running from the rack back to the reservoir, the only way for me to hook it up was to route it over the motor mount, is there anything wrong with doing it this way? It fits up fairly nicely just wondering if there is possible problems with running the line over the mount instead of under, unless I'm just being dumb and that's the way it goes, It is the stock e30 line. For the high pressure line, I went over to my local car-quest and picked up a high pressure line for something like 35 bucks ( much better compared to a bmw oem line which is closer to 200). The line is a very nice quality piece and fit up very nicely , It is shaped slightly differently and does get slightly close to the steering shaft u-joint but after testing it installed they clear just fine.
Off to other things.
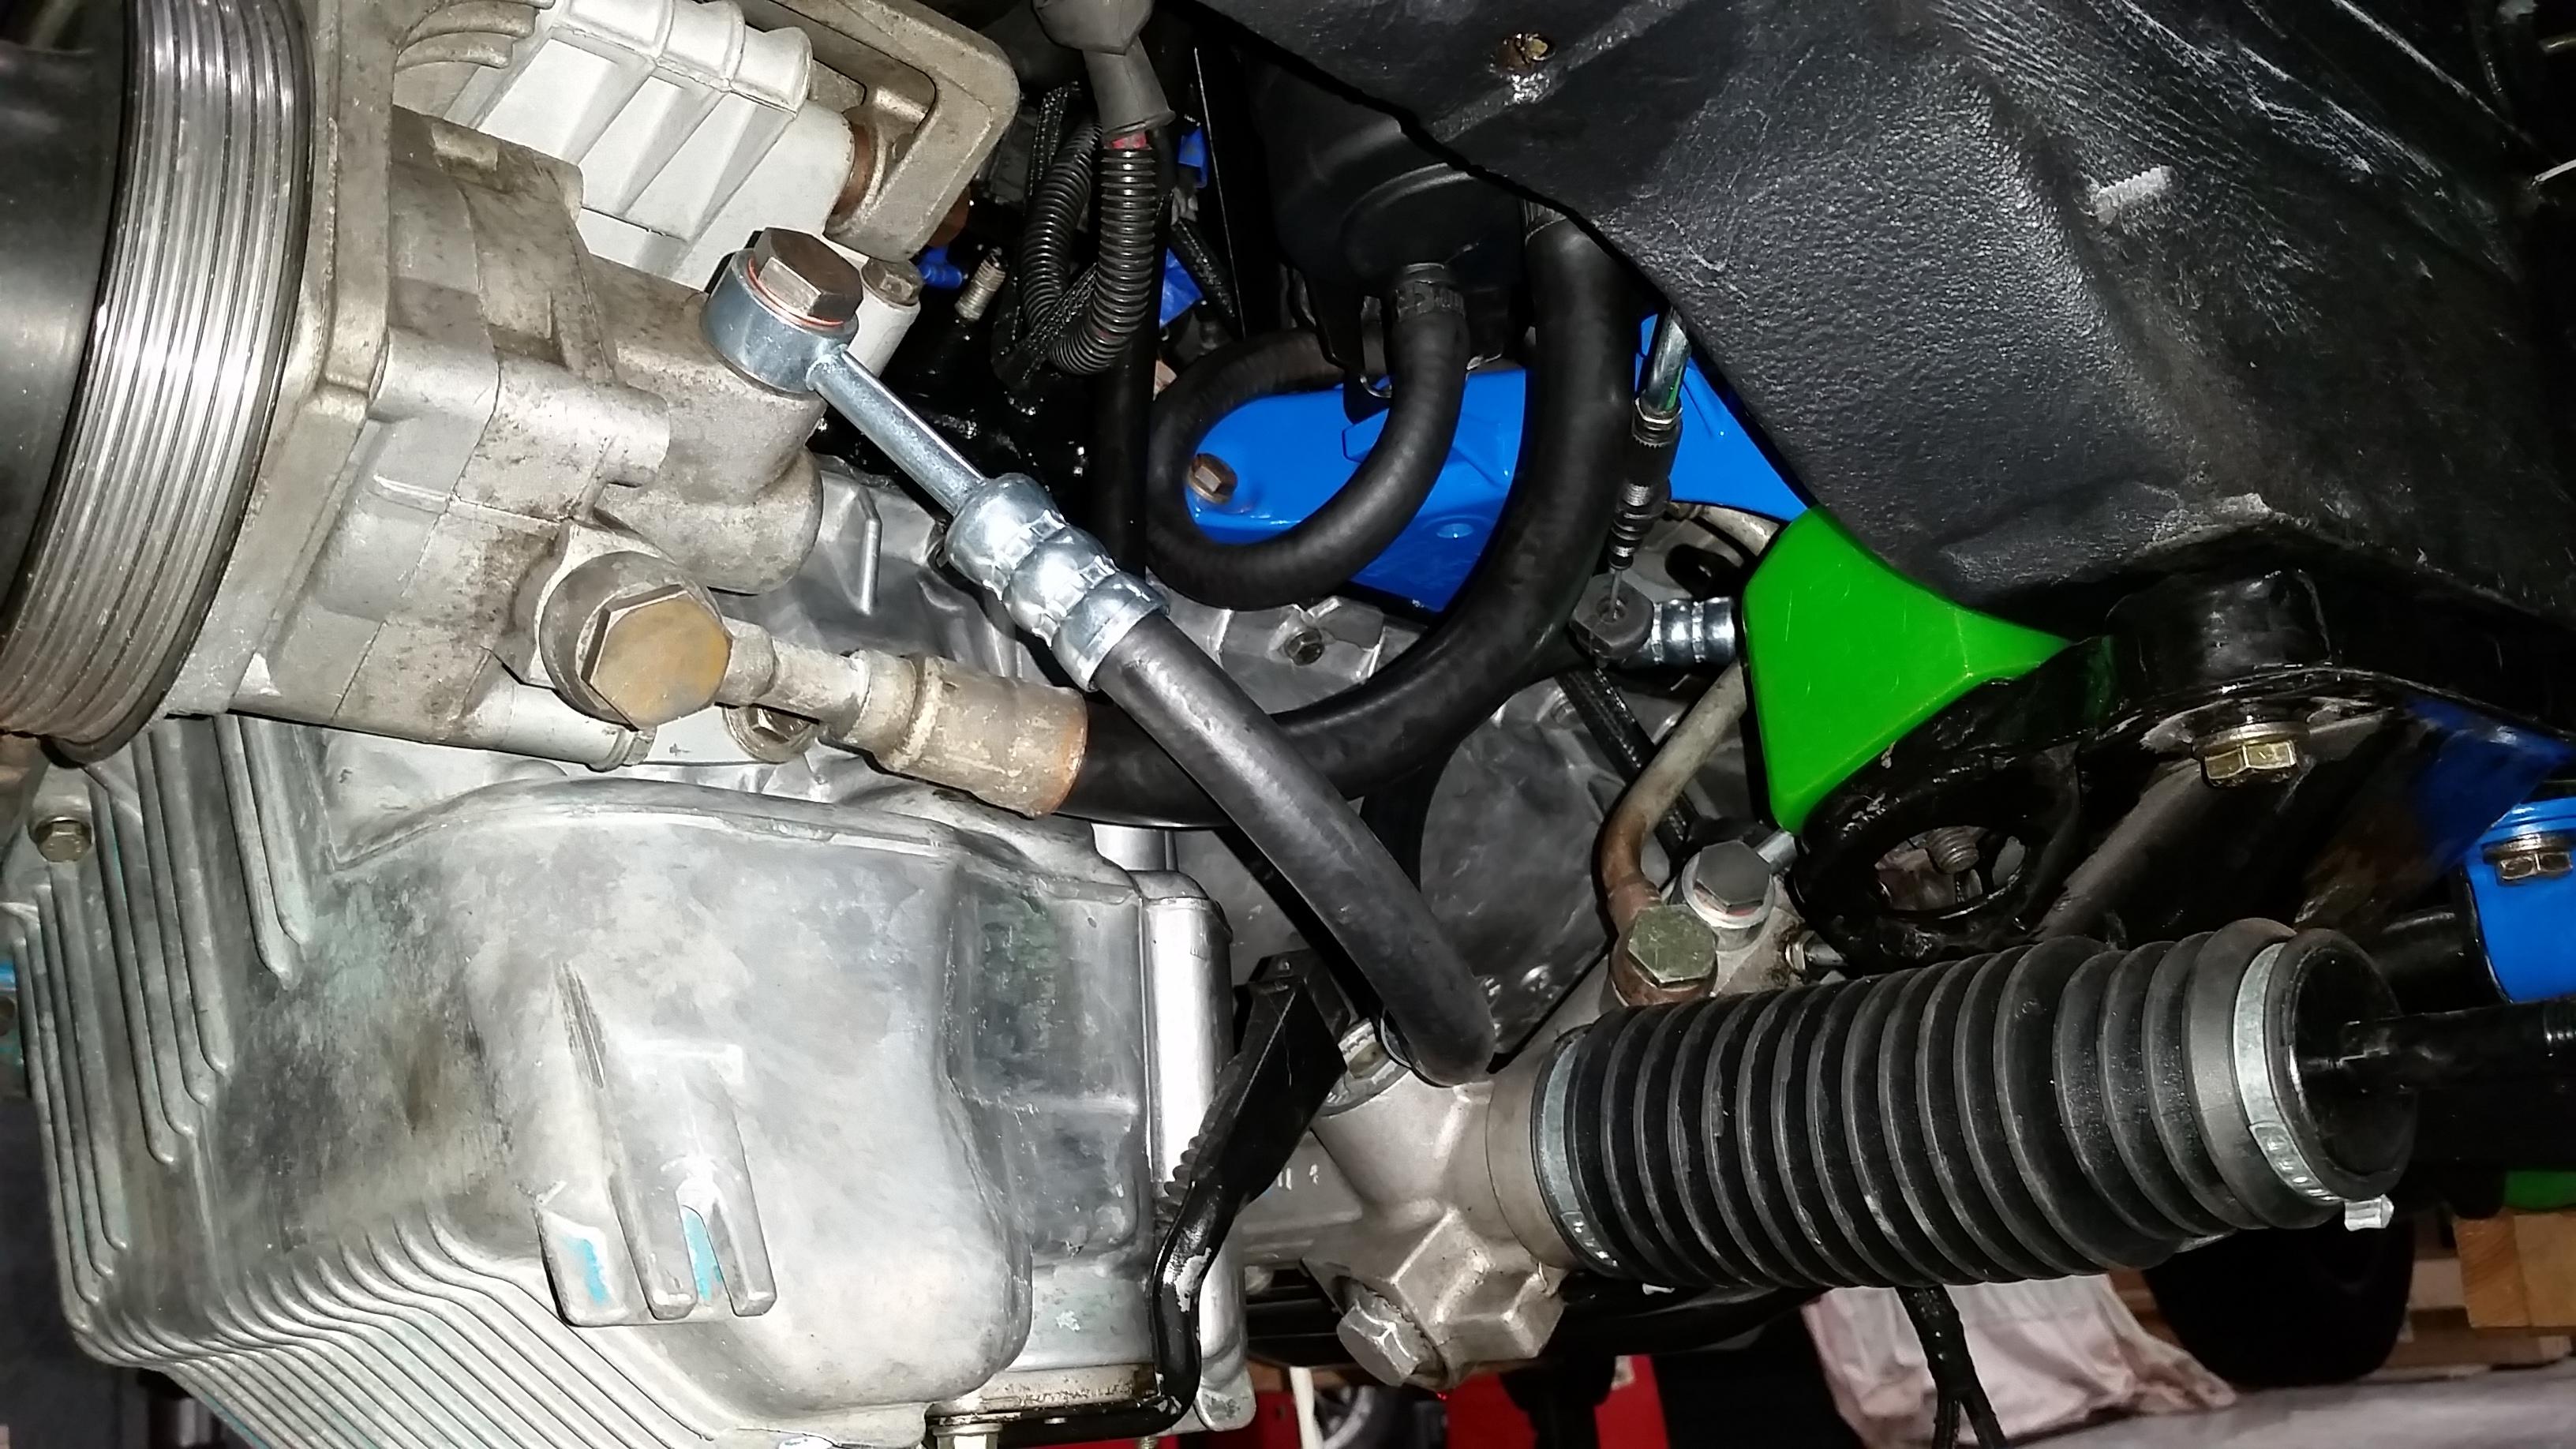
Intake is back off
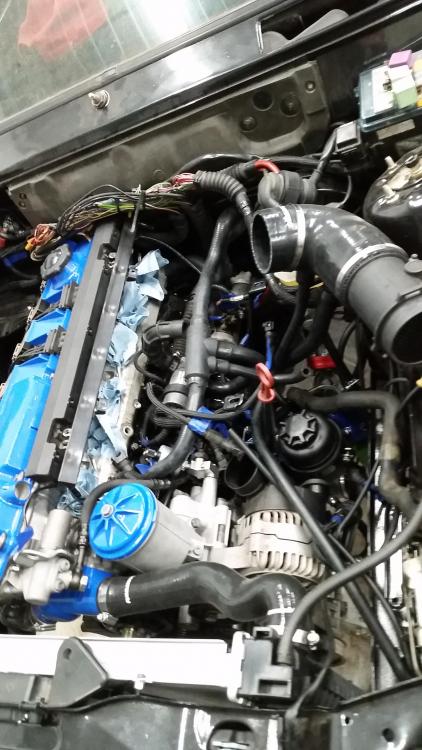
Was working on installing the spider coolant hose and noticed that when installed it kinks once you strap it down to the mounting locations on the motor harness bracket. Still working on a solution for this or I may not strap it down but still worried it may kink. Solutions?
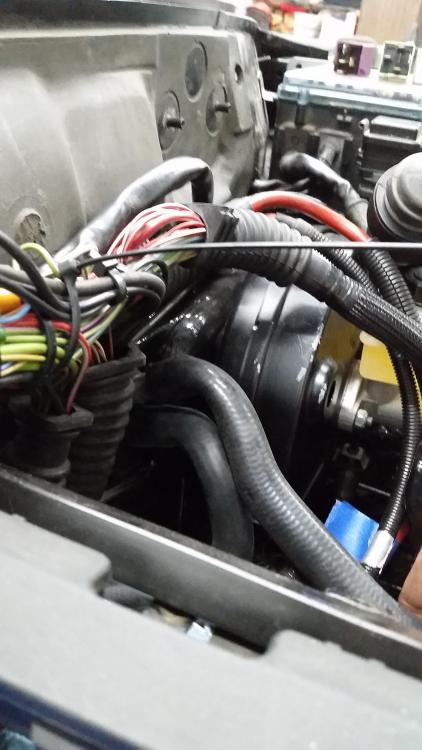
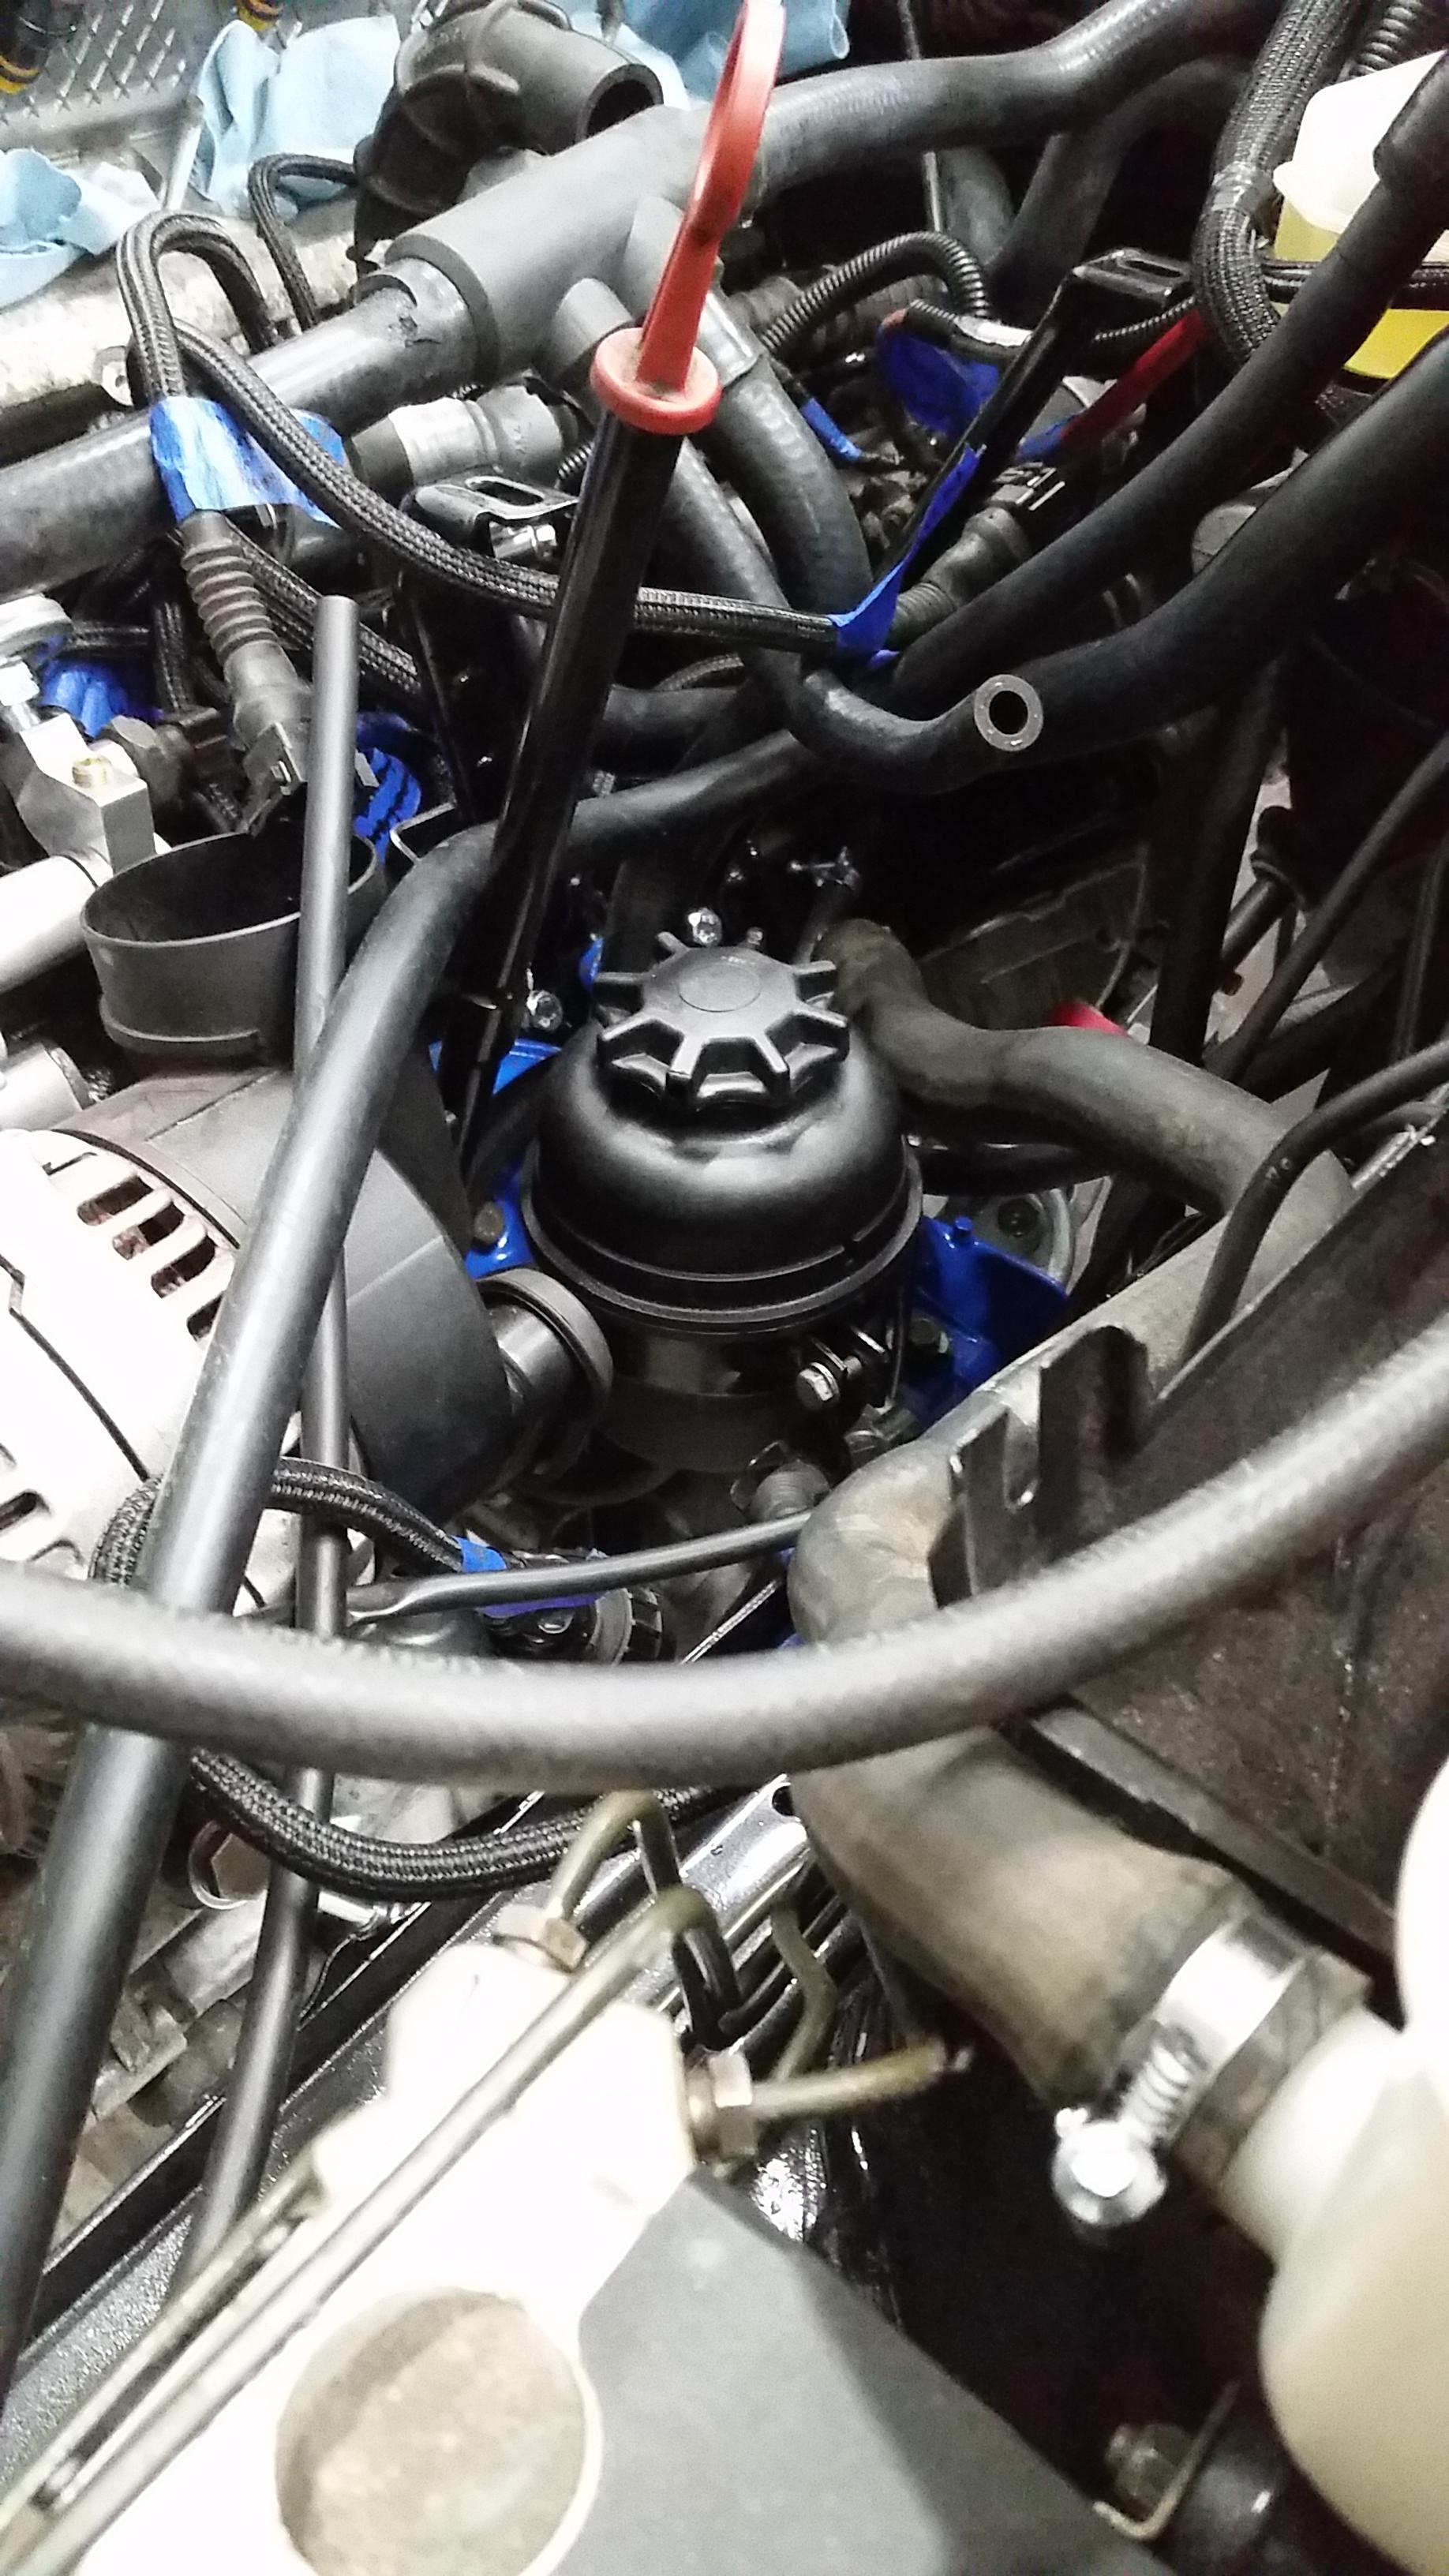
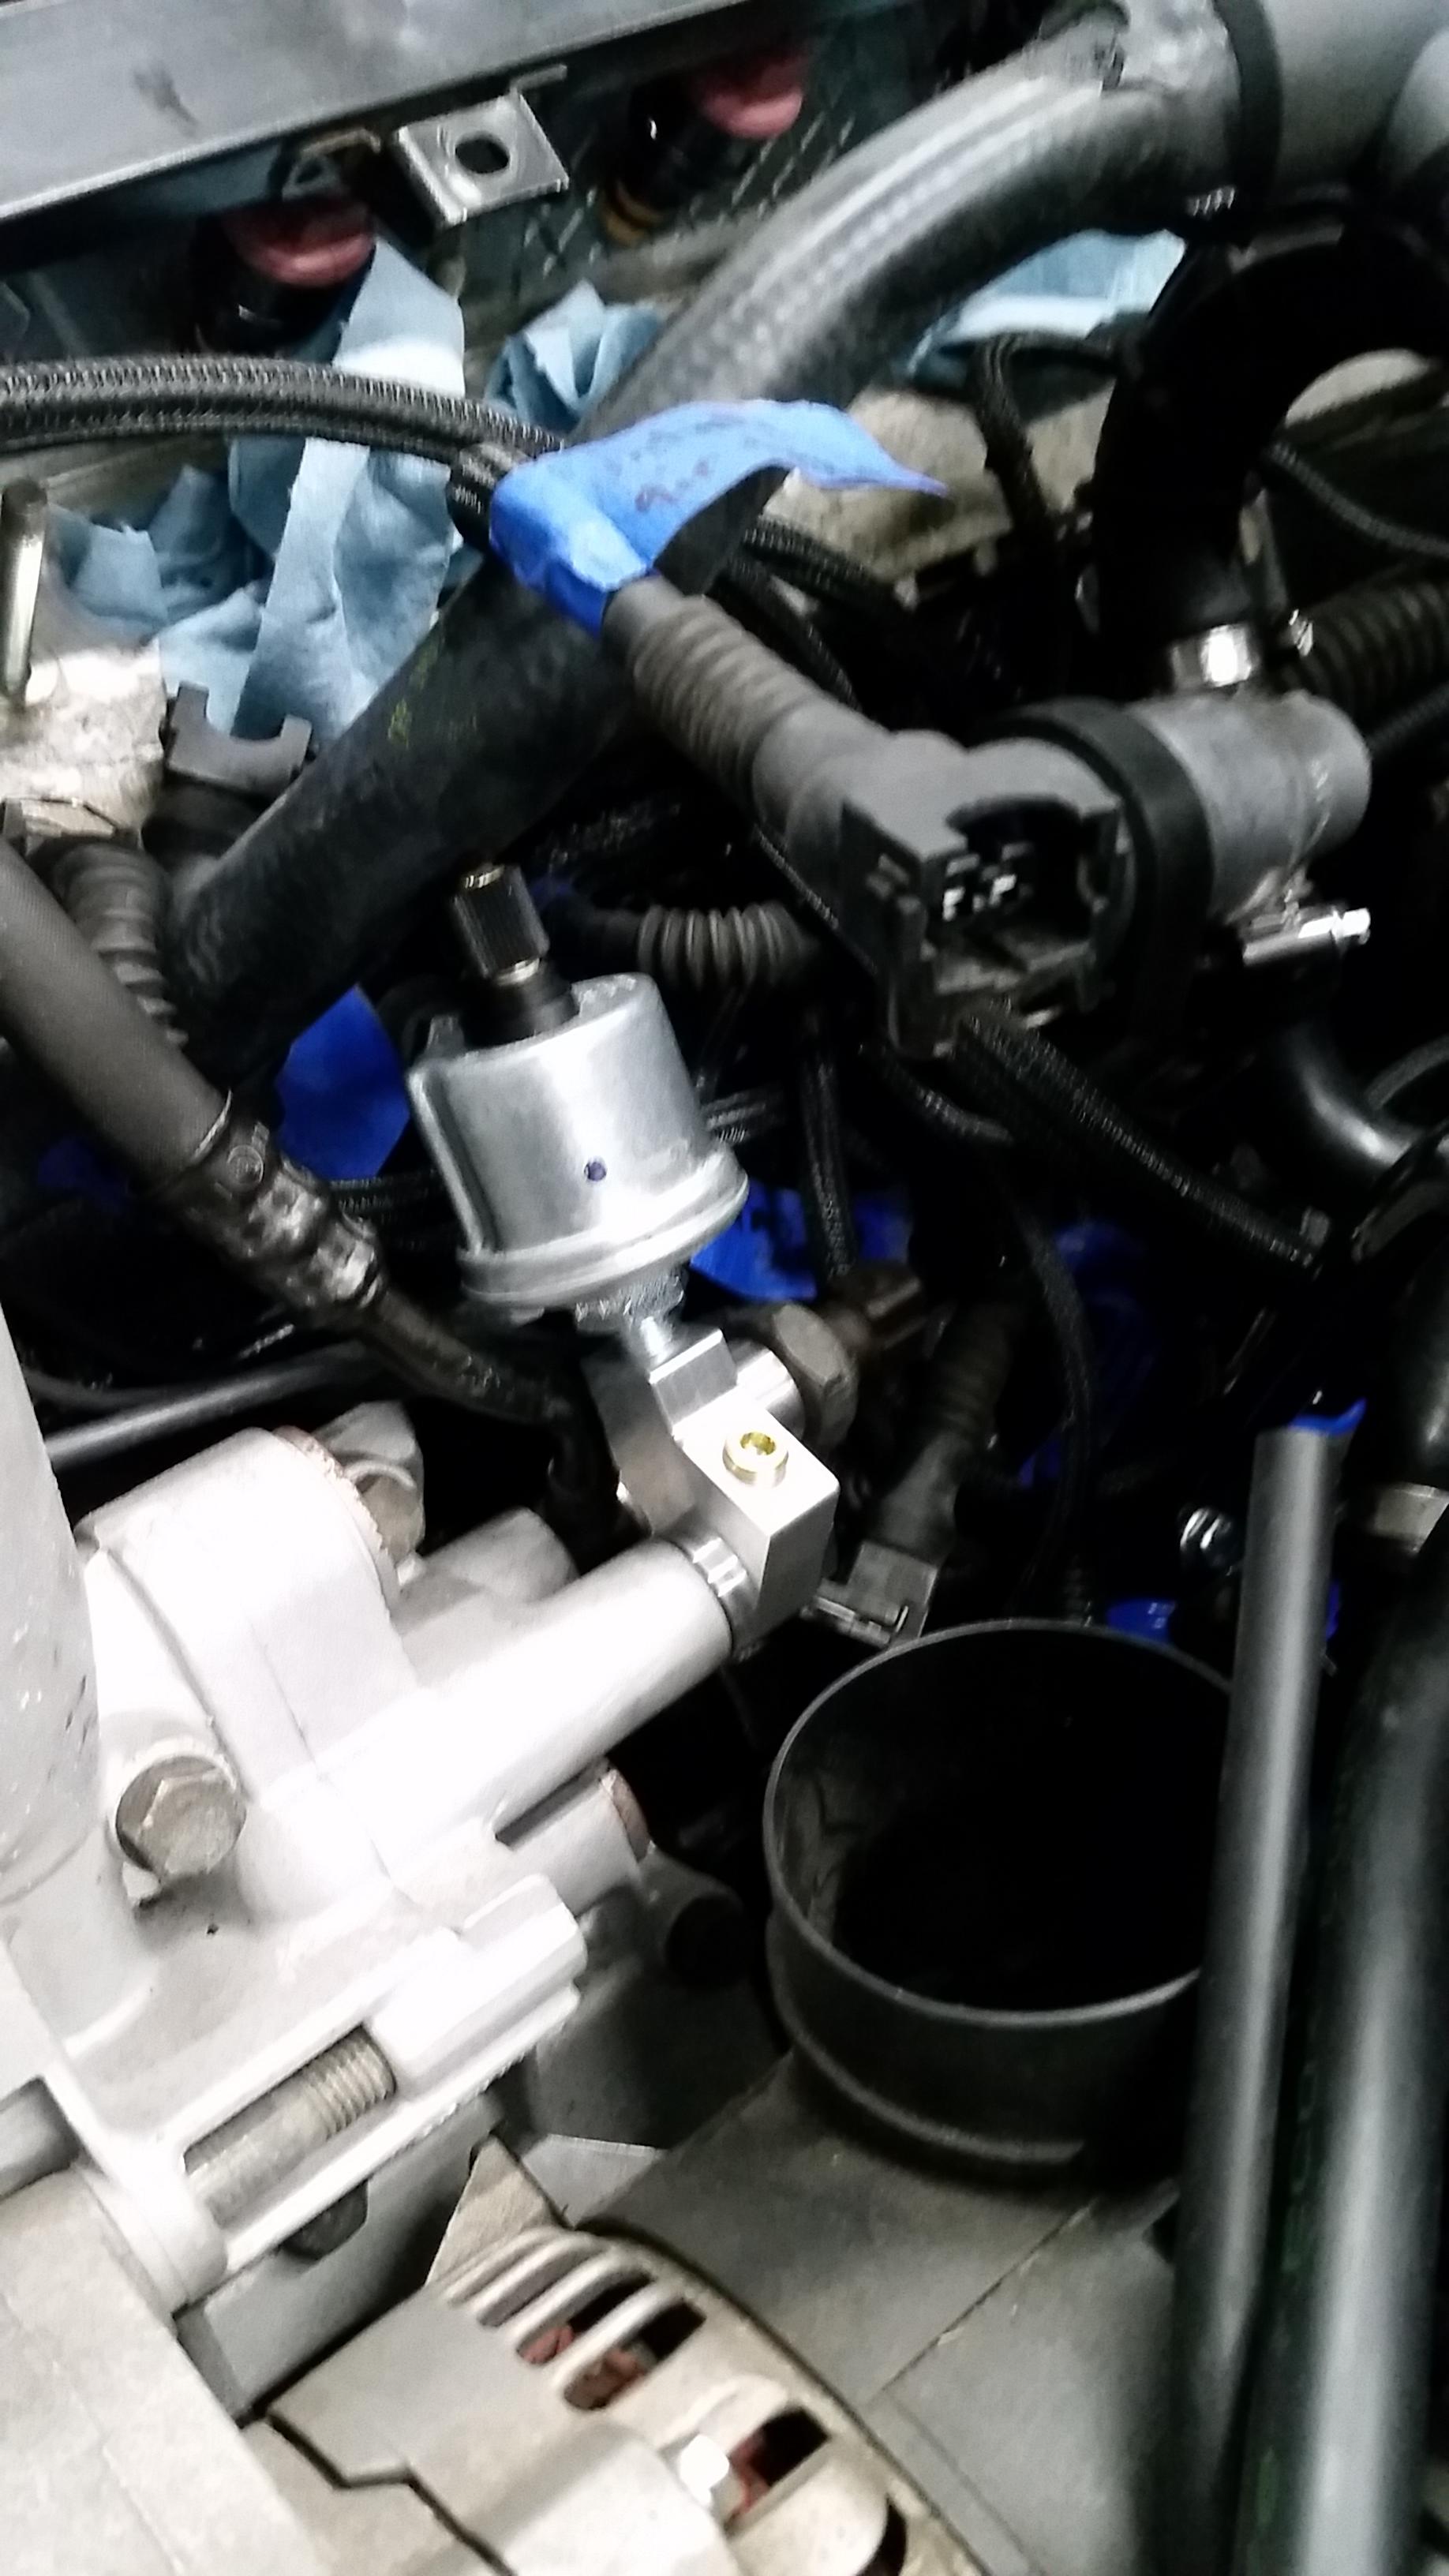
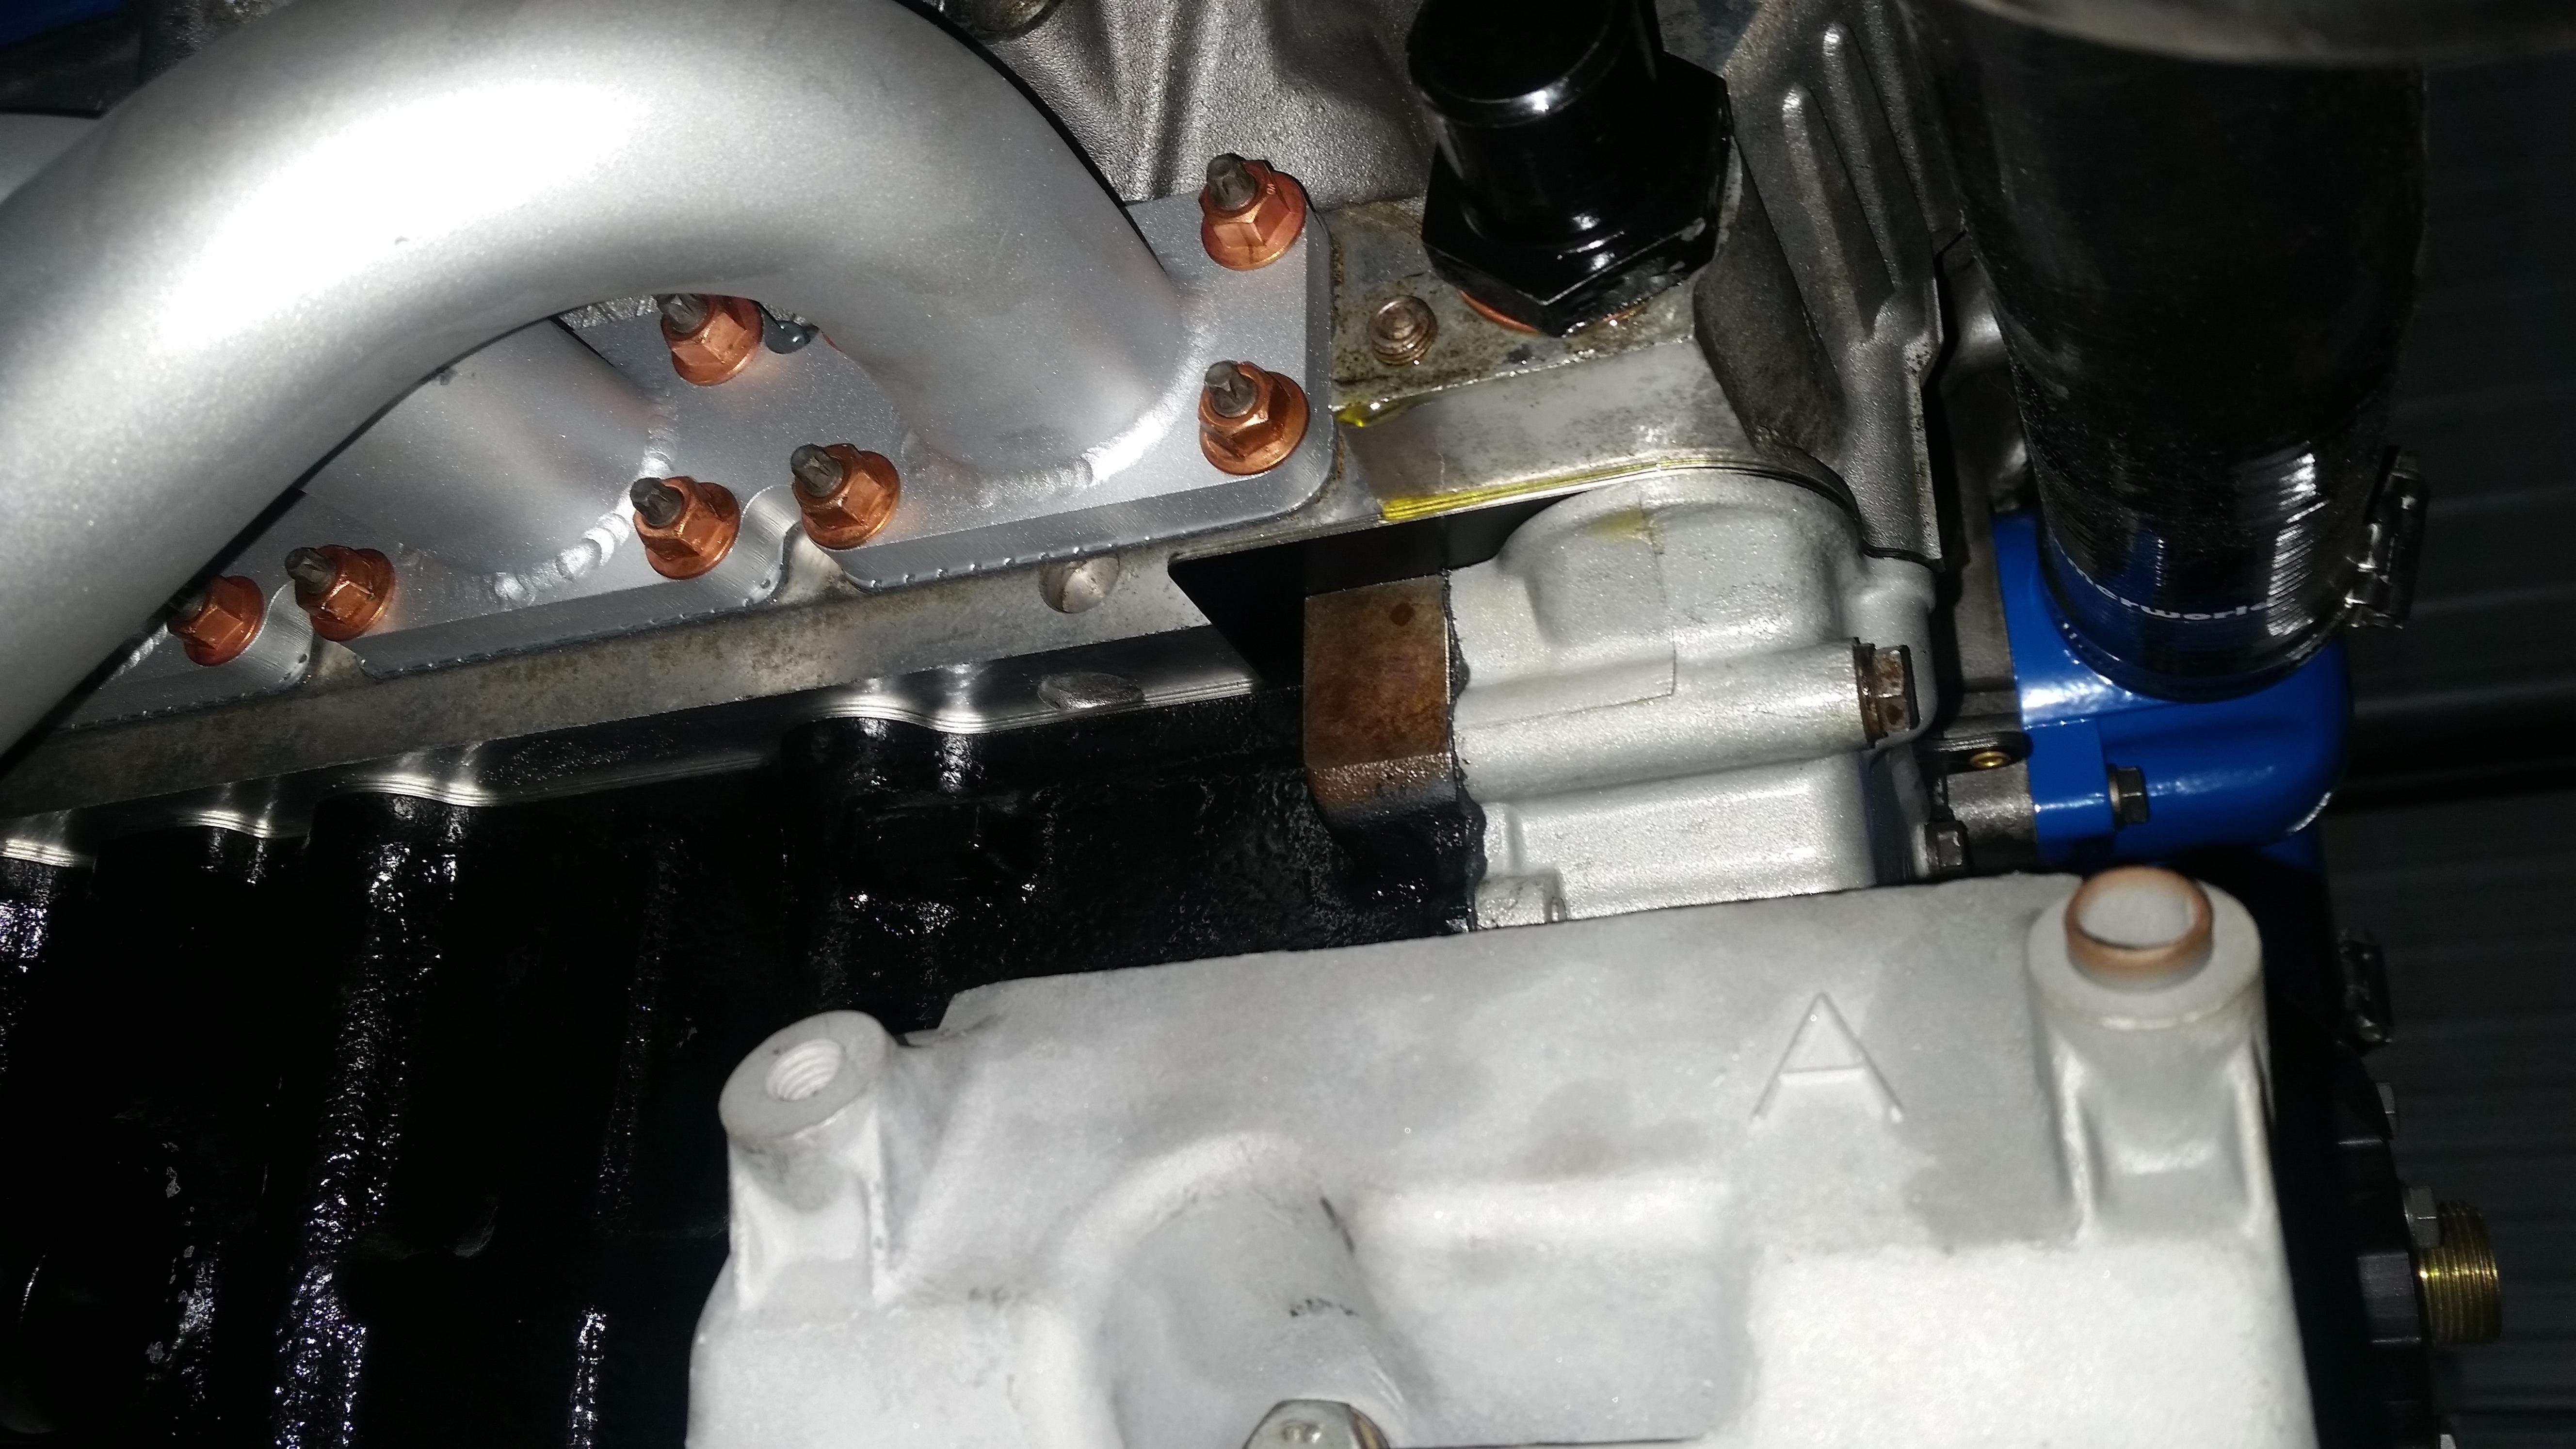
Ended up purchasing a bimmerworld oil distribution block when I ordered the fan and radiator. It's a very pricey piece and I searched for other alternatives but sort of just came back to the same thing and it is a very nice quality part. Also got sending units from vdo for the oil pressure, oil temp, and coolant temp. Just got the oil temp sending unit in the mail yesterday so still have to install it then I will begin working on wiring everything up hopefully tomorrow.
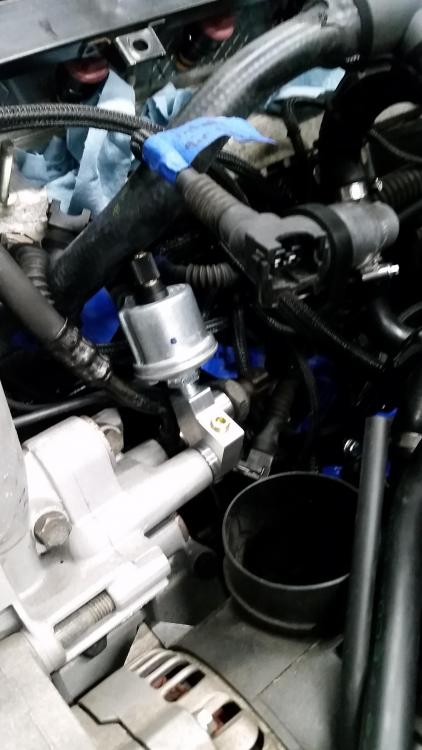
I decided to remove the m20 coolant temp sensor in order to run this sensor in the throttle body coolant passage hole. So my temp gauge on the cluster will be dead but I like the vdo gauge much more and I can more accurately read water temps. Unfortunately s52/m52 heads only came with two coolant threaded holes instead of the m50/s50 heads with three so I have to pick between one or the other. When installing the unit it got tight halfway through the threads and didn't reach flush on the head. Now I understand that it has pitch on the threads to tighten up, just wondering as to whether it should tighten down flush to the head or if this is okay and I shouldn't see any leaks just don't want to over tighten and strip it.
meh, boring. Yet's talk about some more exciting things!
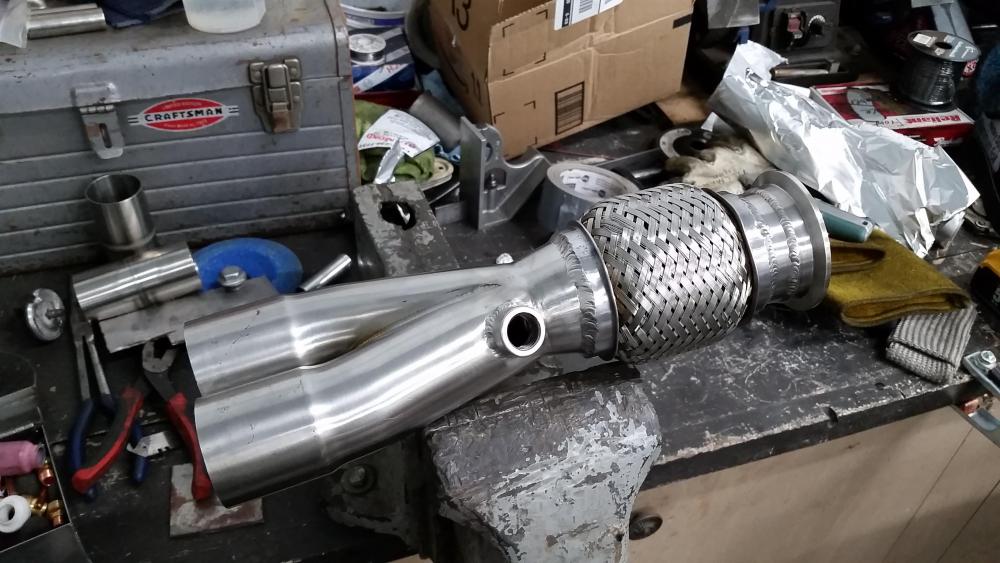
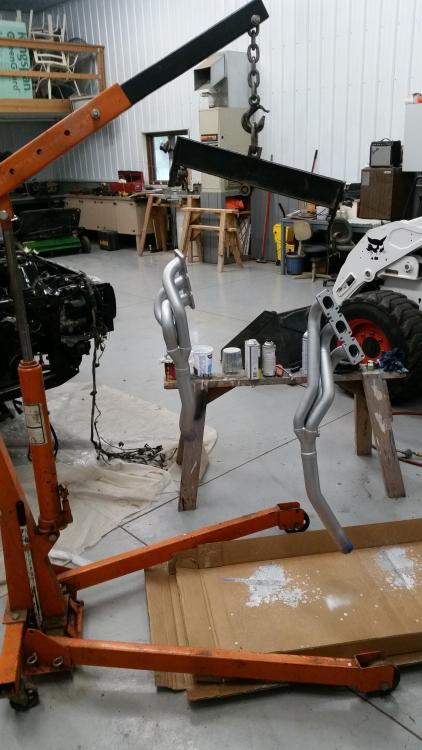
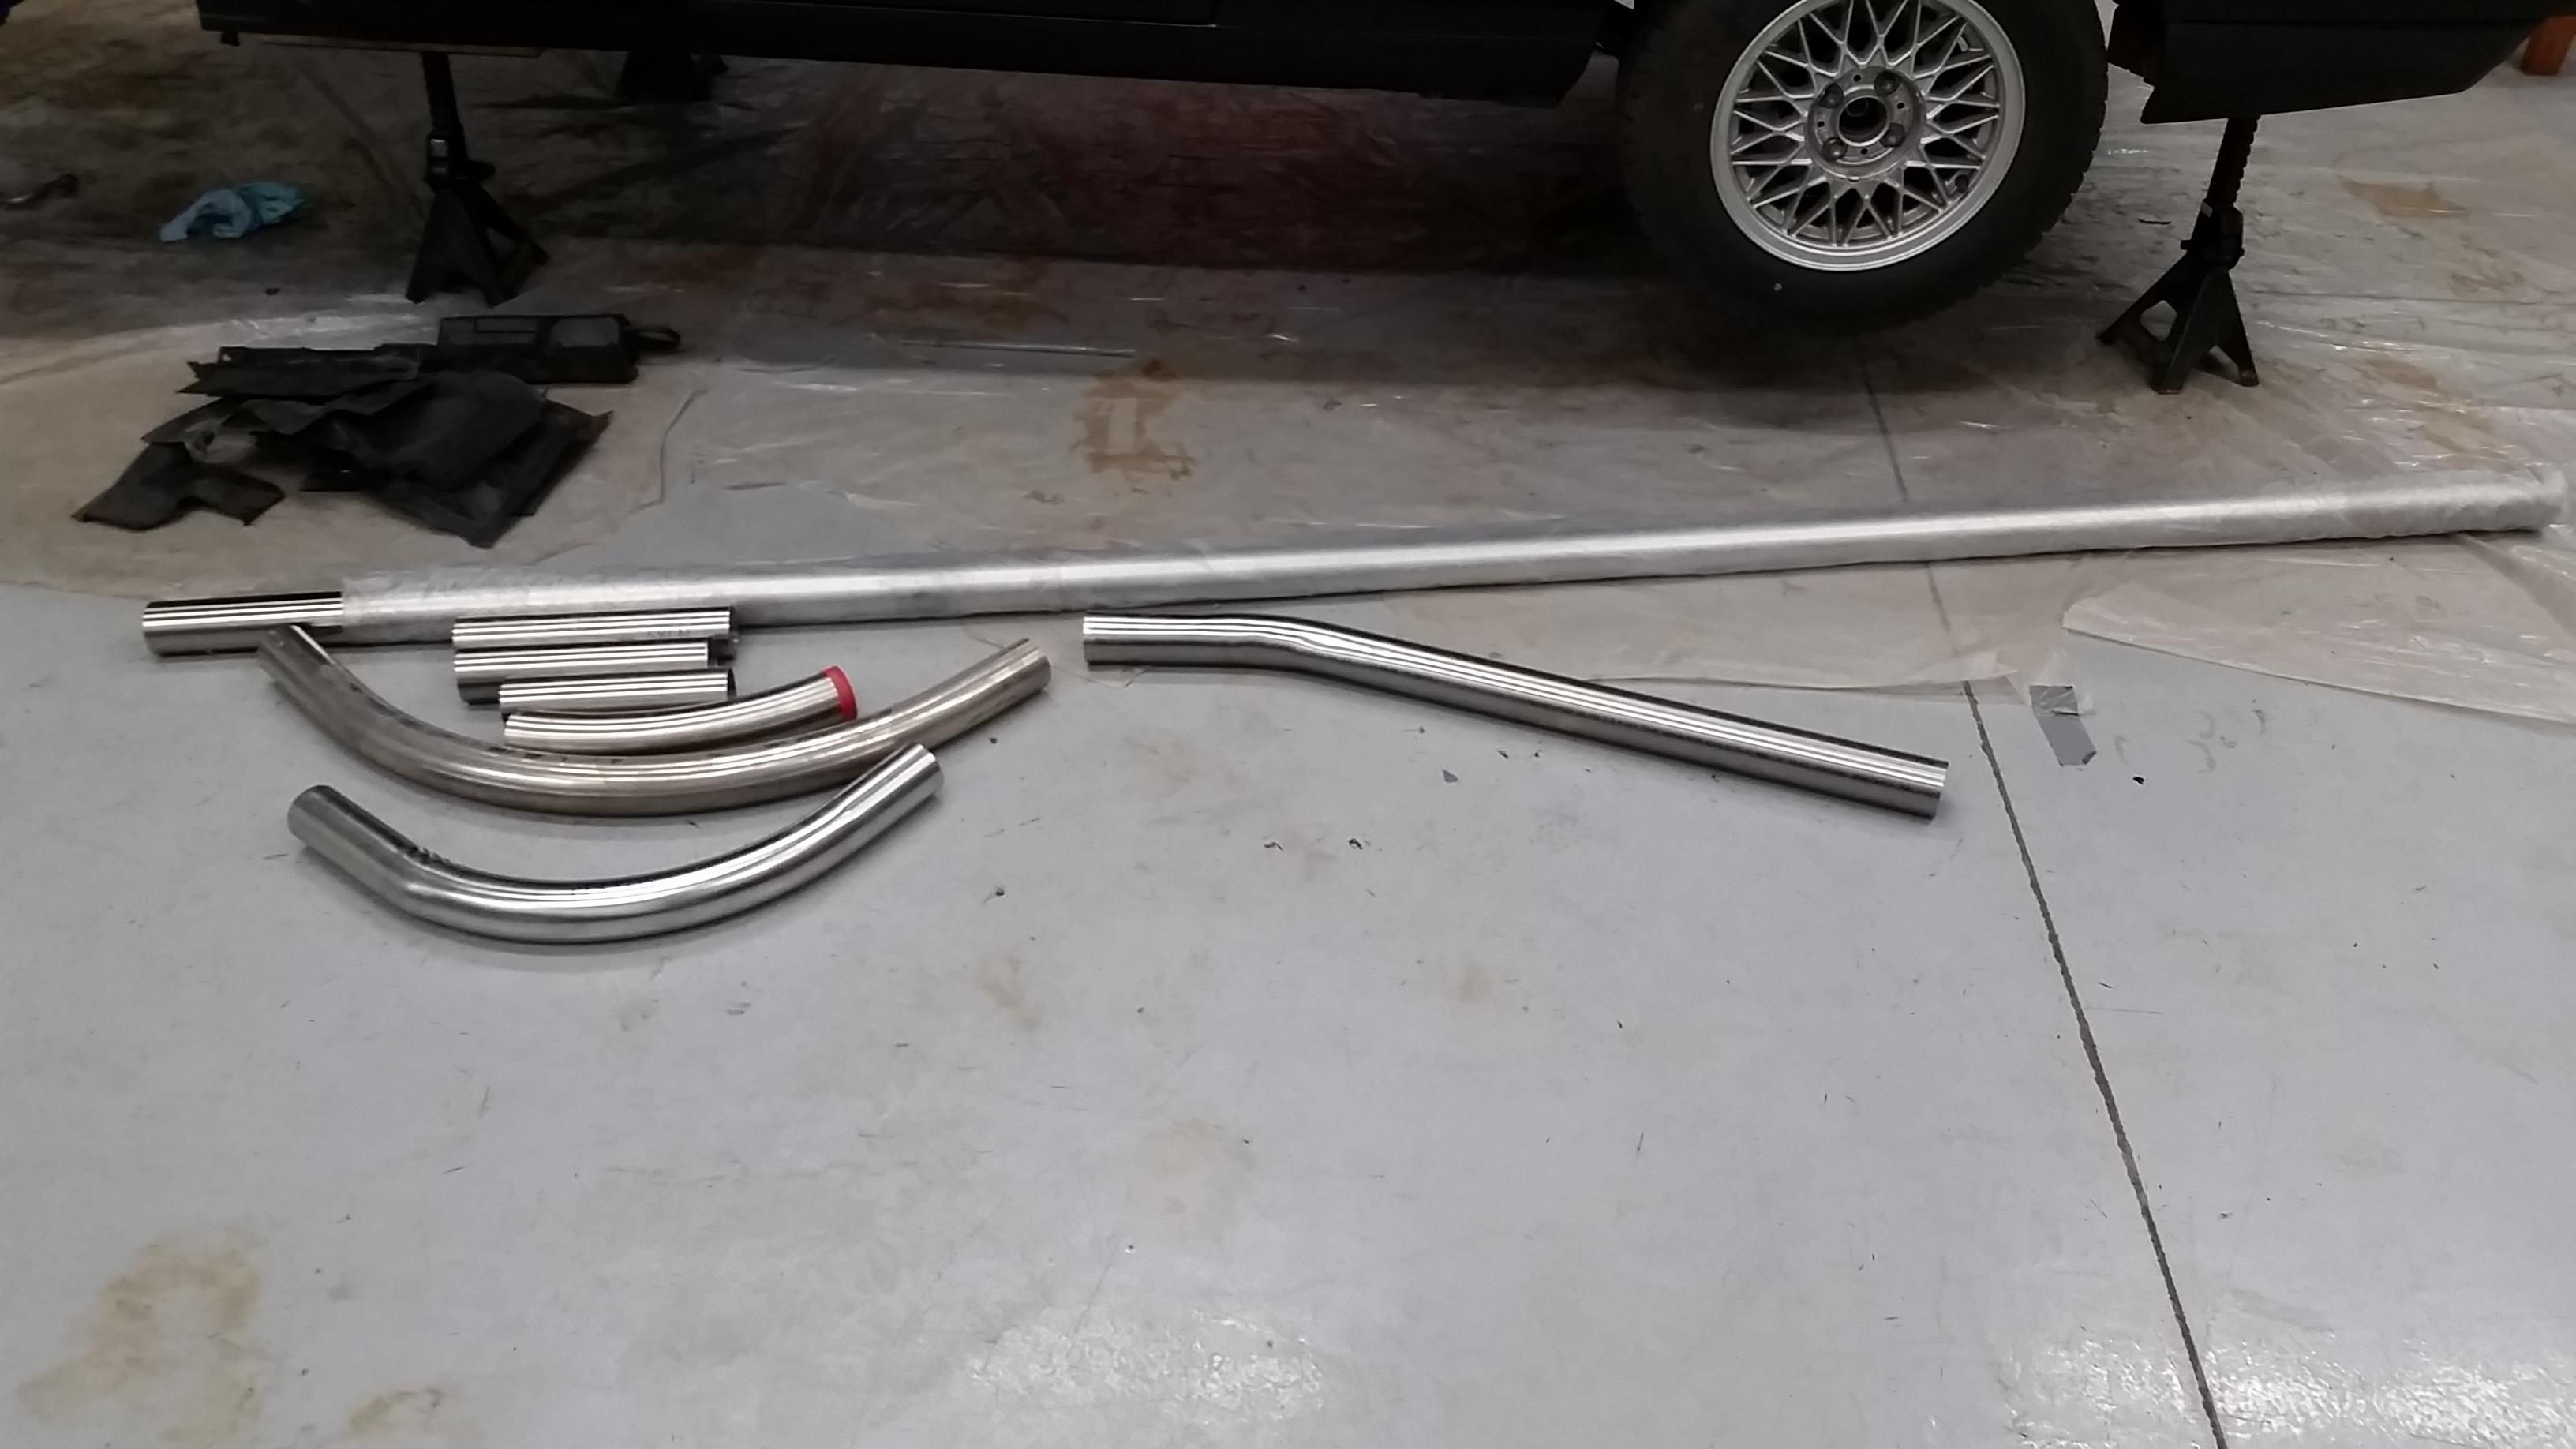
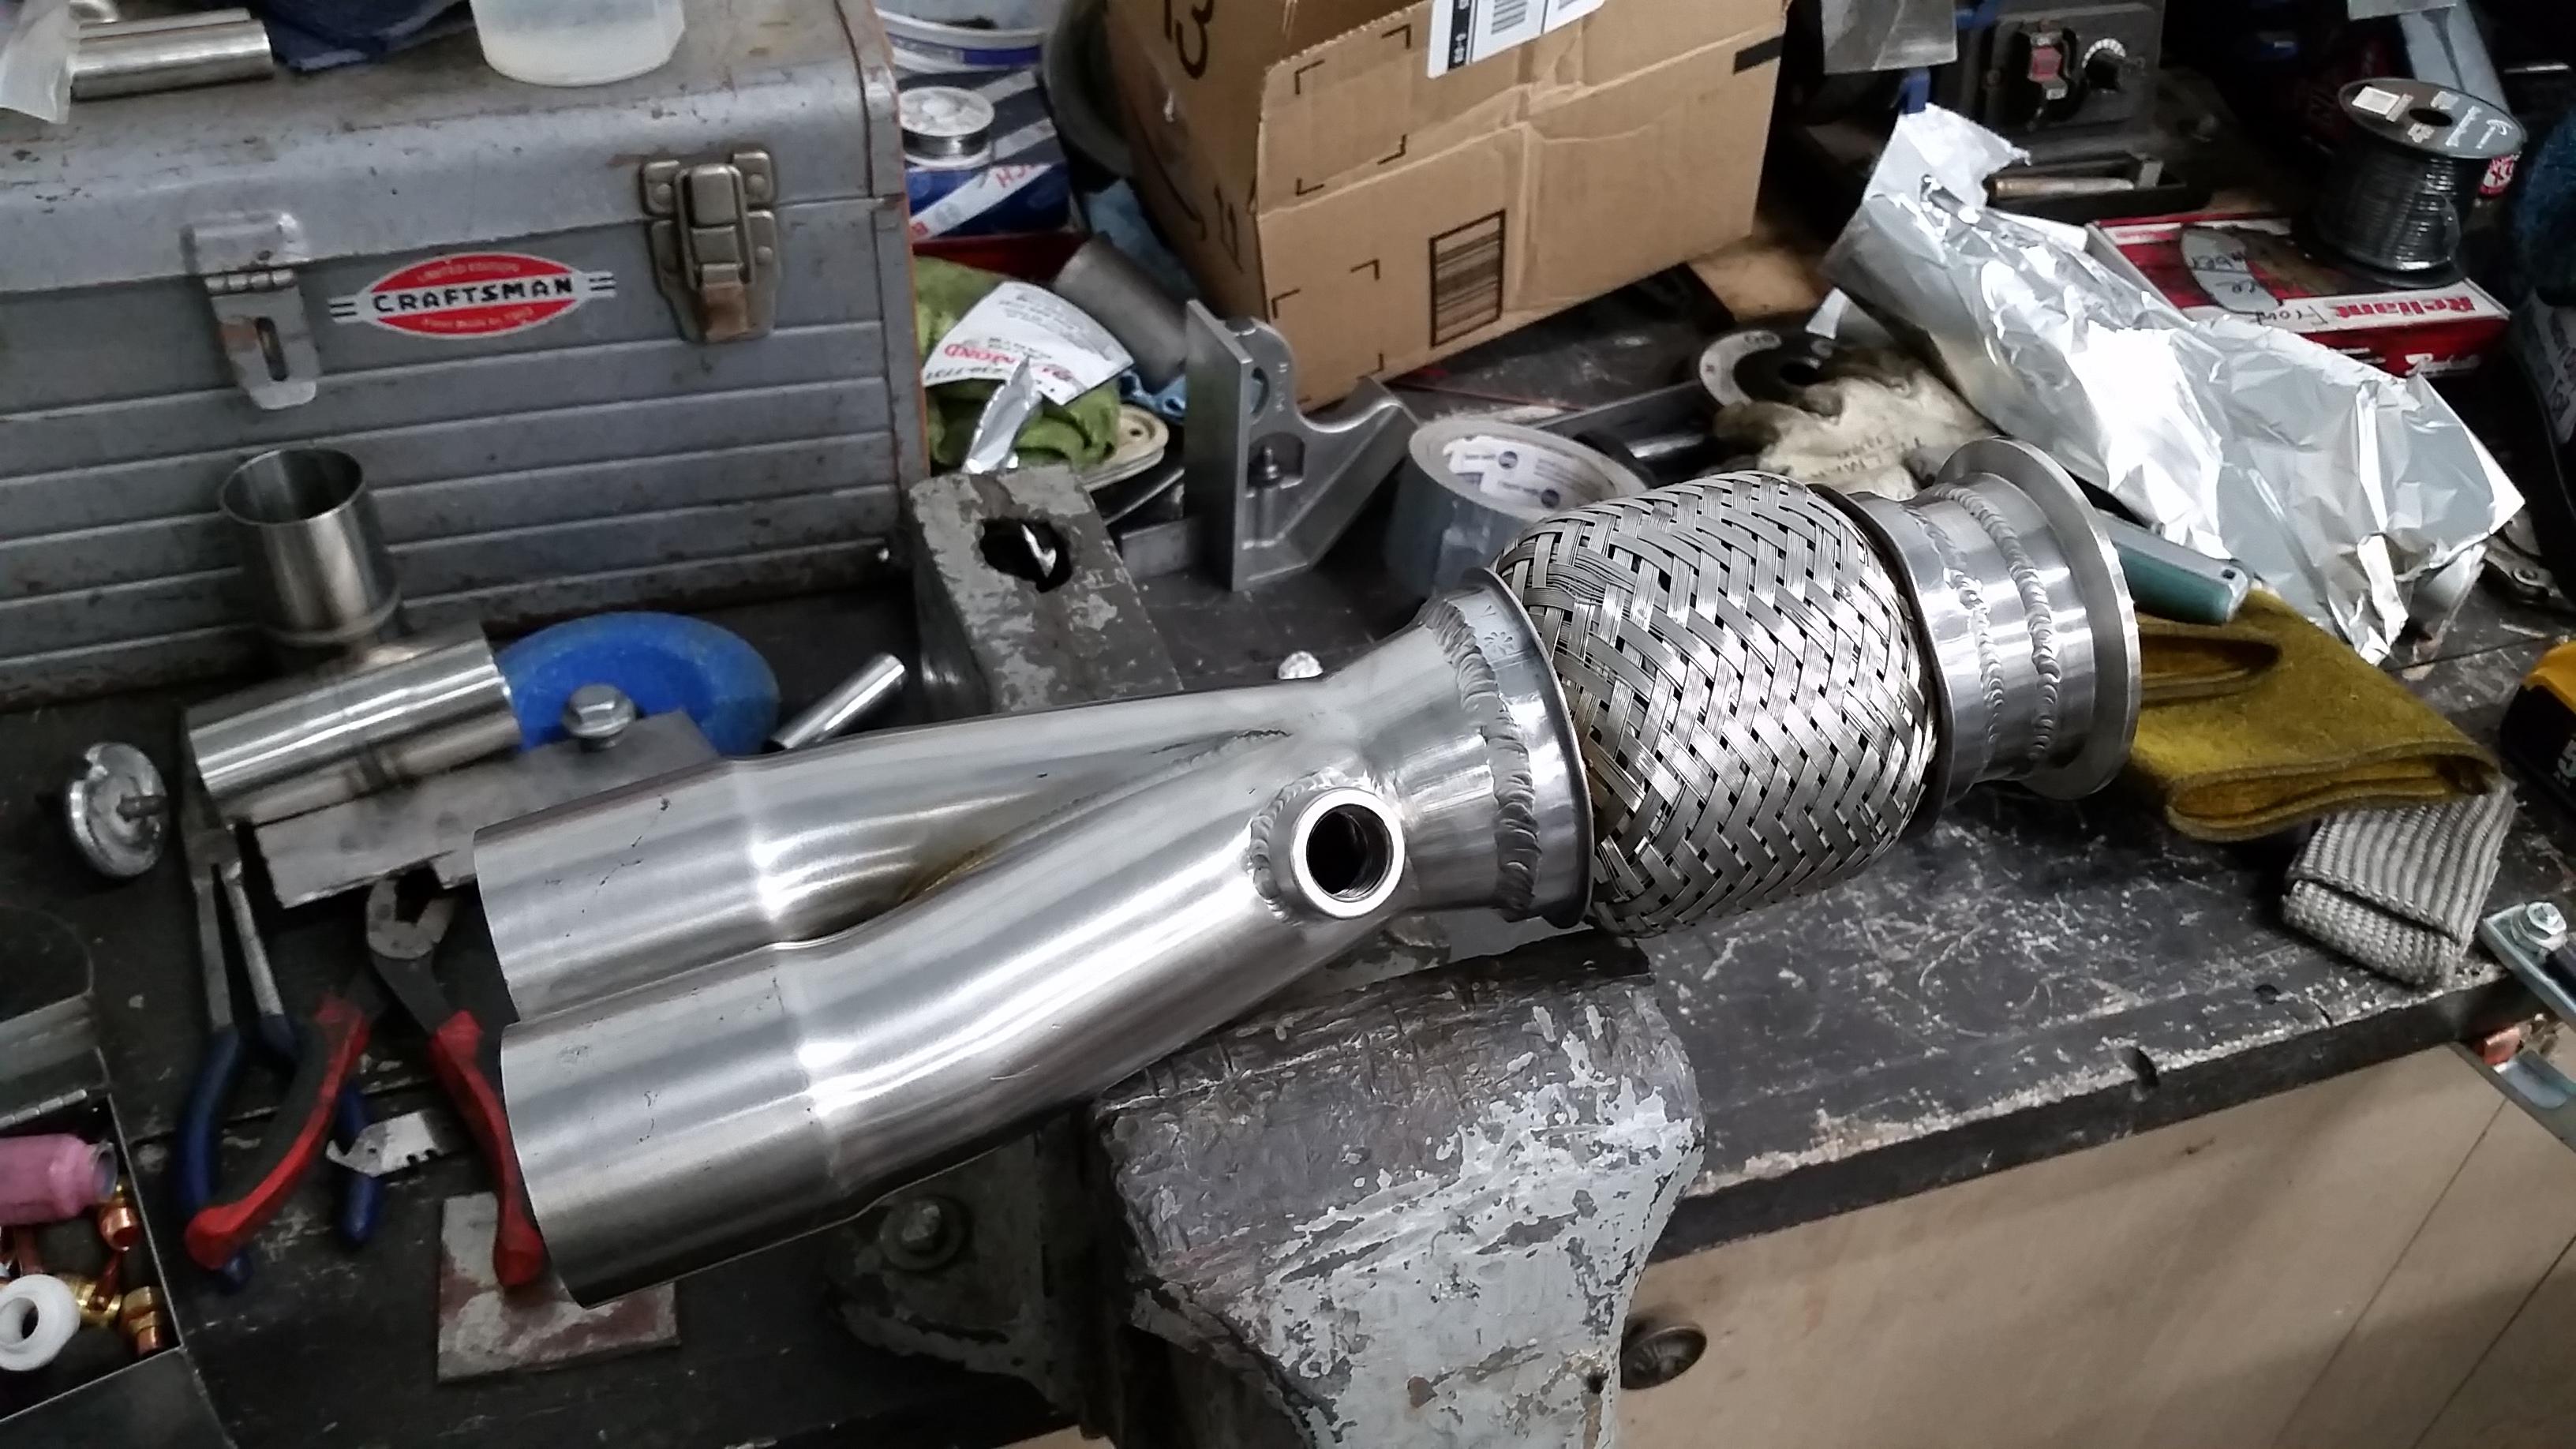
Was super stoked when one of my close friends hooked me up with a guy who runs a stainless polishing shop down in Kenosha that had a bunch of scrap 2.5 inch polished 316 stainless piping that he would be willing to give to me for free. So that following weekend I took a drive down there and he was kind enough to give me a tour of his shop which was very impressive (sort of disappointed I didn't take any pics ) and hooked me up with more then enough tubing I would need to complete the exhaust. There was a side of me that felt my car was not worthy of such nice quality tubing sense this type of stainless is considered food grade metal and is also used in parts made for medical equipment polished to a mirror finish. Now the wall thickness is a bit thicker then what normal exhaust tubing would be so the weight does go up slightly but It's minimal.
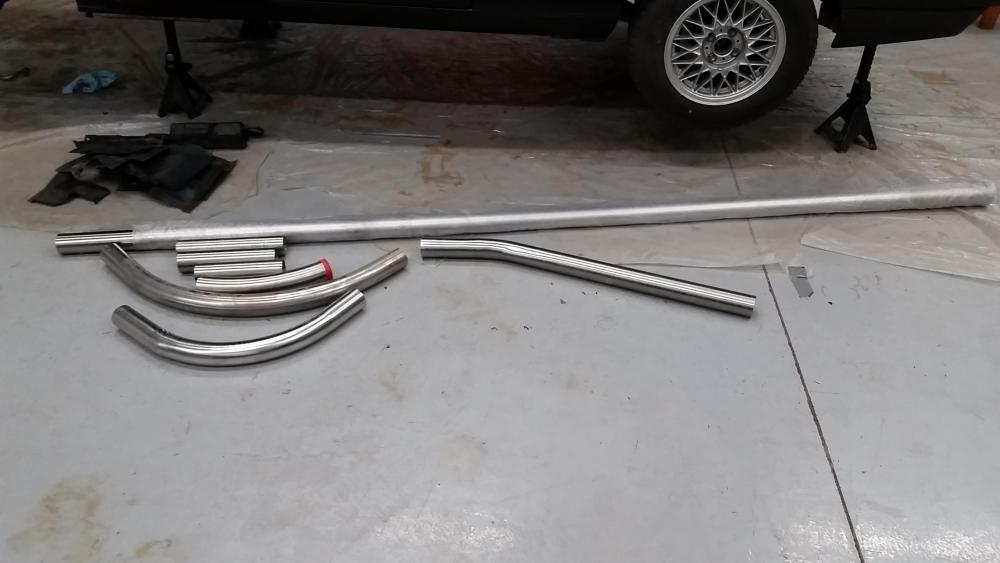
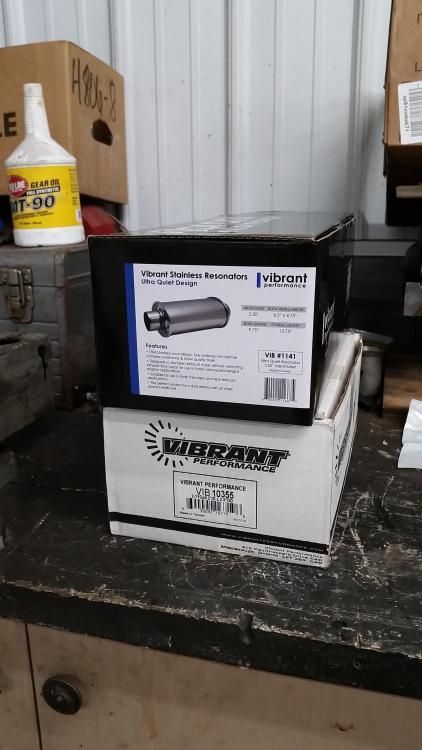
Ordered and received all of my other needed things for the exhaust from vibrant including a quiet flow resonator, y-pipe, o2 bung, flex tube, and clamp. I Kind of went along the same lines as @snap did on his exhaust for his previous e30 build. Thanks for the good info on ur thread for that man!
After everything was at the shop I had my buddy come over and get started on fitting everything up and doin his thing. Of course, the welds come out with a bit of discoloration once complete so after he was done he took a scotch brite pad on a drill and polished them up which looked much better.
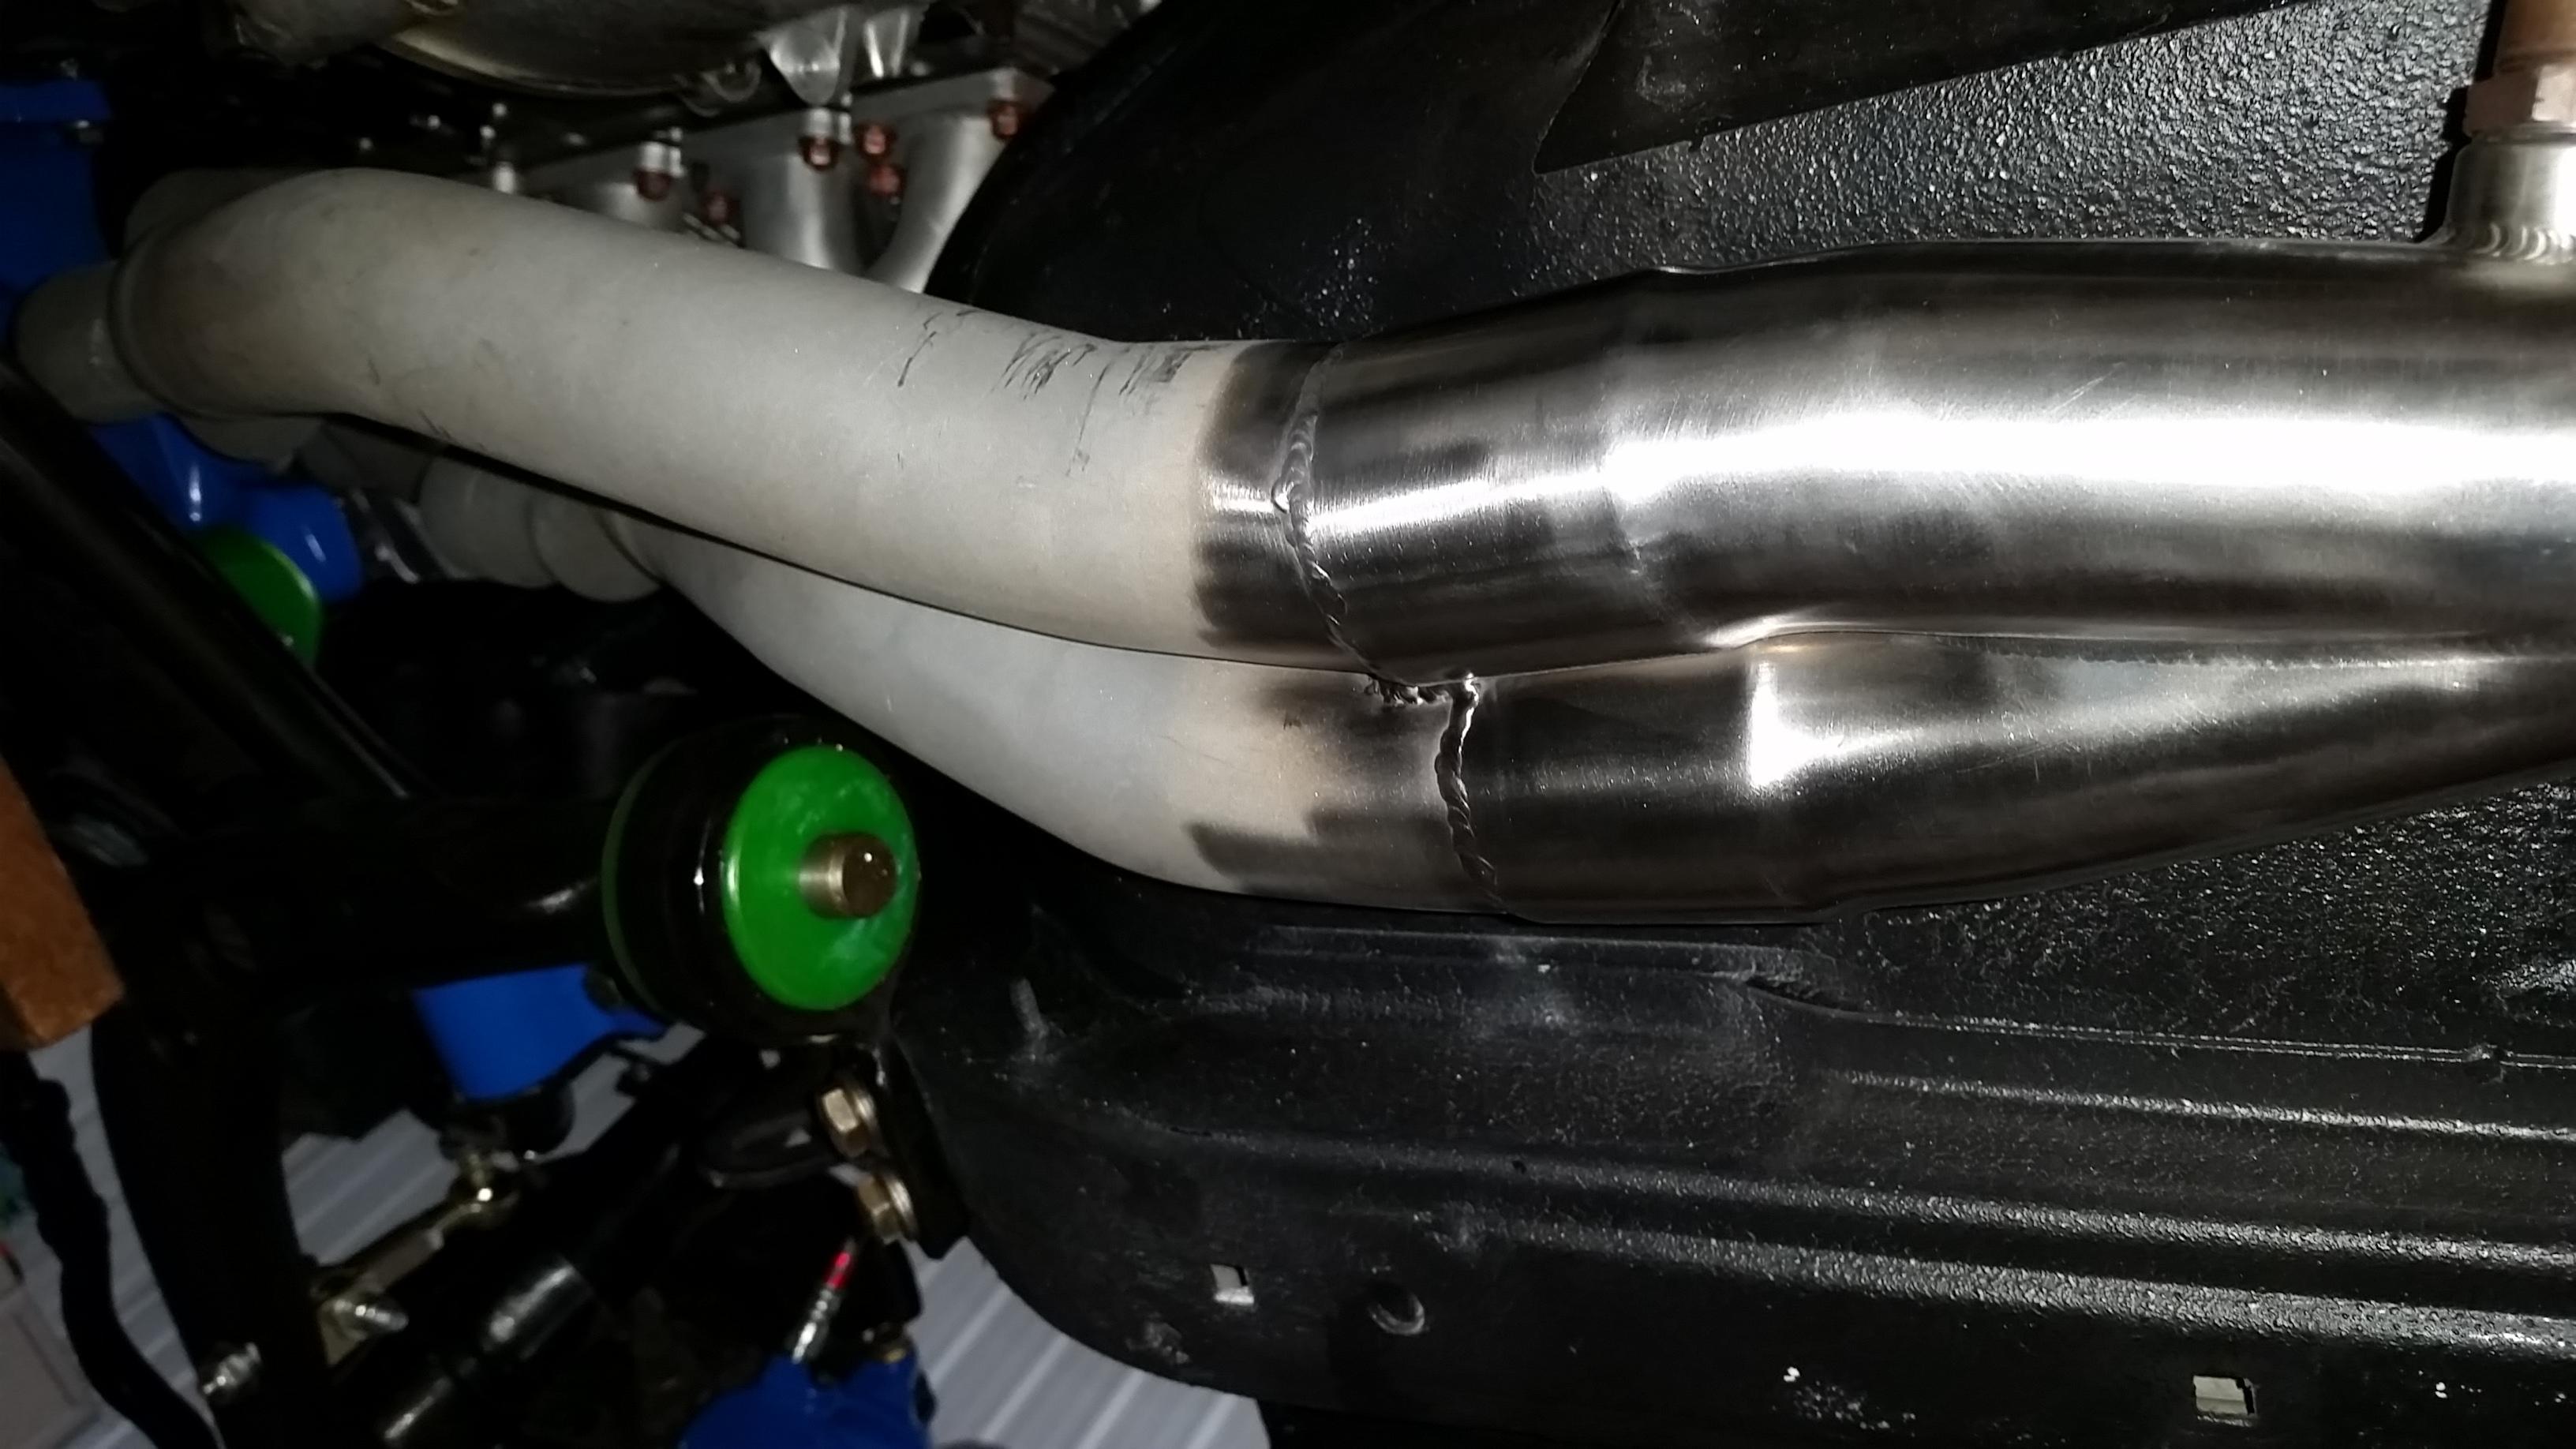
After getting that welded up it was time to throw it on the car. Few issues right of the bat. The header tubes didn't come out all that straight and there was about a 1/2 inch gap between them and the y-pipe was very tight. In order to straighten out the tubing a bit we pulled the cylinders 1-3 header out of the car and welded on a extra small piece of scrap tubing to bring things together a bit better.

After re-installing we took a c- clamp and brought the two tubes in a bit to fit the y pipe over.
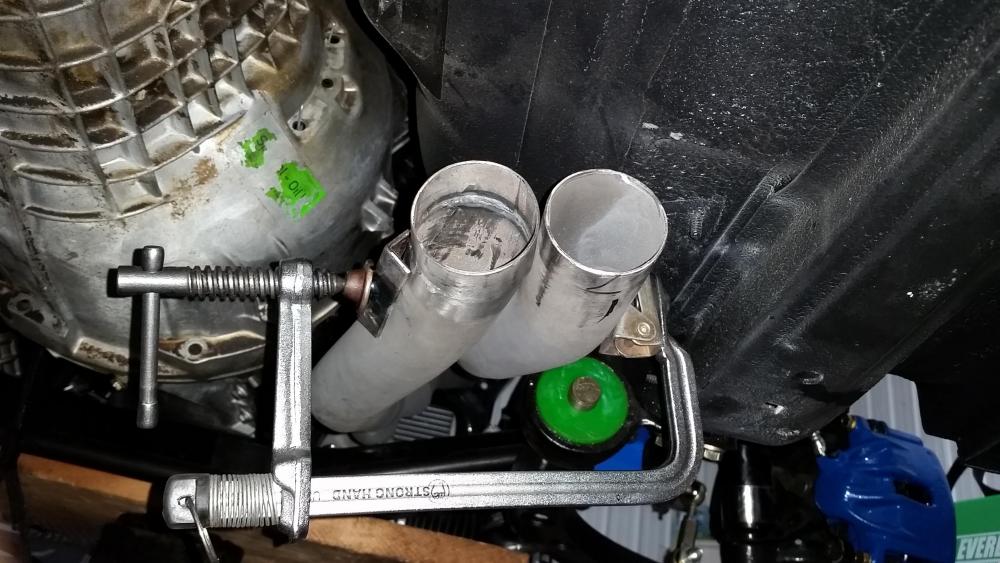
Once the y-pipe was tacked up in place we unbolted both the headers and angled them down so he could lay a nice bead all the way around. There was no way we were getting both the headers out of the car as a pair unless we dropped the subframe which I really didn't want to do so this was the only other option and it ended up working out pretty good.
To keep the headers from shifting we threw in a piece of aluminum clamped down by vice grips on the flanges to keep them straight.

I did feel a little bad for him though as he had to get into some pretty shitty positions to lay beads across the top side.
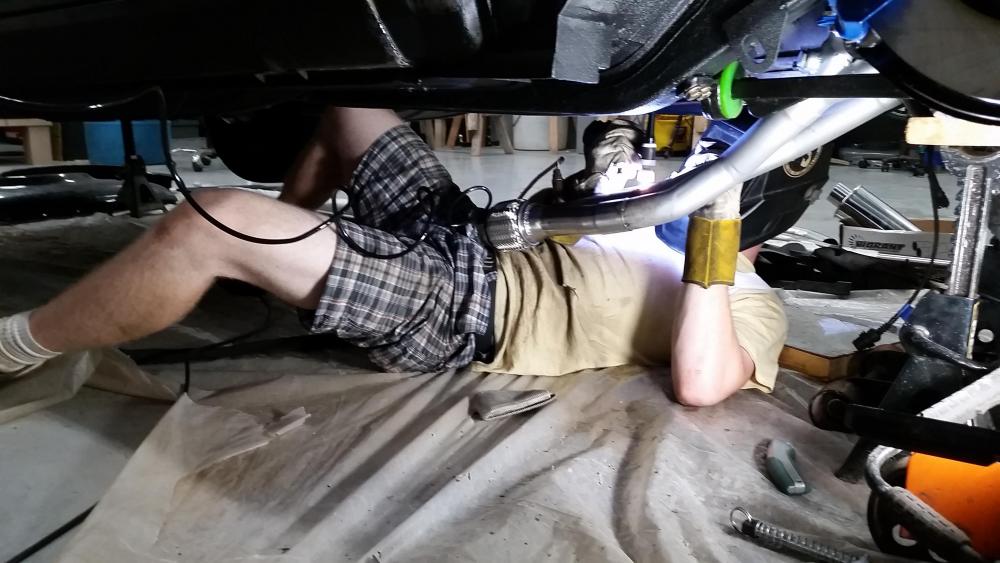
Of course it would have turned out a bit better if the headers were sitting in the vice but he managed to pull it off and I still think it turned out great. After we got the thing welded up and cleaned them up with scotchbrite we got the headers reinstalled with new oem exhaust gaskets and torqued to spec.
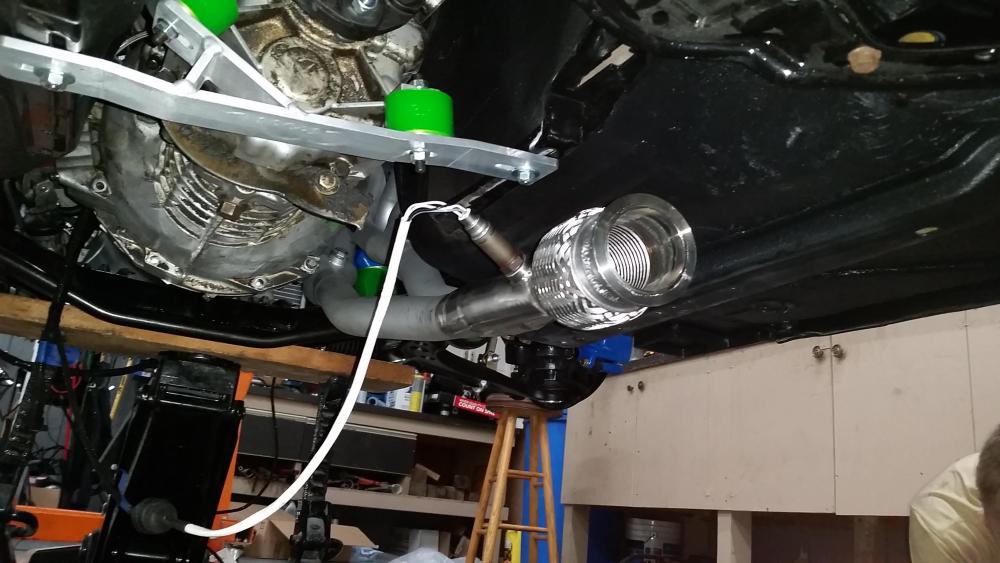
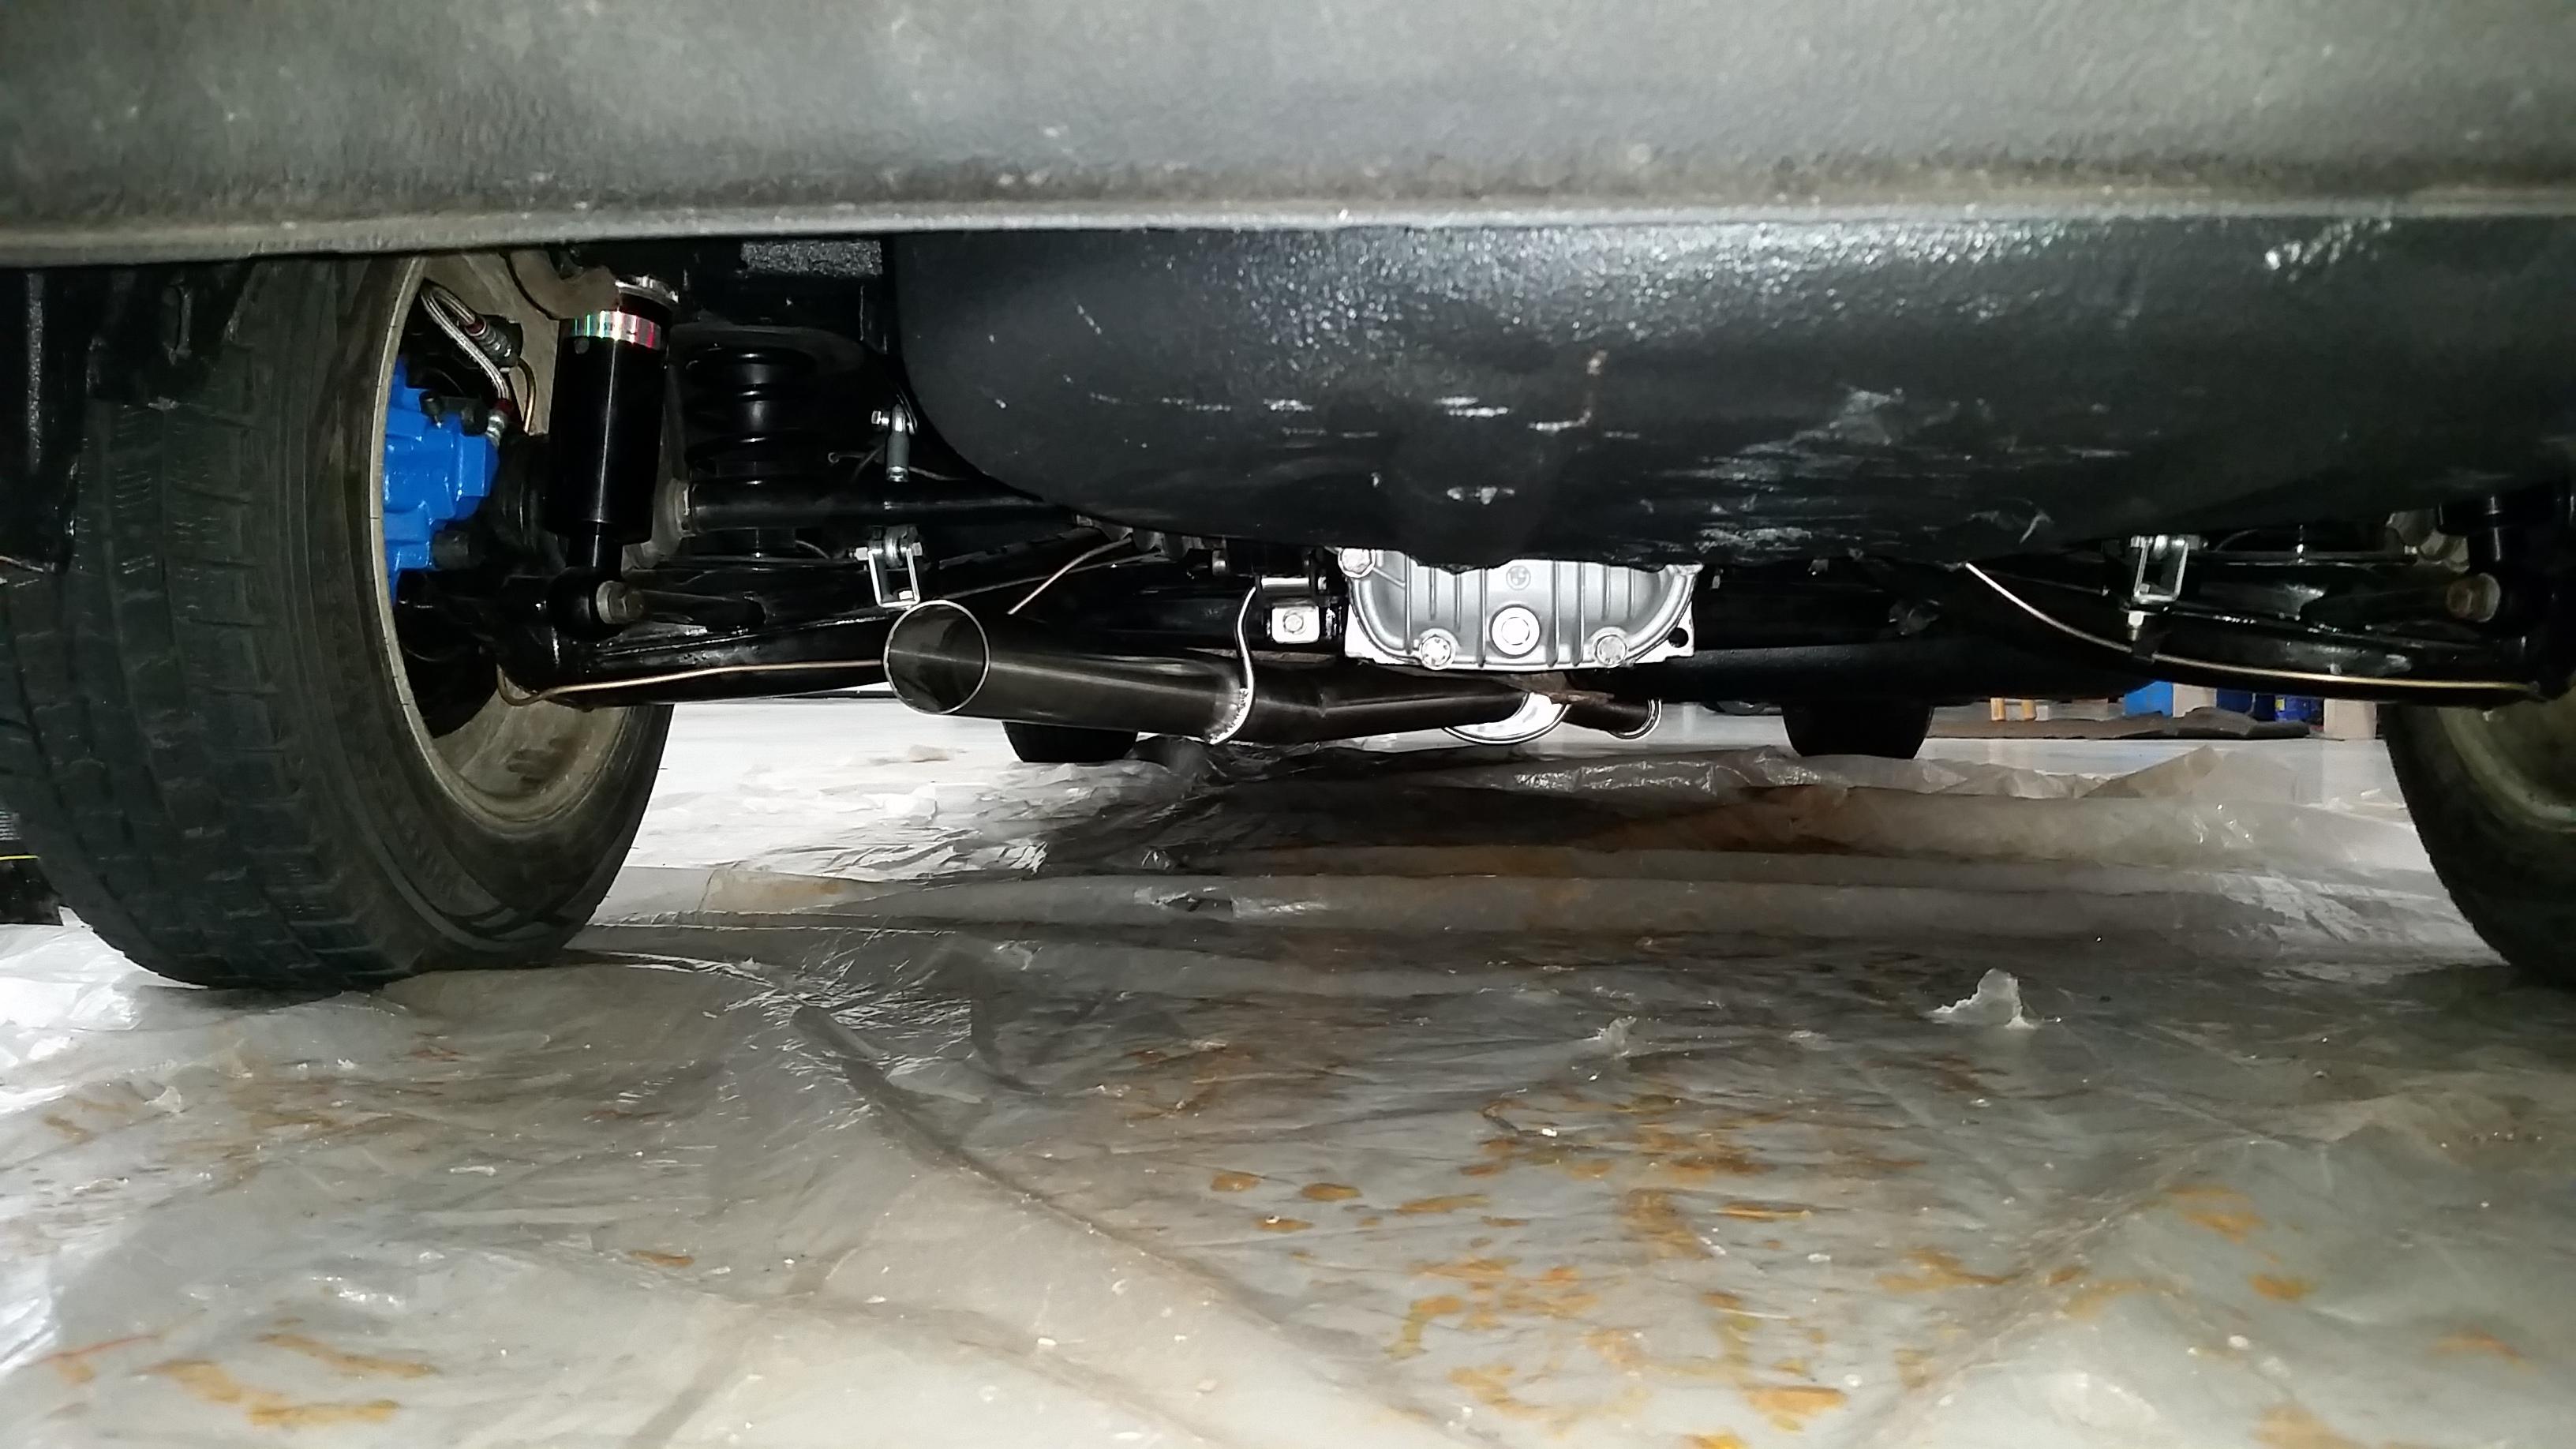
Tomorrrow he will be coming back over to start working on the mocking up the rest of the exhaust. I also ordered a 180 and 45 degree mandral bent tubing from vibrant which will come in very handy to make some of the turns to get the exhaust tubing to fall right down the center of the car through the resonator and pass under the rear subframe where it will meet a magnaflow muffler poking out under the rear valance for some very nice sounds.
Unfortunately I will probably fall short of my goal to try to get the car done by this weekend to make it to the cruise as even if I got it running I am still waiting on the seats which will probably not be here tell the following week,
. I'm gonna go cry now.
-
3 hours ago, m42b32 said:
Turner makes an excellent piece that includes a stainless version of the bracket. It's quite a bit more expensive but this is what I would probably buy if I was doing that job, plus it's the same cost as just buying the OEM one
This ^
FWIW, I used the Turner bushing for my linkage and its a very nice part, stiffened everything up quite a bit more vs. Oem and its gonna last quite a bit longer. The price is a little high in terms of what ur getting so I would talk to patsbimmer about pricing, he got me a much better deal on it.
- patsbimmer1 and m42b32
-
 2
2
-
Now, whats the chances of that sealing up after a heat cycle or two and a re-torque of the headbolts?
-
1 hour ago, straight6pwr said:
you sure you got RTV between the front cover and the head? I see RTV seepage between the cover and the block, but not around the top.
No I did not put any rtv between the head gasket and timing cover, damn it.
-
3 hours ago, snap said:
Did you have the deck machined? If so, the timing cover needs to be machined the same amount. What sort of rtv did you use on the gasket? Black RTV all the things!!!!
See this is where I went wrong, I never had the engine deck machined. I only found out after the fact that in order for a MLS or cut ring headgasket to seal correctly it is important to have the engine deck machined. Although, my machinist said that the deck was checked with a straight edge and had no warpage and I have yet to see any leaks other then this small area.
Every gasket on the motor was installed with a layer of "The right stuff" black gasket maker.
-
Aaaaahhhhh yaaaaaa!!!
I still can't believe how well the motor is running and the fact that it even started! it idles very smooth. Gotta be honest, Was a little worried whether or not it was gonna start at all and if it did that it was just gonna throw a rod through the oil pan right away or something.
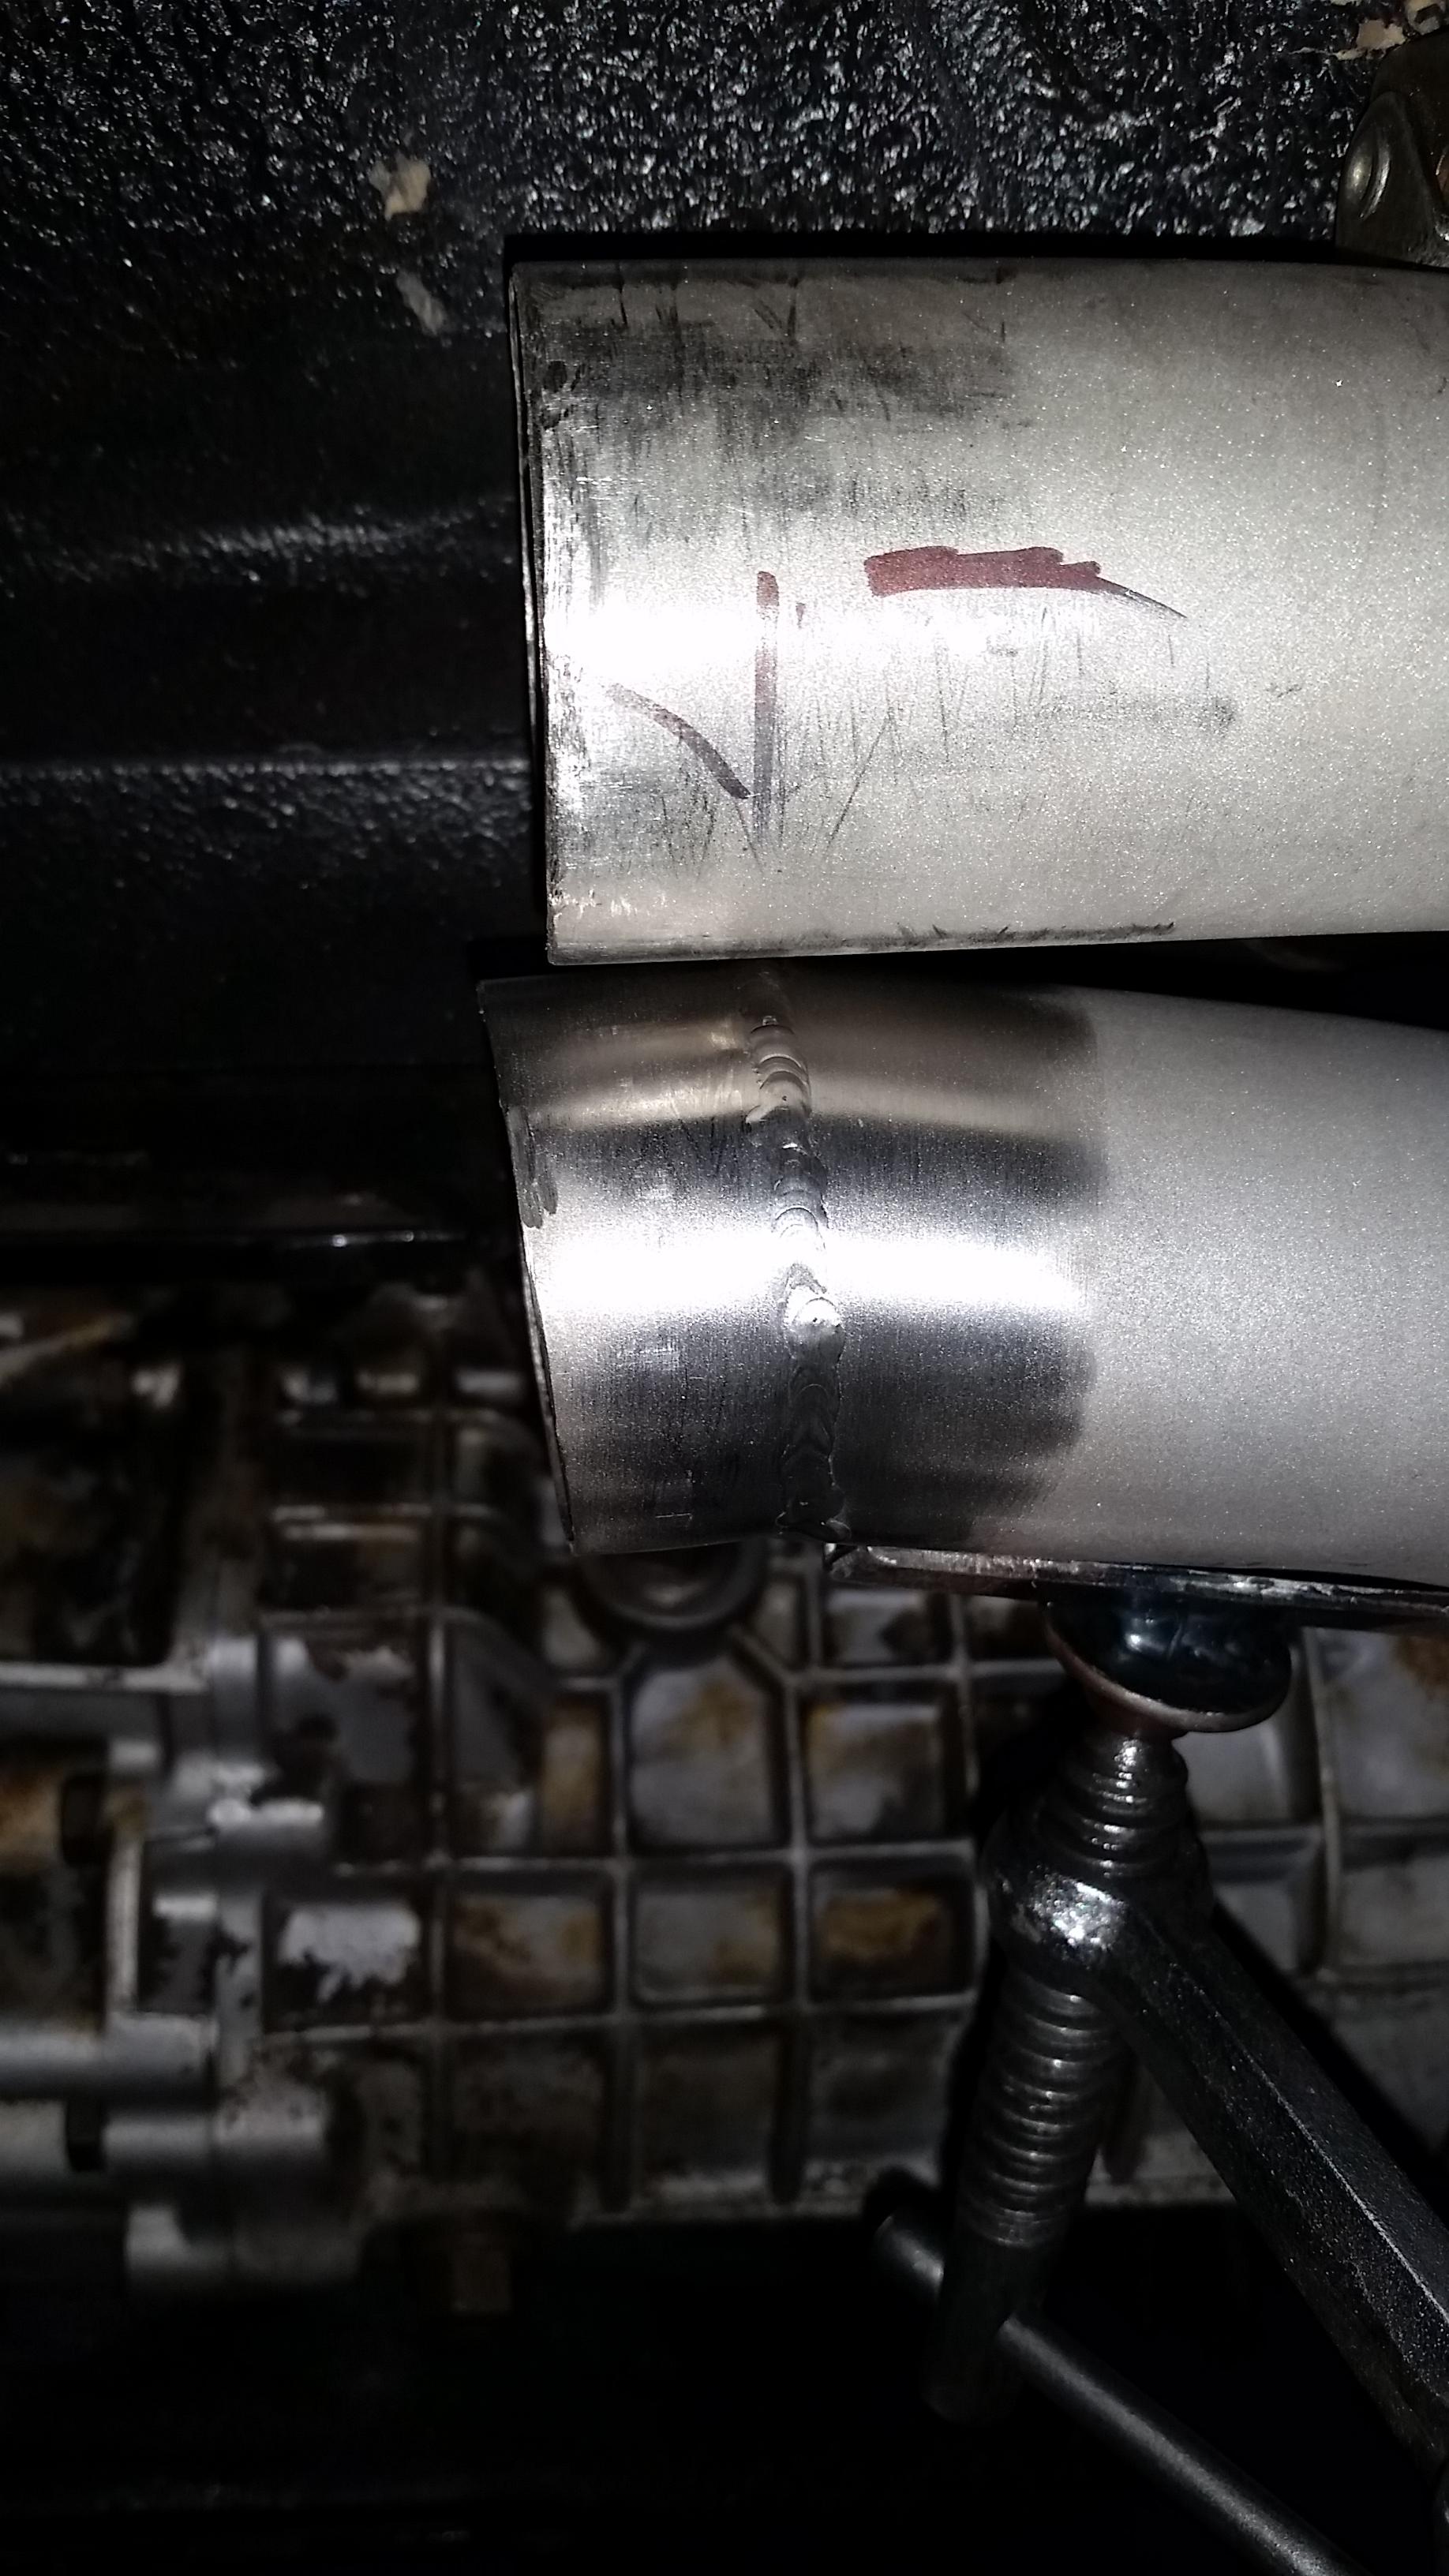
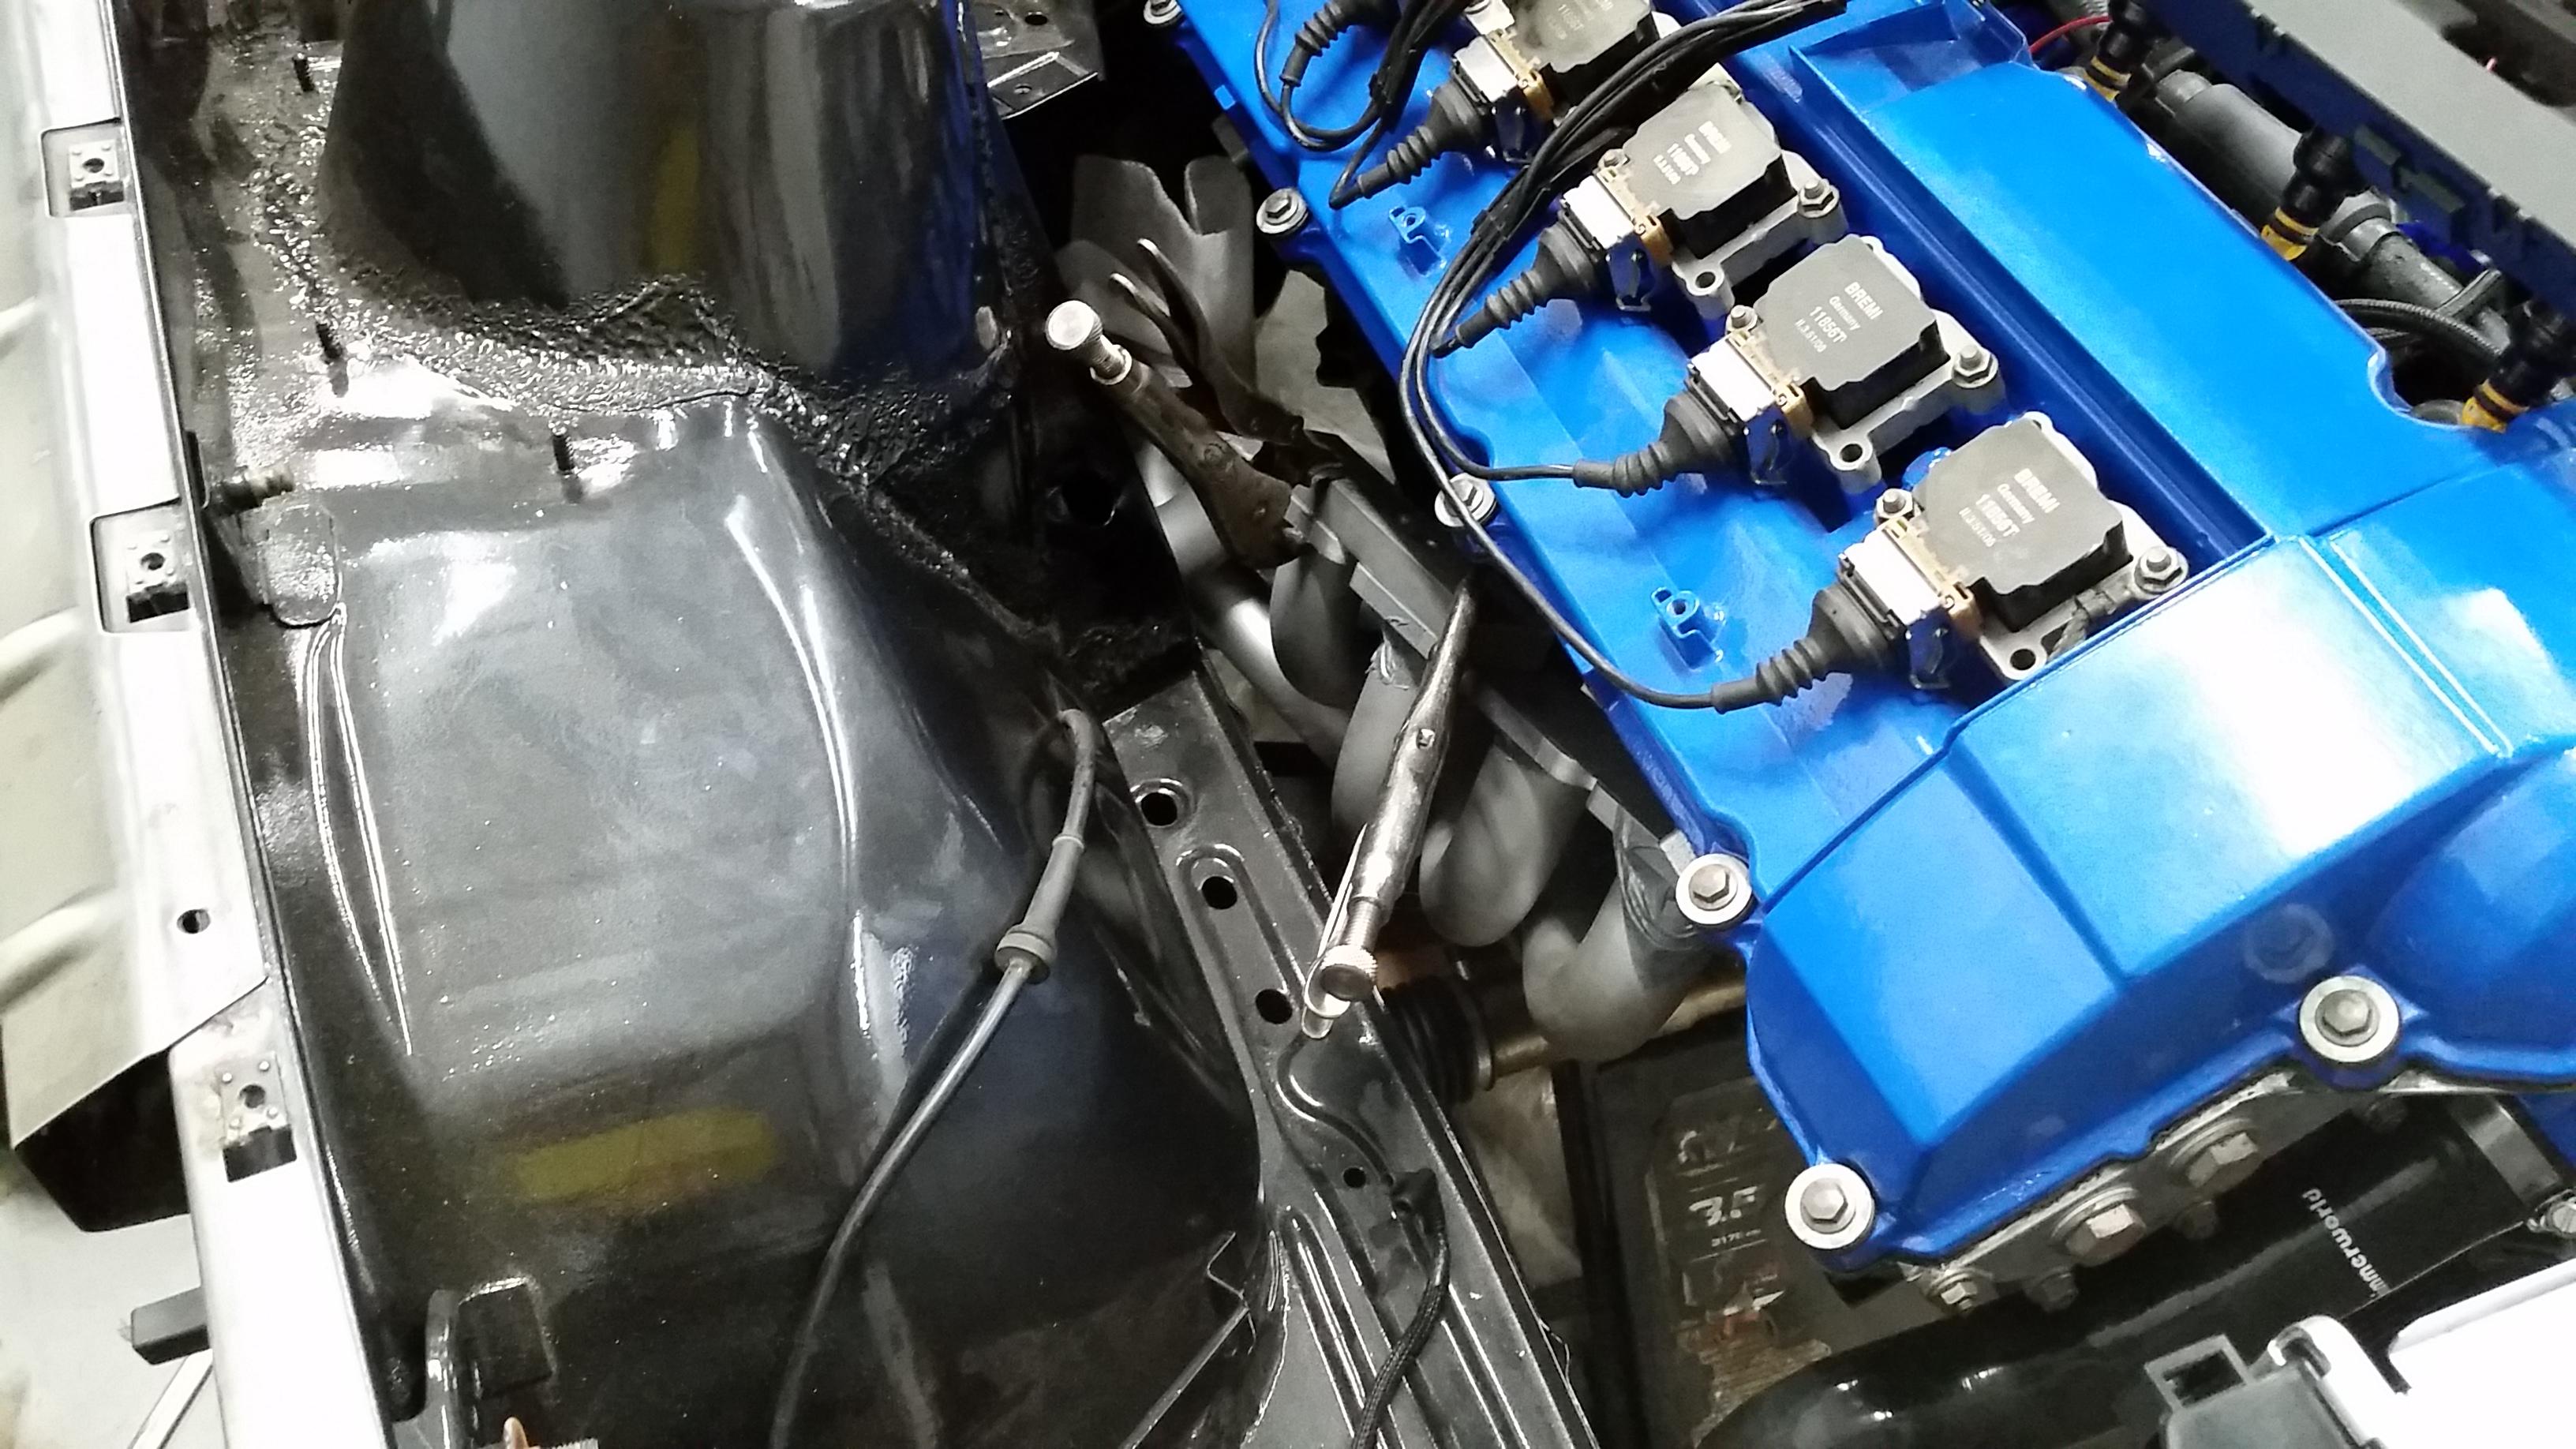
Now the motor ain't perfect and in fact I may still have a possible minor problem that could turn into a major one. It wasn't tell the second time I started it up (for my grandfather who was very excited to hear it finally run) that Ben noticed a very bad oil leak coming from the right side of the motor where the engine block, head gasket, and timing cover meet.
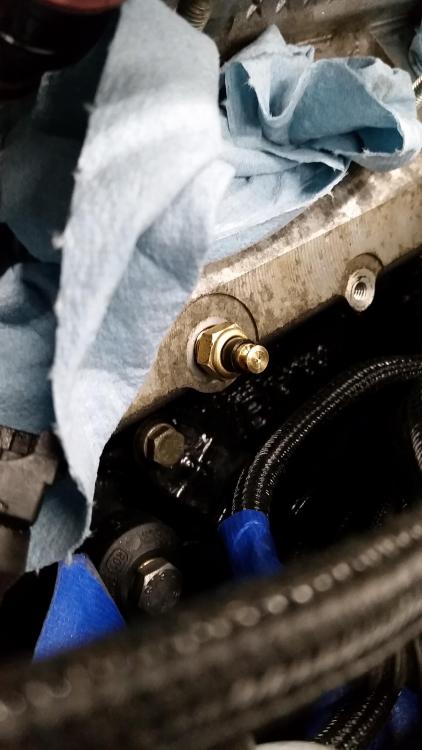
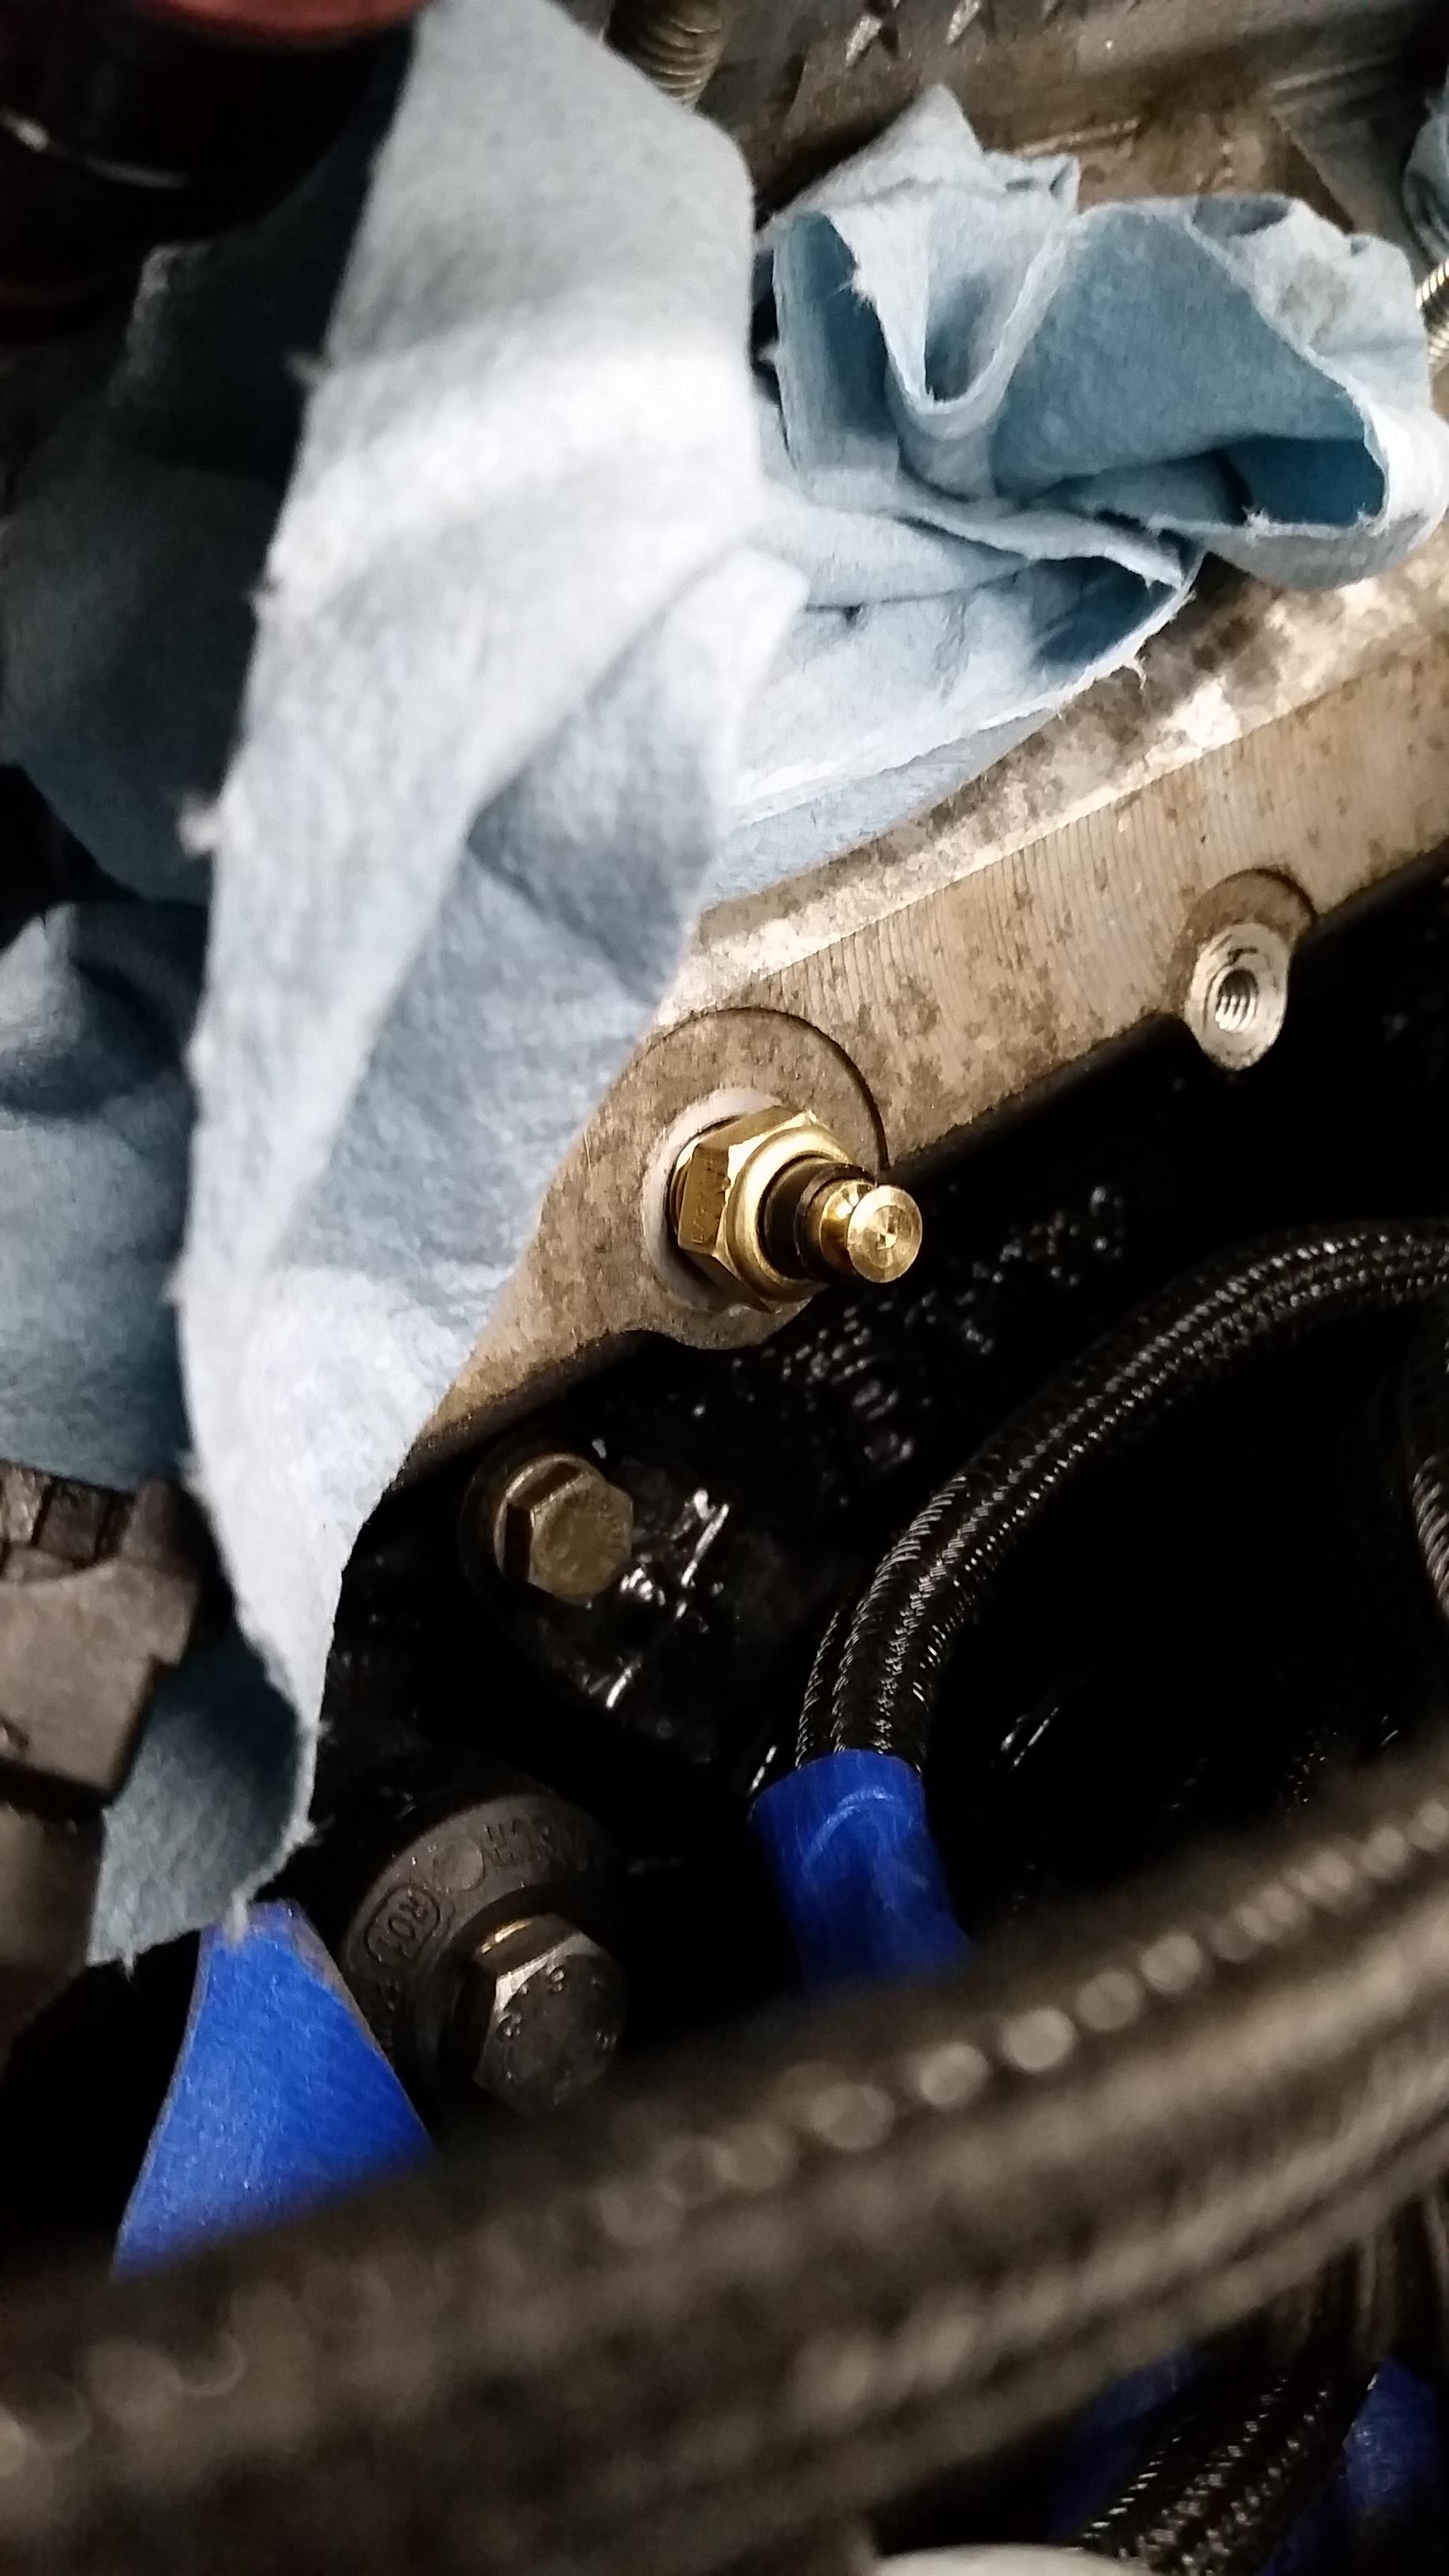
Assuming my head gasket wasn't sealing properly and I was gonna have to pull the head back off I almost immediately felt like falling to the floor and crying. After chatting about it for a bit and running it another time I got a better look at where the leak was coming from and I can't even begin to explain how relieved I was. I never installed a crush washer on the primary timing chain tensioner and it was leaking very quickly.
Friday rolled around and right after I finished up at work I picked up the correct size crush washer from Napa, installed it torquing it to spec, and ran the motor one more time.
The super fast leak I was experiencing before is gone which is a plus but, as you can see there is still a small amount slowly seeping out of the area where the head gasket and timing cover meet, Shit.

As for right now I'm gonna get the rest of the cooling system hooked up and run the motor through a few heat cycles, re-torquing the head studs after. Only after doing this does it continue to leak I will most likely be pulling the head back off 😫 and assessing the problem in more depth which will probably conclude with me going back to a oem head gasket which is what I should have done in the first place but I'm a noob at this and sometimes I think I need things that I really don't and it comes back to bight me in the ass.
Onto other things... interior is almost completely reinstalled. At the moment I am on the hunt for another driver side sport seat of any color or fabric as long as it has a good bracket. Tomorrow I'm going to be giving a junk yard down in Milwaukee a call who apparently have some out of a 88 325is, really hoping they're sport seats)
As for things to get done the list is plentiful but definitely attainable. I have to take the intake manifold back off to finish up installing the coolant spider hose and upper heater core hose so that I can finally fill the system with coolant. I also have the bimmerworld sending unit block to install as well as sending units for oil pressure, oil temp, and coolant temp (still waiting on them to show up). If everything shows up this week and I find a seat, hopefully I can take the car out on the road for a short drive next weekend and break in the motor a bit.
Next big thing on the list though will be the exhaust system for sure as I do plan on making my own and I do not have that all figured out quite yet.
-
Oh I so want to do this... Count me in if my engine runs by this weekend.
-
I shot my machinist a message yesterday about it and he also recommended brad penn for initially breaking in the motor. Said he's used it in every fresh rebuilt motor he has built.
Looks like we got a winner!
As always thx for your feedback guys, very much appreciate it.
-
I know there is a lot of info about this out there and I have done my fair share of reading so I mostly understand what I need. Sense many people on here have rebuilt motors from the bottom up and have good experience with such, I just wanted to know what type oil you ended up running for the first start up and break in periods. So far I have looked at some break in oils (which just seems to be sae 30 with zinc additives) and I also know not to run a synthetic based oil as it prevents the rings from seating properly. What has been used successfully on others builds?
Thanks!
-
😁😁

(ya I know, the pics are terrible. I dropped my phone and the camera lens hit a small rock and cracked so now I get fun little glares on every picture)
-
I feel so lame with my wimpy amounts of progress lately.
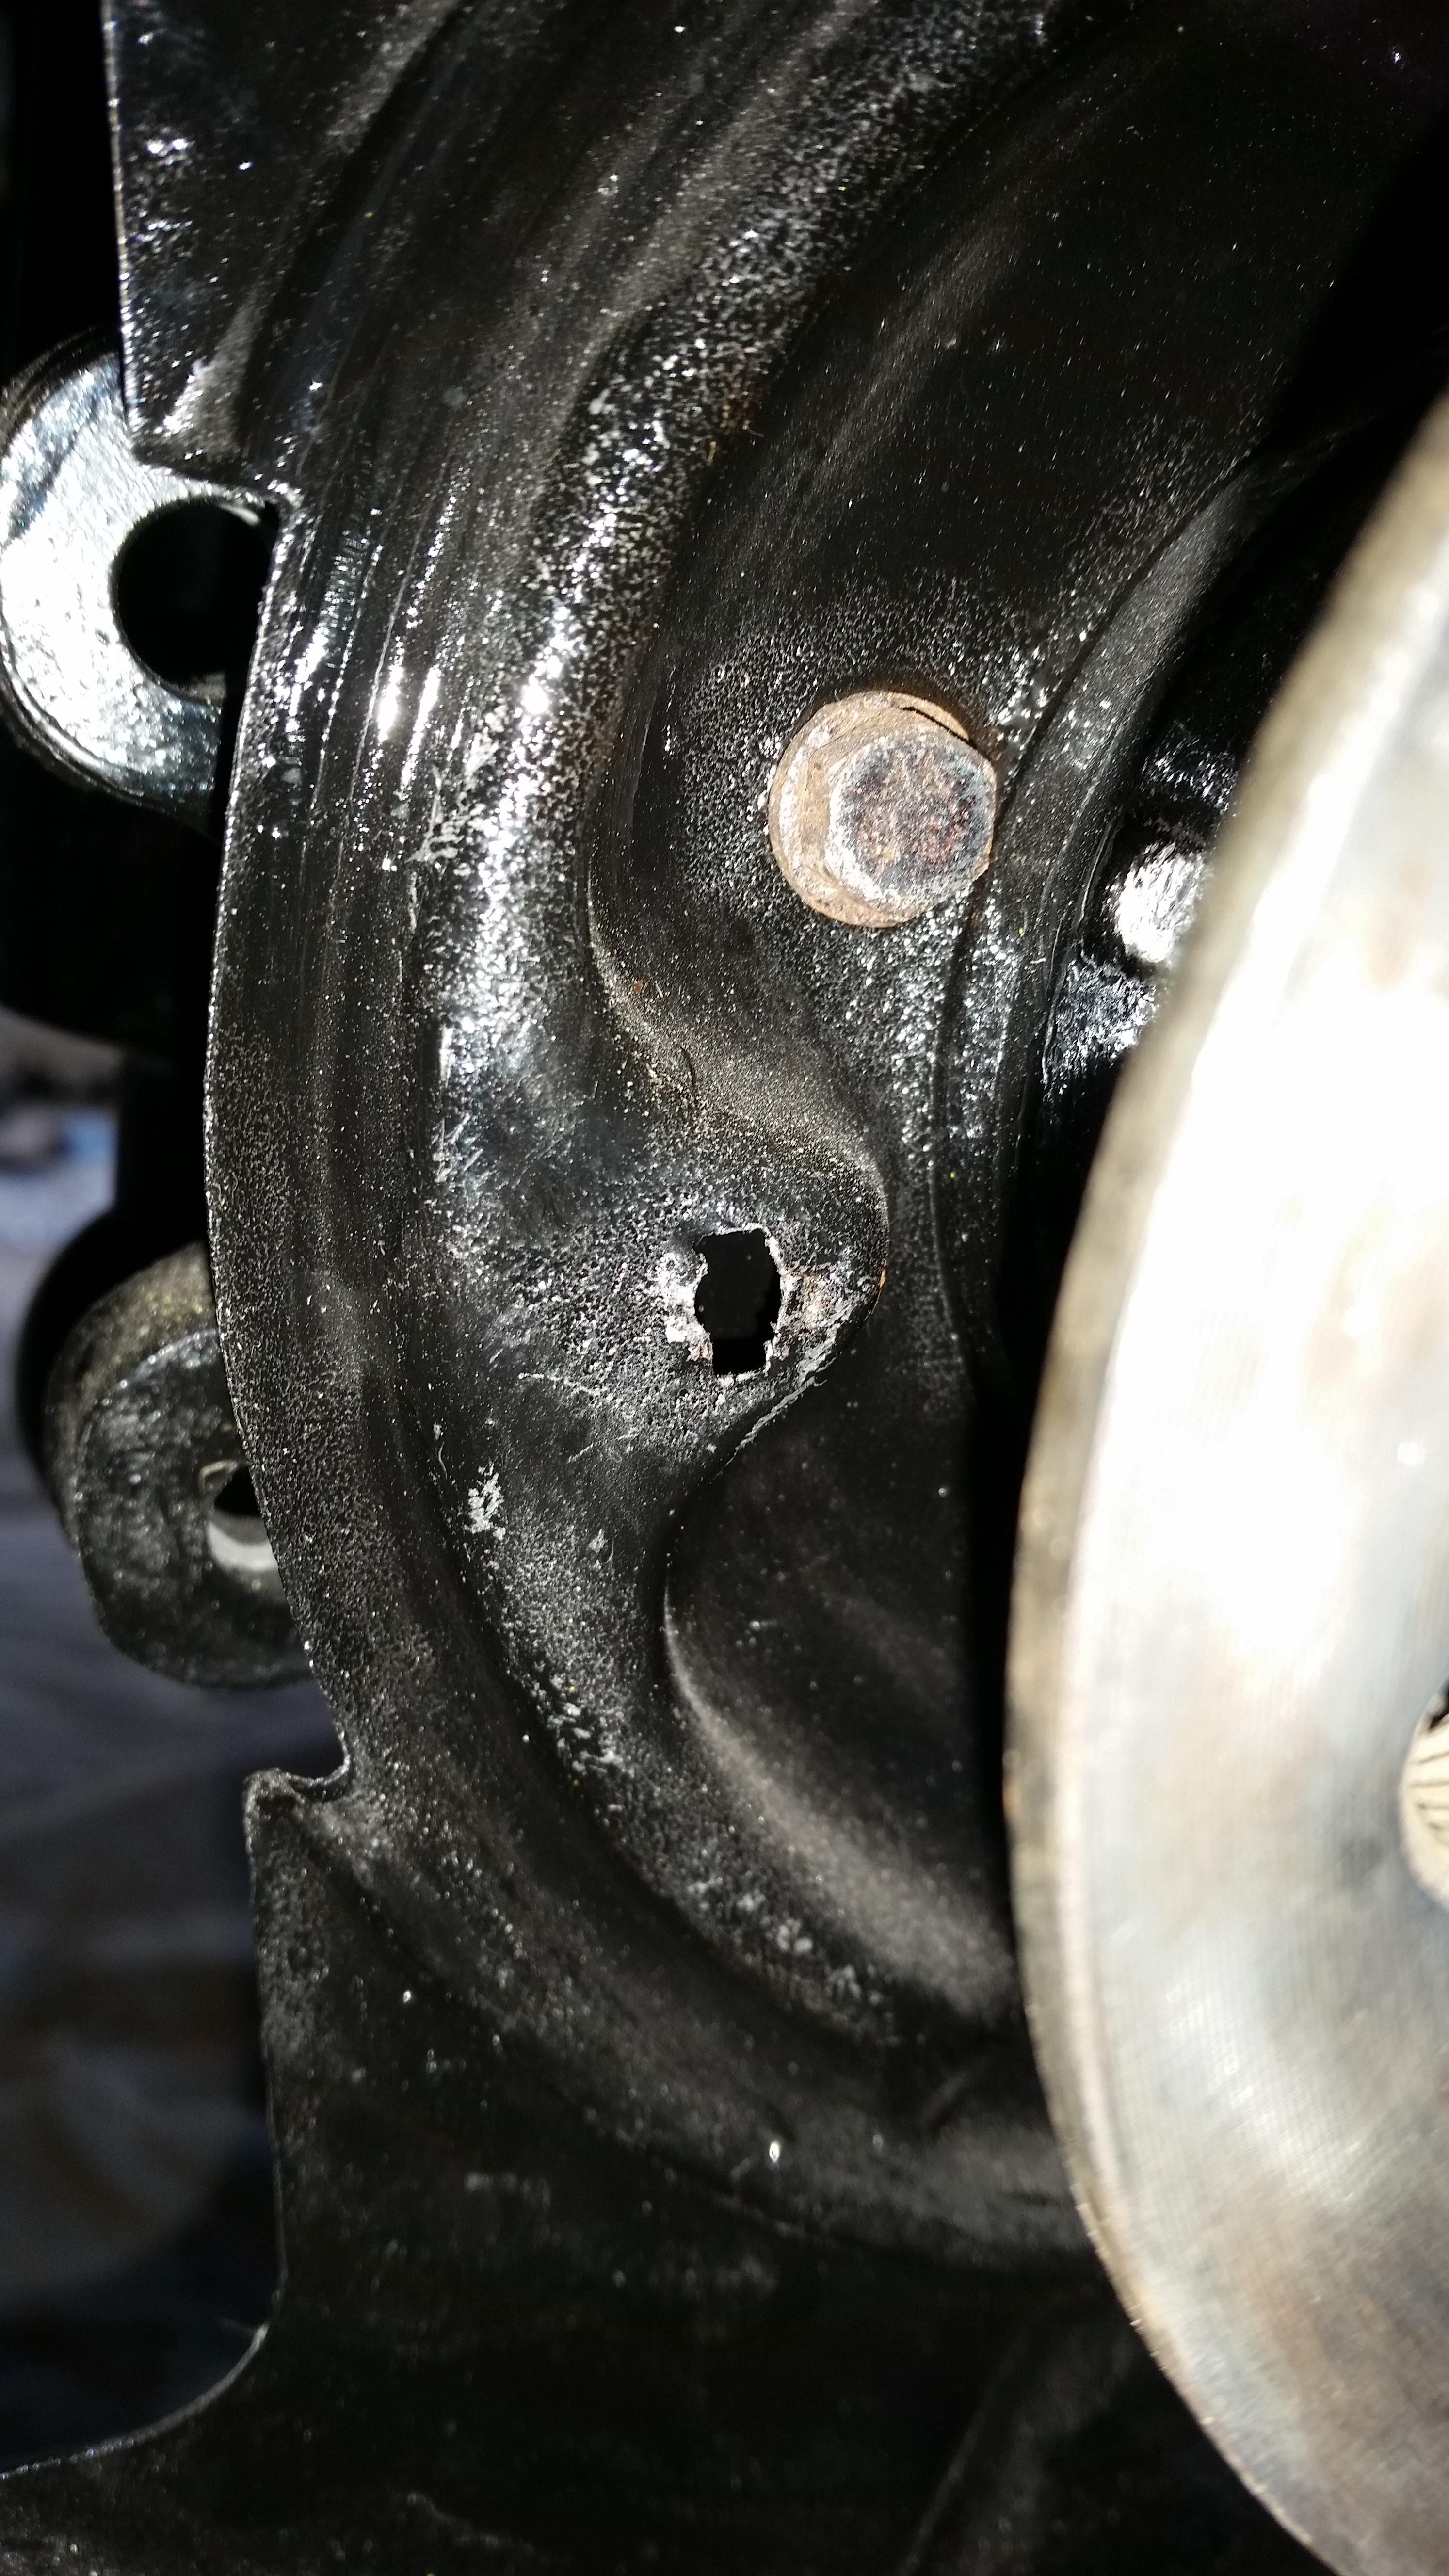
Got the output flange removed, pulled the dampener off so I don't have anymore dssr clearance issues, then reinstalled. Had to modify a 30mm socket just slightly to fit around the nut.


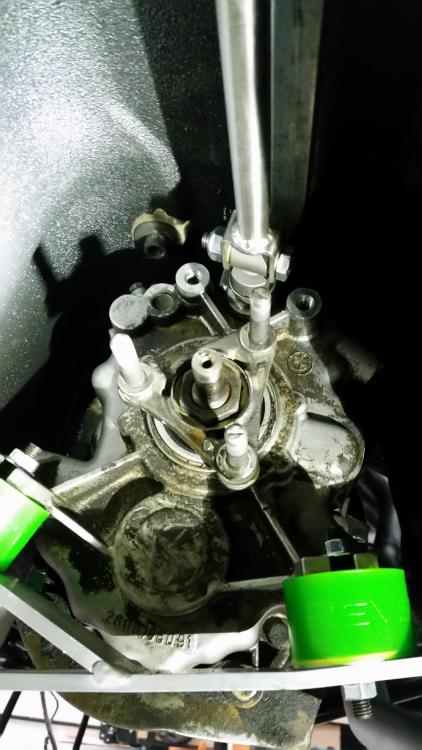
Now that the dssr clears, everything feels nice and tight and the shifter is very crisp. As you can see though, I'm having some lineup issues.
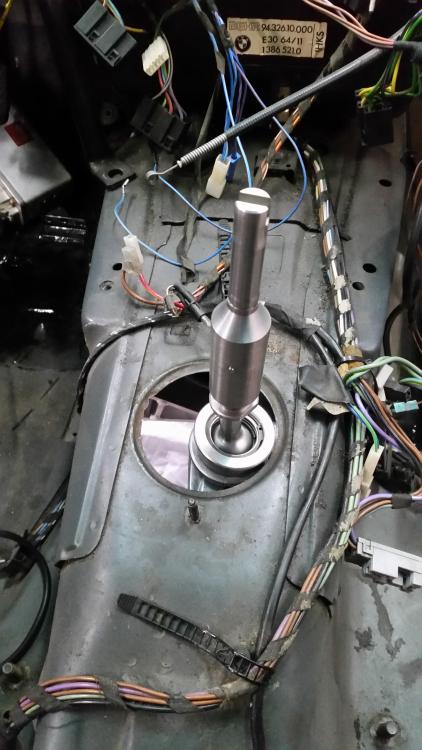
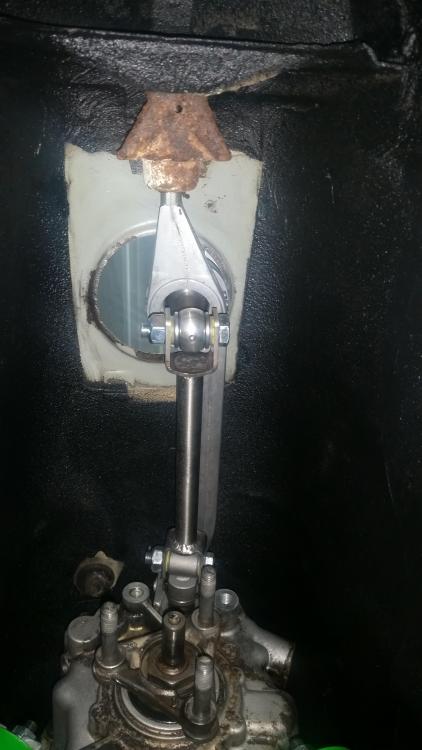
I have no issues with shifting and it goes into every gear with no interference's but the thing is completely off center and looks wacky as hell so I'm just curious what others have done or if they had similar issues.
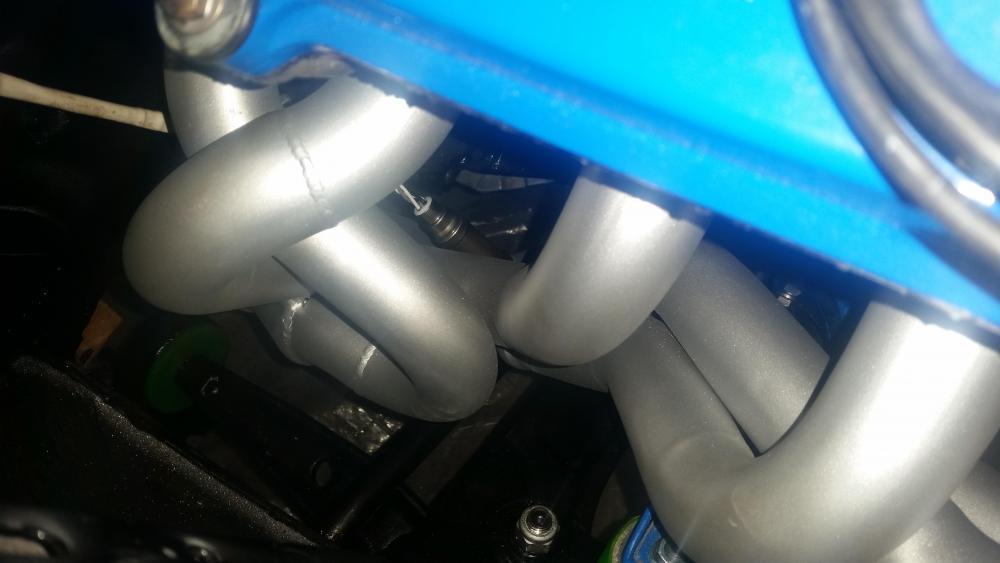
Ceramic coat headers... check
Re-installed them and was relieved when I crawled under and was able to screw in my O2 sensor with just enough clearance on the original bungs welded on the headers.
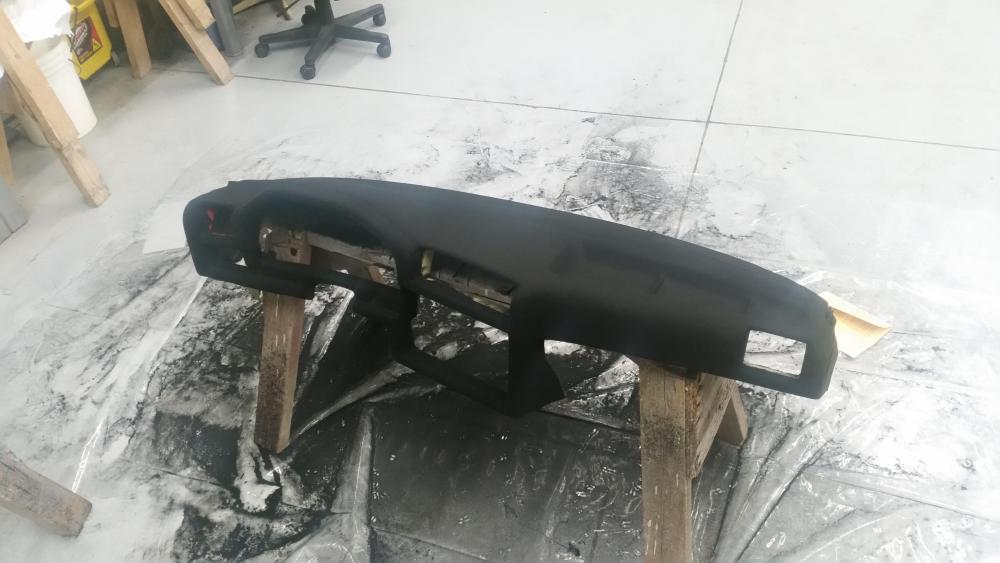
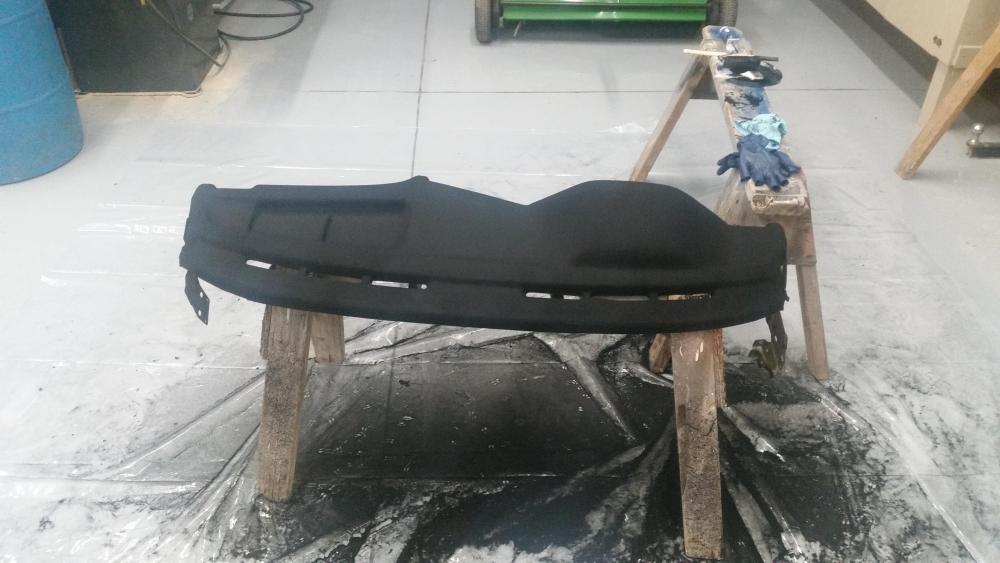
Last week I pulled the dash back out and threw another layer of the flock it kit on there. It needs about a week to cure completely before blowing off access and reassembling.
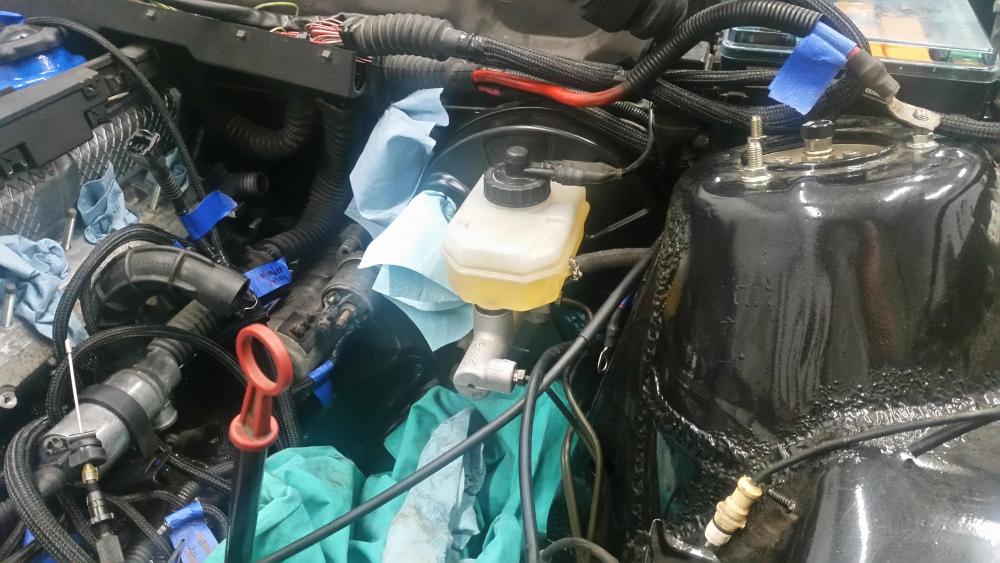
At the moment I'm waiting for the last of my parts to show up for the motor so to keep chugging along I took some time to install and bleed the entire brake system, brake pedal feels great and there are no leaks!
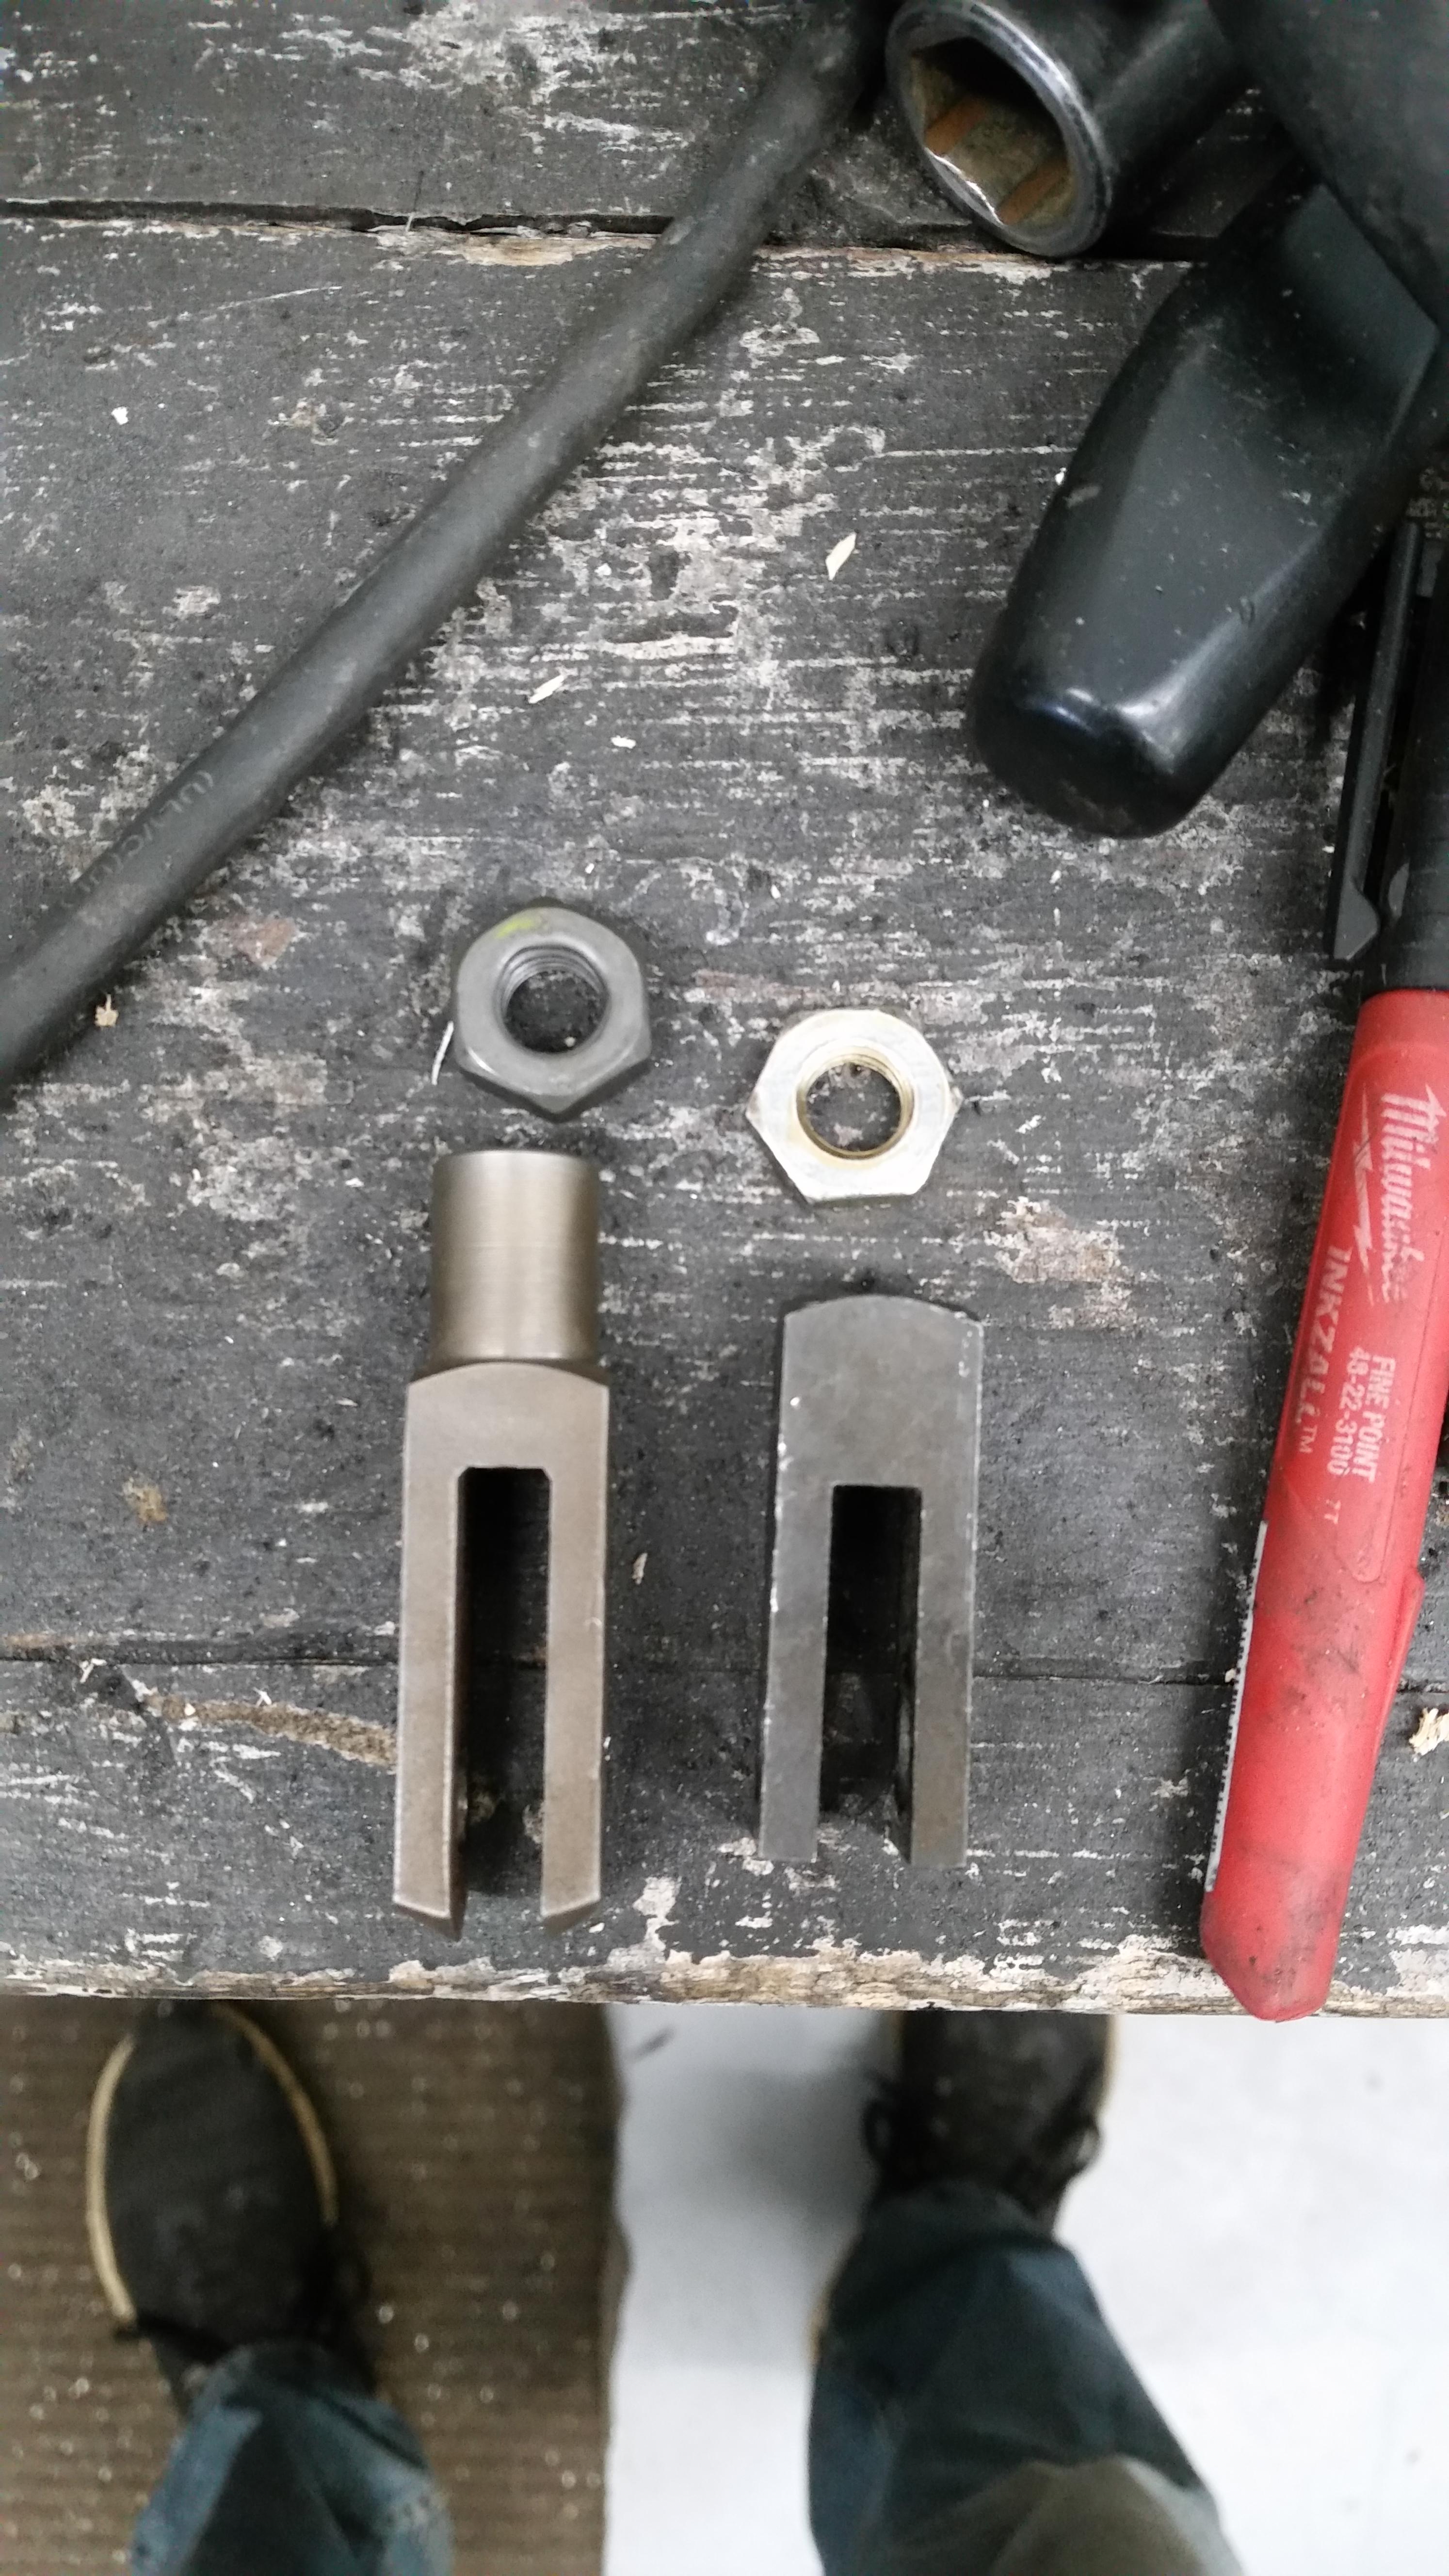
Figured out why I was having troubles with the booster rod not bolting up to the pedal...
I was trying to use the 944 clevis (left) instead of the original e30 one (right). All I can say is I'm lucky I didn't take any more off the threaded rod cause once I put the e30 one on it fit up perfectly!

On to more brake related things... doesn't look like I will be having a e-brake this season. Instead of replacing the dust shield like any person with a brain would do I decided to sand blast and por-15 the old ones in order to save them. Well, turns out the metal is a bit to corroded through around the holes where the pins go in to hold the shoes and every attempt at installing the pins with the springs results in it just ripping back out and tearing the hole even more, yah!
Sense I will have to replace the dust shields (which means pulling the trailing arms back off and the wheel hub) I removed the e-brake lines and decided I'm just gonna run no e-brake for this season and mess around with reinstalling it next winter.
I did get the carpet scrubbed as best I could this last weekend. There are a few stains that are most definitely coming out but they are in areas where the floor mats will be covering so I'm not gonna worry about it to much.
Hoping to get the carpet and dash reinstalled by the end of this week.
Also gonna start tearing the front seats apart for reupholstering.
Oh! one other thing I should mention is I found an alternative replacement for the gas tank tube.
https://www.advancedfluidsolutions.co.uk/m16-x-15mm-swivel-nut-x-7mm---8mm-hose-tail-516-2107-p.asp
I located this website off the forums from a guy who had found this part that has the correct flared ends for the tank. With the barbed end sides you just have to run a rubber gas hose with a bit of slack from one to the other. Now these parts are coming from the UK so I'm not entirely sure when they will be showing up but the cost was so inexpensive I couldn't not give it a try and according to this guy, they worked great with no leaks.
-
3 hours ago, GunMetalGrey said:

-
Super stoked your not giving up on this, yets hope with a different motor we can see it spending more time on the road and less on the jack stands.
Keep up the good work!
-
1 hour ago, GunMetalGrey said:
Easy chief!
Is this because of your gender fluidity?It is.
It's not your fault, lol. I thought for sure I had the right sensor because real oem was giving me that same part number as the sensor you gave me under a couple different obd1 vehicle. Made me keep thinking something was funky with harness.


 \
\
.jpg.8aa209273bbdb4f27d44fd187408c04b.jpg) '
'


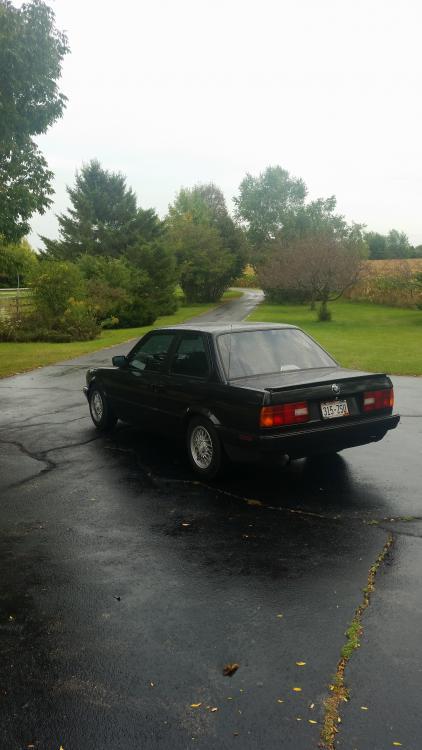
the one and only e30 s52 engine swap
in Members BMWs
Posted
When the car got painted I was gonna go ahead and do a wet sand and buff a few days after, Buuttt life happened and being that it is quite the tedious job I never got around to do doing it. That's why I didn't really flip shit over it as it is still on the list to do after all is done.