

TehRaydarlover
-
Posts
323 -
Joined
-
Last visited
-
Days Won
12
Content Type
Profiles
Forums
Events
Gallery
Store
Posts posted by TehRaydarlover
-
-
I should have a set of revshift poly bushings with me when I stop to pick up that engine block if you just want to take a few quick measurements of those.
-
Hopefully its late January early February. I'm on field service for a week or so starting January 5th.
-
So is this happening in December or January?
-
Definitely in this year
-
Trunk carpet.. can haz??
-
Any e30s at these junkyards?
edit: thread revive haha
-
Yeah that's the goal, should be able to handle pretty much everything I can throw at it when its done. Yeah I was going to shoot it just for fun. I don't think it will see a huge load its mainly just holding the shaft the spider gears ride on. I figured if it is some sort of tool steel it should be nice and hard and hopefully help keep the shafts aligned correctly.
-
Anytime! Depending on where your located, if you ever need help working on it hit me up.
-
Thanks, not sure what model it is, I can check on monday.
-
Hey guys happy thanksgiving, here’s an update on the front diff project I’m working on.
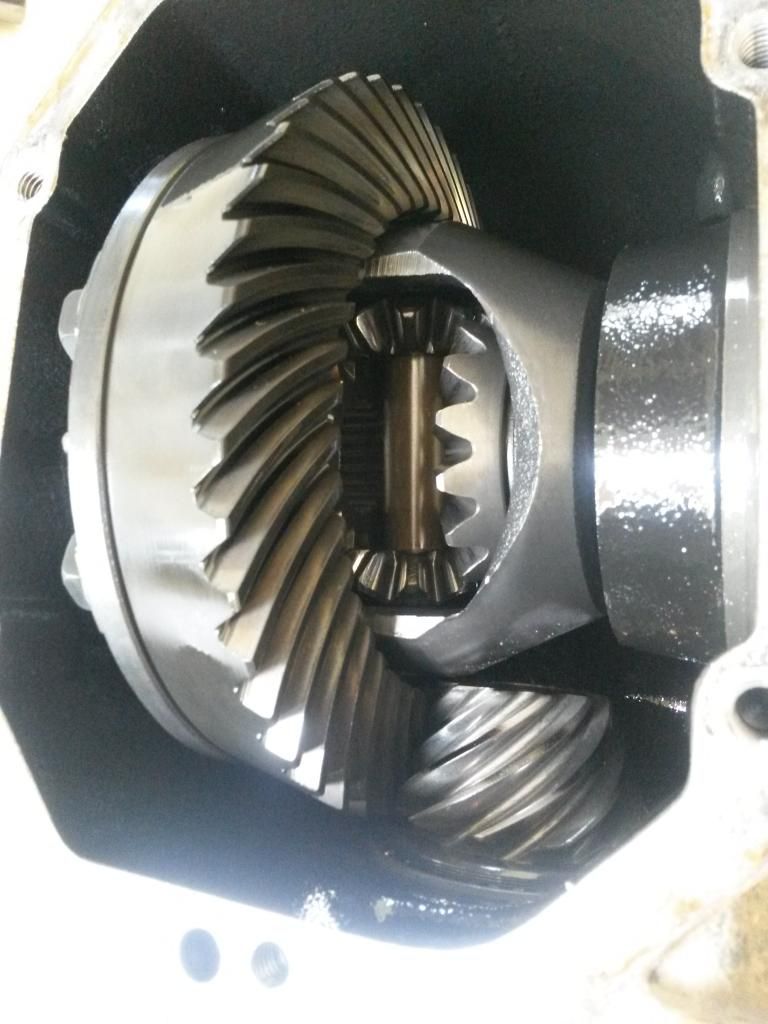
The idea is to cut the walls of the pumpkin off one diff and weld them to another thus adding two more spider gears, basically sacrificing one diff to reinforce another. This will help to lessen the load on each gear. With adding the two more spider gears I need to cut the shaft the gears ride on in half and machine a support block to hold the free ends of the shafts. I took a few measurements and had the support block machined out of a “tool steel” I’m not exactly sure what type of steel it’s made out of, I got the material when I was at school, it was just advertised as tool steel.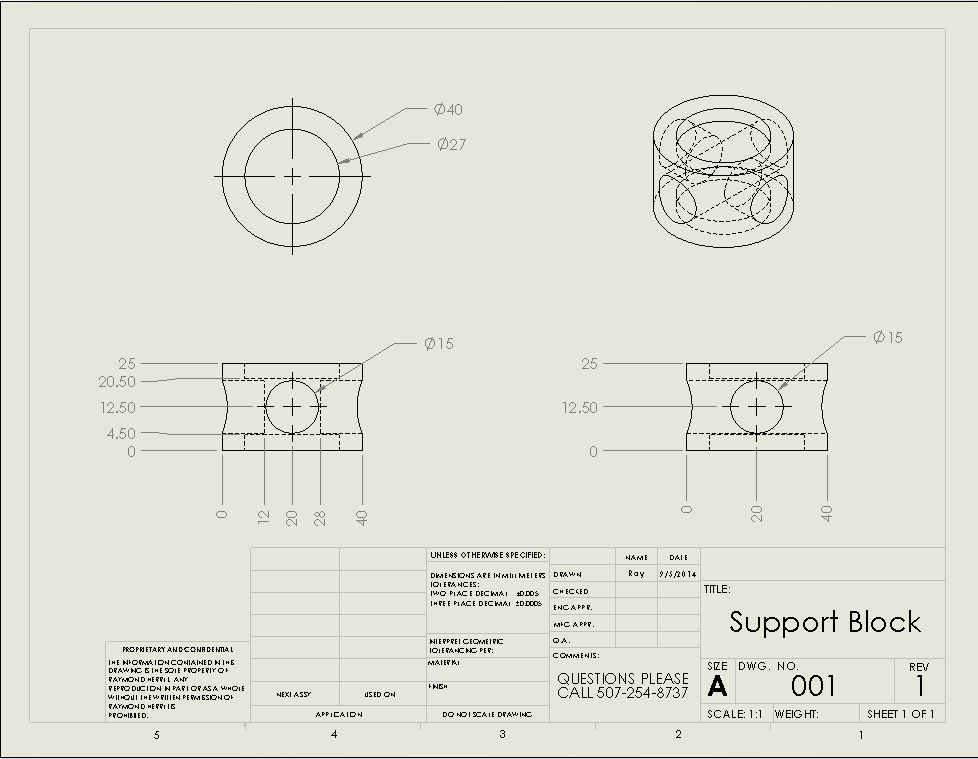
The support block came out quite nicely. I was a little upset after having to wait about two months to get it back when the machine shop forgot about my order and temporarily lost the material I gave them, but when I did get it back it was no charge because of the wait, I was like, wat? Oh alright, thanks! haha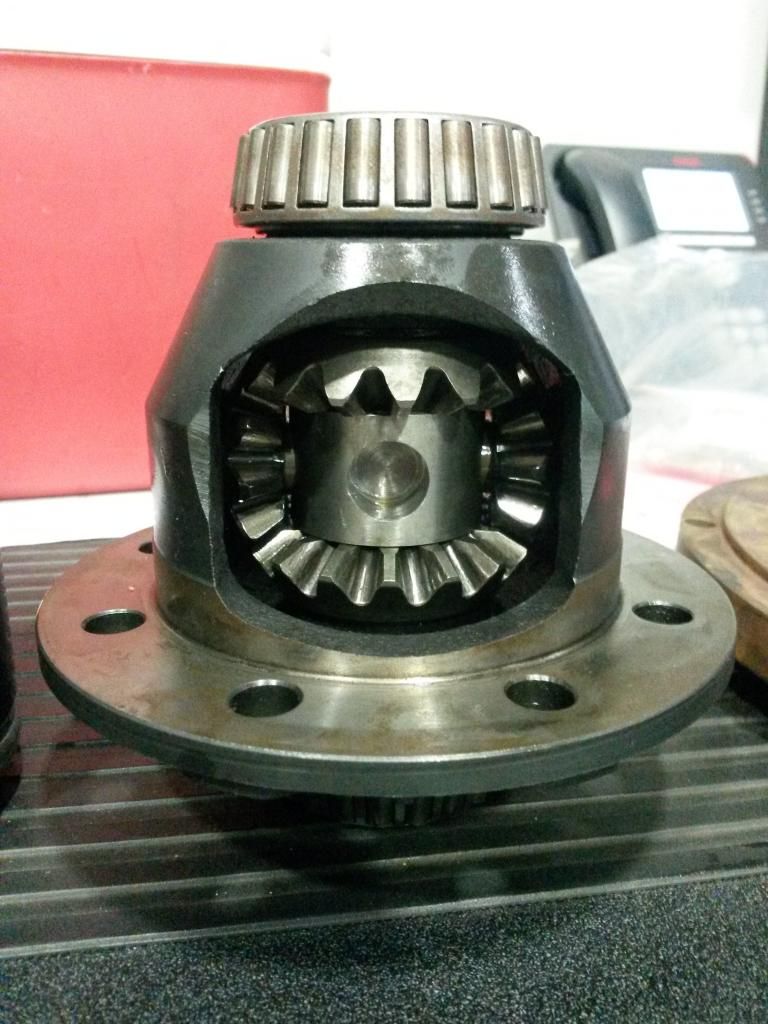
Alright easy stuff done, now for the complicated part. My plan is to bolt the crown gear back on and weld the sides of the pumpkin to the crown gear. Then cut off the top and bottom of the pumpkin. In my mind, the geometry of the additional spider gears is critical; you must retain the original gear fitment/lash or you will have increased wear and ultimately failure. By welding the sides of the pumpkin to the crown gear I can then (after some shaping/grinding) bolt the crown gear onto another diff, keeping the cups that the spider gears ride on in the correct position.
Now for the welding. The plan is to grind and shape the sides of the diff so everything bolts up without any interference. Then with the crown gear bolted to the diff tack weld the additional sides from the old diff to the new diff. Then cut the tack welds off of the crown gear and remove it. Then finish welding.
To ensure a good weld I need to know what material the diff is made of and come up with a weld procedure. To determine what kind of steel I’m dealing with I shot it with our Niton XRF Analyzer at work. It came back as 1215 carbon steel. This is kind of bad news because while 1215 has excellent machinability it doesn’t have very good weldability due to a high sulphur content. I don’t think it will be too much of an issue because it won’t take too much to hold the sides in there and the weld isn’t going to be seeing too much of a load, its mostly just holding the sides on there. We have some extremely skilled welders at work that I’m sure are more than capable of getting the job done. Here’s the print out from the XRF Analyzer if anyone is interested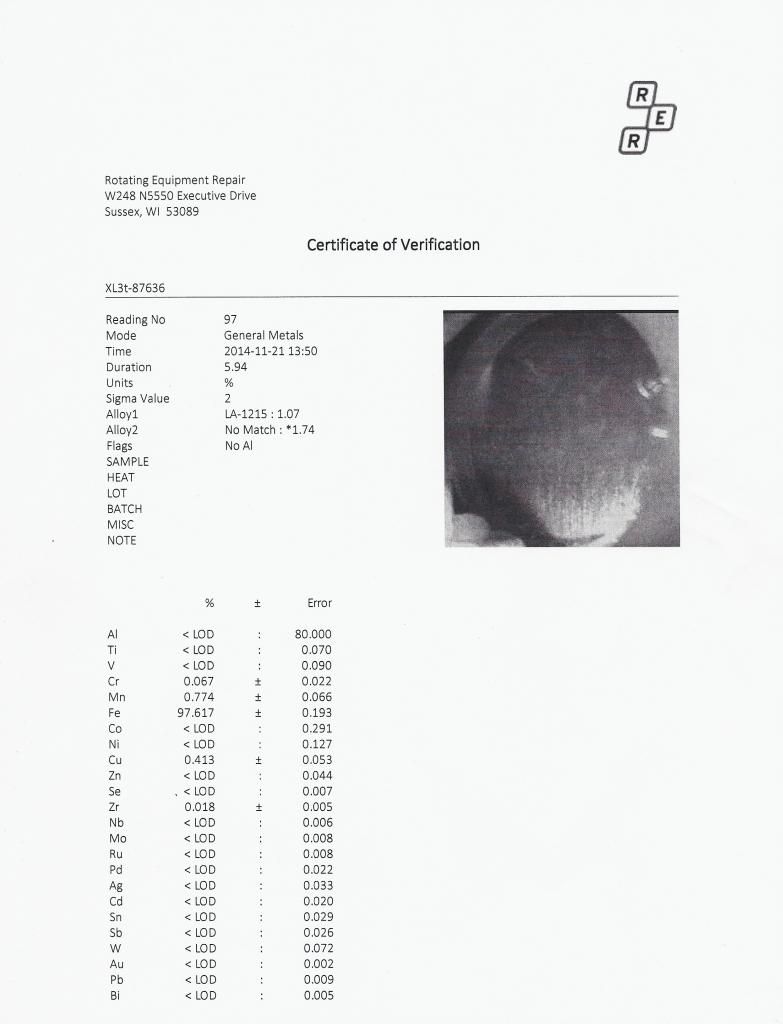
After everything is welded up I would like to have it sent out for stress relieving but I don’t think it would be a good idea because I don’t want to mess with the gear heat treat or that it will distort or crack the case. Once its welded I may need to skim cut the crown gear fit turn on the diff to clean up any excess weld. Then it’s just a matter of pressing on some new bearings and resealing it, then I should be good to go.
Any input is welcome,
Ray -
Just a quick thought but they may not always have been as hard as they are now. Sent from my potato phone
True, they seem about as hard as the rwd ones I have now, similar to like a boot soul.
-
Awesome! What did you use to scan them and how do you plan on making the replicas? Silicone? SLA? Photopolymer?
We used the Romer arm. I'm thinking once the scan is done and cleaned up cnc cut the master molds in aluminum then a injection mold. Not sure what material to use yet, haven't been able to do much research. The stuff is actually quite hard I would guess around 75A. I guess I'm open to suggestions on the material.
How thin is the bracket? Should be able to use glass bead blast to clean them up without damaging even thin metal then repaint.
You can't really tell in the picture but they are pretty much shot, one is almost completely rusted through. If I can get them for a reasonable price I would like to just use rwd mounting brackets and modify them if needed.
YES! do you guys have a faro arm scanner?!?!?! I might have to get a 24v head scanned!
We used a Romer arm for this but we also have a few long range 3D scanners. Ha 12v head scanning will get priority

-
But srrussly these are stupid rare. I did a 3D scan of them at work today. Hopefully make some replicas.

-
Looking at them I believe the brackets are the same as the readily available rwd brackets sooo hopefully disaster averted.. if not I'll invest in some tin snips and make use of all of these soup cans I have laying around my computer desk.
-
Not sure how many of you are ix freaks but I got these a few days ago. They are ix specific front mud flaps... its kinda a big deal.


-
~wibimmers missed connections~
Saw a nice looking e46 yesterday on the way home from work on 43, you came up behind me at a suggestive speed but your tint was too dark and I was left making squinty eyes as you took an exit.
-
I'm in!
-
Working on it!Pics of the garage space!
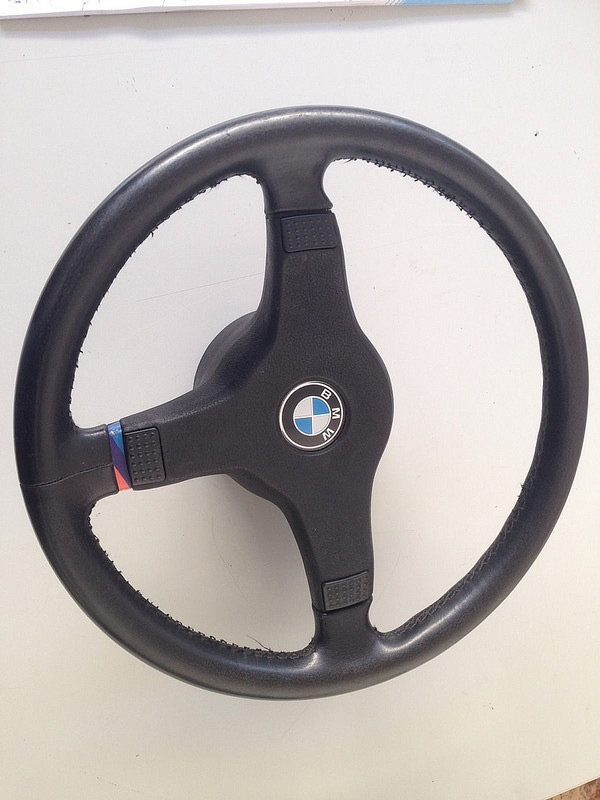
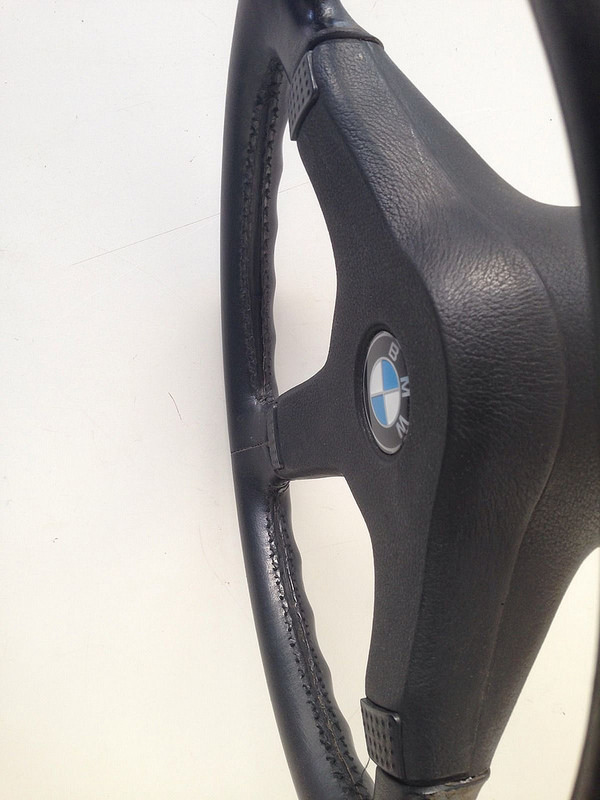
Picked up a 370mm mtech 1 wheel. I really like my 385mm mtech 1 wheel but with my steel toe boots for work I can't get in my car without hitting my knee. The stitching is coming apart but the leather is in perfect shape. Anyone good with a needle or know a good upholstery shop that can re-stitch it for me?


-
Internet installed in my apartment today... ahhhhh finally
Got myself a present when I got my job, mmm poooowwwwaaarrrr
Fap-worthy

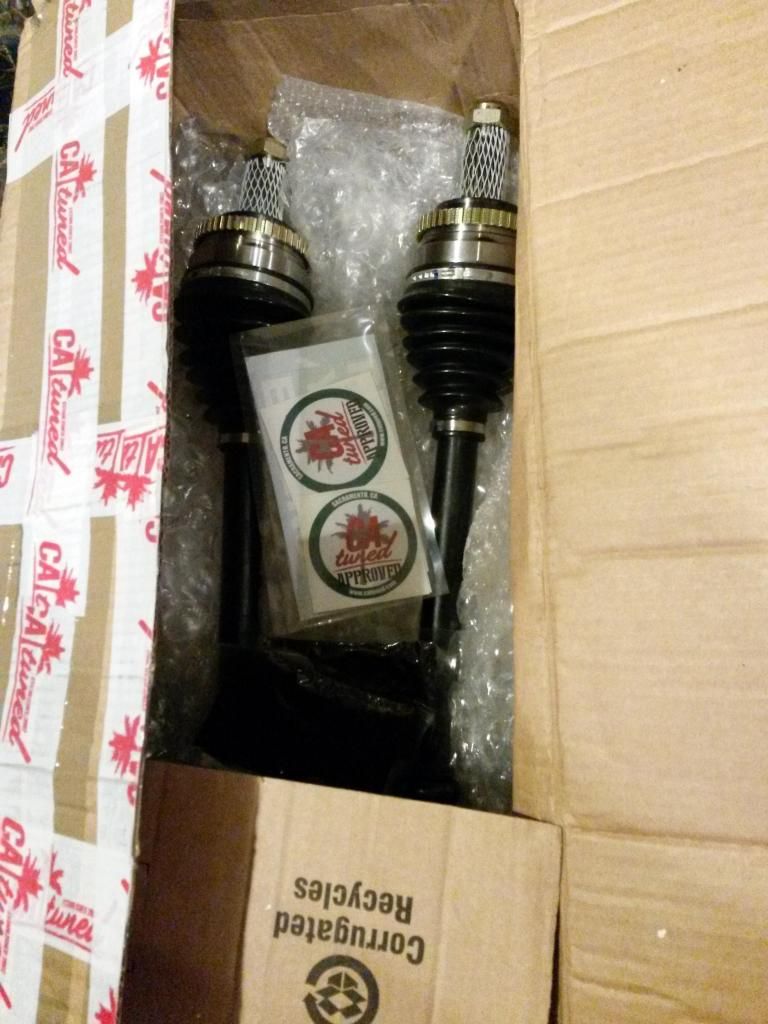
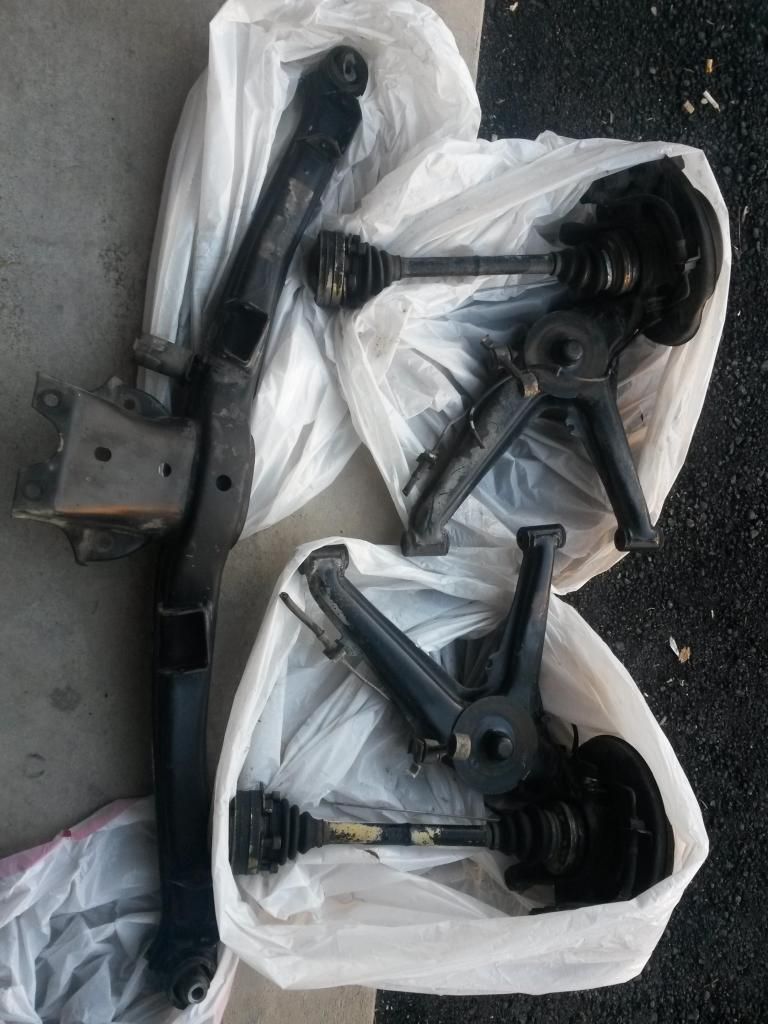
Bought these a few weeks ago, got them all disassembled and cleaned up, getting ready to weld in some reinforcements. Completely rust free, bought them from a guy who shipped them from Washington state aka no salt!! lucky bastards
more stuff soonish, been working 10hr days starting at 5am. This week I'm doing field work at the we energies oak creek power plant.. cool stuff, not allowed to take pics tho :\
-
haha
How about at one of the checkpoints you're required to do some automotive maintenance task before continuing, like changing a tire with the factory-supplied jack and lug-nut wrench?
...maybe like a head gasket

- GunMetalGrey, B C and jc43089
-
 3
3
-
Cheers!
-
That's not very far from me
Awesome! when the time comes prepare to on call with megasquirt troubleshooting haha
Congrats! Super jelly on the garage.
The manager said no working on cars in the garages because of oil stains but I said I could put down a rubber or plastic mat, she said keep the garage door shut and be discrete. Was trying to keep a strait face when talking about oil stains lol m20
-
Sooooooo... last week I accepted a job offer in Sussex with Rotating Equipment Repair... WHOOOOOOOOOOOOOOOOOOOO!!!!!!!!!!!! I was in Milwaukee yesterday looking for an apartment and found one I really like with an attached heated garage (was the deal maker) in the Broadway Commons apartments southeast edge of Waukesha. I start October 13 but the apartment wont be available until the 15th so I'll have to stay at a friends house for a few days then my parents will bring a uhaul with all my stuff from Minnesota on the weekend. very exciting
 Looks like I'm going to be an OFFICIAL WIBIMMER haha
- B C and patsbimmer1
-
2
-

Who uses their BMW trunk tool kit to work on small projects?
in General Off-Topic
Posted
I keep my hand tools in my trunk at all times, 9 times out of 10 when I need them its for something car related. I did use the spark plug wrench in the trunk tool set. Worked quite nicely haha.