

mkoepp
-
Posts
462 -
Joined
-
Last visited
-
Days Won
6
Content Type
Profiles
Forums
Events
Gallery
Store
Posts posted by mkoepp
-
-
I sent my package out on Thursday and received one late last night. I am going to wait to open though.
-
Count me in!!
-
Happy Birthday! Have a Great Day!!!
-
How's this coming along sir?
Slow but sure.....Have not spent very much time at all on it. Way too many other things I have had to do. I will have it going before snow one way or another. It's under a cover and very comfortable for the time being.
-
It has been a while since I have posted an update.
Due to issues beyond my control I have not spent too much time on the e28 for way too long.
I just finished recovering from a knee injury that kept me from doing anything for three weeks and just sprained my ankle! Just can’t win here.
During the brake and clutch bleeding process I discovered I have a hard line leaking at the rear of the car, just above the diff. I just got new line and unions. When I bought the shell the rear trailing arms were left on the car. They were tied up but during the move one of them ended up dragging on the ground and breaking the line.
I miss driving my E28 and have to get things going here. I am not far away from having a driving car! It will not be finished but will be drivable.
Once I can move it around I want to fit the rear valance and side skirts. It will be then when I decide to paint them or sell them. I did set the rear valance in place just to get an idea and I really liked how it changed the look at the rear of the car. I think the skirts will pull it all together. We shall see.
Until next time……
Happy Bimmering
-
Welcome....
-
On E28's there is an in tank transfer pump. If that fails they tend no not run or run like crap if the tank get lower than 1/4.
-
Congratulations ....Great looking couple.
-
-
Welcome
-
Welcome to the board.
-
Happy Birthday! Have a great day!
-
Welcome
-
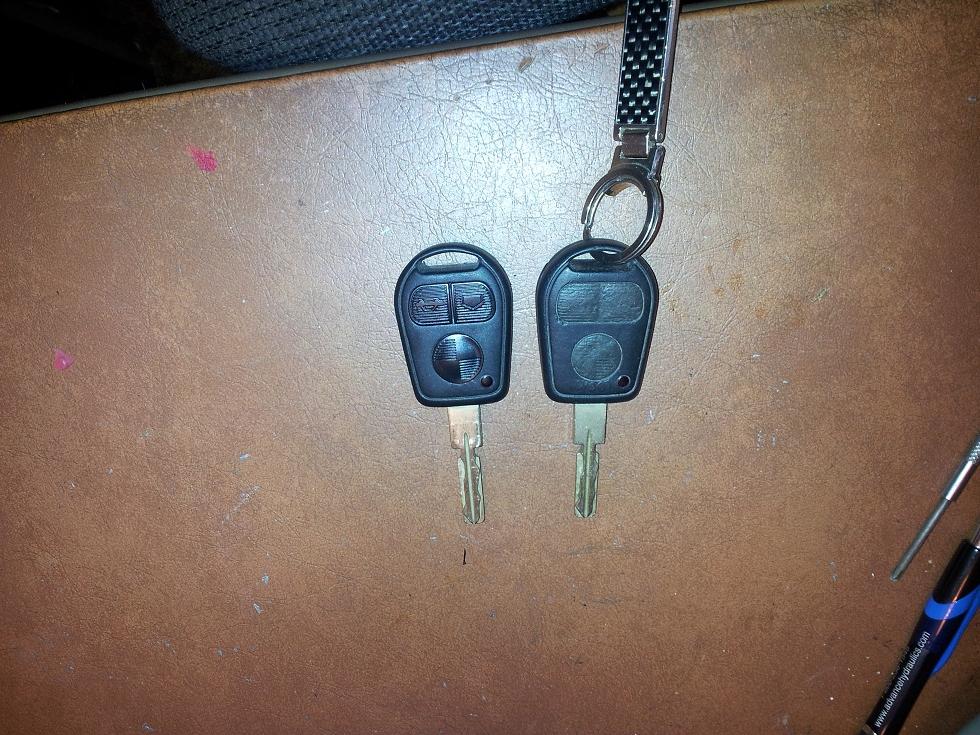
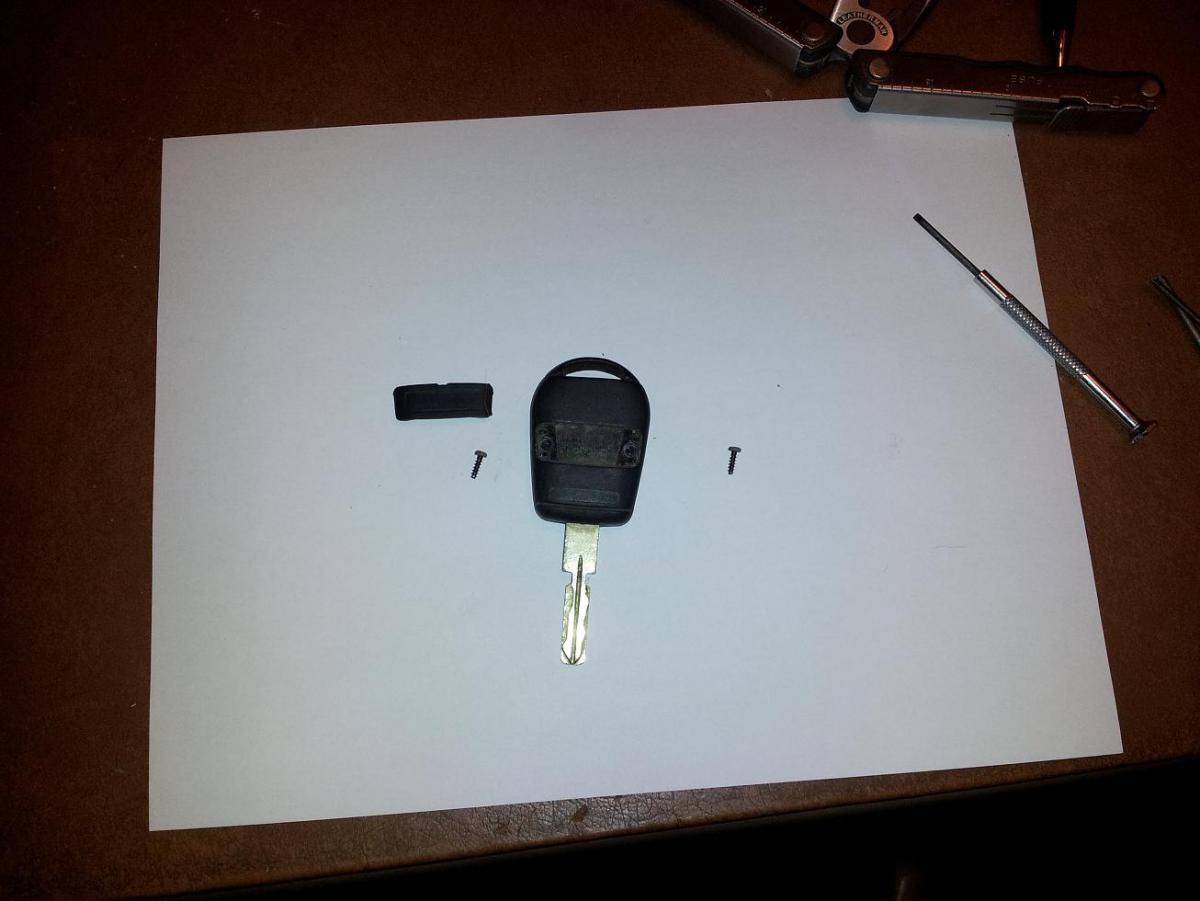
I took some pictures of my second key repair.
It can be found here.
http://www.wibimmers.com/board/index.php?/topic/3576-e39-key-button-dyi/
-
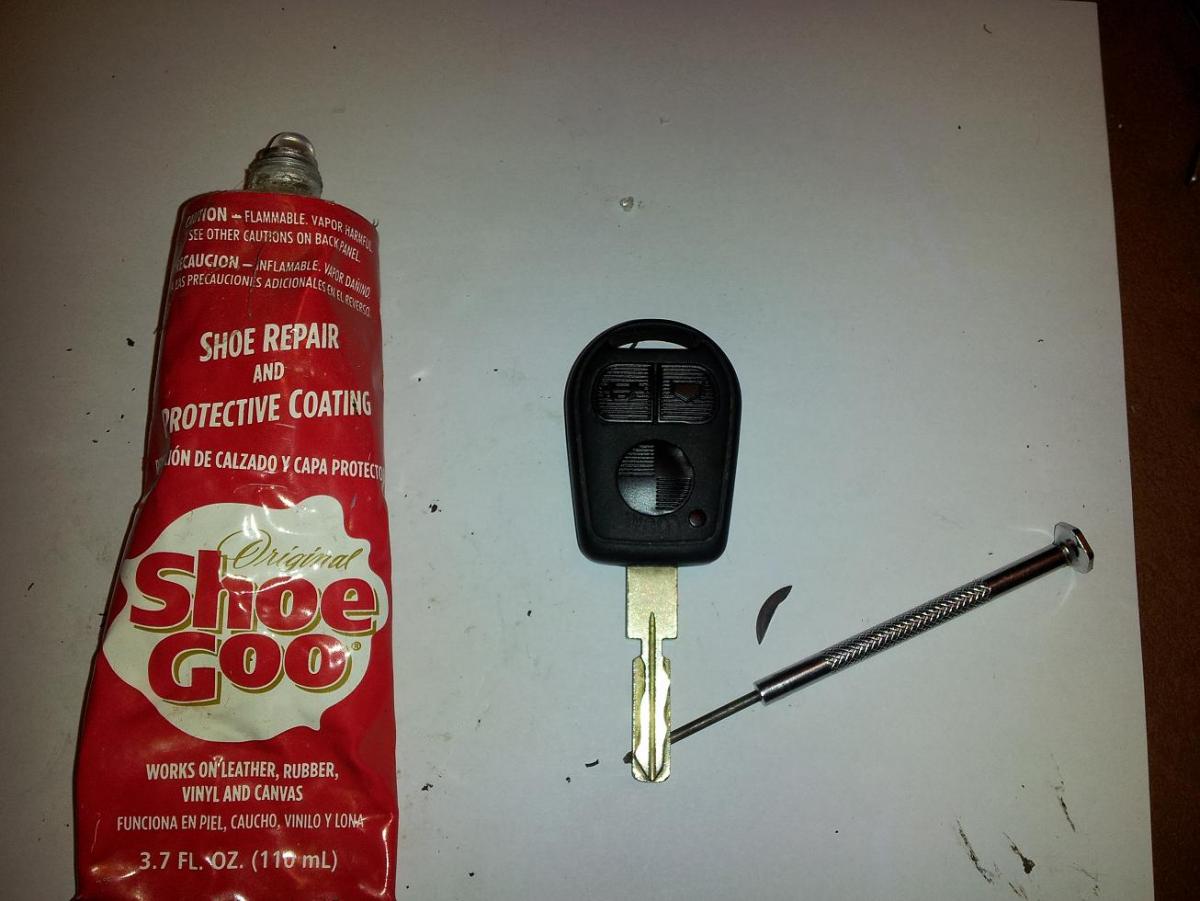
I purchase a set of these to replace my worn out buttons.
http://www.ebay.com/itm/261201404201

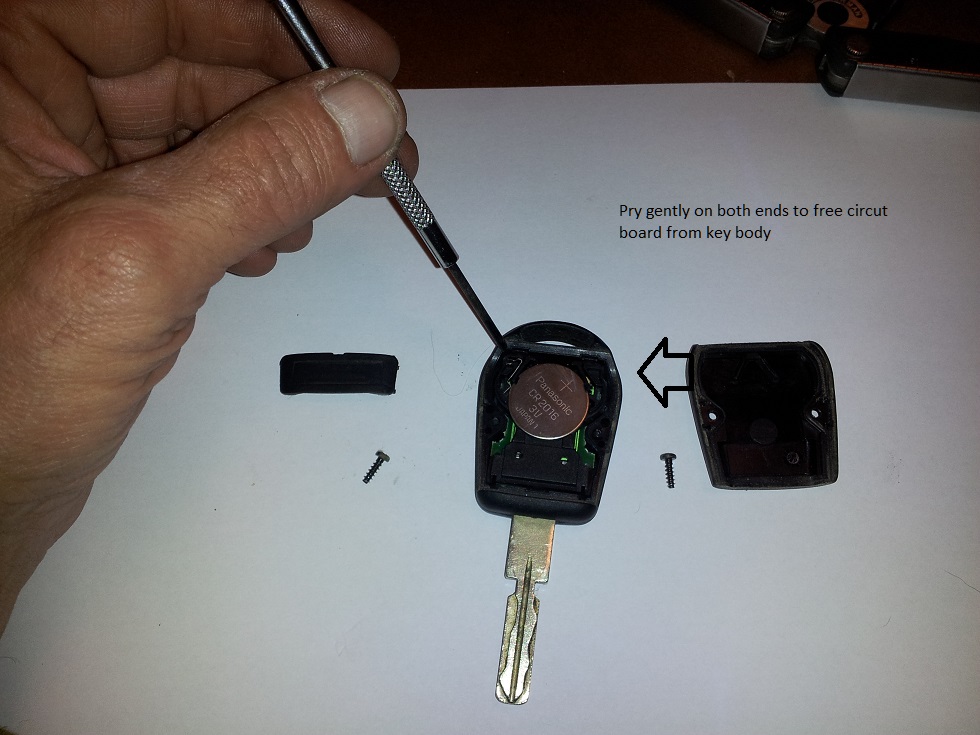
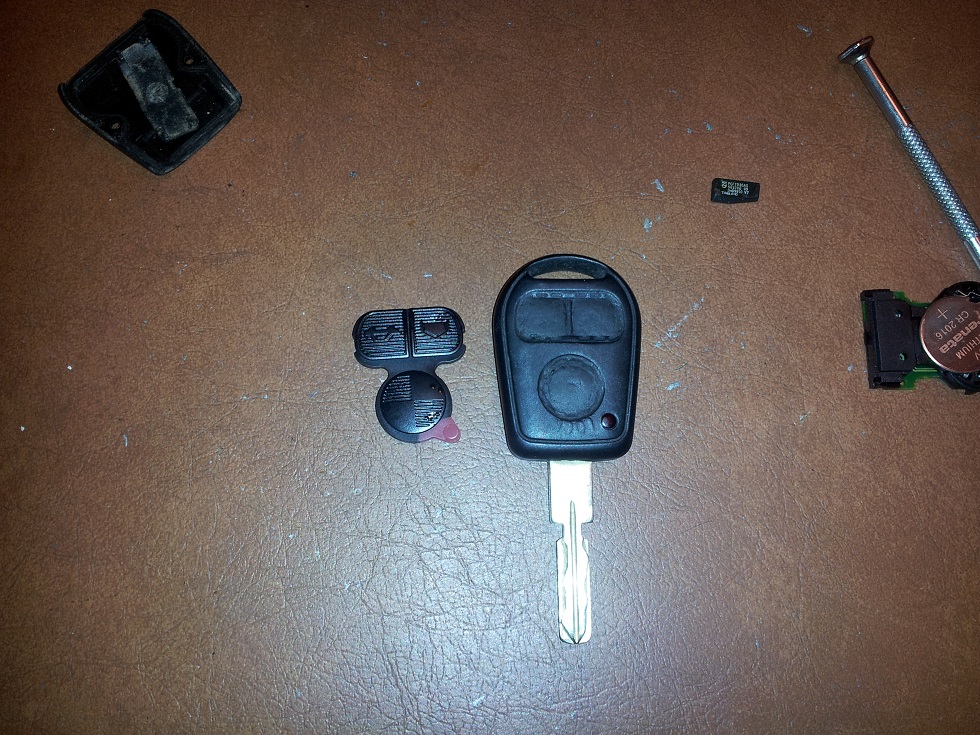
I popped off the rear cover to reveal 2 screws. I removed both screws.

Remove board as shown.
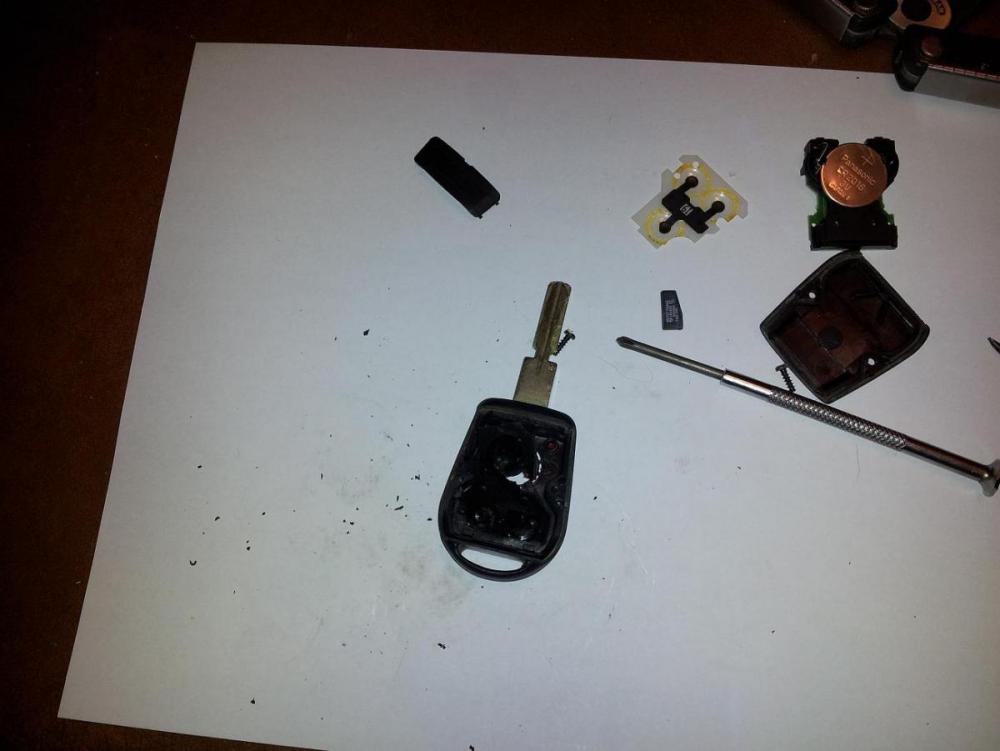
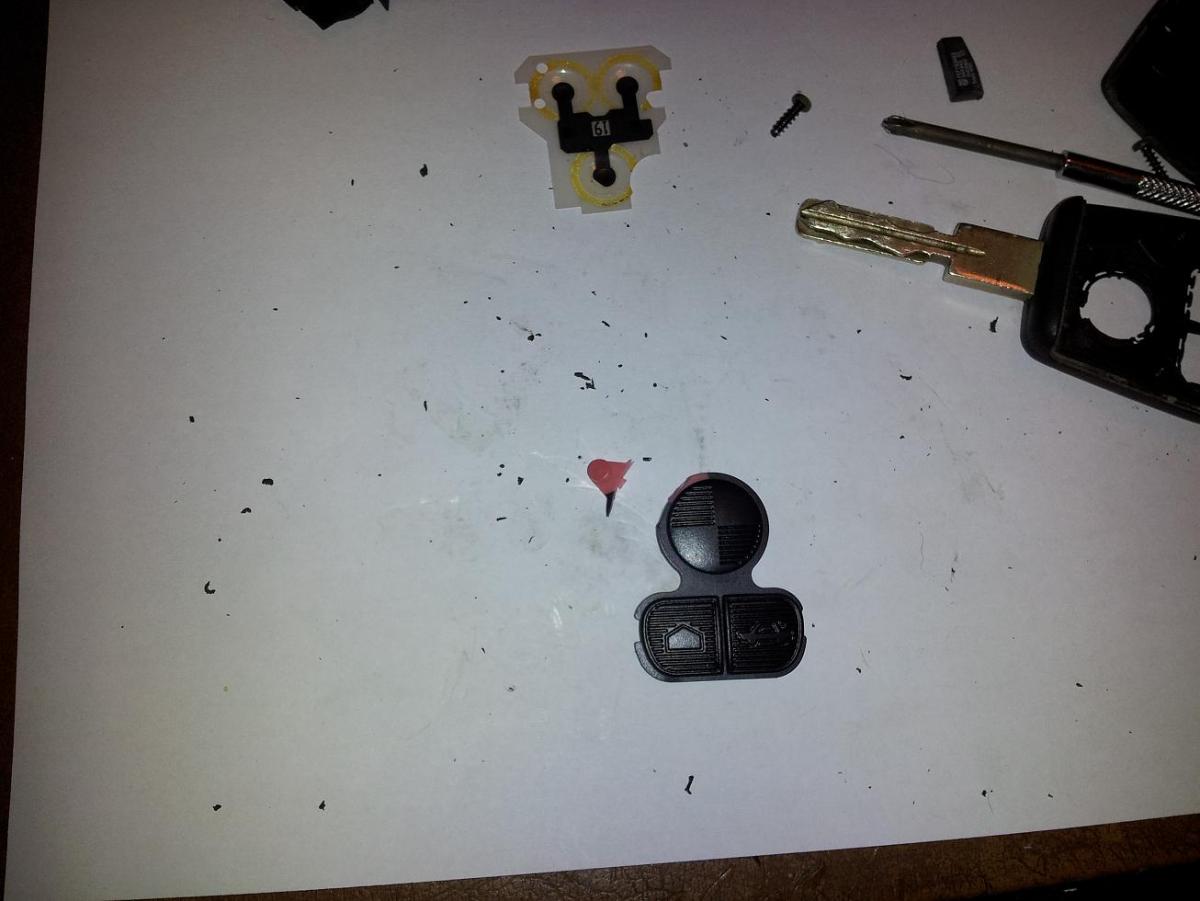
Start removing old buttons. Use caution and work slowly.
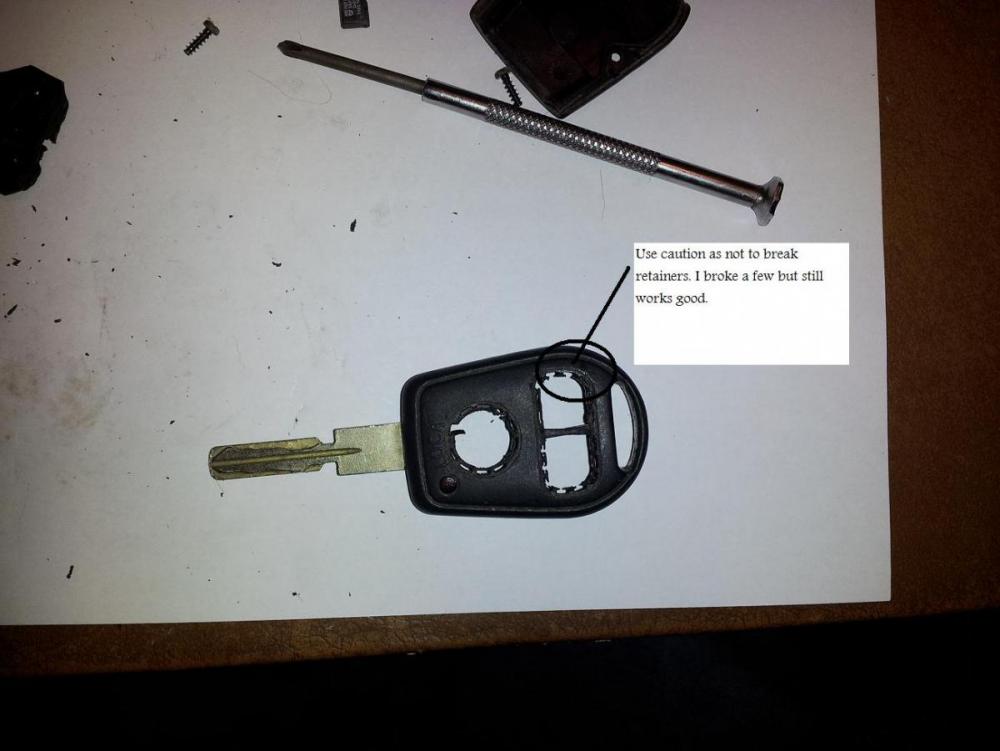
I broke a few tabs but all is good. Again use caution.
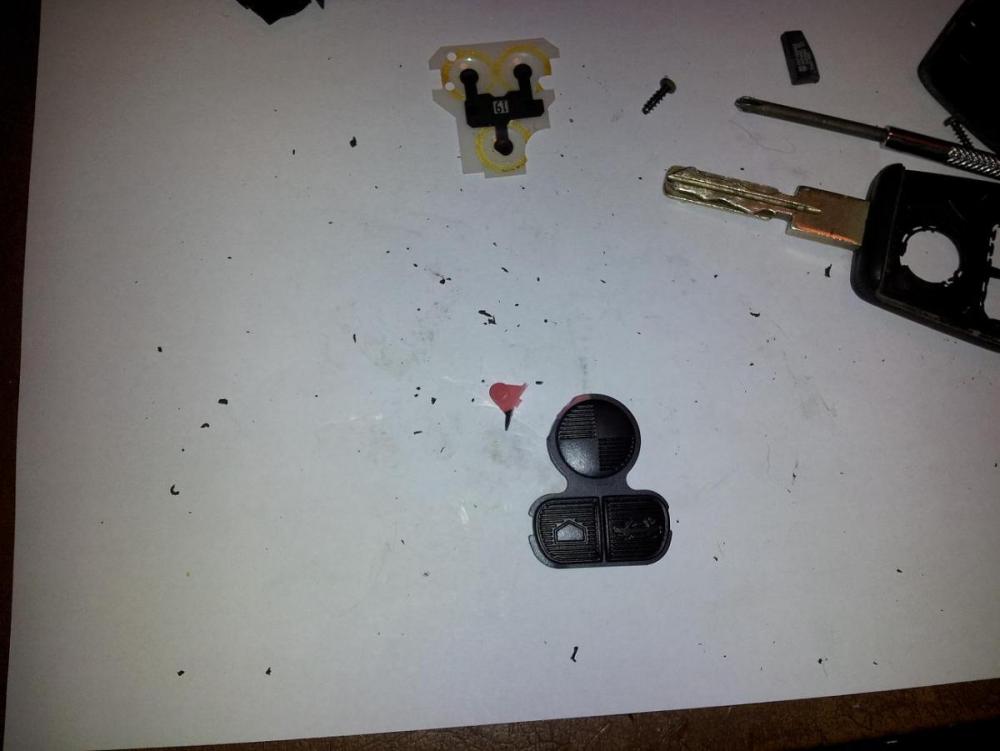
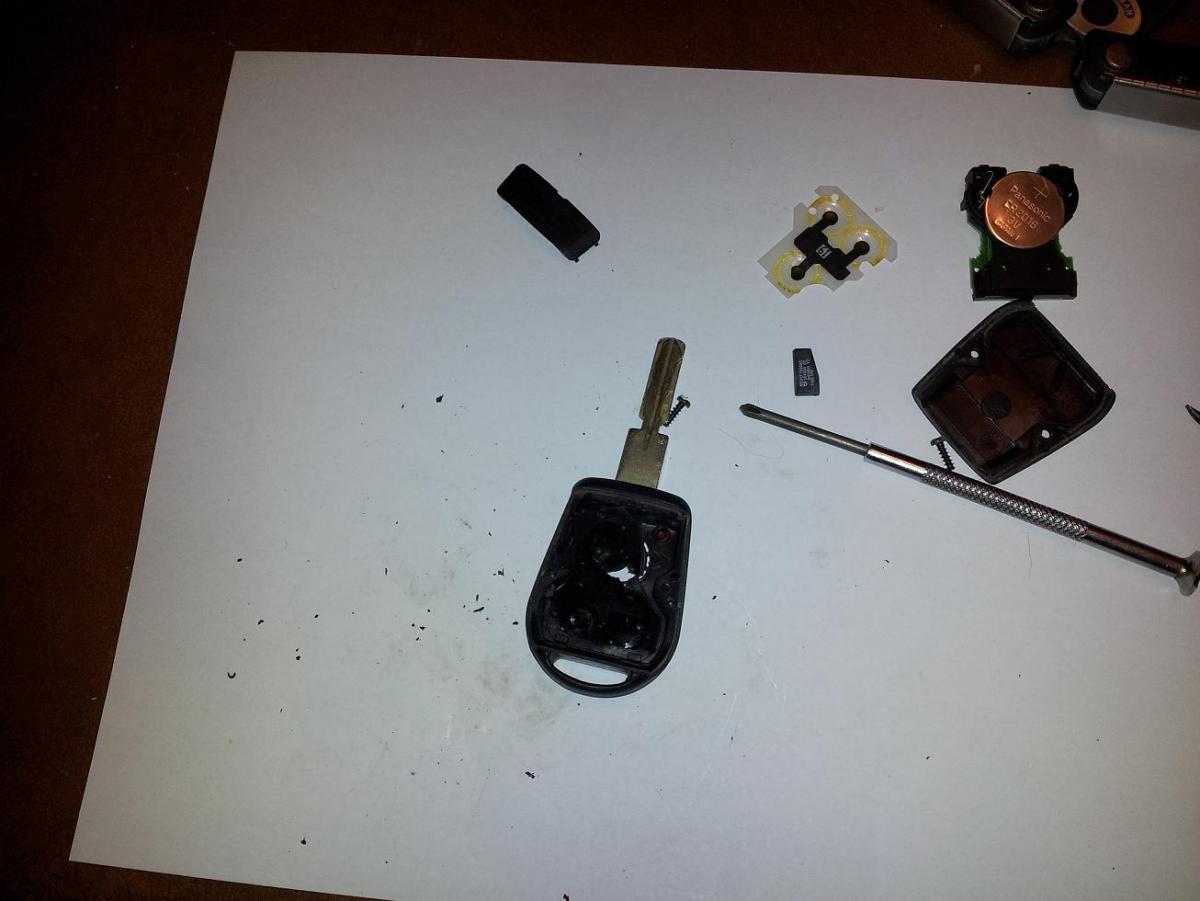
I cut off the fake led light as my key had a real one.
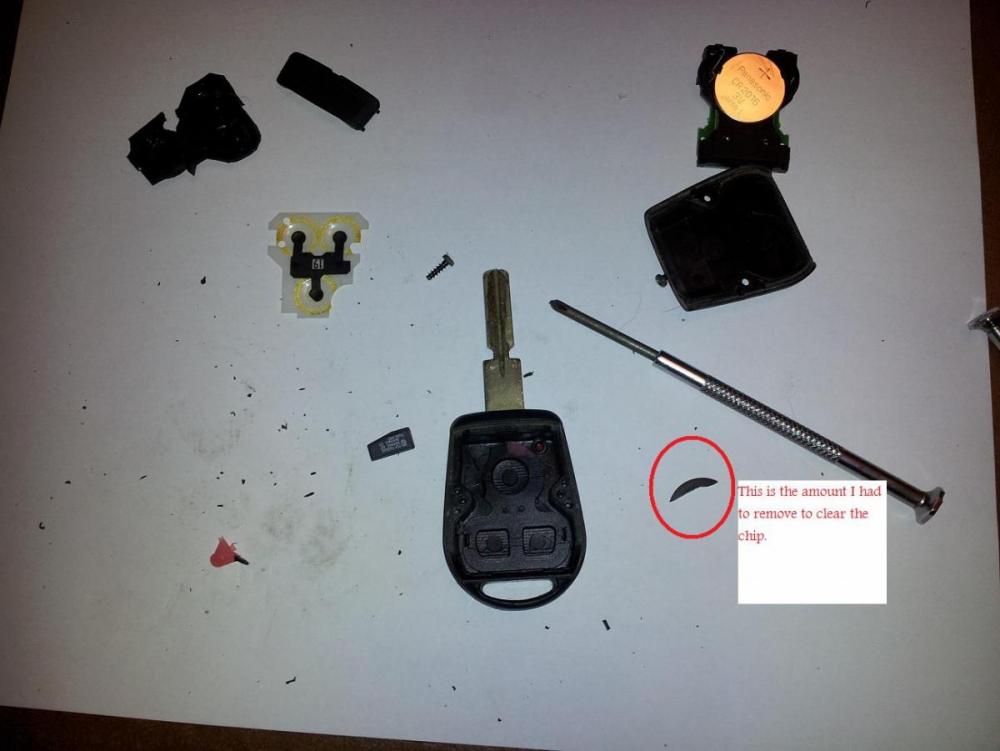
I needed to cut a corner off the lock button to clear the chip.
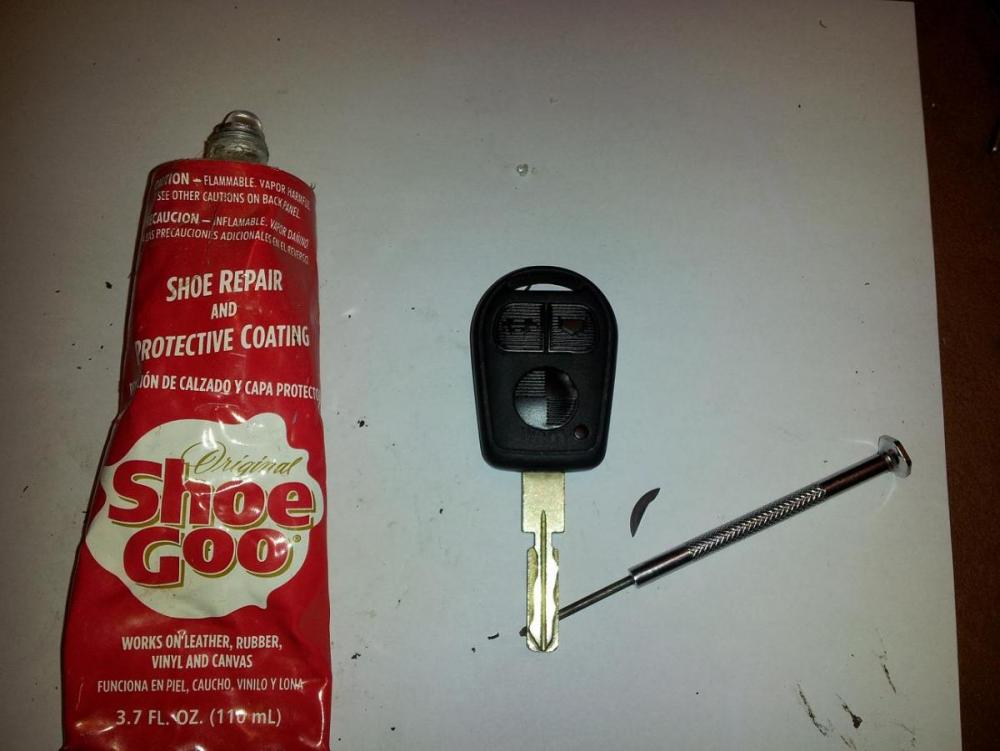
The chip had some adhesive holding it down preventing it from rattling. I used a dab of shoe goo to hold it in place.
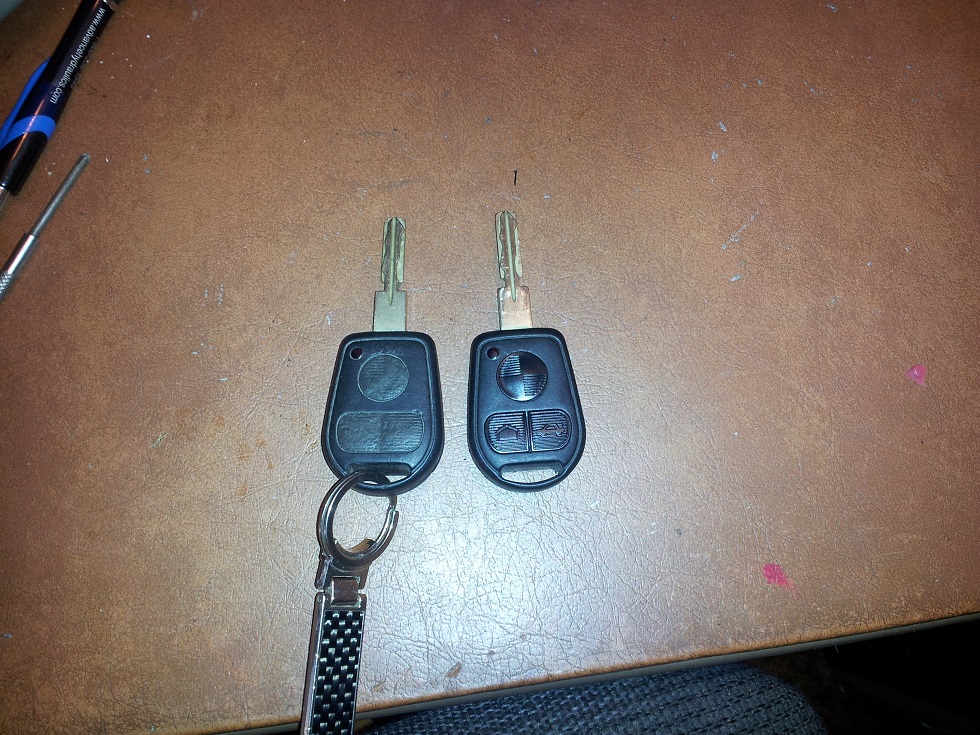
Put it all back together with a new battery and all it good.
If replacing battery, you have 30 seconds to get the new battery in once the old is out. It took me about 3 seconds so it should not be a problem. If battery is out for longer you will have to re-initialize the key.
- jc43089 and nick.e46.330i.
-
 2
2
-
-
Welcome.....Nice looking car
-
I did that on my e46 key, my buttons were smashed into the key and all kinds of sticky. New buttons FTW! If only my key battery would charge in my ignition... battery dies every few weeks.
I will look at my Bentley some time this weekend to see how the power is distributed to the key charger. They can't be that much different in that respect.
-
I bought a set of these
http://www.ebay.com/itm/261201404201
I found a good write up on bimmerforums on how to do it.
I cut the fake led end off and had to trim the top button to clear the chip in the key. The battery does not need to be removed so I did not have to re-initialize the key. I am happy how the buttons turned out. The lock button would not work with the old worn buttons. When I do my other key I will post a few more pics on what I did.

-
This arrived in the mail yesterday

Along with new key buttons
-
-
Nice find!
If it is a M20 and the age of the belt is unknown that would be the first thing I would do.
-
Happy Birthday!
-
I found this awhile back. Looks like it is not too difficult.
http://www.mye28.com/viewtopic.php?t=93418


Secret Santa 2015
in Local Scene
Posted
I have been meaning to post a pic.
I actually have a signed copy of this book. It's a great read and now I can save the wear on the signed copy.
The tic tacs threw me off. There were 4 of them but my dad scooped up on one right away")
Thank you secret Santa.
I don't know who sent it but when I googled the address I found a white E30")