m42b32
-
Posts
2441 -
Joined
-
Last visited
-
Days Won
85
Content Type
Profiles
Forums
Events
Gallery
Store
Posts posted by m42b32
-
-
so we aren't friends then

Nobody said we weren't friends!
-
Well at $1300, I am practically giving it away, but I am just glad it will be going to a good home.
Haha different car, its a white 1991 318is slick top that spent most of its life in Florida so it's basically rust free.
-
Ok, so a really good friend of mine who has been on the fence about selling his e30 is finally selling it. The car is in really nice shape with next to no rust and a ton of maintenance done to it. The only problem is...I'd most likely need to sell the e36 to buy it as I could never afford two bimmers. What do you guys think I should do? I really love this car and don't want to sell it (I've also got way more money in it that I should), but I've always lusted after an e30 and this one is almost too nice to pass up, especially for what he wants for it.
-
http://milwaukee.craigslist.org/cto/3922759515.html
e30 touring, I can't see the pictures here at work though
-
Damn, that looks awesome. I'm usually not a fan of the stretch/poke look but those wheels on that car just work so well
-
very nice.
this thing is clean!
How did I miss this build thread? Loving it!Thanks guys! The pictures definitely hide some things but its certainly coming along nicely in my opinion. I can't wait to lower it but unfortunately that's probably a long way off still haha
-
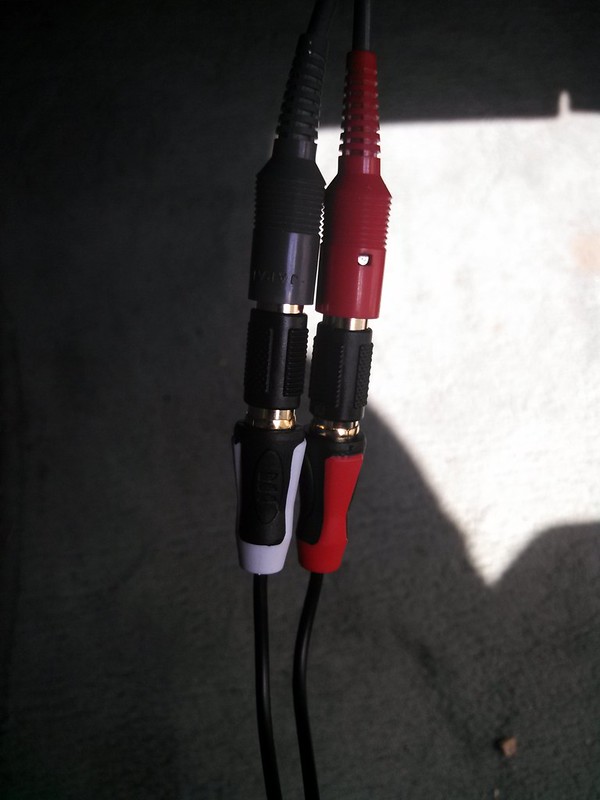
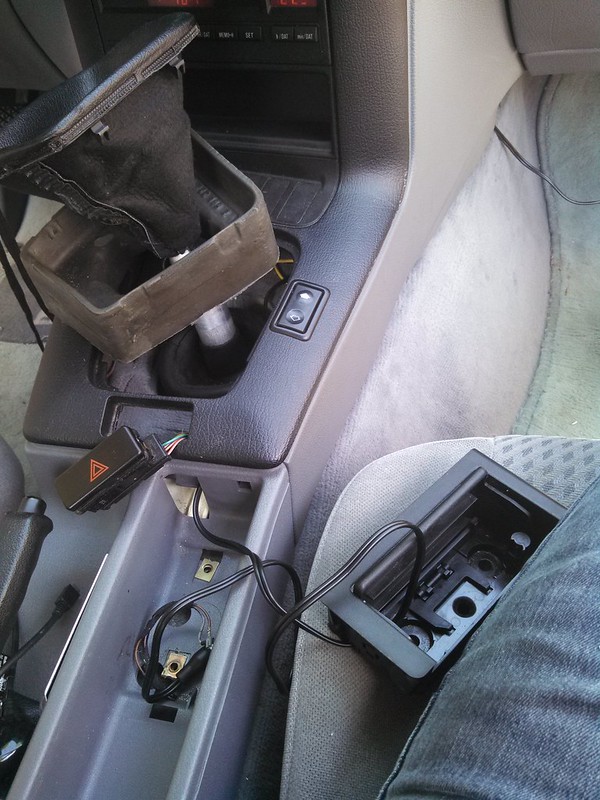
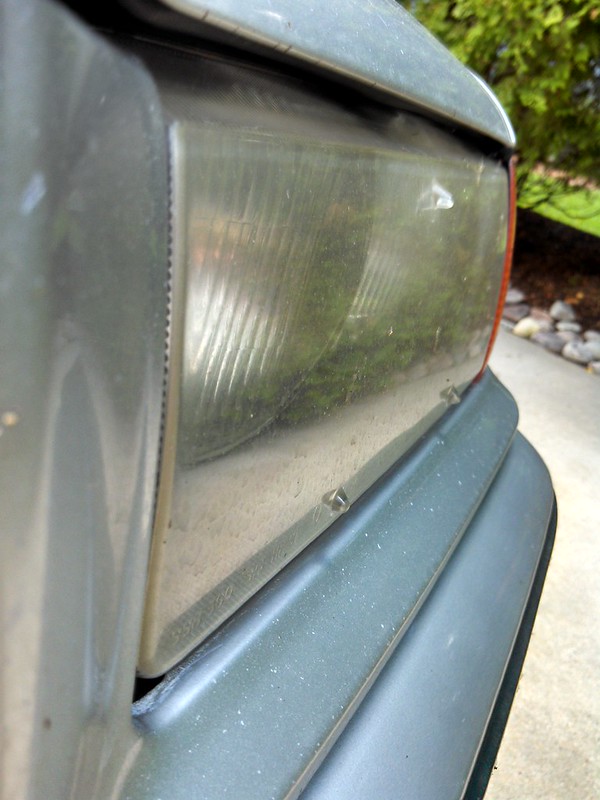
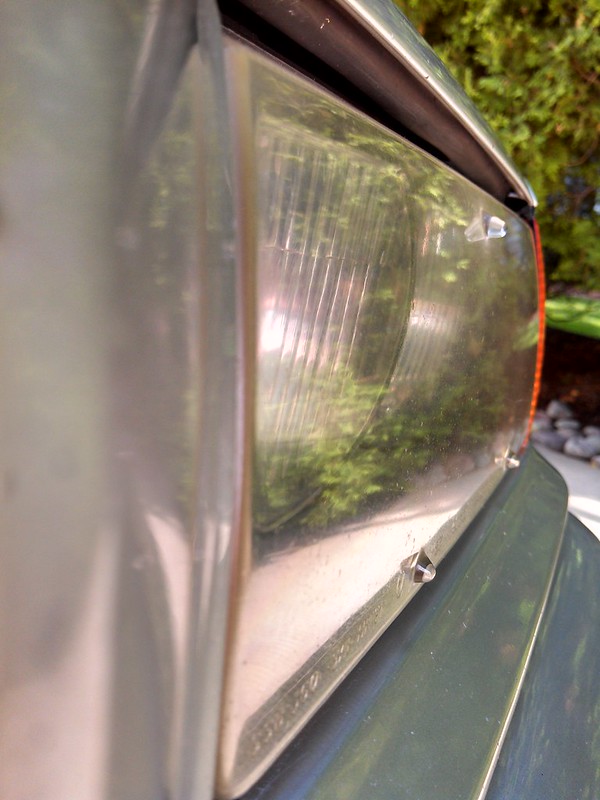
Minor update, I haven't done anything to the car in a few weeks but I finally did some things I've wanted to do for a while today since I had a few hours free. I installed an auxiliary audio input to my head-unit and also polished my headlights again as they were getting pretty foggy and nasty.
For the audio input, the car already had an XM radio reciever installed under the glovebox and I found that the connection to that could be modified a bit to accommodate a 3.5mm stereo jack. I picked up a few little adapters since I couldn't find the proper adapter I was looking for and ended up with this
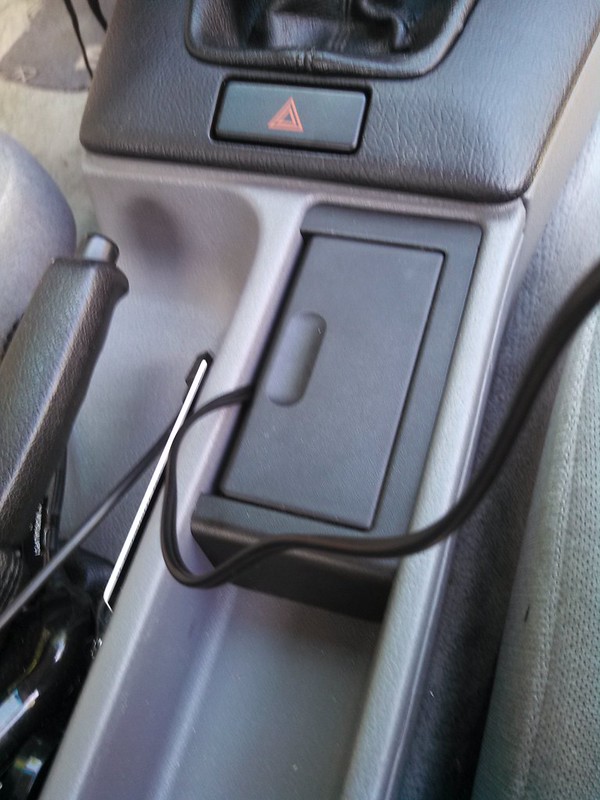
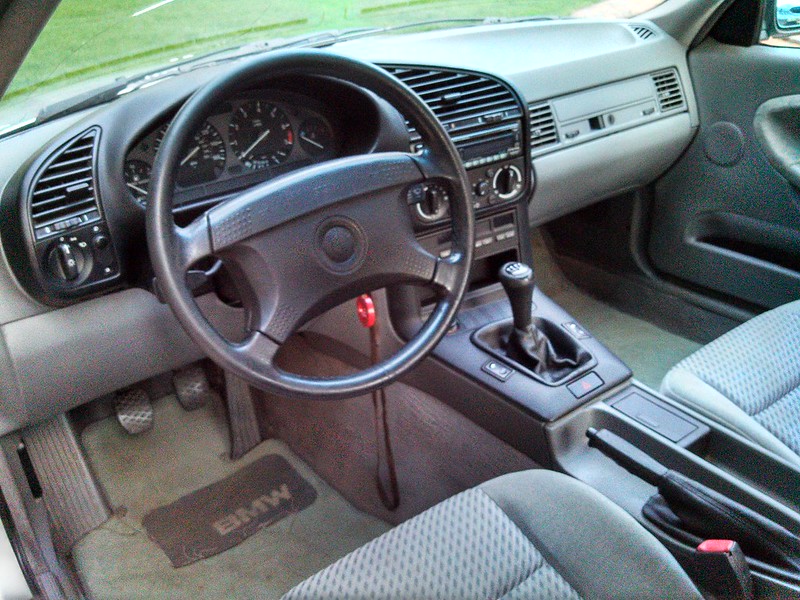
I then routed the cable under the center console to the ash tray between the driver and passenger seats
I am always finding reminders if how nasty this car was before I got it, that is all dog hair. When I bought the car, the entire interior was covered in it.
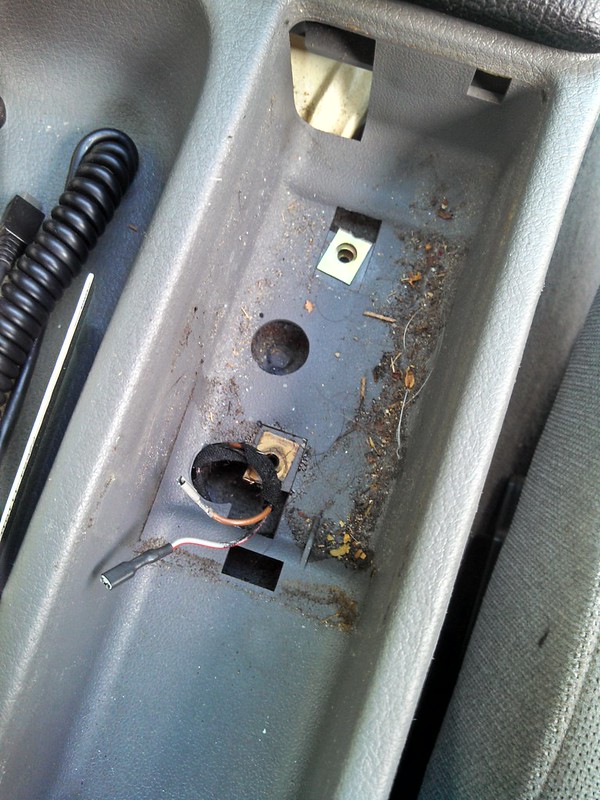
I left enough wire to be able to hold my phone when it is plugged in yet little enough that I could tuck it into the compartment in the ash tray and hide it when I wasn't using it. All in all it is pretty stealthy and works perfectly.
I used some auto polishing compound and a microfiber pad to buff the headlights. Here is a before and after, I tried to show the difference in how well it worked
Before:
After:
-
Bummer! I thought I saw a few cars I recognized haha. Those '02s were pretty awesome for sure
-
I'll be there rain or shine tonight, German night last year was awesome
-
Those wheels look amazing, cant wait to see them on the car!
-
I vote Plastidip them black.
How much would you want for just the wood template?
I'm thinking the same thing.
And I'd rather not make a template out of wood since its pretty time consuming to cut, but I could make one out of a heavy cardboard or foam-core board, that way you could make a set of panels out of any material you'd like. It would be pretty sweet to see them made out of aluminum or something. And I have no idea what I would want for a template, PM me an offer and we can go from there
-
All coupe door panels are the same.
Awesome. After having a number of things not line up on my car because it is a '92 I can never be too sure anymore.
The reason I ask is because I have seen people do these without needing to cut the hole for the window motors. I just figured mine stuck out farther, but I guess they just bent the panel around them or something (which I wouldn't do, I feel like that could cause problems). On mine, the board is 1/4" thick and then the motor sticks out maybe another 1/4", the MDF is surprisingly rigid for the size of the panel so bending it around would be a pain
On another note, should I paint/plastidip the handles black? I feel like they stick out (in a bad way) because they are a brushed silver right now
-
I love this build. Clean and done right the first time.
Make me some of those door cards, I'll pay you

Thanks! And I'd think about it actually, assuming the doors are set up the same between years I could make a template or something (for a coupe) and then making more sets would be fairly straightforward
-
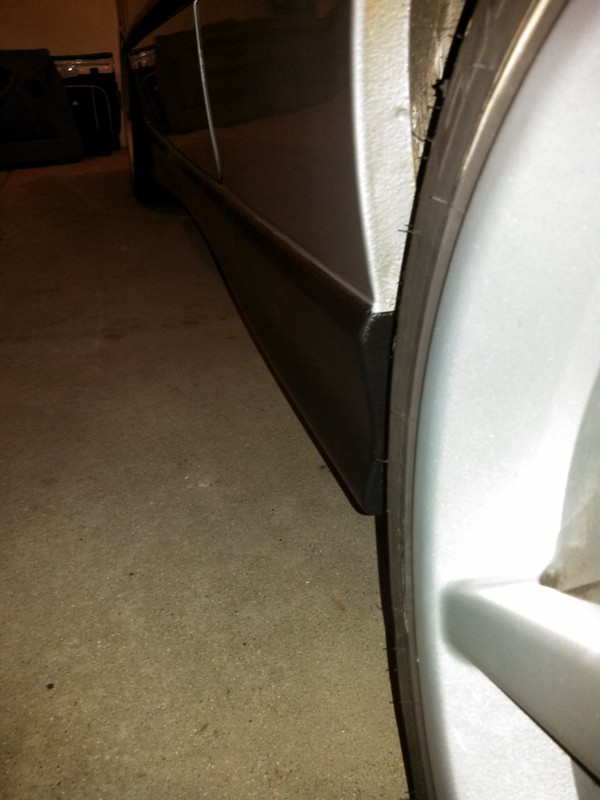
Got a lot more done over the last few days. The side skirts are solidly on the car and not going anywhere. I got everything put back together and I'm very pleased with it

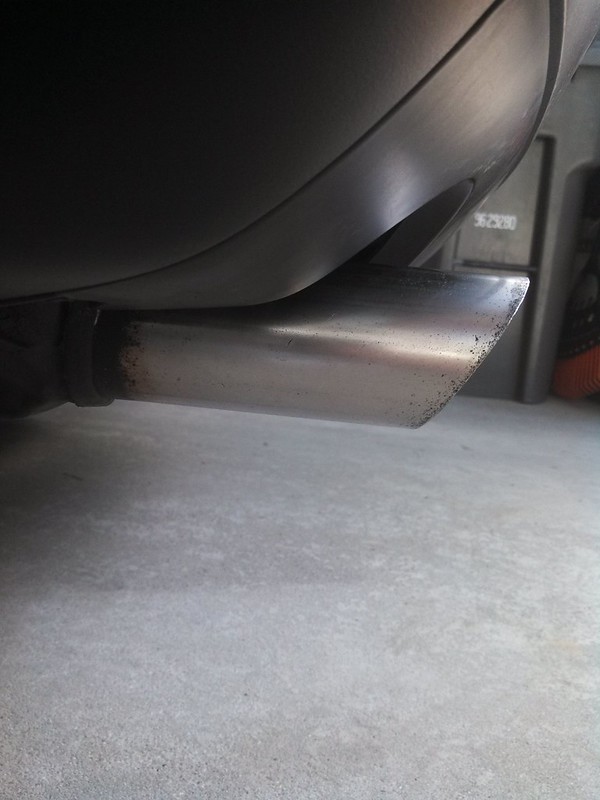
While I was waiting for the glue to cure I decided to polish the exhaust tip. I don't have a before picture but it was all black and rusty before, here it is all shined up:
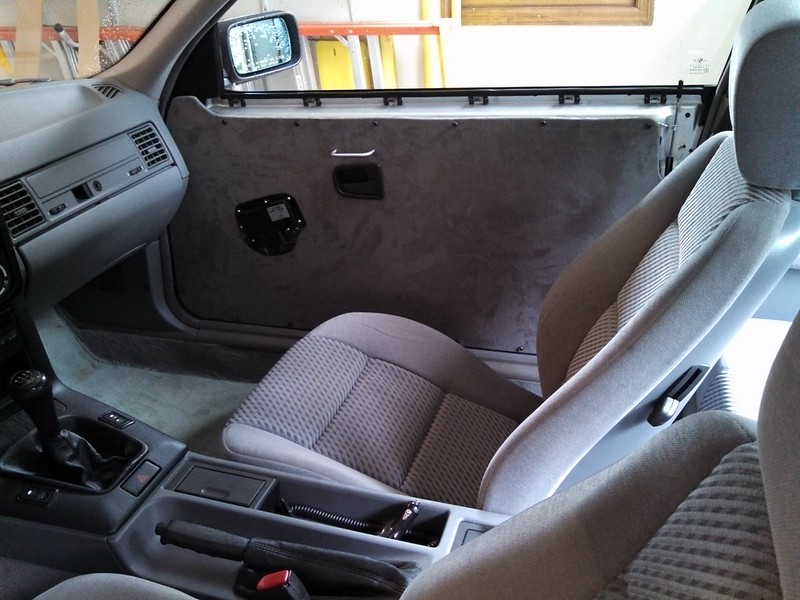
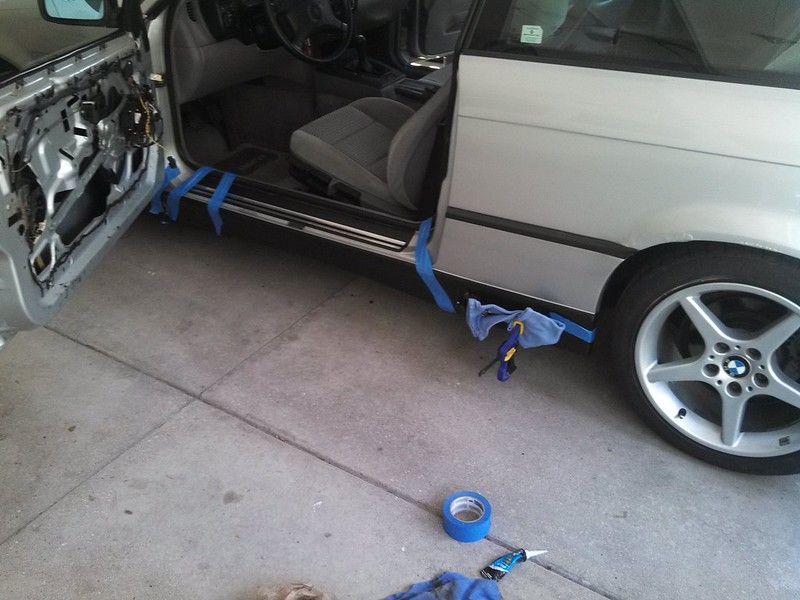
I decided to try and tackle my trashed door panels and instead of trying to repair the current ones again, I decided to make my own based on some I have seen over on bimmerforums
I started with a 2x4 foot piece of 1/4" mdf board and traced the outline of the old door panel onto it
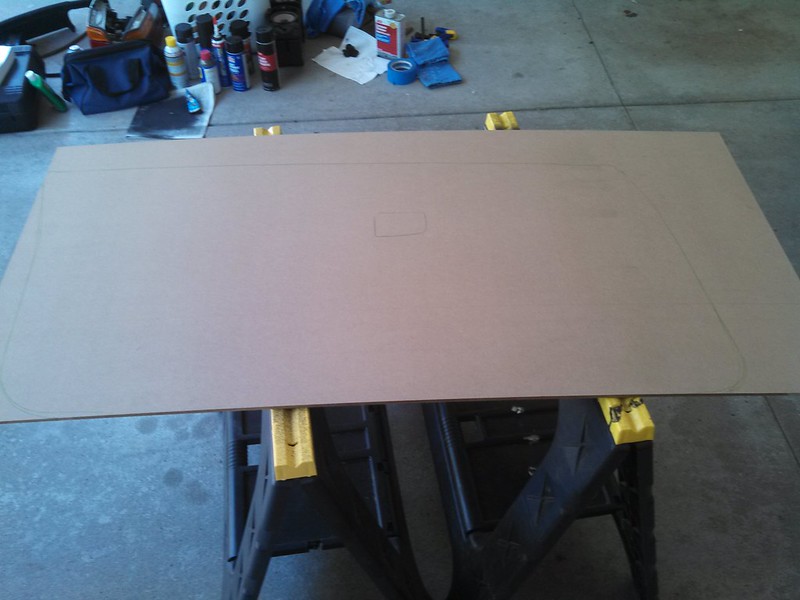
I then used this shape and kept trimming it until I got a shape that fit nicely and how I wanted it. I had to cut a hole for the window motor as it stuck out too far for the panel to cover it.

I had a bunch of the suede I used for the headliner left over so I wrapped the door panels in that fabric. I bought some simple handles from the hardware store as well as some self tapping screws that I painted black and affixed the panels to the doors. All in all I am very happy with how they came out. Everything lines up perfectly and they are rock solid.
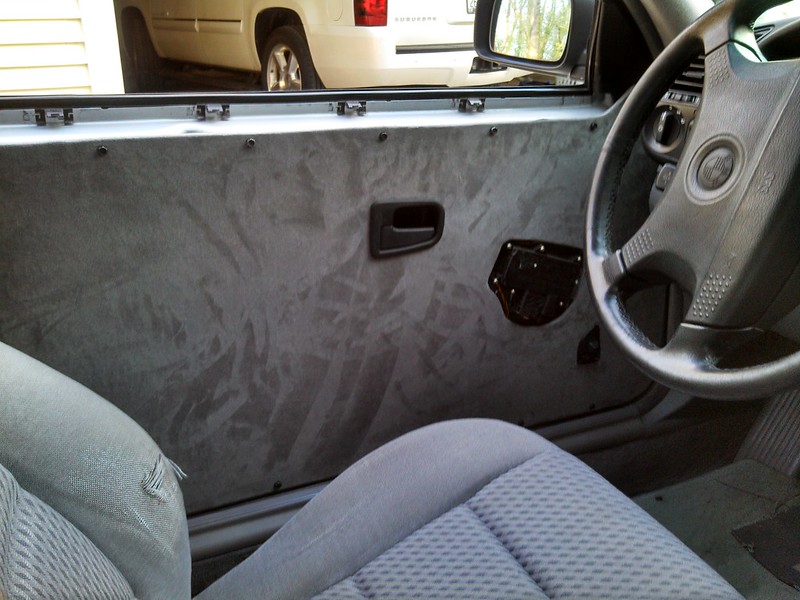
(I added the handle seen here on the drivers side after I took that picture)
Let me know what you think! I was tempted to get nylon straps to close the doors but I decided that was a little much. I will be ordering some nice tweeters in the near future to mount on the doors to finish everything off
-
Update! I have been working on the car non-stop since Sunday afternoon and have gotten a ton done. After I finished thoroughly cleaning the inside and outside, I replaced the RSM's and added Z3 reinforcement plates. This got rid of the annoying squeak I've been having over sharp bumps so that was a plus.
I then started on doing some rust prevention. I bought some rust treatment stuff along with a rust stopping primer and a heavy duty rubber undercoating spray. I went through the underside of the car with with a wire brush and the rust treatment and let that sit overnight. I also opened up the open areas behind the front fender linings and treated that whole area after I cleaned out the majority of the dirt and debris in there.
Previously, I had done a repair on the passenger side as the inside of the fender had rotted out and I noticed that some rust was coming back so I wire brushed everything visible, treated it again, and then primed and undercoated the whole area with a few heavy coats. This should hopefully slow any rust significantly.
On the drivers side (I have never checked it) I found this:
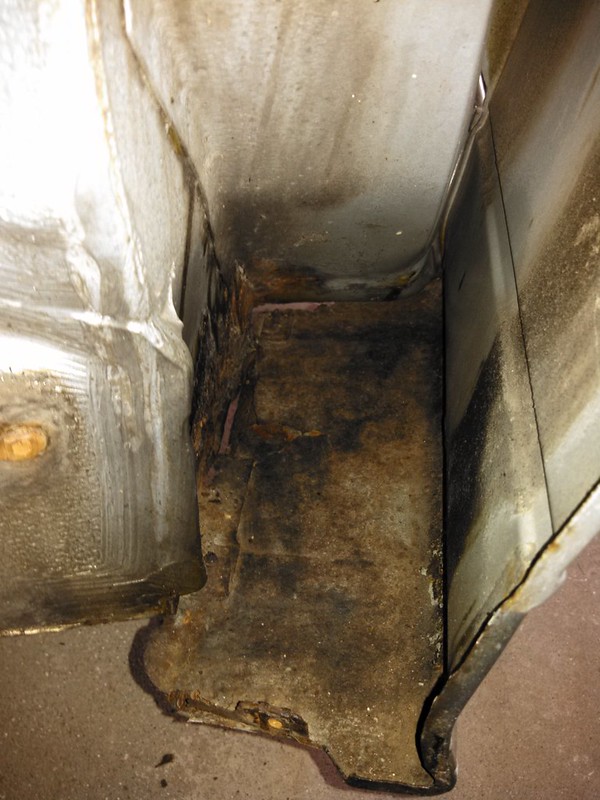
This is after the rust treating stuff, and honestly, its better than I thought it would be. I cleaned all the loose crap out and then used some high strength sealant/glue to hold the metal that had sagged closed and then gave it multiple coats of primer and undercoating to help slow it down. As much as I would love to cut out stuff/wend in new metal and replace the fender, etc. this car is ultimately a cheap daily so that is not really an option. It was dark when I finished this job so I didn't get an after picture unfortunately.
I tore into the rear brake where my parking brake had previously gotten messed up (and I subsequently removed it)
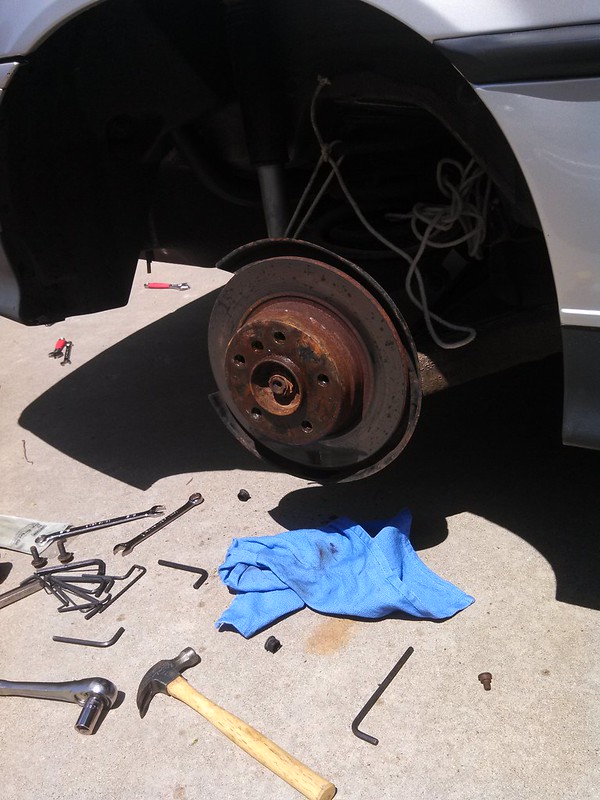
I had bought all the parts needed to rebuild the parking brake so that was the plan until I found this:
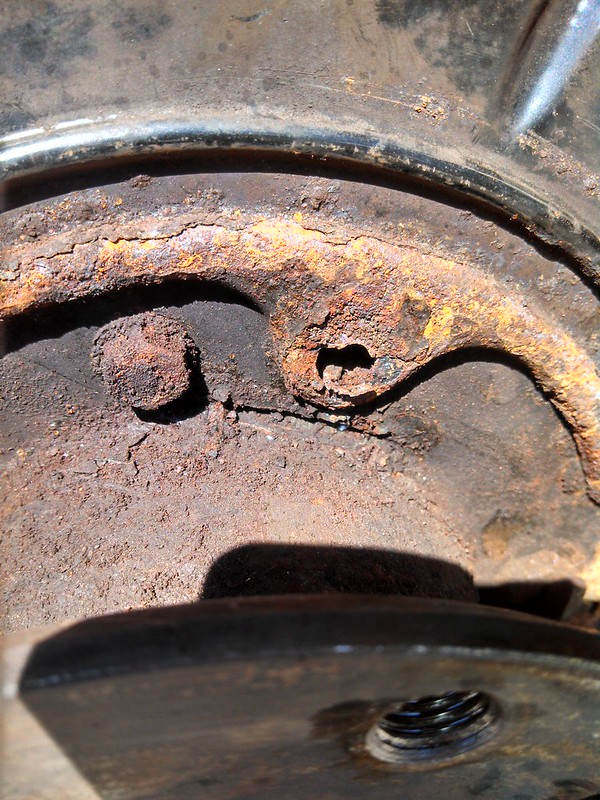
The hole that the guide pins fit into has torn out because of rust so I am going to order new dust shields and replace them on both sides as I am sure its only a matter of time before the other side pulls through as well.
I know to properly replace the dust shields I need to remove the hub and axle to get them off. I have seen people cut off the old ones and then cut a slot in the new dust shield to slip it over the axle without disturbing everything else like this guy did: http://www.e46fanatics.com/forum/showthread.php?t=924240
I put that all back together for now and moved on to making the car look a bit better.
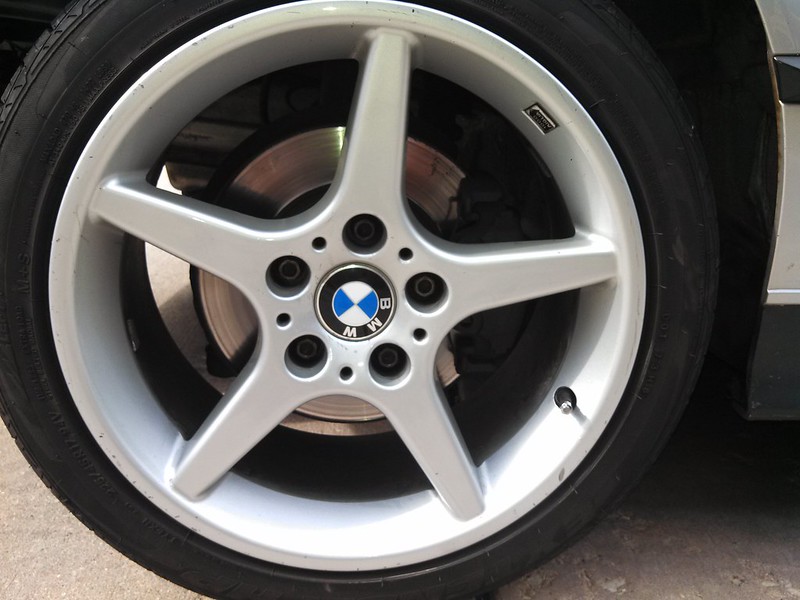
I wire brushed all the loose junk off the old rotors and calipers and sprayed them with a high temp (1000 degree) paint that is a flat dark gray in color. They look a million times better than the rusted ones:
I decided to black out the lower portions of my bumpers with plastidip so I picked up two cans of the rattle can plastidip and went to town.
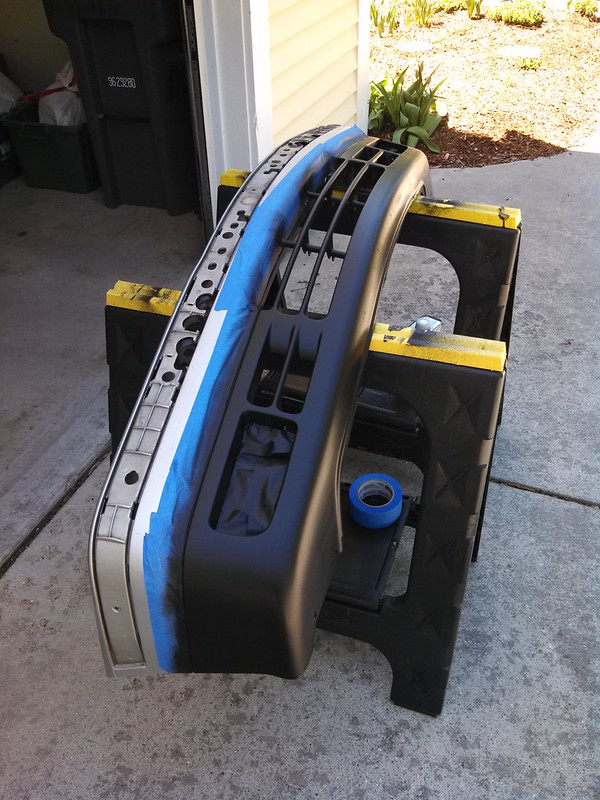
I couldn't get the rear bumper off the car as the bolts were pretty stuck so I sprayed it on the car.
Just a quick pic of the front end without the bumper:

This morning I started installing the side skirts that I had plastidipped black yesterday. I decided that instead of drilling a bunch of holes and creating new places for rust that I would use the strongest version of the 3m double sided tape and silicone RTV adhesive.
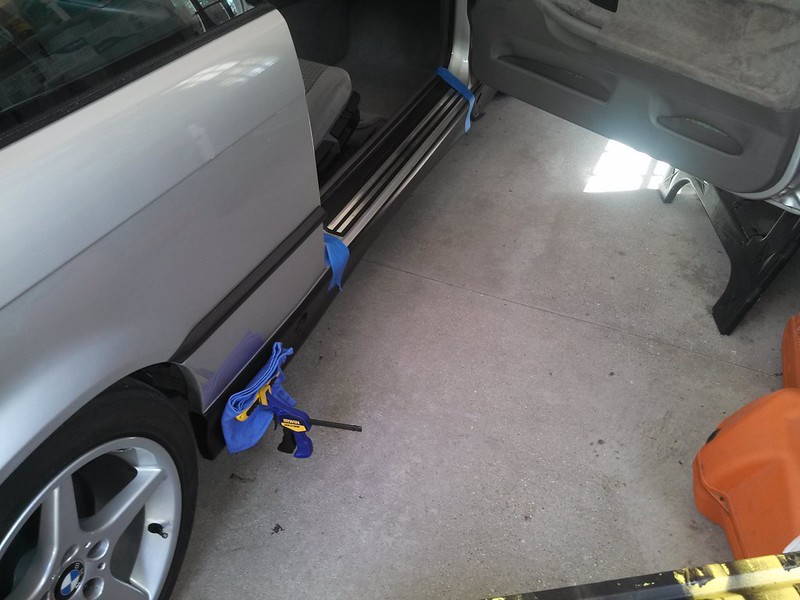
As of right now the glue is setting and they seem to be on there VERY solidly with just the tape. I will post pictures of the end result once the blue tape and clamps come off! I am already loving how it looks!
-
Well, after a total of 980 miles in two days if travel I am finally home. The car ran flawlessly, cruising between 65 and 80 mph for about 9 straight hours on Thursday and then even a few hours of stop and go traffic through Chicago today. All in all I am extremely happy with how it ran and how it held up to the trip, the amazing mileage was nice too!
I stopped at a stealership right before I left because I realized my oil had become extremely dirty due to all the extremely short trips I had been making and since I couldn't do it myself at that moment and i didn't trust any other shops in the area (It's not the best area) the dealership was the best option. Heck, they washed the car and did a 'complimentary' inspection so that wasn't bad either I guess.
While they were doing that I was wandering around and came across a few cool bimmers:

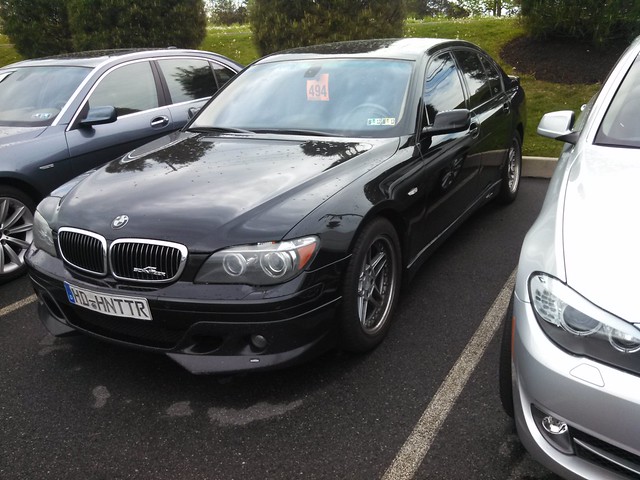
(yes, that's a real AC-Schnitzer 7 series)
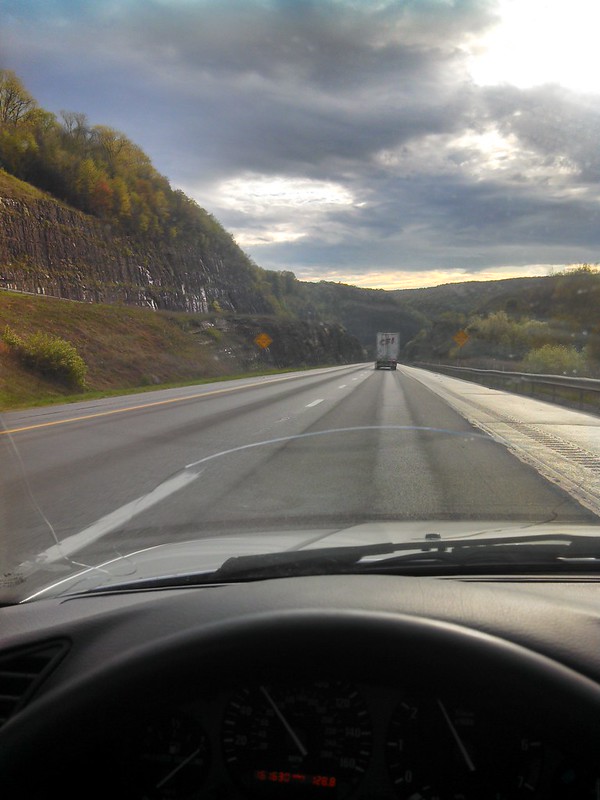
Here's a view from somewhere in the middle of Pennsylvania:
After all that travel (and all the neglect at school) I got home and immediately gave the entire car a really thorough wash, cleans up pretty well!
(I took it through a touch-less car wash to get off the majority of the crap as it was pretty cold out today, and the pressure from the washers/air dry system were enough to destroy the roundel on the hood. It had begun to peel slightly but the car wash ripped the white areas off as well as a majority of the clear coat. Looks like I will be getting a new one of those as well haha)
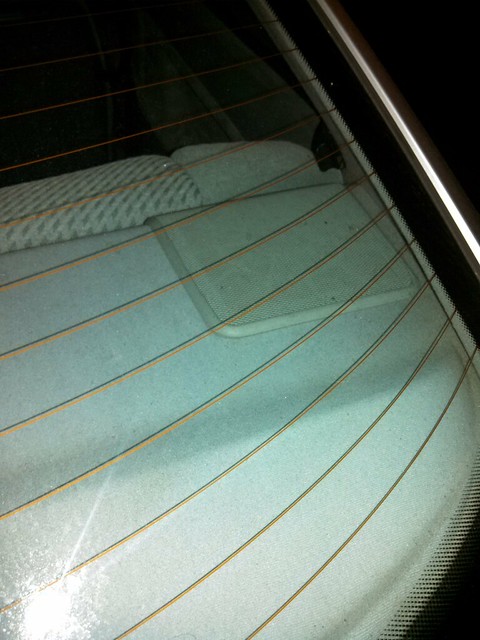
(That's as good as those floor mats are getting without a shampoo unfortunately)
Cleans up pretty well if you ask me! I'll keep updating as I get things done
-
......................................pics

There will be many! Now all I need to do is get home and start haha
-
Well not much of an update but more of a plan for the next few weeks. I will be driving it from eastern PA to Michigan on Thursday after my last final for the annual formula SAE competition, and then after that I will be returning to WI, so all in all about 1000 miles, hopefully she's up to the task! I don't have a lot of time for prep so I plan on topping off the tires, checking all the fluids and then setting off!
Once I'm home I have about two weeks before I start work so that time will be completely dedicated to working on the car, I've got a lot of stuff id like to do over that time:
- Ive got new RSM's and reinforcements to put in as the ones there are pretty worn but the metal is perfect thankfully, no cracks at all
- Rebuild the parking brake
- Possibly tie rods ends since they are old and the last thing before I have basically completed a full front end rebuild and I need an alignment anyway (the place I took it to this past summer did a crap-tastic job and then waited till AFTER to tell me that the outer ball joints were shot. On that note, stay away from Trust tire on Port Washington road in Mequon)
- My passenger door doesn't open from the outside like 90% of the time so I need to investigate that as well
- I am going to try a bit of rust repair in the less noticeable spots and then work my way up to the ones that are more visible over the course of the summer
- I have a set of side skirts off a '97 that I picked up off about a year ago for my car that I am planning on plasti-dipping either gray to match the rest of the bumpers or black (and then do the bumpers to match) as I really like the two tone of the early e36
- I am going to paint my rotor hats and calipers either a dark silver or black (nothing to bright) to clean them up and well as other things under the car that don't look too pretty at the moment
- My door panels are falling apart so I am thinking of making some out of either aluminum sheeting or thin MDF and then covering them with a gray vinyl to match the rest of the interior, should be a fun project
- I am looking to replace the more of the sound system as I have a blown speaker in the kick panel and my tweeters are also on the way out, so money depending I am going to get on this too
All in all I have a lot I want to get done, but it should be fun, Ill make sure to keep things updated!
-
Mind sharing the seller where you bought the adaptors from?
Sure! I was going to include it but I forgot, here it is:
Shipped really quickly and were the cheapest ones I could find. Probably not anywhere near the quality of the Bavarian Soundwerks ones but they get the job done just fine.
-
A little update, took a break from school work and decided to install the speakers that have been sitting in my room for months now that I had the proper adapters.
I replaced the stock 4" speakers and their enclosures with a pair of Memphis Audio 6x9 (PR-693) that I got a really good deal on.
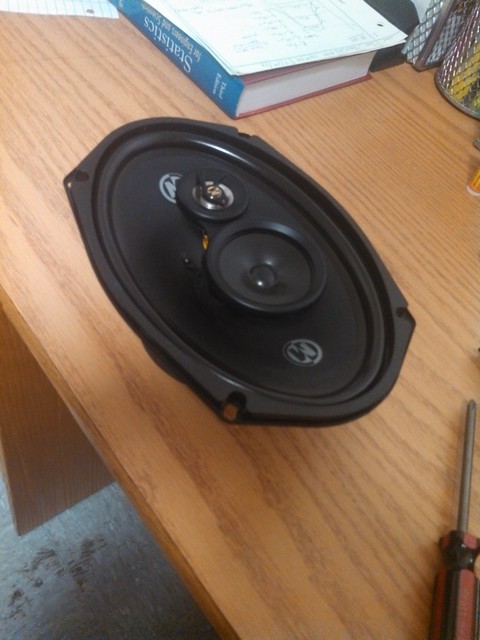
I was originally planning to make adapters but then I found a set on ebay for about the same cost of the materials to make one so I just bought those.
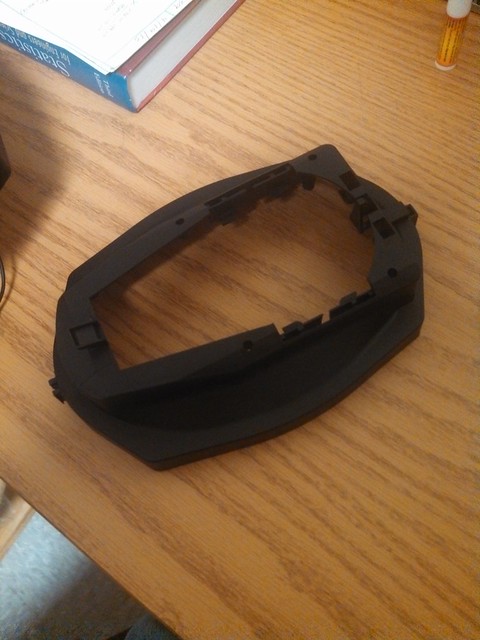
It was nearly dark when I put them in so I didn't get many pictures of the install, but here is the final product!

You'd never know they were there! The sound is INCREDIBLE and I would recommend these to anyone who wants to upgrade their sound a bit. I only had about two hours of free time so I will be taking them out again this summer to properly seal everything up and make proper soldered connections for the wires instead of the crap I did due to minimal tools out here (It will do for now though as I have a nearly 1000 mile trip home after finals end in about two weeks and really wanted these in to keep me entertained haha)
-
I see a bike creepin' in the background!
You do! It belongs to a friend of mine. its a Honda CBR600 I believe
-
Got some parts in today and had a free hour between class so I replaced the intake bellows and it runs much better. Literally took about 30 minutes to do, and the majority of that time was looking for my exacto knife that I had misplaced to cut the clips for the wires out of the old one.
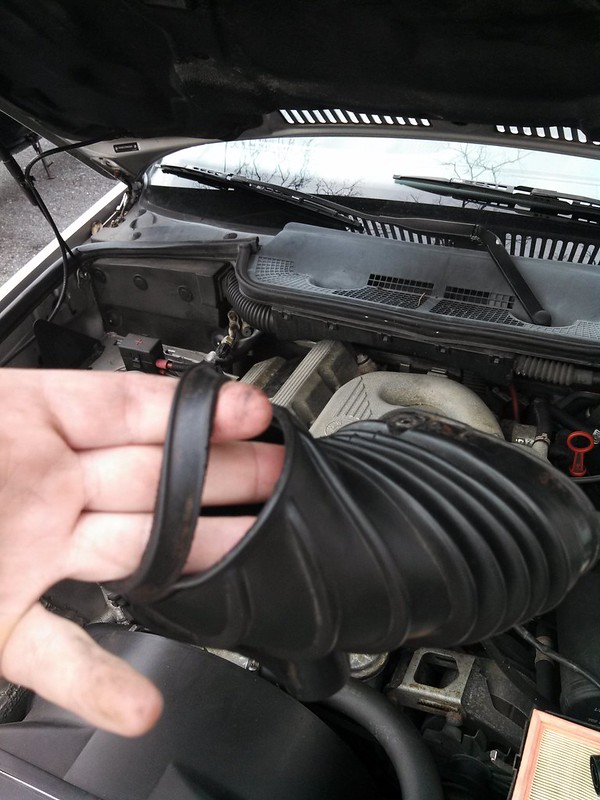
quite the hole if you ask me...
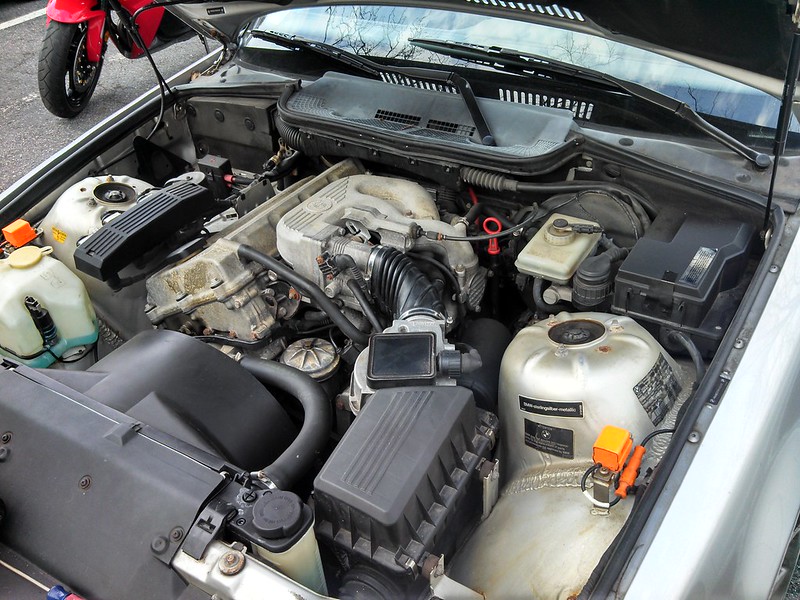
And a quick engine bay shot for those of you who care
More to come as I find more free time...
-
Looks fantastic! I'm dying to see those wheels come together. One day I will do a suspension overhaul like this with my car
-
Nice! Keep us updated with pics too!
Of course! I I'll snap pics whenever I have a hand available haha

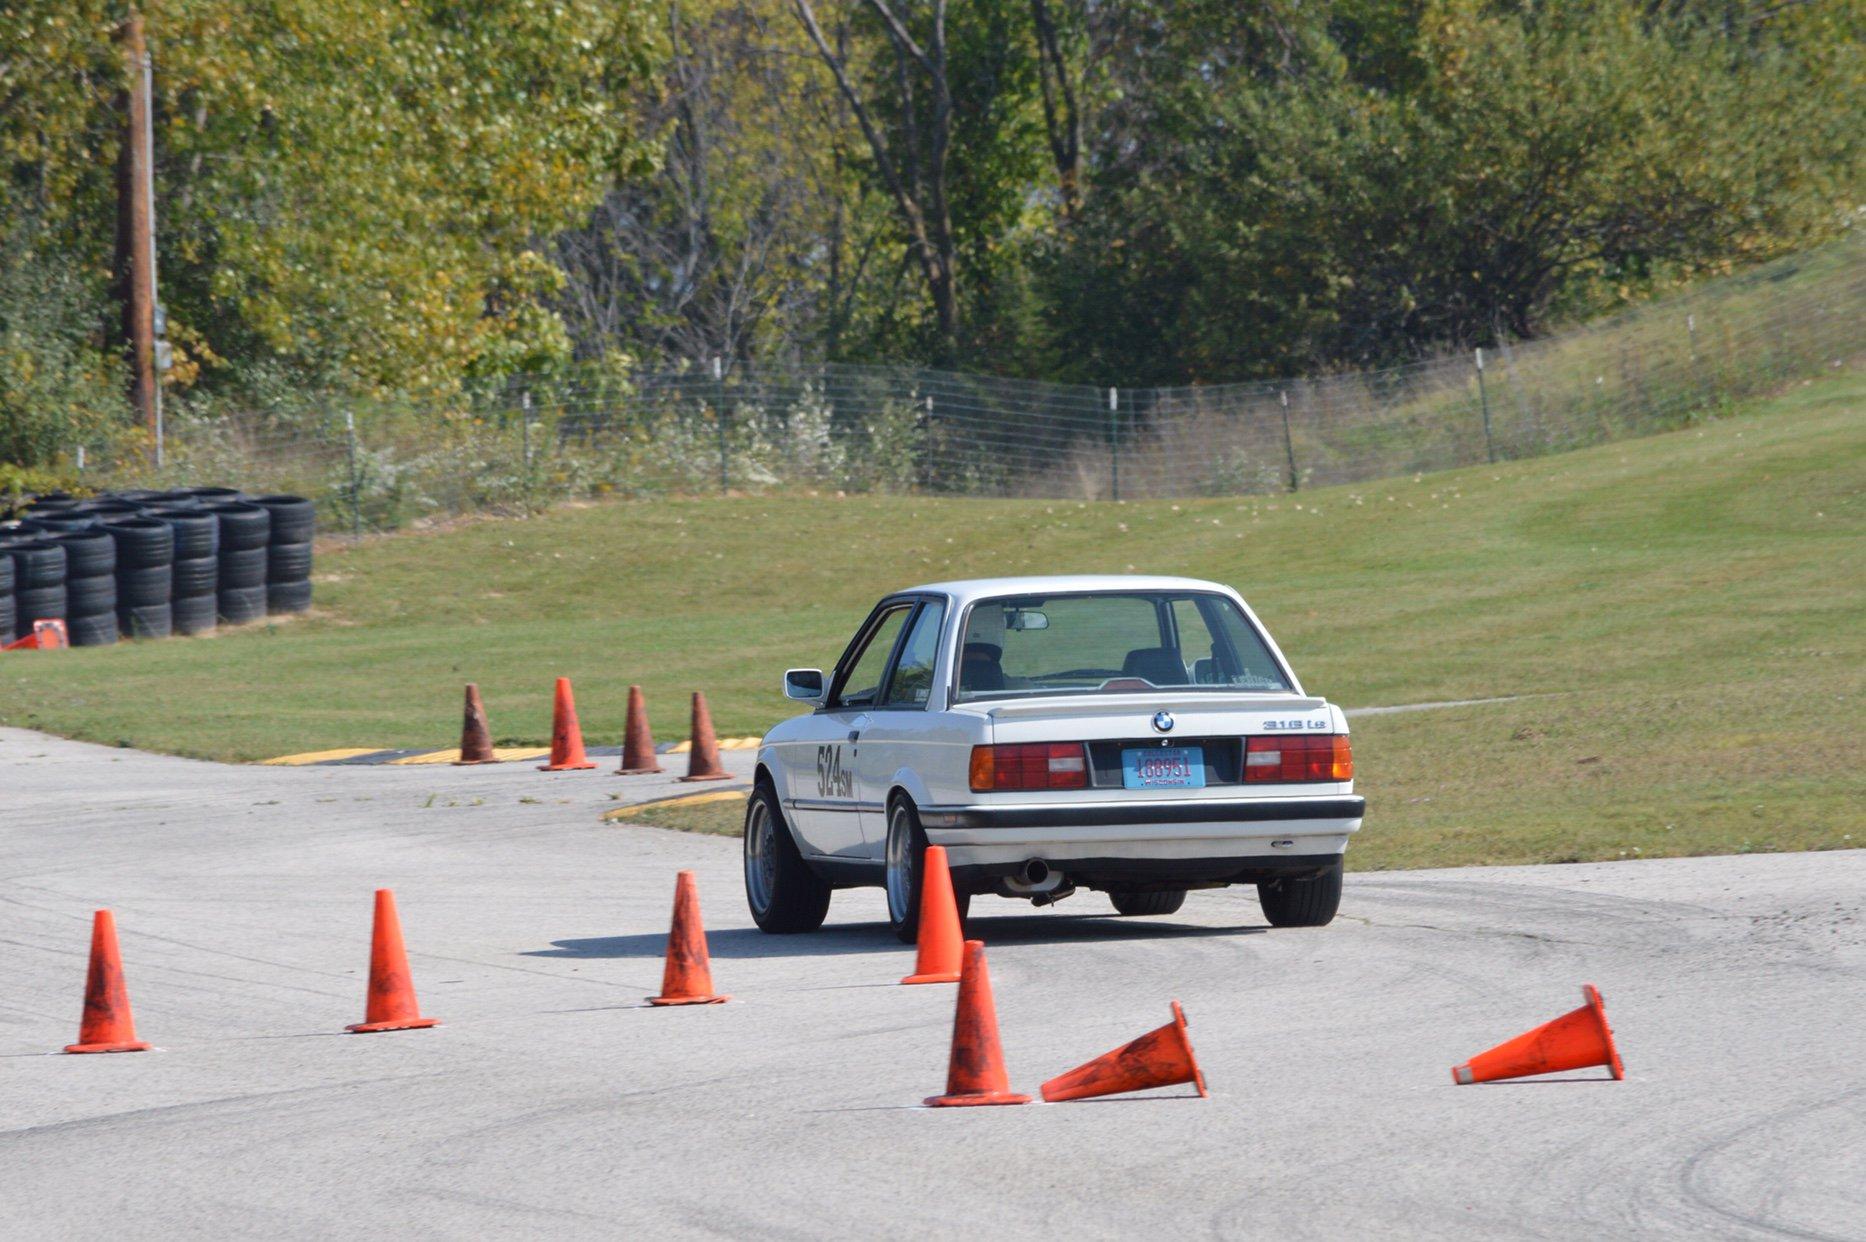
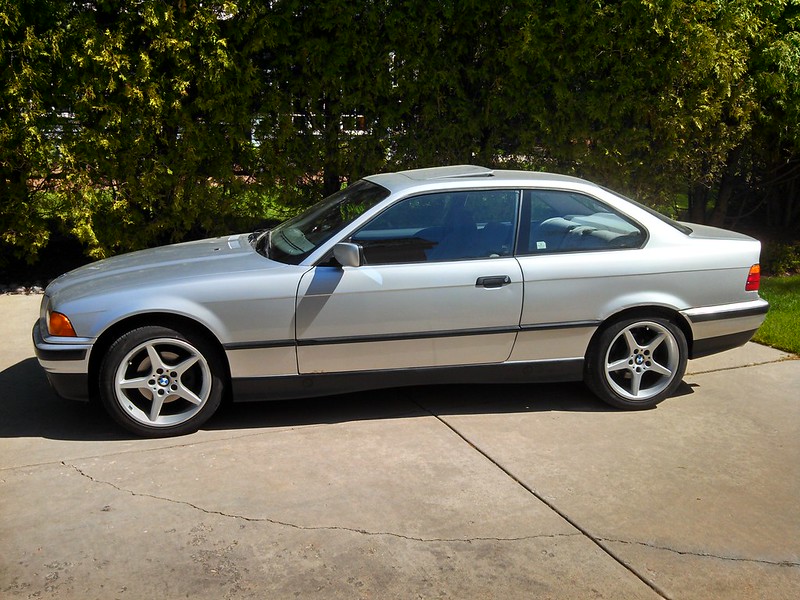
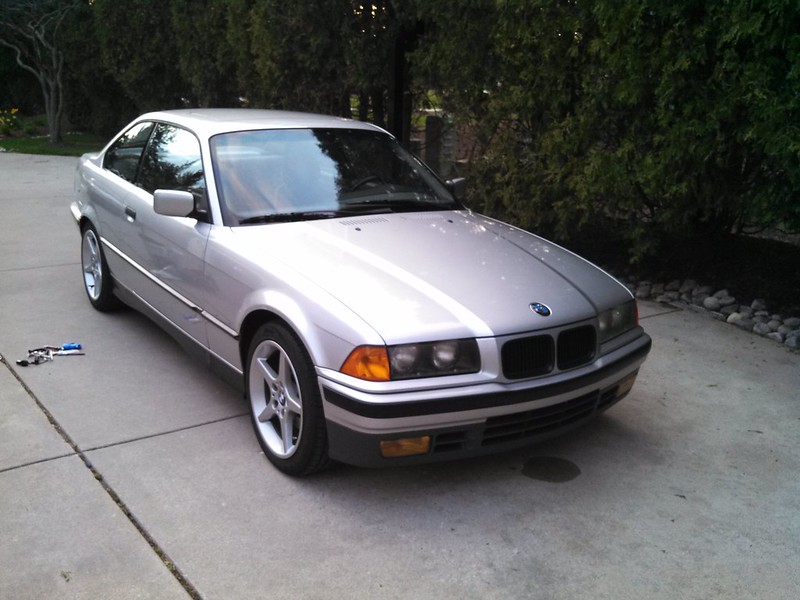
My 1992 318is, I guess you could call it a build thread
in Members BMWs
Posted
They do, mine lined up perfectly. I don't know why they told you otherwise. The post 95 cars that came with the skirts from the factory are the same underneath, they just have holes drilled into the body to mount the skirts. My skirts are OEM so there might be a difference if the bavauto ones are aftermarket so I would ask why they say that